Building your dream mountain retreat on a slope offers breathtaking views and unique architectural possibilities. Steep terrain construction comes with specific challenges that flat land simply doesn’t present. Understanding how to protect your investment from soil movement and water runoff is essential for long-term success.
This guide walks you through everything you need to know about mountain slope stabilization and proper land management. You’ll discover proven techniques for site assessment, drainage systems, vegetation planning, and foundation protection. We cover both the initial construction phase and ongoing maintenance strategies that keep your property secure.
With the right approach, your hillside cabin can thrive for generations. Proper planning prevents costly problems like foundation damage, landslides, and property value loss. You’ll learn how interconnected systems work together to create a stable, beautiful mountain home that respects both your investment and the natural environment around it.
Understanding Hillside Erosion and Its Impact on Cabin Construction
Hillside erosion is more than just dirt sliding down a hill. It’s a complex process that can affect your cabin project. Building on a slope means gravity works against soil stability. Knowing how erosion control for hillside cabin sites works starts with understanding soil movement.
Slope erosion occurs when topsoil wears away from its original spot. Hillsides see this process speed up because water moves faster downhill. Rainfall rushes down, picking up soil particles along the way.
The science behind hillside erosion involves gravity and water. Water acts as a lubricant and transport mechanism. When soil gets saturated, it becomes heavier and loses cohesion. This creates the perfect conditions for soil displacement.
Hillside erosion differs from flat terrain erosion in three ways. Water velocity increases on slopes, and water infiltration time decreases. Soil displacement accumulates lower on the slope, causing pressure and instability.
Four primary agents drive erosion on mountain properties:
- Water runoff – Common in mountain areas, causing powerful streams that wash away soil.
- Wind exposure – Strong winds strip away topsoil, leaving behind harder subsoil.
- Human disturbance – Construction and landscaping can destabilize slopes.
- Loss of stabilizing vegetation – Plant roots hold soil together; removing them makes soil vulnerable.
Preventing soil erosion on slopes is critical for cabin builders. Erosion threatens the structural integrity of your investment. Soil loss can cause foundations to crack or fail.
Slope failures can be dangerous, destroying homes and endangering lives. Small movements can turn into catastrophic landslides during storms. These events can affect your property and neighbors’ access.
Environmental stewardship requires attention to erosion control. Runoff from construction sites pollutes streams and lakes. This harms aquatic habitats and drinking water sources. Many mountain communities have strict regulations due to these impacts.
The financial stakes are high for cabin builders. Foundation repairs can cost between $15,000 and $75,000. Complete slope stabilization can exceed $100,000.
In Colorado, a cabin owner saved $8,000 by skipping erosion control. Two years later, spring runoff caused structural damage and flooding. The repair cost was over $45,000, and the family couldn’t use their cabin for a summer.
Even small erosion creates ongoing problems. Gullies deepen with each rainstorm, creating drainage scars. Topsoil loss makes plants struggle, leaving patches that erode faster. The landscape loses its beauty as it becomes unstable.
Understanding these basics prepares you for effective erosion control. It’s not just an extra—it’s essential for protecting your cabin and preserving the site’s beauty. The money and effort you invest now will save you from costly repairs and preserve property value.
Assessing Your Slope: Grade, Soil Type, and Risk Factors
Knowing your slope’s grade, soil type, and risk factors saves time, money, and headaches. Before starting mountain slope stabilization, you need to understand your land. This assessment is key to your erosion control strategy.
Think of this phase as getting to know your land well. Every hillside is unique, affecting which control methods work best. Proper evaluation now prevents costly mistakes later.
Measuring Your Hillside Grade and Slope Angle
The steepness of your slope affects which erosion control methods work best. Use simple tools like a carpenter’s level, measuring tape, and a smartphone app to measure. This will help you understand your slope’s steepness.
To calculate slope percentage, place a level horizontally on your hillside. Measure the vertical distance from the level’s end to the ground. Then, divide that distance by the level’s length and multiply by 100.
Knowing slope classifications helps you choose the right techniques:
- Gentle slopes (less than 33% grade): Mulch, ground cover plants, and basic drainage work well here
- Moderate slopes (33% to 50% grade): Need drip irrigation, erosion-control blankets, and strategic planting
- Steep slopes (higher than 50% grade): Require riprap, terracing, and retaining walls for stability
Your slope angle affects water runoff speed. Steeper grades mean faster water flow, carrying more soil. This makes preventing soil erosion on slopes critical as steepness increases.

Identifying Soil Composition and Stability
Soil type greatly affects how your hillside responds to water and vegetation. Different soils have different erosion vulnerabilities. You can identify your soil composition through simple field tests.
The ribbon test is great for basic soil identification. Squeeze a handful of moist soil between your thumb and fingers. Try to form a ribbon shape and see how it behaves.
Sandy soils won’t hold together and feel gritty. They drain quickly but don’t anchor plant roots well. Sandy soil erodes easily because particles don’t bind together strongly.
Clay soils form long, smooth ribbons and feel sticky when wet. They retain moisture well but can become compacted and heavy. When saturated, clay increases landslide risk because it holds so much water weight.
Loamy soils form short ribbons and feel smooth but not sticky. This balanced mixture of sand, silt, and clay offers the best natural stability. Even loamy soil remains vulnerable on steep grades without proper protection.
Water infiltration rates vary significantly by soil type. Sandy soils absorb water rapidly but don’t hold it. Clay soils absorb slowly, causing more surface runoff. Understanding your soil’s infiltration rate helps you design drainage systems that work with your terrain.
Recognizing High-Risk Erosion Zones on Your Property
Certain areas on your hillside face greater erosion risk than others. These high-risk zones occur where multiple vulnerability factors converge. Identifying them early lets you prioritize protection efforts where they matter most.
Walk your property with this checklist in hand. Document problem areas with photos and notes for your construction planning:
- Concentrated water flow paths: Look for gullies, channels, or areas where water naturally converges during rain
- Soil tension cracks: These indicate your hillside is already under stress and may be moving slowly
- Leaning trees or exposed roots: Signs that soil has already eroded away from original levels
- Previous erosion scarring: Bare patches, rills, or gullies show where erosion has succeeded before
- Vegetation failure zones: Areas where plants struggle to establish indicate poor soil stability
- Seepage areas: Constantly wet spots suggest underground water movement that weakens soil structure
Pay special attention to areas directly upslope from your planned cabin site. Problems there will eventually flow downhill toward your foundation. Mark these zones on a simple site map so you can address them in your erosion control plan.
Natural drainage patterns tell you where water wants to go. Fighting these patterns requires constant maintenance and often fails eventually. Smart preventing soil erosion on slopes strategies work with natural water movement, redirecting it safely.
Areas where your driveway or access road will cross the slope deserve extra scrutiny. These cuts through the hillside can create new erosion pathways if not properly protected. Plan for additional stabilization measures at these construction access points.
Your assessment documentation becomes invaluable when working with engineers and contractors. Detailed notes about slope angles, soil conditions, and problem areas help professionals design solutions tailored to your specific property. This groundwork saves time and ensures everyone understands your site’s unique challenges from the start.
Pre-Construction Site Planning for Slope Stability
Investing in pre-construction planning can save you a lot of money and headaches. Before starting your hillside cabin project, assess the site and plan carefully. This ensures sustainable development that protects your investment and the environment.
Municipalities have learned to avoid building in risky areas. They now have strict land use policies. Natural shorelines and untouched slopes are the most stable and erosion-resistant.
Several factors can greatly affect erosion on hillside properties. Heavy rain can destabilize slopes quickly. Human activities during construction harm vegetation and soil. Without proper planning, residential development in risky areas leads to long-term problems.
When buying land for your cabin, check with local authorities. Make sure the land isn’t in a hazardous area. Also, confirm that there’s enough erosion protection and that structures are safe.
Getting Expert Eyes on Your Hillside
Hiring a geotechnical engineer is a wise investment for your project. They provide scientific insights that can’t be seen with the naked eye. Their assessment helps avoid costly surprises during and after construction.
A thorough geotechnical assessment includes several key steps. Soil boring samples reveal what’s beneath the surface. Engineers drill into the slope to get soil cores that show composition, density, and moisture.
Percolation testing shows how fast water moves through the soil. This affects drainage system design and septic system placement. Slopes with poor drainage need different solutions than sandy soils.
Slope stability analysis looks at the forces on your hillside. Engineers consider soil weight, water pressure, and vegetation. They identify if the slope is stable under different conditions, including heavy rain.
Bearing capacity calculations determine how much weight your soil can support. This affects foundation design. Some hillside soils need deeper footings or special foundations.
Ask prospective engineers about their hillside experience. Request examples of their work and references. Clarify what you’ll get—a detailed report with specific recommendations.
Your report should outline foundation types, drainage needs, and construction limits. It should give clear guidance on excavation depths and retaining wall needs. It should also highlight areas needing special attention.
Developing Your Customized Protection Strategy
Generic erosion control plans rarely work on hillside properties. Your site’s unique conditions demand a tailored plan. A customized approach ensures every detail is considered.
Your plan should cover all construction phases. During active construction, temporary measures prevent erosion damage. This includes silt fencing, stabilized access routes, and proper soil stockpile management.
Permanent installations are your long-term defense. Detail retaining wall locations and specifications. Map drainage systems and plan terraces to reduce slope length and erosion pressure.
Your revegetation plan determines what grows where after construction. Use native plants with deep roots to stabilize soil. Ground covers protect bare areas, and strategic tree placement adds support and beauty.
Include a maintenance schedule in your plan. Outline seasonal inspection points and drainage system cleaning needs. Specify vegetation care activities like watering, pruning, and replacement.
This approach turns erosion control into proactive property protection. Your plan guides contractors, landscapers, and future maintenance efforts.
Following the Water’s Path
Water shapes hillsides more than any other force. Understanding water movement across your property is key for sustainable development. This knowledge helps work with natural drainage patterns.
Observe your property during and after rainstorms. Walk the slope and note where water collects and flows. Mark areas where water ponds or soil stays saturated.
Natural drainage paths are usually the most stable. These channels have formed over years or decades. Preserving them is often smarter than trying to redirect flow.
Identify areas where water sources converge. These high-flow areas need strong erosion protection. Rock armoring, reinforced channels, or special drainage structures can help.
Seasonal changes affect water patterns on hillside properties. Spring snowmelt and intense summer storms create different flow conditions. Fall leaf accumulation and winter freeze-thaw cycles also impact water movement.
Observe your site during its wettest season for valuable insights. Spring runoff reveals drainage capacity limits. Summer storms show where water moves too quickly and causes erosion.
Document your findings with photos, sketches, and notes. Mark significant features on a site map. This information informs drainage system design, building placement, and landscaping decisions that protect your hillside cabin for generations.
Erosion Control for Hillside Cabin: Essential Strategies
Building on a hillside is risky for erosion. It’s key to manage the site well. Activities like building and removing plants increase erosion risk. The right strategies during construction can protect the slope for years.
To control erosion on a hillside cabin project, be proactive. Every piece of equipment and removed tree increases risk. But, with careful planning, you can build your dream cabin without harming the hillside.
Keeping Your Construction Footprint Small
Limiting your construction area is important. It protects the hillside from damage. Mark off protected zones with clear fencing before starting.
Use specific paths for equipment to avoid soil damage. Random driving can harm the slope. Compacted soil leads to more runoff and erosion.
Store materials on flat areas when possible. Use platforms on slopes to avoid soil damage. Clear only the needed areas for the cabin and access.
- Install silt fencing around the entire work zone before any earth-moving begins
- Use equipment mats or temporary roads to protect soil in travel areas
- Maintain a 25-foot buffer zone around streams, wetlands, or drainage features
- Limit the number of workers and vehicles on site to reduce cumulative impact
- Schedule deliveries to avoid multiple trips that compact access routes
The smaller your construction area, the less you’ll need to restore. Every undisturbed slope helps prevent erosion.
Choosing the Right Season for Building
When you build is as important as how you build. Choose dry seasons to reduce erosion risk. Wet soil is more prone to erosion and compaction.
The best time to build varies by region. In areas with wet and dry seasons, build during the dry months. This ensures stable conditions and less erosion risk.
In areas with constant rain, avoid storm seasons. Make sure to revegetate disturbed areas before harsh weather hits. This is key for erosion control for hillside cabin sites.
Regional climate considerations include:
- Mountain areas: Build after snowmelt but before fall rains begin
- Pacific Northwest: Target late summer through early fall for minimal precipitation
- Southern regions: Avoid hurricane season and intense summer thunderstorm periods
- Midwest: Plan around spring thaw and autumn freeze cycles
Don’t start building if bad weather is coming. A short delay is better than fixing erosion damage later.
Preserving Natural Vegetation as Your Best Ally
Existing plants are your best defense against erosion. They hold soil in place with their roots. Protecting them is a top priority.
Use tree protection barriers to the drip line and beyond. Trees’ roots go far beyond what you see. Heavy equipment can damage these roots, weakening the tree.
Keep vehicles and equipment away from trees to avoid soil compaction. Foot traffic can also compact soil. Prevent damage to bark and branches to avoid disease and pests.
Save understory plants for their immediate protection. Native plants are best because they fit local conditions and support ecosystems.
If removing plants is necessary, follow these steps:
- Mark trees and plants to save with bright, visible tape before work begins
- Remove only vegetation within the absolute minimum necessary area
- Cut plants instead of uprooting to preserve roots
- Salvage topsoil for later restoration
- Document removed plants for replanting
Mature trees take decades to replace. Working around existing vegetation improves slope stability and prevents erosion.
Building Access Routes That Minimize Damage
Access routes can cause as much erosion as the construction itself. Poor planning leads to soil damage and erosion. Use temporary gravel roads to distribute weight and prevent compaction.
For short distances, consider equipment bridges. These protect sensitive areas and maintain water flow. Place the construction entrance on the most stable area.
Avoid straight routes up or down slopes. They become water channels during rain. Design routes to cross slopes at angles or switchback on steeper sections.
Install water diversion features along routes. Simple dips or water bars channel runoff. Space these features closer together on steeper grades.
Monitor access routes and fix erosion immediately. Don’t wait until the project ends to address damage.
Retaining Walls for Mountain Properties: Types and Applications
Building cabins on sloped land requires retaining walls for stability and beauty. These walls hold back soil, making steep areas flat and usable. Knowing your options is key for mountain slope stabilization.
The right wall depends on slope, soil, and budget. Some walls use weight, while others use engineering. Timber and concrete systems offer different benefits for your project.
Choosing the right retaining walls for mountain properties balances looks, function, and cost. Let’s look at the best wall types and when to use them.
Gravity Retaining Walls for Moderate Slopes
Gravity walls rely on their weight to resist soil pressure. They work well for slopes up to 3-4 feet. DIY builders like them for their simple design and erosion control.
For gravity walls, the base should be half to one-third the wall’s height. A slight lean adds stability by pushing soil downward.
Materials like concrete blocks, natural stone, and poured concrete are common. Concrete blocks are easy to use, while stone adds beauty. Concrete is strongest for tough spots.

Drainage behind gravity walls is critical. Use perforated pipes, gravel, and weep holes to prevent water pressure.
Cantilever and Reinforced Concrete Walls
Cantilever walls are for steeper slopes and taller walls. They use an L-shape and soil weight for stability. They’re more efficient than gravity walls.
Rebar in the concrete adds strength. This lets cantilever walls handle more pressure with less material. They’re thinner and cheaper for tall walls.
For walls over 4 feet, you need a pro. Engineers design the walls for your soil. The cost is higher, but they’re reliable for big projects.
Cantilever walls are best for tough spots. They can be 10-20 feet tall or more. They’re the only choice for big slopes.
Timber and Stone Retaining Wall Options
Natural materials like timber and stone add warmth and stability. They’re good for DIY projects and fit well with cabin styles.
Pressure-Treated Timber Walls
Timber walls are affordable and rustic. They last decades with proper treatment. They’re best for heights under 4 feet.
Build them by stacking timbers and using rebar. Add dead-man anchors for stability. Drainage is key to prevent water damage.
Use landscape fabric and gravel behind timber walls. Drill weep holes for water to escape. This extends their life.
Natural Stone and Boulder Walls
Stone walls are beautiful and durable. Dry-stacked walls look traditional and drain well. Mortared walls are stronger but need weep holes.
Boulder walls use big stones for stability. They fit well in natural landscapes. They look like part of the rock.
Building stone walls is an art. Use flat stones for the front and tilt them back for stability. Start with big stones and get smaller as you go up.
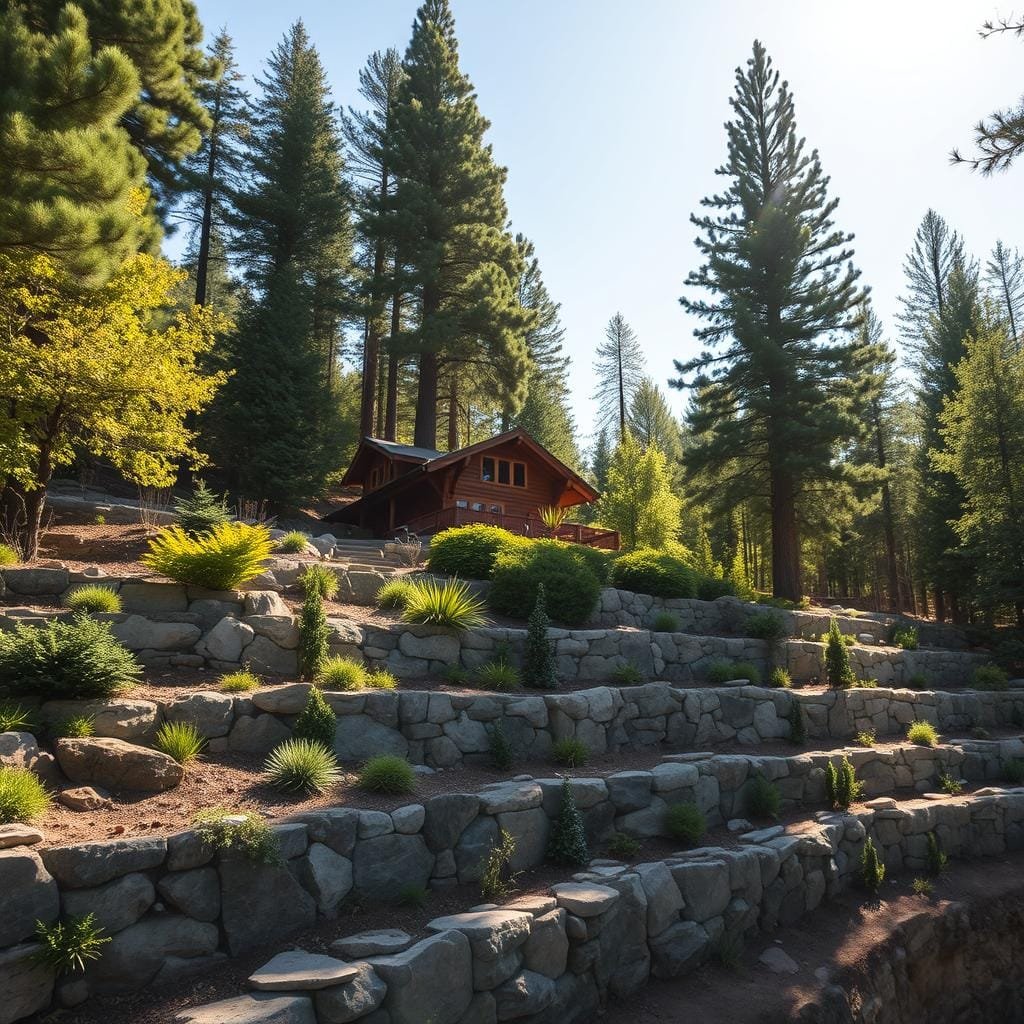
Building Terraces to Reduce Slope Length and Pressure
Terracing breaks steep slopes into levels. This spreads soil pressure and is often cheaper than tall walls. Terraces also create planting areas.
Space terraces based on slope and planting needs. A common rule is to make each terrace twice as wide as the wall is tall. This allows for plant growth and looks good.
Plan water flow between terraces carefully. Slope each level slightly back to encourage water to soak in. Use drainage channels or pipes to control water flow. This prevents erosion.
Terraces can be made from various materials. Mixing them adds interest and matches the site’s needs. Use heavy materials for lower terraces and lighter ones for upper ones.
| Wall Type | Best Height Range | Relative Cost | DIY Feasibility | Lifespan |
|---|---|---|---|---|
| Gravity (Concrete Block) | 2-4 feet | Moderate | High | 50+ years |
| Cantilever (Engineered) | 4-20 feet | High | Low (requires professional) | 75+ years |
| Pressure-Treated Timber | 2-4 feet | Low to Moderate | High | 20-30 years |
| Natural Stone (Dry-Stack) | 2-6 feet | Moderate to High | Moderate | 100+ years |
| Terraced System | Variable (multiple short walls) | Moderate | Moderate to High | Varies by material |
The best hillside cabin projects use different wall types. Use cantilever walls for steep areas and timber terraces for gentle slopes. Stone walls add character and hold soil.
All walls change water flow. Plan drainage before building. Good engineering and drainage make your cabin project reliable.
Installing Effective Cabin Site Drainage Systems
Managing water on your hillside property is key to preventing erosion. Without proper drainage, water can damage your soil and create channels. Well-designed systems can intercept and redirect water, keeping your property safe.
Think of drainage as a network, not just individual parts. Your roof gutters, French drains, and swales work together. Each part is important for effective drainage.
Let’s look at the best ways to protect your hillside cabin from water damage and erosion.
French Drains for Hillside Properties
A French drain is a reliable solution for managing water on sloped land. It has a gravel-filled trench with a perforated pipe. This pipe collects water and directs it away from your property.
French drains protect foundations and prevent water from pooling behind walls. They work well underground, needing little maintenance once installed.
The success of a French drain depends on proper installation. This includes the depth and materials used.

The depth of your French drain depends on its purpose. For managing surface water, a 18 to 24 inch trench is usually enough. For intercepting groundwater, you may need a 3 to 4 foot deep trench.
Choosing the right gravel is important. Three-quarter-inch crushed angular stone is best for water flow and filtration. Avoid rounded river rock, as it doesn’t filter well.
The gravel layer should be at least 3 inches deep on both sides of the pipe. This ensures water flows into the pipe and prevents clogging.
Wrap the trench with landscape fabric to keep soil out. This fabric helps your French drain last longer by preventing sediment from clogging the pipe.
Perforated Pipe Installation Techniques
For most homes, a 4-inch diameter perforated pipe works well. But larger 6-inch pipe is needed for bigger properties. The pipe should slope at least one-quarter inch per foot to keep water flowing.
Should the pipe’s holes face up or down? It depends on the water source. For groundwater, holes face down. For surface water, holes face up. Many use pipe with holes all around for both.
Connect pipe sections with proper couplings. Make sure the outlet is above ground and easy to see. Check the system during heavy rains to ensure it’s working right. For more on adding retaining wall drainage, check professional resources.
Surface Drainage Channels and Swales
While French drains handle subsurface water, surface features manage runoff. Swales and channels work together in your drainage plan.
Swales are gentle, vegetated areas that slow water and promote absorption. They’re great for managing moderate runoff. The shallow profile and plant roots filter sediment and allow water to soak into the soil.
Channels move water more quickly. They guide concentrated flow away from vulnerable areas. Line the bottom with river rock or hardy vegetation to prevent erosion.
Size your swale or channel based on the drainage area. A general rule is one square foot of channel cross-section for every 50 square feet of drainage area. Local rainfall intensity can affect this ratio.
| Drainage Feature | Best Application | Typical Dimensions | Vegetation Approach |
|---|---|---|---|
| Vegetated Swale | Gentle slopes, moderate flow, areas where infiltration is desired | 12-24 inches deep, 3-6 feet wide, gentle side slopes | Dense ground cover, native grasses, erosion-resistant plants |
| Rock-Lined Channel | Steeper slopes, concentrated flow, areas needing rapid conveyance | 18-36 inches deep, 2-4 feet wide, defined edges | Minimal vegetation, focus on rock armoring and stability |
| Combination Swale-Channel | Variable flow conditions, transitional zones between gentle and steep areas | Varies with terrain, typically 18-30 inches deep | Vegetation on sides, rock or mat lining on bottom |
Position surface drainage features to catch runoff before it erodes your land. The top of your property is a good spot for swales to catch water early.
Subsurface Drainage Networks
Connecting individual French drains into a network makes them more effective. This system collects water from various sources and directs it to a safe point.
Your subsurface drainage network might include perimeter drains, collection systems behind walls, and interceptor drains. Use the same sloped pipe principles for connecting these components.
Junction boxes at connection points make maintenance easier. These boxes allow you to clean out sediment and inspect pipes without digging up the whole system.
Map your drainage network carefully during installation. Take photos, create diagrams, and note depths and locations. This documentation is invaluable for future maintenance or system expansions.
Install cleanout access points every 50 to 100 feet along longer drainage runs. These vertical pipes allow you to flush the system or clear blockages with a plumber’s snake.
Downspout Extensions and Gutter Management
Your cabin’s roof collects a lot of water during storms. Dumping this water near your foundation or unstable slopes can cause erosion. Proper gutter sizing and downspout management prevent these problems.
Standard 5-inch gutters work for most homes. But hillside cabins with steep roofs or large areas need 6-inch gutters for more water. Make sure gutters slope slightly toward downspouts.
Never let downspouts discharge water close to your foundation or building. Use rigid or flexible extensions to carry water at least 10 to 15 feet away.
For better protection, connect downspouts to underground pipes that tie into your French drain network. This eliminates roof water runoff.
Install splash blocks or rock-lined basins at discharge points. These features help spread out water, reducing erosion.
Clean gutters and downspouts twice a year. Do this in late spring after pollen season and again in late fall after leaves drop. Clogged gutters can overflow and damage your soil and landscaping. Consider gutter guards if you have a lot of trees.
| Drainage Component | Primary Function | Maintenance Frequency | Common Problems |
|---|---|---|---|
| Roof Gutters | Collect and channel roof runoff to controlled discharge points | Clean twice yearly, inspect annually | Clogging with debris, sagging sections, separated joints |
| Downspout Extensions | Carry water away from foundation and vulnerable slopes | Verify positioning seasonally | Disconnection, inadequate length, poor discharge location |
| Underground Drain Lines | Permanently route water to safe discharge areas | Inspect outlets after heavy rains | Pipe separation, root intrusion, sediment accumulation |
| Splash Blocks | Dissipate water energy at discharge points | Reposition as needed after storms | Displacement from water force, erosion around edges |
Effective drainage is an ongoing task. Check your systems during and after rain to find and fix problems early. Water always seeks the easiest path, and your job is to make sure that path is safe for your hillside cabin.
Runoff Management for Cabins on Steep Terrain
On steep mountain properties, uncontrolled water flow can cause soil loss and dangerous erosion. The previous section talked about underground drainage systems. But managing surface runoff needs different strategies.
Effective runoff management for cabins uses various techniques to slow and redirect water. The steeper your slope, the more critical these systems are. Without proper controls, even moderate rainfall can cause significant damage.
Your approach should work with your property’s natural topography. By understanding how water moves across your land, you can implement targeted solutions. This protects vulnerable areas while maintaining natural drainage patterns.
Diversion Channels to Redirect Water Flow
Creating diversions helps channel excess water down the slope. These features intercept runoff before it gains dangerous velocity. Diversion channels are among the most effective tools for erosion prevention on hillside properties.
Open ditches work well for many cabin sites. You can create these by digging along the slope. The ditches should follow the contour of your land, slowing water movement and allowing it to infiltrate the soil.

Position diversions on the uphill side of disturbance areas or at regular intervals down long slopes. For moderate slopes, channels spaced 50 to 100 feet apart typically provide adequate protection. Steeper terrain may require closer spacing.
Size your channels appropriately for expected flow volumes. A typical residential diversion might be 12 to 18 inches deep and 18 to 24 inches wide. Line the bottom and sides with rock, erosion control matting, or establish grass to prevent the channel itself from eroding.
Pipes and gutters offer another effective option. Underground pipes can carry water without creating surface obstacles. Use solid pipe for conveyance and perforated pipe where you want water to infiltrate. Connect these systems to your overall drainage network for complete water diversion.
Catch Basins and Sediment Traps
These features capture water and allow suspended sediment to settle out before the water continues downstream. Catch basins and sediment traps protect downstream areas while improving water quality. They work by temporarily slowing or ponding water, giving particles time to drop to the bottom.
Catch basins are typically prefabricated structures with grates on top and outlets near the bottom. Install them at low points where water naturally collects. The grate allows water to enter while blocking large debris. Inside, sediment settles in a sump area below the outlet pipe.
Sediment traps are excavated areas designed to pond water temporarily. They’re simpler and less expensive than manufactured catch basins but require more space. Create a depression that’s at least three times the area of the drainage area it serves.
Key design considerations include:
- Size the structure to handle peak flow rates from your drainage area
- Provide adequate depth for sediment storage between cleanings
- Install overflow protection for extreme rain events
- Create safe, stable discharge points that won’t erode
- Plan for regular maintenance access
Both systems require periodic cleaning to remove accumulated sediment. Check them after major storms and clean when sediment fills more than one-third of the storage capacity. This maintenance ensures they continue functioning effectively throughout the year.
Collecting rainwater in barrels can reduce the amount of water that flows over your slope. Rain barrels capture runoff from rooftops, which you can then use to irrigate your garden or landscape. This approach reduces peak flows and provides a water source during dry periods.
Permeable Paving and Gravel Driveways
Permeable surfaces allow water to infiltrate, reducing the total volume that needs management. For mountain cabin access, gravel driveways offer an excellent balance of functionality and erosion control. They handle seasonal weather changes while allowing water to soak through.
Proper gravel driveway installation starts with adequate base preparation. Excavate to stable soil, then install geotextile fabric to prevent mixing between layers. Add a base layer of larger crushed stone for drainage and stability. Top with smaller gravel for the driving surface.
Consider these permeable surface options:
- Gravel driveways: Cost-effective, easy to maintain, excellent drainage
- Permeable pavers: More formal appearance, handles light traffic well
- Reinforced grass: Natural look, works for occasional-use areas
- Porous asphalt: Traditional appearance with infiltration benefits
Slope angle affects which options work best. Gravel remains stable on slopes up to 15%, though you may need edge restraints or stabilization grids on steeper sections. Permeable pavers work well on moderate slopes but may shift on steep terrain.
Integrate permeable surfaces with your overall slope drainage plan. Even though water infiltrates, you may need subsurface drainage to move that water safely away. Install perforated pipes beneath permeable areas to capture infiltrated water and direct it to stable discharge points.
A dry well can capture runoff water, allowing it to percolate slowly into the ground. These underground structures filled with gravel or other materials collect and store runoff, promoting infiltration and reducing surface water flow. Position dry wells downslope from impermeable surfaces or at the end of drainage lines.
Rain Gardens for Hillside Water Absorption
Rain gardens are shallow vegetated depressions designed to capture and absorb runoff. While traditionally used on flat sites, they can adapt to hillside properties through careful placement and design. These natural features combine water management with attractive landscaping.
On slopes, position rain gardens at the base of runoff-generating areas or create terraced gardens at intervals down the slope. Each garden captures water from the area above it, processes what it can, and safely overflows to the next level or to a stable discharge point.
Size your rain garden based on the drainage area it serves. A general rule is that the garden should equal 20 to 30% of the impervious area draining to it. For a 500-square-foot roof, plan a 100 to 150-square-foot rain garden.
Plant selection matters significantly for mountain environments. Choose native species with deep root systems that can handle both wet and dry periods:
- Sedges and rushes for the center where water ponds deepest
- Native flowering perennials for intermediate zones
- Shrubs and grasses for outer edges and overflow areas
- Plants adapted to your specific elevation and climate zone
Design overflow protection to prevent the rain garden from becoming an erosion source during extreme events. Create a defined overflow path lined with rock or established vegetation. This channel should direct excess water to a safe discharge location where it won’t threaten your cabin or other structures.
Rain gardens require establishment care but become low-maintenance once mature. Water new plantings regularly during the first growing season. Mulch to retain moisture and suppress weeds. Remove accumulated sediment and debris annually to maintain infiltration capacity.
By combining these runoff management for cabins strategies, you create multiple layers of protection against erosion. Each technique addresses water at different points in its journey across your property, working together to slow, capture, and safely manage rainfall before it can cause damage.
Hillside Landscaping for Cabins: Using Vegetation for Erosion Prevention
Vegetation is key for hillside landscaping around cabins. It acts as both art and engineering to keep slopes stable. Plants create barriers that hold soil in place and add beauty to your mountain property.
Native plants are best for preventing soil erosion on slopes. They’ve evolved to thrive in your climate and soil. These plants need less water and care, and they control erosion better than non-native species.
To control erosion, create layers of vegetation. Ground covers protect the soil surface. Shrubs add mid-level roots, and trees anchor the soil deeply. Together, they form a shield against water damage and soil loss.
Selecting Deep-Rooted Native Plants for Mountain Slopes
Deep-rooted native plants are essential for slope stabilization. They send roots deep into the soil, holding it in place during storms. Native shrubs like serviceberry and mountain laurel have extensive root networks that bind soil together.
The best plants vary by mountain region. In the Appalachians, try rhododendrons and dogwoods. Rocky Mountain properties benefit from shrubby cinquefoil and mountain mahogany.
Cascade region slopes do well with Oregon grape and native huckleberries. These plants handle wet winters and dry summers well. Their roots can reach three to six feet deep in a few years.
Plant spacing is important. Space shrubs four to six feet apart on moderate slopes and three to four feet apart on steeper ones. This helps cover the soil quickly and reduces erosion risk.
Ground Cover and Low-Growing Plants for Slope Protection
Ground cover plants create a living carpet that shields soil from rain. They spread quickly to cover bare soil where erosion starts. Their roots hold topsoil in place while deeper-rooted plants establish below.
Native sedges work well in shaded areas. Pennsylvania sedge and California sedge spread to form thick mats. Wild strawberry covers sunny slopes with spring flowers and edible berries.

Creeping juniper and kinnikinnick are great for colder climates. They tolerate poor soil, drought, and temperature extremes. They spread slowly but provide permanent coverage for decades.
Use erosion control blankets with integrated seed for best results. These blankets hold seeds and young plants in place while roots develop. Plant in early spring or fall when moisture levels support growth but temperatures remain moderate. Water regularly for the first growing season until plants establish independent root systems.
Native grass seed mixes are another good option. These mixes include fine fescues, native bunch grasses, and wildflowers. The combination of grass roots and flower roots creates superior soil binding.
Strategic Tree Placement for Soil Stabilization
Tree placement requires careful planning for slope stabilization. Position trees where their root systems will provide the most benefit without threatening your cabin foundation or utilities. Keep large trees at least 20 feet from structures and consider their mature size when planning locations.
Place trees in staggered rows for natural-looking landscapes that provide better erosion control. This pattern distributes root systems more evenly across the slope. Space trees 15 to 25 feet apart depending on species and expected mature size.
Select tree species that offer both deep taproots and spreading lateral roots. Oaks, hickories, and native pines develop extensive root systems that anchor soil on steep slopes. These trees also provide shade that reduces soil temperature and moisture loss during hot summer months.
| Tree Species | Best Mountain Region | Root Depth | Slope Suitability |
|---|---|---|---|
| White Oak | Appalachians | 10-20 feet | Moderate to steep slopes |
| Ponderosa Pine | Rockies | 8-15 feet | All slope grades |
| Douglas Fir | Cascades | 12-18 feet | Moderate slopes |
| Red Maple | Eastern Mountains | 6-12 feet | Gentle to moderate slopes |
Avoid planting trees in areas where they could damage your cabin if they topple during storms. Consider prevailing wind direction and lean existing trees away from structures. Remove dead or dying trees promptly to prevent erosion from exposed root systems after they fall.
Avoiding Plants That Increase Erosion Risk
Not all plants help with erosion control, and some can make slope problems worse. Shallow-rooted ornamentals like many annual flowers provide minimal soil holding power. Their roots rarely penetrate more than a few inches deep, leaving subsurface soil vulnerable to sliding.
Bamboo species spread aggressively but create shallow root mats that don’t stabilize deep soil layers. Their rapid growth can outcompete native plants that provide better erosion control. Many bamboo varieties also require excessive watering that saturates slopes and increases landslide risk.
Avoid plants with high water requirements that don’t match your natural rainfall patterns. Excessive irrigation weakens slope stability by adding weight and reducing soil cohesion. Choose drought-tolerant native species that thrive on natural precipitation instead.
Invasive species pose particular problems for slope stability. English ivy initially spreads quickly but adds considerable weight to slopes while providing poor deep-root anchoring. Kudzu and other aggressive vines can overwhelm and kill trees that provide real erosion control.
Stay away from plants with aggressive but shallow root systems like some willow species on steep slopes. While willows work well for streambank stabilization in flat areas, their water-seeking roots can destabilize hillsides. Their shallow, spreading roots don’t provide the deep anchoring needed for preventing soil erosion on slopes.
Check with your local extension office for region-specific invasive species lists. Many states prohibit planting certain species known to cause environmental damage. Native plant nurseries can recommend appropriate alternatives that provide better erosion control without ecological risks.
Erosion Control Blankets, Mats, and Temporary Stabilization
When you disturb the soil, your hillside needs protection. Erosion control blankets act as a barrier against rainfall and water runoff. They give plants time to establish their roots.
These blankets are vital for mountain construction sites. They prevent soil loss and help plants grow by keeping moisture in. This makes them key soil conservation techniques for challenging terrain.
The market offers many options, from straw mats to synthetic systems. The right product depends on your slope, water flow, and how fast you need plants to grow. Let’s look at your options and how to use them well.
Biodegradable Erosion Control Blankets
Biodegradable blankets break down as plants take over soil protection. They’re made of natural fibers with degradable netting. As they decompose, they leave behind established plants and stable soil.
Straw blankets are the cheapest option for gentle slopes. They work well on hills up to 3:1 and last six to twelve months. They’re great for tight budgets and forgiving terrain.
Coconut fiber blankets are durable for steeper slopes and high water flow. They handle slopes up to 2:1 and last two to three years. Coconut coir retains moisture, helping seeds germinate even in dry spells.
Jute mesh blankets offer good performance on gentle slopes with moderate water. They decompose in twelve to eighteen months. They’re ideal for planting native grasses or wildflowers, allowing good seed-to-soil contact.
Wood fiber blankets help plants establish quickly. They create a growing medium like instant mulch. They’re useful for erosion prevention for steep terrain where fast germination is key.
Choose biodegradable blankets based on your vegetation establishment timeline. Match the blanket’s longevity to your climate and growing season. A blanket that degrades too quickly won’t protect the soil long enough, while one that lasts too long may interfere with plant growth.
Synthetic Turf Reinforcement Mats
Synthetic turf reinforcement mats (TRMs) are permanent solutions for severe erosion challenges. Unlike biodegradable options, these mats stay in place indefinitely while vegetation grows through the synthetic matrix. The plants and the mat work together to create an extremely durable protective layer.
TRMs are made from UV-resistant polypropylene or similar materials that won’t degrade in sunlight or weather. The three-dimensional structure creates space for soil and roots while providing incredible tensile strength. This combination can withstand water velocities that would wash away unprotected soil or even biodegradable blankets.
These permanent mats excel in high-stress applications. Consider them for slopes steeper than 2:1, areas with concentrated water flow like drainage channels, or locations where failure would create serious problems. They’re also ideal for shoreline protection around cabin ponds or streams.
The investment in TRMs is substantially higher than biodegradable alternatives, but the cost makes sense in critical areas. One properly installed synthetic mat can prevent thousands of dollars in repair costs. Think of them as insurance for your most vulnerable erosion points.
Installation of TRMs requires more expertise than simpler blankets. The mats need proper anchoring systems and careful attention to overlap details. Many mountain property owners hire professionals for TRM installation to ensure the system performs as designed.
Installation Techniques for Maximum Effectiveness
Proper installation transforms erosion control products into effective soil conservation techniques. Even the best blanket will fail if installed incorrectly, potentially making erosion worse by channeling water or creating gaps where soil washes away. Follow these guidelines for success.
Site preparation is your first critical step. Grade the area to create smooth contours without sudden dips or bumps. Remove rocks, sticks, and debris that could create air pockets under the blanket. Ensure good seed-to-soil contact by raking the surface lightly before installation.
Apply seed and fertilizer before laying the blanket unless you’re using a pre-seeded product. Broadcasting seed onto the prepared soil, then covering it with the blanket, creates ideal germination conditions. The blanket holds moisture against the seeds and protects them from washing away.
Always start at the top of the slope and work downward when installing any erosion control blanket. This prevents water from getting underneath and lifting the material. Unroll the blanket carefully to avoid stretching or tearing, and maintain contact with the soil surface.
The upslope edge needs special attention. Dig an anchor trench about six inches deep across the top of your slope. Bury the first foot of blanket in this trench and backfill with soil, tamping firmly. This anchor prevents the entire installation from peeling off during heavy rain.
Use proper staple patterns throughout the installation. Place staples every twelve inches along edges and every twenty-four inches in a staggered pattern across the blanket surface. On steep slopes, increase staple density. The staples should be long enough to penetrate several inches into firm soil.
Overlap adjacent blankets by at least six inches at all seams. Place staples every twelve inches along these overlaps. Water should flow over the seams, never underneath them. On steep slopes, consider using an upslope-over-downslope overlap pattern for extra security.
At the bottom of the slope, create another anchor trench or use stakes to secure the downslope edge. Don’t leave the blanket edge exposed or unanchored—it will catch wind and water, causing the entire installation to fail.
After installation, water the area gently if natural rainfall isn’t expected within a few days. This settles the blanket against the soil and begins the germination process. Inspect your installation after the first rain event, repairing any lifting or damage immediately.
| Blanket Type | Best Slope Application | Functional Longevity | Relative Cost |
|---|---|---|---|
| Straw Blanket | Up to 3:1 slopes | 6-12 months | Low |
| Coconut Fiber | Up to 2:1 slopes | 2-3 years | Moderate |
| Jute Mesh | Gentle slopes | 12-18 months | Low-Moderate |
| Wood Fiber | Various slopes | 6-12 months | Moderate |
| Synthetic TRM | 2:1 and steeper | Permanent | High |
Monitor your erosion control blankets throughout the growing season. Look for areas where the blanket has lifted or where concentrated water flow is causing problems. Address these issues promptly—small repairs prevent major failures.
As vegetation establishes, you’ll notice the blanket gradually becoming less visible. This is exactly what should happen with biodegradable products. The plants are taking over the job of soil protection, which is the ultimate goal of temporary stabilization systems.
For permanent synthetic mats, vegetation should grow through the matrix within one growing season. The combination of mat and plants creates a reinforced system that can handle extreme conditions. Established TRM installations can protect slopes during storms that would devastate unprotected areas.
Riprap and Rock Armoring Techniques for Preventing Soil Erosion on Slopes
Heavy water flow needs strong solutions, and rock armoring is the answer. Riprap uses large rocks or broken concrete to protect slopes from water erosion. It works by breaking up water flow and shielding the soil from being washed away.
Riprap acts like nature’s armor for your hillside. The rocks absorb water energy, preventing it from tearing into your soil. Rainwater and snowmelt slow down, spreading across a wider area.
This method is great for areas with high water energy. It provides strong protection against erosion, unlike plants or blankets. Cabin builders facing steep terrain find it very effective.
When to Use Riprap for Slope Protection
Not every erosion problem needs riprap. Knowing when to use it saves money and ensures effective slope stabilization.
Riprap works well in drainage channels and swales where water flows fast. It prevents water from carving deeper into your property. Rocks along the channel bottom and sides do the trick.
Use riprap on steep slope sections where gravity makes water flow fast. The steeper the hill, the faster the water, and the more damage it can cause. Rock armoring stops erosion before it starts.
Areas below culvert outlets need riprap protection. Water exiting from pipes can blast away soil. An apron of rocks at these points prevents erosion damage.
Shoreline protection is another key use. If your cabin is near a stream or pond, wave action and current can erode your banks. Riprap creates a permanent barrier along these edges.
Use riprap at slope bases where runoff concentrates before leaving your property. These points see the highest flow volumes and need strong protection.
Proper Rock Sizing and Gradation
Choosing the right rock size is key to success. Riprap effectiveness depends on using stones heavy enough to resist water forces.
The basic principle is simple: steeper slopes and faster water flow need larger rocks. A gentle swale might need rocks 4 to 6 inches in diameter. But a steep drainage channel or high-energy culvert outlet demands stones 18 to 24 inches or larger.
Water velocity determines rock size more than any other factor. Engineers calculate the shear stress water exerts on rocks and match stone weight. For DIY cabin builders, a practical rule is: if you can easily lift and place a rock by hand, it’s too small for high-energy areas.
Gradation matters just as much as maximum size. A well-graded mix with various sizes works better than uniform stones. Smaller rocks fill gaps between larger ones, creating a matrix that resists displacement.
Think of gradation like a puzzle where different-sized pieces fit together tightly. A typical gradation might include:
- 30% large rocks (primary armor stones)
- 40% medium rocks (secondary fill stones)
- 30% smaller rocks (void-filling stones)
This mixture creates minimal open space for water to penetrate and eliminates channels where flow could concentrate. The tighter your rock matrix, the better your erosion protection performs over decades of use.
Riprap depth also factors into effectiveness. A single layer of rocks rarely provides adequate protection. Most applications need rocks placed 12 to 18 inches deep, sometimes more for severe conditions. This depth ensures that even if surface rocks shift slightly, underlying material protects the soil.
Installation Methods and Filter Fabric Requirements
Proper installation is what separates riprap that lasts from riprap that fails. The process involves more than dumping rocks on a slope—it requires careful preparation and placement for long-term effectiveness.
Start by preparing the slope surface. Remove loose debris, vegetation, and unstable soil. Grade the area to match your design profile, creating a smooth surface that won’t leave voids under the riprap. Any irregularities can create water channels or weak points where erosion starts.
Installing filter fabric comes next and is critically important. This geotextile layer prevents fine soil particles from migrating up through the rocks while allowing water to drain through. Without filter fabric, water pressure forces soil through rock voids, eventually creating sinkholes and undermining your riprap.
Choose between woven and non-woven filter fabrics based on your situation. Woven fabrics offer higher strength for steep slopes and heavy rock installation. Non-woven fabrics provide better filtration for fine soils but can tear more easily during rock placement. For most cabin applications, a heavy-duty non-woven fabric strikes the right balance.
Overlap fabric seams by at least 12 inches and secure the fabric with stakes or pins before placing rocks. This prevents shifting during installation. Extend the fabric beyond your riprap area by a foot or more to ensure complete soil coverage.
Rock placement technique matters a lot. For detailed guidance on proper installation procedures, check out this install riprap properly cheat sheet that covers essential steps. Place rocks individually instead of dumping them. Dumping damages filter fabric and creates poor rock orientation.
Position larger rocks first to form the primary armor layer. Nestle them tightly together, adjusting each stone so its flattest side faces the water flow. Then fill gaps with progressively smaller rocks, creating that interlocking matrix discussed earlier.
Pay special attention to toe protection at the slope base. This critical area prevents water from undercutting your entire riprap installation. Dig a shallow trench at the bottom, install extra fabric, and place your largest rocks here. Some installations embed the toe rocks partially below grade for maximum stability.
Edge transitions need care too. Where riprap meets natural ground or vegetation, create a gradual transition. This prevents water from exploiting the boundary as a weak point.
After installation, inspect your work during the first several rainstorms. Minor adjustments early on prevent major problems later. Look for rocks that have shifted, areas where water concentrates unexpectedly, or spots where soil appears between stones. Address these issues immediately by adding rocks or adjusting placement.
Long-term maintenance for mountain slope stabilization with riprap is minimal but important. After major storm events, walk your riprap installations and replace any displaced rocks. Check that drainage paths remain clear and that vegetation hasn’t begun undermining the rock matrix. Annual inspections catch small problems before they become expensive repairs.
Riprap provides decades of reliable erosion control when sized correctly and installed properly. For cabin builders facing challenging water flow conditions, this robust technique offers peace of mind that your investment in slope protection will stand the test of time and weather.
Foundation Considerations for Mountain Slope Stabilization
Building a foundation on a hill is different from building on flat land. You need special systems for sloped areas. The foundation is key to keeping your cabin stable and preventing erosion.
Foundations on hills must handle uneven loads and variable soil depths. They also need to manage drainage. The right foundation keeps your cabin safe and stable for years.
Elevated Foundations That Follow the Natural Contours
Pier and beam foundations are a smart choice for hills. They use vertical posts to reach solid ground. Then, horizontal beams create a level floor for your cabin.
This method disturbs the slope less than other foundations. It works with the natural topography. This is good for the soil and helps prevent erosion.
- Minimal grading requirements that preserve natural drainage patterns and vegetation
- Reduced soil disturbance compared to full basement or slab foundations
- Flexibility on steep terrain where other foundation types become impractical
- Easier accommodation of walkout basements or lower-level garages that follow the slope
- Better drainage as the elevated floor allows water to flow naturally underneath
When building, space piers 8 to 12 feet apart. Use larger piers for heavier loads. Protect exposed piers from weather with treated wood, concrete, or metal.
Engineered Deep Foundation Solutions
Caisson and drilled pier foundations are for tough hillside sites. They drill large holes deep into the slope until reaching solid ground. Then, they fill these holes with steel-reinforced concrete.
Engineers use caissons for unstable slopes or heavy structures. They’re needed on steep slopes, in loose soils, or where seismic activity is high.
Drilling for caissons requires special equipment. The process goes deep, sometimes 20 feet or more. Steel rebar cages are lowered into each hole before concrete is poured.
Caisson foundations cost more, with prices ranging from $150 to $300 per linear foot. But they offer unmatched stability on challenging sites.
Working With Topography Instead of Against It
Removing soil from your hillside increases erosion risk. Smart design works with the land, not against it. This approach preserves the soil structure.
Split-level and terraced designs are great for slopes. They step down the hillside with different floor levels. This reduces soil disturbance and supports mountain slope stabilization and sustainable hillside development.
Partially embedded designs are another smart solution. The cabin nestles into the hillside, with minimal excavation. This creates dramatic architecture while disturbing less soil.
Managing cut-and-fill operations on-site reduces soil hauling. Use excavated soil to fill and level other areas. This saves money, reduces truck traffic, and maintains soil volume.
Anchoring Your Cabin to the Mountain
On very steep terrain, anchoring systems are needed. They tie your foundation to stable soil or bedrock. This makes building on steep slopes possible.
Helical anchors work like giant screws in the slope. They’re twisted into the ground until reaching stable soil. Then, they’re connected to your foundation with cables or rods.
Rock anchors are the strongest when bedrock is beneath your site. They drill holes into rock, insert steel rods, and grout them in place. The exposed ends connect to your foundation with cables or tie-backs.
Tie-back systems use multiple anchors with a structural wall or foundation. They distribute loads across the slope. Engineers design these systems with specific angles and spacing.
These systems require professional engineering and installation. The cost is high, but they make steep terrain accessible for cabin construction. Each anchor costs between $3,000 to $8,000, depending on site conditions.
Soil Conservation Techniques During and After Construction
Soil conservation during construction is key to a stable cabin site. The construction phase is the biggest risk to your hillside. Heavy equipment and excavation harm the soil structure.
Protecting topsoil is about more than just preventing mud. It’s about keeping the soil healthy for your erosion control for hillside cabin projects. The techniques used during construction affect how quickly your site recovers.
Soil conservation is like insurance for your investment. The methods covered here help trap sediment and preserve topsoil. They also help ground cover grow back after construction ends.
Silt Fencing and Sediment Barriers
Silt fencing is your first defense against sediment. These barriers are made of fabric attached to stakes. They’re placed along slopes or property lines to filter runoff.
Proper installation is critical for silt fence effectiveness. The bottom edge must be buried 8 inches deep. Stakes should be 6 feet apart, driven 18 inches into the ground.
For steeper slopes or high water flow, use reinforced silt fence. Standard silt fence is fine for gentler slopes. The fabric should let water through while trapping sediment.
Maintenance is essential. Check your silt fencing after every rain, no matter how small. Remove soil buildup when it reaches one-third the fence height. Fix any damage or water bypasses right away.
Other sediment barriers include:
- Fiber rolls (straw wattles or coir logs) placed along contours to slow water and trap sediment
- Compost filter socks filled with composted organic material, excellent for slopes and around storm drains
- Gravel bag barriers for temporary protection in concentrated flow areas
- Sediment basins for larger sites requiring centralized sediment collection
Remove silt fencing only when vegetation is established and your site is stable during rain. Removing it too soon can undo all your conservation efforts.
Stockpiling Topsoil for Restoration
Your topsoil is full of organic matter and beneficial microorganisms. Before excavation, separate it from deeper soil layers.
The topsoil layer is 4 to 12 inches deep. It’s darker and crumbly. Use equipment to remove it and store it separately.
Location matters significantly for topsoil stockpiles. Choose flat areas away from drainage paths. Never place stockpiles in natural drainage swales or areas that collect water during storms.
Keep stockpile height to 4-6 feet. Taller mounds become compacted and anaerobic, killing beneficial organisms. This defeats the purpose of stockpiling topsoil.
Cover your stockpiles with erosion control blankets, tarps, or mulch right away. Uncovered topsoil erodes quickly and gets colonized by weeds. The covering also keeps moisture levels up and protects against extreme temperatures.
Keep subsoil and topsoil stockpiles separate. Mixing them reduces topsoil quality and makes restoration harder. Label areas and brief operators on the importance of separation.
Plan your redistribution strategy before construction starts. Map where topsoil will be spread after grading. Focus on areas around your foundation, landscaping zones, and slopes needing revegetation.
Mulching Exposed Areas
Mulching is a simple yet effective soil conservation technique for hillside construction. It creates a barrier between soil and elements, reducing erosion and improving plant establishment.
Mulch absorbs raindrop energy, preventing soil displacement and surface crusting. It slows water runoff, encouraging infiltration. This reduces soil movement and improves moisture retention.
Organic mulches decompose, enriching soil with nutrients. As vegetation grows, roots stabilize the slope. Mulch bridges the gap between bare soil and full cover.
Appropriate mulch types depend on slope steepness and situation:
- Straw mulch (not hay, which contains weed seeds) works well on moderate slopes up to 3:1
- Wood chip mulch provides longer-lasting coverage but takes longer to decompose
- Shredded bark resists washing better than chips on steeper slopes
- Compost mulch adds immediate nutrients while providing erosion protection
Apply mulch 2 to 4 inches deep. Thinner applications don’t protect enough, while too much can smother seedlings. On steep slopes, use tackifier spray to help mulch adhere.
Apply mulch immediately after grading, before the first rain if possible. Don’t wait for vegetation to establish first. The mulch protects soil while seeds germinate and young plants develop root systems.
Combine mulching with seeding for optimal results. Spread seed first, then apply mulch over the seeded area. The mulch protects seeds from washing away while maintaining moisture and temperature conditions needed for germination.
Hydroseeding for Quick Vegetation Establishment
Hydroseeding accelerates vegetation establishment on slopes where traditional seeding methods struggle. This technique involves spraying a slurry mixture of seed, mulch, fertilizer, and tackifier onto prepared soil surfaces, creating ideal conditions for rapid germination and growth.
This method is valuable for erosion control for hillside cabin sites with steep slopes. Dry seed washes away on grades steeper than 3:1, making conventional seeding ineffective. The tackifier in hydroseeding mixtures helps everything adhere to slope surfaces, even during rainfall.
The hydroseeding process begins with site preparation. Grade and smooth the area, removing large rocks and debris. Rough up compacted surfaces to improve seed contact with soil. Install necessary erosion control structures before hydroseeding.
A specialized hydroseeding machine mixes and applies the slurry under pressure. Professional contractors typically charge $0.08 to $0.20 per square foot, which compares favorably to the cost of erosion control blankets plus conventional seeding. Large sites benefit most from the efficiency and speed of hydroseeding.
Seed mix selection determines long-term success. Work with local suppliers to develop region-appropriate blends that match your site conditions:
- Sun exposure – Full sun areas need different species than shaded slopes
- Soil type – Clay soils require different plants than sandy or rocky soils
- Climate zone – Choose species rated for your USDA hardiness zone
- Maintenance expectations – Native species typically require less ongoing care
Quality hydroseeding mixes include multiple grass species, wildflowers, and ground covers. This diversity ensures that some plants will thrive regardless of microclimate variations across your site. Avoid single-species mixes that create vulnerability to disease or environmental stress.
Post-application care significantly impacts germination success. Keep hydroseeded areas consistently moist for the first 3-4 weeks. This may require daily watering during dry periods. Avoid walking on treated areas until vegetation is well established, typically 6-8 weeks after application.
You should see initial germination within 7-14 days under favorable conditions. Full ground cover typically develops within 60-90 days, depending on growing season and species selected. This rapid establishment provides erosion protection far sooner than traditional seeding methods.
Combine hydroseeding with other soil conservation techniques for complete protection. Use silt fencing to contain the site perimeter, stockpile and redistribute topsoil to improve growing conditions, and apply additional mulch to steeper sections if needed. These methods work together to protect your hillside investment during the vulnerable construction and establishment phases.
Permits, Regulations, and Professional Requirements for Sustainable Hillside Development
Before starting your hillside cabin project, it’s key to know the legal rules. Building on hills means dealing with many rules to protect both you and the environment. The process for sustainable hillside development includes many steps and experts.
Getting these rules right saves time, money, and stress. It makes sure your cabin is safe and legal for years. Let’s look at the main rules you need to follow.
Understanding Local Building Codes and Zoning Laws
Your local building codes and zoning laws have special rules for hillside building. These rules change a lot from place to place. It’s smart to learn about them early, even before you buy land.
Most places have minimum setback requirements to keep buildings safe from slopes. These rules are usually 10 to 20 feet from the top of steep slopes. They help protect your building and make it easier to get to.
In Ontario, the Provincial Planning Statement guides where to build. Make sure the land isn’t in a hazardous area. This one step can save you from buying land that can’t be built on.
Some common rules for building on hills include:
- High-hazard zone limitations: Areas with slope failures or unstable soils may not be allowed for building
- Maximum site coverage: Codes limit how much of your land can be covered by buildings and hard surfaces
- Required erosion control plans: Most places need detailed plans to control erosion before you can build
- Access road standards: Driveways on slopes must meet specific requirements
Some areas have rules so strict that your cabin design might not work. Finding this out early can save a lot of trouble and money.
Working with Geotechnical and Civil Engineers
Professional engineers are key for erosion control for hillside cabin projects. They make sure your building stays safe and your site management works.
Geotechnical engineers check soil and slope stability. They test soil and suggest the right foundation for your land. Civil engineers design drainage and grading plans to manage water.
You’ll need engineers for:
- Slopes over 25-30% grade
- Retaining walls taller than 4 feet
- Unstable soil
- Any project needing professional certification
Finding the right engineers is important. Look for those with experience in your area. They’ll know the local soil, climate, and rules.
Engineering costs vary by project. Expect to spend $3,000 to $10,000 for detailed assessments. These reports are part of your permit application and protect you later.
Environmental Protection and Wetland Regulations
Many mountain properties have protected areas. Knowing these rules helps avoid delays and legal problems.
Common environmental rules for sustainable hillside development include:
- Stream proximity: States regulate building near streams, needing special buffers and controls
- Wetland impacts: Even small wetlands may need federal permits for any disturbance
- Endangered species habitat: Properties with endangered species habitats face extra restrictions
- Stormwater management: Most places require plans to manage runoff without harming water quality
Environmental reviews can take months. The U.S. Army Corps of Engineers handles wetland permits, while state agencies manage water and species issues.
Doing a preliminary environmental assessment early helps spot issues before you spend a lot on design. Many firms specialize in these assessments and can help with regulations.
Obtaining Grading and Drainage Permits
Grading and drainage permits are separate from your building permit. They require detailed plans for managing earthwork and water flow. These permits ensure your construction won’t harm neighbors.
Your grading permit application needs:
- Detailed site plans: Showing existing and proposed contours, typically at 2-foot intervals
- Drainage design drawings: Illustrating water flow through your property during and after construction
- Erosion control plans: Specifying measures to prevent erosion
- Construction sequencing: Outlining the order of operations to minimize erosion risk
- Post-construction restoration: Describing how to stabilize disturbed areas permanently
The permit review process can take 4 to 12 weeks. Incomplete applications get rejected, making timelines longer.
Working with experienced site designers and contractors helps a lot. They know what reviewers want and can prepare complete, approvable submissions.
Some places require inspections during construction to check if you’re following your approved plans. Make sure to budget for these inspections—they’re not optional, and failing can stop your project until issues are fixed.
Long-Term Maintenance and Monitoring Your Hillside Cabin Site
Think of erosion control for hillside cabin sites as a living system that needs regular care. Even the best drainage systems and retaining walls need ongoing maintenance. Without it, small problems can turn into big, expensive issues or even slope failures.
Your maintenance program keeps your investment safe and your family safe. Regular checks help spot problems early, when they’re cheap to fix. This proactive approach to mountain slope stabilization can save you thousands of dollars compared to emergency repairs.
Seasonal Inspection Checklists for Erosion Signs
Each season brings different challenges to your hillside property. Spring inspections after snowmelt and heavy rains are key for spotting winter damage. Look for new erosion channels, settling around retaining walls, and whether drainage systems are handling the increased water flow.
Summer inspections focus on vegetation health and dry-season stress. Check that your plants are thriving and their root systems continue stabilizing the soil. This is also the best time to assess whether your irrigation system is functioning properly without creating new erosion patterns.
Fall preparations before winter are essential for mountain slope stabilization. Clear all drainage systems of leaves and debris that could cause clogs during winter storms. Inspect for any signs of soil movement during the growing season and verify that vegetation is healthy going into dormancy.
Winter inspections, where accessible, should look for ice damming around drainage outlets and snow load issues on retaining structures. Check for freeze-thaw damage to walls and exposed drainage pipes that can crack when water expands.
| Season | Primary Concerns | Key Inspection Areas | Action Items |
|---|---|---|---|
| Spring | Snowmelt runoff, winter damage assessment | Drainage channels, retaining wall integrity, erosion gullies | Clear debris, repair winter damage, test drainage flow |
| Summer | Vegetation health, drought stress, irrigation effectiveness | Plant vitality, exposed soil areas, irrigation patterns | Water struggling plants, mulch bare spots, adjust irrigation |
| Fall | Preparing for winter, leaf accumulation, final growth check | Drainage system clearance, vegetation establishment, outlet function | Remove leaves from drains, trim overgrowth, verify outlets clear |
| Winter | Freeze-thaw cycles, ice formation, snow accumulation | Retaining wall cracks, ice dams, drainage blockages | Monitor after storms, remove ice buildup, check structural integrity |
Maintaining Drainage Systems and Clearing Debris
Your drainage systems are the hardest-working components of your erosion control for hillside cabin setup. French drains collect sediment over time, catch basins fill with debris, and outlet pipes can become clogged with leaves or roots. Regular cleaning prevents these issues from compromising your entire system.
At minimum, inspect drainage systems before and after storm seasons. Spring and fall are the most important times because these periods bring the heaviest precipitation. Look for standing water, slow drainage, or unusual wet spots that indicate blockages.
Clean catch basins annually by removing accumulated sediment and debris. This simple task takes less than an hour but prevents backup that could flood your property. Flush drain pipes every few years using a garden hose to clear minor sediment buildup before it becomes a serious clog.
For more serious issues, call professionals equipped with camera inspection equipment and high-pressure flushing systems. They can identify problems deep within your drainage network that aren’t visible from the surface. This preventive maintenance costs far less than excavating and replacing failed drainage systems.
Pay special attention to maintaining clear outlets where water exits your drainage system. If outlets become blocked, water backs up and finds alternative escape routes, often causing unexpected erosion damage. Keep vegetation trimmed away from outlet pipes and ensure nothing obstructs the flow path downhill.
Vegetation Care, Pruning, and Replacement
The plants you installed for slope stabilization require ongoing care to remain effective. While established vegetation needs less attention than new plantings, neglecting your hillside landscaping can undermine its erosion control benefits. Dead plants leave bare spots that quickly become erosion sites.
Prune trees and shrubs appropriately to maintain their health without reducing their soil-stabilizing root systems. Remove dead branches and thin overcrowded growth, but avoid aggressive pruning that weakens the plant. The goal is healthy, vigorous growth that holds soil firmly in place.
Replace any plants that die or fail to thrive promptly. Don’t let bare patches develop, as these become starting points for erosion channels. Choose replacement plants suited to your specific slope conditions, considering sun exposure, soil type, and water availability.
Manage invasive species before they outcompete your beneficial erosion control plants. Invasives often have shallow root systems that provide less slope stability than native deep-rooted species. Regular monitoring helps you catch invasions early when removal is manageable.
Renew mulch around shrubs and trees every few years. Mulch reduces water runoff velocity, prevents soil surface erosion, and helps plants retain moisture during dry periods. A 2-3 inch layer provides excellent protection without smothering plant roots.
Addressing Erosion Issues Before They Escalate
Learning to recognize early warning signs of erosion problems is critical for effective mountain slope stabilization. Small issues caught early are easy and inexpensive to fix. The same problems ignored for months can develop into slope failures requiring tens of thousands of dollars to repair.
Watch for small rills or channels forming on previously smooth slopes. These indicate concentrated water flow that will deepen and widen with each storm. Address them immediately by installing drainage diversions or planting additional vegetation.
Areas of concentrated flow where none existed before signal that your drainage patterns have changed. This might indicate a clogged drain redirecting water, soil settling that created a new low spot, or vegetation loss that removed natural flow obstacles.
Cracks in soil above retaining walls suggest the wall may be moving or that soil behind it is settling unevenly. These cracks allow water to penetrate behind the wall, potentially causing failure. Have a professional assess the situation before the wall fails completely.
Leaning trees or exposed roots indicate active soil movement. Trees that were vertical now tilting downslope show the ground is creeping. Exposed roots that were previously buried mean erosion has removed several inches of protective soil.
Keep yourself and your family away from steep and unstable slopes. Discourage children and pets from sliding down or climbing slopes, as this activity damages vegetation and compacts soil in ways that increase erosion. Don’t throw compost, leaves, or gardening debris into ravines, as this material plugs natural drainage outlets and prevents groundwater from draining properly.
Sediment depositing at the base of slopes indicates active erosion from above. The amount and frequency of deposition show how quickly erosion is progressing. Trace the sediment back to its source and implement erosion control measures there before more soil is lost.
Wet spots that appear where ground was previously dry suggest drainage problems developing underground. These might indicate a failed French drain, a new spring emerging, or changed water flow patterns. Investigate immediately because hidden water movement causes the most dangerous slope failures.
By implementing these maintenance practices consistently, your erosion control for hillside cabin will continue protecting your property for decades. The time invested in regular inspections and preventive maintenance pays dividends by avoiding expensive emergency repairs and ensuring your mountain retreat remains safe and beautiful.
Building Your Dream Mountain Cabin with Confidence and Care
Building a cabin on a slope is possible with the right planning and respect for nature. Effective erosion control for hillside cabins involves a system of drainage, structural support, vegetation, and maintenance. It’s not just one solution.
Natural shorelines and plants are the best defense against erosion. The best strategy is to keep the natural drainage and disturb the site as little as possible. Building with the landscape, not against it, ensures lasting stability.
Investing in sustainable hillside development pays off in the long run. Many methods are DIY-friendly, but for complex tasks, it’s wise to hire experts. This approach ensures safety and environmental care for years.
The effort is worth it. You’ll enjoy stunning views, privacy, and a deep connection with nature. Creating something beautiful that respects the mountain landscape brings true satisfaction.
You now know how to evaluate your site, choose the right techniques, and keep your systems working for decades. Remember, your erosion control does more than protect your land. It also safeguards neighboring areas and water quality for everyone.
Your dedication to doing it right will lead to success. With these principles, your dream mountain cabin can become a reality. Approach it with care and attention to detail.


