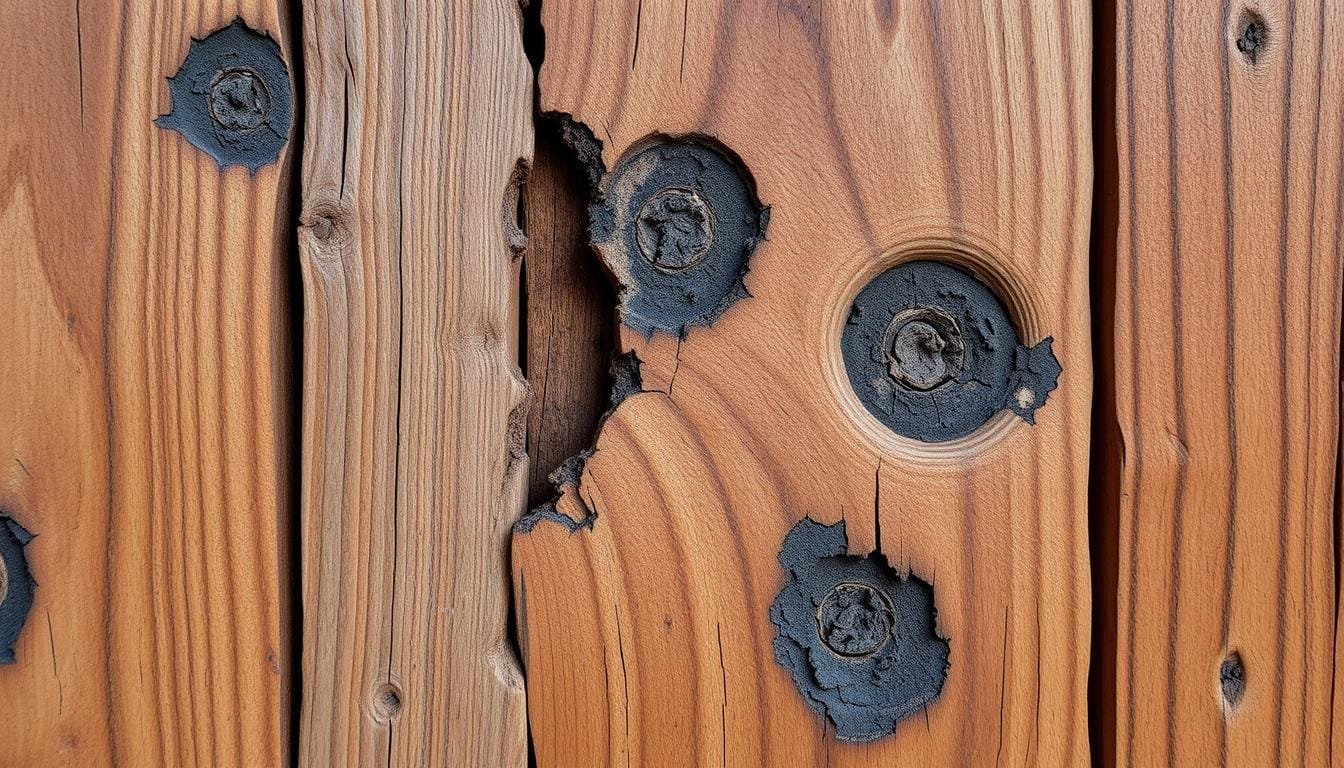
Did you know that 80% of wood rot issues in cabins start unnoticed? They often hide beneath surfaces that look fine. This is why early detection in log cabin log repair is so important. Wet rot, which loves moisture, can cause serious damage if not caught early.
Knowing the signs of wood rot is key to protecting your cabin. A damp, musty smell can be a warning sign before you see anything. In the beginning, dry rot might look like fine white threads. Later, it can turn into cotton wool-like stuff with an orange color.
Wet rot shows up as darkened wood that feels soft and spongy. Both types can weaken your cabin. Wet rot usually happens in damp spots, while dry rot can spread without moisture. Spotting these signs early can save your cabin and avoid expensive fixes later.
As we explore ways to protect wood, remember that prevention is best. Regular checks and good air flow are your best defense against wood rot in your cabin.
Understanding Wood Creosote
Wood creosote is a strong wood preservative. It’s a brownish-black oil made from coal tar. For centuries, it has protected wood from moisture and decay.
What is Wood Creosote?
Wood creosote is a mix of chemicals from coal tar. Its dark, oily nature lets it deeply penetrate wood. This gives it great moisture protection.
It’s very good at keeping water out and stopping fungi. These are big reasons for wood rot.
Historical Uses of Creosote
Creosote has a long history in industry. It was used on railroad ties, telephone poles, and marine pilings. It was chosen for its ability to protect wood in wet conditions.
Effectiveness in Moisture Protection
Creosote’s moisture protection is unmatched. It creates a barrier in the wood, making it last longer. In fact, treated wood can last up to five times longer than untreated wood.
But, its use is now limited because of health and environmental worries. Today, there are safer alternatives that work just as well.
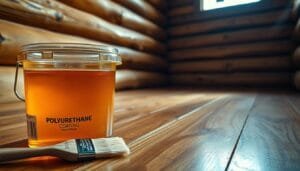
The Application Process
Understanding how to treat wood is key for keeping cabins safe. Creosote was once used but is now banned for homes. Yet, learning about it helps us see how pros protect wood today.
Preparation and Safety Measures
Before treating wood, make sure it’s clean. Remove dirt and loose fibers. It’s also important to wear protective gear like gloves and goggles.
Work in a place with good air flow. This helps avoid breathing in harmful fumes.
Application Techniques
Creosote was once applied under pressure. This pushed the preservative deep into the wood. The wood was placed in a special vat filled with creosote.
High pressure made sure the preservative reached every part of the wood. This helped protect it from moisture and pests.
Drying and Curing
After treatment, the wood needs to dry and cure. This lets the preservative set right. The wood is left to air dry, letting excess preservative evaporate.
The drying time depends on the wood and the environment. Proper drying is key to using the wood safely and preventing preservative leaks.
Even though creosote is banned for homes, today’s wood treatments are safer and better for the environment. They offer strong protection for wood.
Health and Environmental Concerns
Creosote, once used for wood preservation, is now under scrutiny. It poses serious health risks and environmental damage. This section looks into the dangers of creosote and the new wood preservation rules.
Risks Associated with Creosote
Creosote can cause severe skin irritation and health problems. Long-term exposure may lead to more severe conditions. Breathing in creosote fumes, like from burning treated wood, can irritate your lungs and eyes.
Environmental Impact
Creosote has a big impact on the environment. It can pollute soil and water, harming plants and animals. Burning creosote-treated wood in stoves adds to urban air pollution, affecting air quality.
Regulatory Restrictions
Because of these issues, strict rules now limit creosote use. It’s banned for home use. The California Air Resources Board has set limits on emissions from wood-burning devices to 12 micrograms per cubic meter.
| Concern | Impact | Regulation |
|---|---|---|
| Health | Skin irritation, respiratory issues | Banned for residential use |
| Environmental | Soil and water contamination | Strict disposal guidelines |
| Air Quality | 12% of urban particulate emissions | Emission limits of 12 μg/m³ |
These rules aim to protect health and the environment. Homeowners are advised to look for safer wood preservation and heating options.
Modern Alternatives to Creosote
The wood preservation industry has changed a lot. Now, we have eco-friendly treatments that are just as good as creosote. These new preservatives protect wood well without harming our health or the environment.

Water-Based Treatments
Water-based preservatives are becoming more popular. They work well on clean, dry wood. They also stop water from getting in, making them great for outdoor use.
Oil-Based Alternatives
Oil-based treatments are strong like creosote. They soak deep into the wood. This gives the wood good UV protection and keeps water out. They’re perfect for places where wood gets really exposed.
Natural Wood Preservatives
For those who care about the planet, natural preservatives are a good choice. They come from plants and don’t have harsh chemicals. They keep wood safe from bugs and fungi.
| Treatment Type | Key Benefits | Application Method |
|---|---|---|
| Water-Based | Eco-friendly, leach-resistant | Direct application on clean wood |
| Oil-Based | Deep penetration, UV protection | Brush or spray application |
| Natural | Chemical-free, environmentally safe | Multiple thin coats for best results |
When picking a wood preservative, think about the wood, where it’s going, and how long it should last. Many of these treatments meet strict VOC rules. They work well if applied and cared for right.
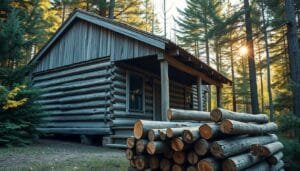
Preparing Your Cabin for Treatment
Getting your cabin ready for treatment is key. A detailed cabin wood assessment is the first step. It helps ensure your cabin stays protected for a long time. Let’s look at the important steps to prepare your cabin for its makeover.
Assessing Wood Condition
Begin with a detailed cabin wood assessment. Look for decay, insect damage, or moisture issues on the exterior. Use a moisture meter to check the wood’s moisture level. It should be below 20% before treatment.
This step is critical. It helps you find areas that need extra care during the treatment process.
Cleaning and Repairs
Cleaning is a must before treatment. Remove dirt, dust, and old finishes that could hinder new treatments. For tough stains or growth, use biocidal cleaners.
Fix any cracks or replace damaged wood. This ensures a strong base for the treatment.
Choosing the Right Treatment
Pick a treatment that fits your cabin’s needs and local climate. Water-based preservatives dry fast and are eco-friendly. Solvent-based options penetrate deeper.
Consider using Cuprinol 5 Star Complete Wood Treatment for inside or Barrettine Premier Wood Preservative for outside. Remember, treatments need to be reapplied every 2 to 5 years, depending on the environment.
By taking these steps, you’ll prepare your cabin for lasting protection. This ensures it stays beautiful and strong for many years.
Application Techniques for Modern Treatments
Wood treatment is key for keeping your cabin in top shape. Knowing the right techniques is essential. Let’s look at the best ways to apply modern wood treatments.
Brushing and Rolling Methods
Brushing and rolling are great for small cabins or detailed work. Start at the top and move down for even coverage. Apply thin coats, letting each dry before adding more.
This method gives you control, which is perfect for DIY projects.
Spraying Techniques
Spraying is fast for big surfaces. Use a pump or airless sprayer for even coverage. Make sure to cover nearby areas to avoid overspray.
Spray in a steady pattern, slightly overlapping for full coverage. This method saves time but needs careful prep.

Professional Application Services
For expert help, consider professional wood treatment services. They use the latest tools and techniques for thorough coverage. They know safety rules and can handle complex jobs well.
| Application Method | Best For | Skill Level |
|---|---|---|
| Brushing | Small areas, detail work | Beginner |
| Rolling | Medium surfaces | Beginner |
| Spraying | Large areas | Intermediate |
| Professional Service | All sizes, complex treatments | Expert |
Pick the method that fits your cabin’s needs and your skill level. Proper application means your cabin stays protected for years.
Maintenance and Reapplication
Keeping your cabin in top shape requires ongoing wood treatment maintenance. Regular care ensures your cabin stays protected against the elements for years to come.
Signs of Treatment Wear
Watch for changes in wood color or texture. These can indicate your treatment is wearing off. Fading, cracking, or peeling are clear signs it’s time for a fresh application.
Regular Inspection Tips
Set up a cabin preservation schedule to stay on top of maintenance. Check your cabin’s exterior monthly, paying extra attention to areas prone to moisture. Look for signs of rot, pest damage, or water stains.
Reapplication Schedule
Your treatment reapplication timing depends on your local climate and the product used. Generally, plan for yearly touch-ups and full reapplication every 3-5 years. Keep a log of when you last treated your cabin to make scheduling easier.
- Annual touch-ups for high-wear areas
- Full reapplication every 3-5 years
- Adjust schedule based on climate conditions
Remember, regular maintenance can extend the life of your wood treatment by up to 50%. By staying proactive, you’ll keep your cabin beautiful and structurally sound for years to come.
Additional Moisture Protection Strategies
Keeping your cabin dry is key to preventing wood rot and keeping it in good shape. Treatments like creosote can help, but a full plan for managing moisture is needed. Let’s look at some ways to control humidity and protect your wooden home.
Proper Ventilation
Good airflow is essential to lower indoor humidity. Put vents in your cabin’s foundation and roof for air flow. This stops condensation, a big cause of wood decay. Add fans in damp places like bathrooms and kitchens to move air better.
Drainage Solutions
Drainage is important to keep water away from your cabin. Install gutters and downspouts to move rainwater off the roof. Make sure the ground slopes away to stop water from pooling. For lots of rain, think about French drains or a gravel border to spread water out.
Humidity Control
It’s important to manage indoor humidity to prevent wood rot. Use dehumidifiers in wet areas and silica gel in closets to soak up moisture. Keep an eye on humidity levels, aiming for 30-50%. In winter, good insulation stops warm, moist air from condensing on cold surfaces, protecting your cabin from moisture damage.