Did you know pier foundations can cut cabin construction costs by up to 30%? This fact shows why more DIY fans are picking this method for their dream cabins. You can build a strong cabin foundation in just 15 days, saving time and money.
Pier foundations are great for different terrains, perfect for cabin building. They keep your structure dry and make it easy to add utilities. Let’s look at how to make a solid base for your cozy cabin.
Building pier foundations for your cabin is a wise DIY choice. It’s both affordable and durable. With the right planning and work, you can make a foundation that lasts. Are you ready to start? Let’s go over the main steps for building pier foundations.
Understanding Pier Foundations
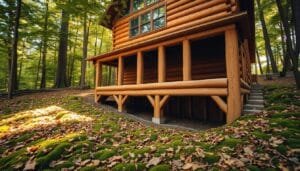
Pier foundations are a common choice for cabins. They lift your cabin up, providing benefits for building and upkeep.
What Are Pier Foundations?
Pier foundations have concrete posts or plinths spaced about 2m apart. They’re made by drilling holes, adding rods, and filling with concrete. This makes a solid base that raises your cabin.
Advantages of Pier Foundations
Pier foundations have many benefits:
- They protect against floods by raising the cabin.
- They improve air flow, cutting down on humidity and mold.
- They make it easy to access utilities in the crawl space.
- They work well on uneven land or clay-heavy soil.
- They also help your cabin stay stable during earthquakes.
Common Uses in Cabin Construction
Cabins often use pier foundations because they’re flexible. They’re great for hilly areas or places with different soil types. The crawl space makes it easy to make changes and keeps the inside temperature stable.
Pier foundations also fight off termites and can save money over time compared to concrete slabs.
Planning Your Cabin’s Layout
Building a sturdy cabin starts with careful planning. This includes choosing the right site, planning the foundation, and assessing the soil. Let’s dive into the essential steps for your dream cabin.
Choosing the Right Location
Finding the perfect spot for your cabin is vital. Think about the terrain, sunlight, and utility access. A flat area with good drainage is best for pier foundations. The right location makes construction easier and extends your cabin’s life.
Considerations for Your Cabin Design
Your cabin’s design affects the foundation. Consider its size, layout, and purpose. For instance, a 30×24 foot cabin with large decks needs precise pier placement. Plan for 18 foundation pads, 6-8 feet apart, for strong support in wet soil.
Assessing Soil Conditions
Soil assessment is key for a solid foundation. Look for signs like small black spruce trees, which may indicate wet soil. Dig test holes to avoid boulders or clay layers. In extreme climates, like Alaska, choose a foundation that adjusts to soil heaving from temperature changes. This ensures your cabin lasts for many years.
| Soil Type | Foundation Recommendation |
|---|---|
| Mucky soil | Pier foundation with adjustable height |
| Rocky terrain | Helical piles or concrete footings |
| Clay-rich soil | Wider foundation pads for weight distribution |
Necessary Tools and Materials
Building pier foundations for your cabin needs the right tools, materials, and safety gear. Let’s look at what you’ll need to start your project.
Essential Tools for Building Piers
To build strong piers, you’ll need both hand tools and power equipment. Here’s a list of must-haves:
- Shovel and post-hole digger
- Wheelbarrow for concrete mixing
- Level and tape measure
- Circular saw and drill
- Concrete mixer (optional but helpful)
Materials You Will Need
Choosing the right materials is key for a solid foundation. You’ll need:
- Concrete mix (about 2 bags per pier)
- Treated lumber for beams (16-foot long 2x8s)
- Rebar for reinforcement
- Metal brackets and hardware
- DAP Subfloor Construction Adhesive
Safety Equipment and Gear
Remember safety when working on your foundation. Essential safety gear includes:
- Hard hat and safety glasses
- Work gloves and steel-toe boots
- Dust mask for concrete work
- High-visibility vest
With these tools, materials, and safety gear, you’re ready to build a strong pier foundation for your cabin. Proper planning and preparation are essential for a successful project.
Excavation and Site Preparation
Getting your site ready is key for a strong cabin foundation. This step includes clearing the land, using the right excavation methods, and setting up good drainage. Let’s explore how to prepare your site for pier foundations.
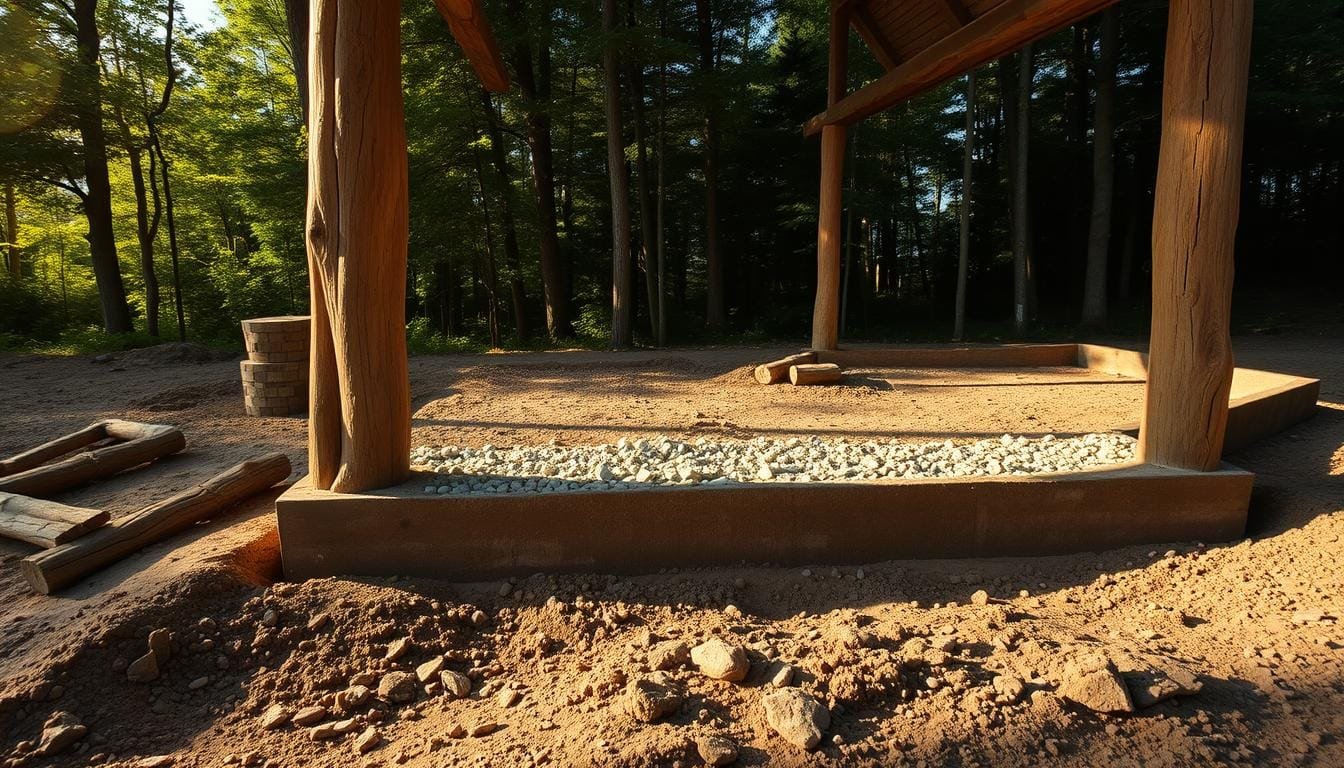
Clearing the Area
First, remove rocks, roots, and debris from the site. This makes a clean space for your cabin. Make sure the area is level, as a flat surface is needed for foundation work. Clearing well can also prevent moisture problems later.
Digging Holes for Piers
After clearing, it’s time to dig holes for your piers. Here are some guidelines for hole sizes:
- 24-inch diameter for double truss bearing columns along eave sides
- 18-inch diameter for other structural columns
- 40-inch depth for all structural column holes
Using the right excavation methods is important. Helical piles are a good choice because they cause less damage and are easy to install. They work well in different soil types, giving strong support even in tough conditions.
Ensuring Proper Drainage
Good drainage is key to keep your cabin’s foundation safe. Make the building site higher than the land around it to help water run off. Aim for a 5% slope, or a six-inch drop over 10 feet, around the building. This slope keeps water away from your cabin, protecting it.
| Site Preparation Element | Recommendation |
|---|---|
| Grading Slope | Minimum 5% (6-inch drop over 10 feet) |
| Fill Layer Depth | No deeper than 6 inches |
| Compaction Requirement | 90% of Modified Proctor Density |
| Flood Plain Consideration | Finished floor top higher than flood level |
By following these site preparation tips, you’ll make a strong foundation for your cabin. This will help it last for many years.
Building the Piers
Pier construction is key to your cabin’s foundation. It involves mixing concrete, pouring it right, and adding reinforcement. Let’s explore how to make strong piers for your cabin’s support.
Mixing Concrete for Piers
First, make a top-notch concrete mix. For a 20×26 foot cabin, you’ll need lots of concrete. Use a 1:2:3 mix of cement, sand, and gravel. Add water slowly until it’s just right. The strength of your piers depends on this mix.
Pouring and Curing Techniques
Next, pour concrete into 12-inch diameter Sonotubes, going 4 feet below the frost line. Fill each with 6 inches of cement, add rebar, then pour another 6 inches. This method makes solid, void-free piers. Let the concrete cure for at least 7 days, keeping it moist to avoid cracks.
Installing Reinforcements
Installing reinforcement is vital for pier stability. Put vertical rebar in the center, from bottom to top. Use horizontal ties every 12 inches for extra strength. This grid boosts the pier’s ability to hold weight and last longer.
Make sure your piers stick out at least 12 inches above ground to keep moisture away. Place them evenly, about one post for every 50 square feet. With the right mix, pouring, and reinforcement, you’ll have a strong foundation for your cabin.
Setting Pier Height and Leveling
Getting the foundation height right is key for your cabin’s stability. Pier leveling needs precision and the right tools for a solid base.
Tools for Leveling Piers
You’ll need some important tools for accurate pier leveling:
- Laser level
- Spirit level
- Plumb bob
- Measuring tape
- Shovel

Maintaining Consistent Height
Piers should be 6 to 8 feet apart for a stable foundation. Dig holes 3 to 4 feet deep and 12 to 18 inches wide. Use a laser level to mark the height on each pier form. This makes sure all piers are at the same height.
Checking for Plumb
Checking if piers are plumb is critical for stability. Use a plumb bob or level to check each pier’s vertical alignment. If piers are not even, you can use leveling techniques like grinding or patching concrete.
| Pier Spacing | Hole Depth | Hole Width |
|---|---|---|
| 6-8 feet | 3-4 feet | 12-18 inches |
Proper pier leveling and plumb checking are vital for a strong cabin foundation. Take your time and use the right tools. This ensures your piers are at the correct height and perfectly vertical.
Connecting Piers to the Cabin Frame
After setting up your piers, it’s time to connect your cabin’s frame. This step links your cabin’s structure to its foundation. It ensures stability and longevity. Let’s look at beam installation and foundation securing.
Beam Placement and Support
The first step is to place your beams correctly. Beams support your cabin’s floor joists. They should be level and parallel, spanning across multiple piers. For a typical cabin, use double 2×10 beams, spanning up to 8 feet between piers.
Bolting and Securing Techniques
Securing beams to piers is essential for a strong frame. Use metal brackets, bolts, or structural screws for this. Here’s a simple guide:
- Place metal brackets on top of each pier
- Set the beam in the bracket
- Use 1/2-inch galvanized bolts or structural screws to fasten the beam to the bracket
- Ensure all connections are tight and secure
Remember, securing your foundation is key to your cabin’s stability. Each pier should support a portion of the deck load. For added strength, consider using Diamond Pier foundations. They have proven effective in over 95,000 installations over 10 years.
Waterproofing and Insulation
Keeping your cabin’s pier foundation dry and warm is key to its long life. Waterproofing and insulation help make your cabin cozy and strong. They ensure it lasts for years to come.
Importance of Waterproofing
Moisture protection is critical for pier foundations. Without it, your cabin’s structure can be damaged. This could also lead to health risks from mold. A good waterproofing plan can save you a lot of money on repairs later.

Insulating Between Piers
Insulating between piers keeps your cabin warm and saves on energy. It blocks cold air and moisture. This is very important in cold or humid areas.
Long-Term Protection Tips
To keep your pier foundation dry and protected:
- Install a high-quality vapor barrier
- Use foam board insulation for superior R-value
- Maintain proper drainage around the cabin
- Regularly inspect for signs of water damage or pest intrusion
Investing in strong waterproofing and insulation now can save you from expensive repairs later.
| Protection Measure | Benefit | Estimated Cost |
|---|---|---|
| Crawl Space Encapsulation | Prevents moisture and pest intrusion | $5,000 – $15,000 |
| Foam Board Insulation | Improves energy efficiency | $1 – $5 per sq ft |
| Drain Tile System | Manages excess water | $2,000 – $6,000 |
Inspecting Your Work
You’ve reached the final stage of your pier foundation project. Now it’s time for a critical step: foundation inspection. This process ensures your cabin’s base is solid and reliable. Let’s dive into how to conduct a thorough quality control check and avoid common pitfalls.
How to Conduct a Thorough Inspection
Start by checking the spacing between piers. They should be evenly spaced, typically 8-10 feet apart. Measure the height of each pier – they’re usually around 4 feet tall and can extend up to 2 feet above the sill plate. Verify that excavation holes are at least 2 feet wide and 3 feet deep, with 5-6 inches of gravel at the bottom. These measurements are key to avoiding mistakes.
Common Mistakes to Avoid
Watch out for signs of foundation failure. These include uneven or bouncy flooring, and diagonal cracks near window or door frames. Ensure trees are planted at least 20-25 feet away from the foundation to prevent root infiltration. Don’t overlook the importance of a proper drainage system – it’s essential for maintaining foundation integrity and preventing water pooling.
Making Necessary Adjustments
If you spot any issues during your inspection, address them promptly. Remember, foundation piers can last beyond the life of your home if properly built and maintained. Consider encapsulation and insulation to protect against moisture and humidity. By conducting regular inspections and making timely adjustments, you’ll ensure your pier foundation remains sturdy for years to come.