Discovering a water issue in your retreat is a stressful moment. Every minute counts when it comes to preventing serious damage.
What begins as a small leak can quickly escalate. It can threaten the structure of your home and lead to problems like mold.
This guide provides the essential steps you need to know. You will learn practical roofing strategies to protect your property.
Even a temporary fix can make a huge difference. Our goal is to help you control the situation until a professional can provide a permanent solution for the leak. Acting quickly and correctly is the key to safeguarding your investment from further roof and water damage.
Understanding the Importance of a Leak-Free Cabin Roof
Protecting your retreat begins with ensuring what’s above remains secure and dry. A compromised overhead structure can lead to serious consequences that affect both your property and health.
The risk of water damage and mold
When moisture enters your space, it creates ideal conditions for mold growth. This fungal issue can spread quickly through your interior spaces.
Black mold poses particular health concerns. It affects air quality and may cause respiratory problems for occupants.
Water damage doesn’t stop at surface-level issues. It penetrates building materials, weakening structural components over time.
Maintaining your cabin’s integrity over time
Regular maintenance preserves your property’s value for years. Addressing small issues promptly prevents major repairs later.
The financial impact of neglect can be substantial. What starts as minor dripping can become expensive reconstruction.
| Issue | Immediate Effect | Long-Term Consequence |
|---|---|---|
| Small Leak | Minor dripping | Structural weakening |
| Mold Growth | Musty odor | Health hazards |
| Water Intrusion | Surface stains | Material deterioration |
Your peaceful escape deserves proper protection. A well-maintained overhead barrier ensures lasting enjoyment and safety.
Identifying and Locating the Source of the Leak
Finding the exact point where moisture enters your structure is the most critical step. The visible drip inside is often a symptom, not the source of the problem. Water can travel far along rafters before finally dripping down.
Inspecting the attic and roofing underside
Your first move is a trip to the attic. Go on a bright day with a powerful flashlight. Carefully look for water marks, dark spots, or mold on the wood.
These signs point to an active leak. Pay close attention to where different parts of the structure meet.

A clever trick uses magnets and a compass. Tape strong magnets inside the attic near the highest water stains. Then, use a compass on top of the roof to find them quickly.
Checking for flashings, damaged shingles, and water stains
Outside, focus on specific areas. Check the metal flashing around chimneys, vents, and pipes. Look for rust, gaps, or loose sections.
Roof valleys are common trouble spots. Also, inspect the edges and eaves. Strong winds can push rain underneath shingles here.
Look for loose, cracked, or missing shingles. These are clear signs of a potential entry point for a leak. Remember, the true source might be uphill from the interior stains.
Preparing Your Roof for Repair Work
A successful repair begins long before you apply the first patch. Taking the right preparatory steps is crucial for a secure and lasting solution. This phase ensures your work area is clean, dry, and safe.
Cleaning and drying the affected area
Start by thoroughly sweeping the damaged area. Remove all leaves, twigs, and loose gravel. Even tiny bits of dirt can prevent patches from sticking properly.
Next, address any moisture. Use old towels or a wet/dry vacuum to soak up puddles. A completely dry surface is essential for adhesives to bond effectively.
Safety is your top priority. Never climb onto a wet or slippery surface. Wait for it to dry completely and wear shoes with excellent grip.
Removing debris and loose materials safely
Carefully lift the edges of surrounding shingles to check for hidden water damage. Pull off any loose or cracked shingles near the problem spot.
For stubborn grime, use a wire brush. Scrub away algae and dirt to help patches adhere. Avoid pressure washers or harsh chemicals that can harm roofing materials.
Your ladder setup is critical. Ensure it is sturdy and extends three feet above the edge. Always maintain three points of contact while climbing.
| Preparation Step | Key Action | Important Tip |
|---|---|---|
| Surface Cleaning | Sweep away all debris | Even small gravel affects adhesion |
| Moisture Removal | Dry the area completely | Use towels or a shop vacuum |
| Material Inspection | Lift shingle edges | Look for hidden soft spots |
| Final Scrubbing | Use a wire brush | Avoid damaging chemicals |
These careful preparations create the ideal foundation for your temporary fix. They help ensure your efforts will be effective until a professional can provide a permanent solution.
Effective Tips for Stopping Roof Leaks in Cabin
Having a game plan for urgent moisture control can prevent a minor issue from becoming a major disaster. These emergency measures are designed to buy you precious time until professional help arrives.
Quick fixes with roof patches and sealants
Rubberized patches work well for smaller openings. They create a flexible barrier that moves with your structure’s natural expansion and contraction.
Always start with a clean, dry surface. Dirt or moisture will prevent proper adhesion. Use a wire brush to scrub the area thoroughly before application.

Waterproof tape offers another temporary solution. Apply it from the bottom upward, creating overlapping layers. This technique directs water flow over the barrier rather than underneath it.
Temporary repairs until professional help arrives
These solutions typically last from a few days to several weeks. Their primary purpose is to prevent extensive interior damage while you arrange for permanent work.
Assess your situation carefully. Small pin-hole openings respond well to sealants. Larger damaged areas may require more extensive coverage with specialized materials.
Remember that timing is critical. Every hour of delay allows more water to penetrate vulnerable spaces. Acting quickly with the right approach protects your investment effectively.
Applying Temporary Roofing Patches and Sealants
Securing your overhead protection requires specific techniques and quality materials for best results. These methods create a reliable barrier against weather while you arrange permanent solutions.
Using tarps, boards, and galvanized nails
Begin with a sturdy blue tarp that extends four feet beyond the damaged area. This provides adequate coverage against driving rain. Combine this with 2×4 boards and galvanized nails for secure anchoring.
Wrap the tarp edges around the boards to create protected anchor points. This prevents wind from tearing the material. Nail these wrapped boards directly into the structure every 16 inches for maximum security.
Proper application of roofing sealant for extra protection
After surface preparation, apply roofing sealant around the repaired section. Spread this sealant at least two inches beyond the patch edges. This creates an additional waterproof barrier.
Quality sealant typically maintains effectiveness for three to six months. For smaller openings, specialized tape or rubber patches offer excellent temporary solutions.
| Material Type | Best Use Case | Expected Duration |
|---|---|---|
| Full Tarp Setup | Large damaged sections | Until professional repair |
| Rubberized Patches | Small holes and cracks | 3-6 months |
| Roofing Tape | Pin-hole leaks | 2-4 months |
These temporary measures provide crucial protection for your property. They buy valuable time until permanent restoration can be scheduled.
DIY Repair Techniques Versus Calling a Professional
The choice between DIY approaches and professional services requires careful consideration of your skills and the job’s complexity. Making the right decision protects your investment and ensures lasting results.
When a quick fix is safe to attempt
Simple maintenance tasks often work well for DIY efforts. Replacing a few damaged shingles or applying small patches are typical examples.
Assess your comfort with heights and physical ability first. Basic tools and materials from local stores can handle minor issues effectively.

Recognizing the need for expert assistance
Extensive damage or structural concerns demand professional attention. These situations require specialized knowledge and equipment.
Experienced contractors identify hidden problems homeowners might miss. They also carry proper insurance and follow safety protocols.
| Situation | Recommended Approach | Key Considerations |
|---|---|---|
| Minor shingle replacement | DIY Fix | Basic tools, low height, clear access |
| Small patch application | DIY Fix | Dry conditions, simple materials |
| Extensive water damage | Call Professional | Structural assessment needed |
| Steep or high work areas | Call Professional | Safety equipment required |
Temporary solutions buy time until permanent work can be scheduled. Knowing when to call professional help prevents costly mistakes.
Essential Tools and Materials for Roof Repairs
Quality results begin with gathering the right implements for the job at hand. Having the proper equipment ready makes your work safer and more effective. This preparation prevents frustration and damage to your property.
Must-have tools: pry bars, nail pullers, and flashlights
Start with two pry bars—one large and one small. Sharpen the tip of the smaller tool to slip under stubborn nails. This simple modification makes removal much easier.
A powerful flashlight helps you see hidden fasteners beneath shingles. Don’t forget heavy-duty gloves and a hammer for completing your basic toolkit. These materials form the foundation for successful repair work.

Choosing the right roofing cement and patch materials
Select replacement shingles by bringing an old sample to the store. This ensures a color match that blends seamlessly. Choose 30-pound tarpaper instead of thinner 15-pound options that tear easily.
Roofing cement like Henry brand creates strong seals but can be messy. Plan to dispose of your gloves afterward. For stubborn nails, sometimes working from the attic below helps push them up for easier removal.
Having the correct materials before starting prevents mid-project delays. These careful steps lead to professional-looking results that protect your home effectively.
Protecting Your Home’s Interior from Water Damage
Swiftly managing the situation within your living space can drastically reduce the impact of a water intrusion event. Your quick actions inside home are vital for preserving your property.
Using buckets, tarps, and protective coverings
Place buckets or large containers directly under any active drips from the ceiling. Bigger containers mean less frequent emptying, saving you hassle.
Move rugs, electronics, and decorations away from the affected area. For heavy furniture, drape plastic sheeting over them for protection.

Lay old towels or a tarp around your buckets. This catches splashes and protects your floors from secondary damage.
Minimizing interior damage during repairs
Water can travel along beams before dripping. Check walls and corners for stains or bubbling paint.
If you can access the attic, inspect for wet insulation. This material loses effectiveness when soaked and promotes mold.
Run fans in the damp interior space. Good airflow fights musty odors and hinders mold growth, keeping your home healthier.
| Interior Protection Step | Primary Goal | Key Benefit |
|---|---|---|
| Strategic Bucket Placement | Contain active dripping | Prevents pooling on floors |
| Furniture & Belonging Coverage | Shield valuables | Minimizes property loss |
| Attic Inspection | Find hidden moisture | Prevents long-term issues |
| Increased Ventilation | Dry the area | Reduces mold risk |
These steps create a strong defense for your home‘s interior. They help control the situation until the external roof issue is permanently fixed.
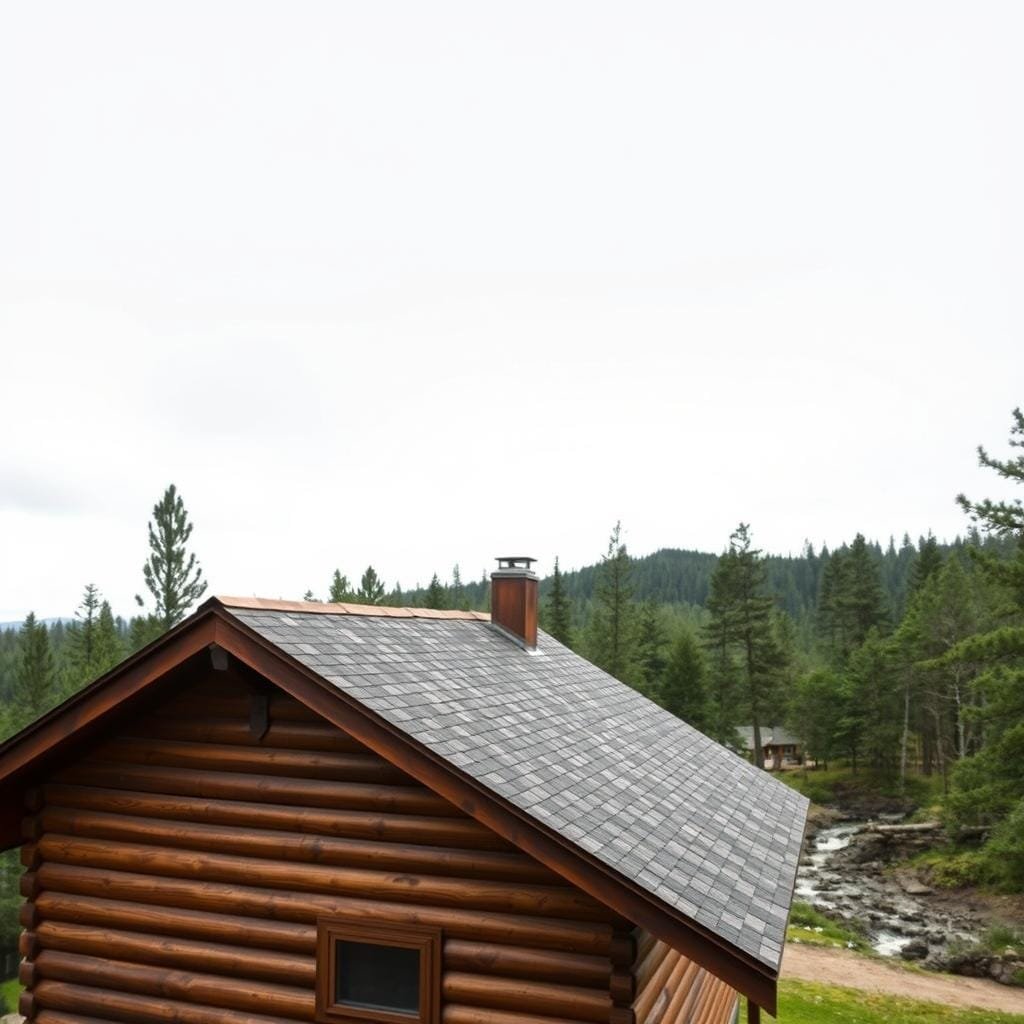
Log Cabin-Specific Roofing Maintenance Tips
Your log cabin’s unique charm comes with specific maintenance needs for its overhead protection. These rustic structures feature different materials than conventional homes, requiring specialized care approaches.
Understanding common materials and challenges
Traditional wood shakes offer authentic appeal but need regular sealing to prevent moisture damage. Modern metal panels provide durability, while composite shingles blend traditional looks with modern performance.

Natural settling over the years creates gaps between logs that need monitoring. These openings can compromise your structure’s integrity if left unaddressed.
Regular inspections and preventative upkeep
Schedule thorough checks each spring and fall. Examine all edges and flashing for potential trouble spots. Look for moss growth or damaged shingles that need attention.
Keep gutters clear to prevent water backup onto your roofing surfaces. Trim overhanging branches that could damage materials during storms.
Proper maintenance preserves your cabin’s character while protecting your investment. These simple steps help maintain a secure shelter for years of enjoyment.
Weather Considerations and Long-Term Roof Care
Understanding your local weather patterns is key to both preventing and effectively addressing moisture issues. The conditions during a repair greatly influence its success and longevity.
Dealing with rain, snow, and strong winds
High winds can drive rain underneath materials, especially near edges. Check these areas for loose or damaged sections after a storm.
In colder climates, snow and ice present unique challenges. Ice dams form when melting snow refreezes at the eaves. This can force water back up underneath the surface.

Proper attic insulation and ventilation help maintain a consistent surface temperature. This simple step is a powerful defense against ice-related problems.
Planning for seasonal changes in your area
Some moisture issues only appear during specific weather events. A problem might be invisible until a heavy rainstorm or rapid thaw occurs.
Plan major maintenance for dry, mild periods. The drying time for most sealants is 24 to 48 hours. Humid or cold weather can extend this period significantly.
| Weather Condition | Primary Risk | Key Prevention Strategy |
|---|---|---|
| Strong Winds | Water driven under edges | Secure loose materials, check flashing |
| Heavy Snowfall | Ice dam formation | Improve attic insulation & ventilation |
| Prolonged Rain | Sealant failure | Schedule repairs during dry forecasts |
Adapting your care strategy to the seasons ensures your property remains protected all year round. A little foresight goes a long way.
Final Steps to Secure Your Cabin and Future-Proof Your Roof
Transitioning from emergency measures to permanent solutions marks the final phase of protecting your property. Your temporary patches have served their purpose well. Now it’s time for professional assessment and lasting repairs.
Schedule a thorough inspection with qualified contractors soon. They can identify hidden issues around edges and gaps that you might miss. This comprehensive approach addresses the true source of problems.
Regular maintenance extends your roof‘s lifespan significantly. It prevents future emergencies and protects your home investment. You’ve taken the right steps toward lasting security and peace of mind.


