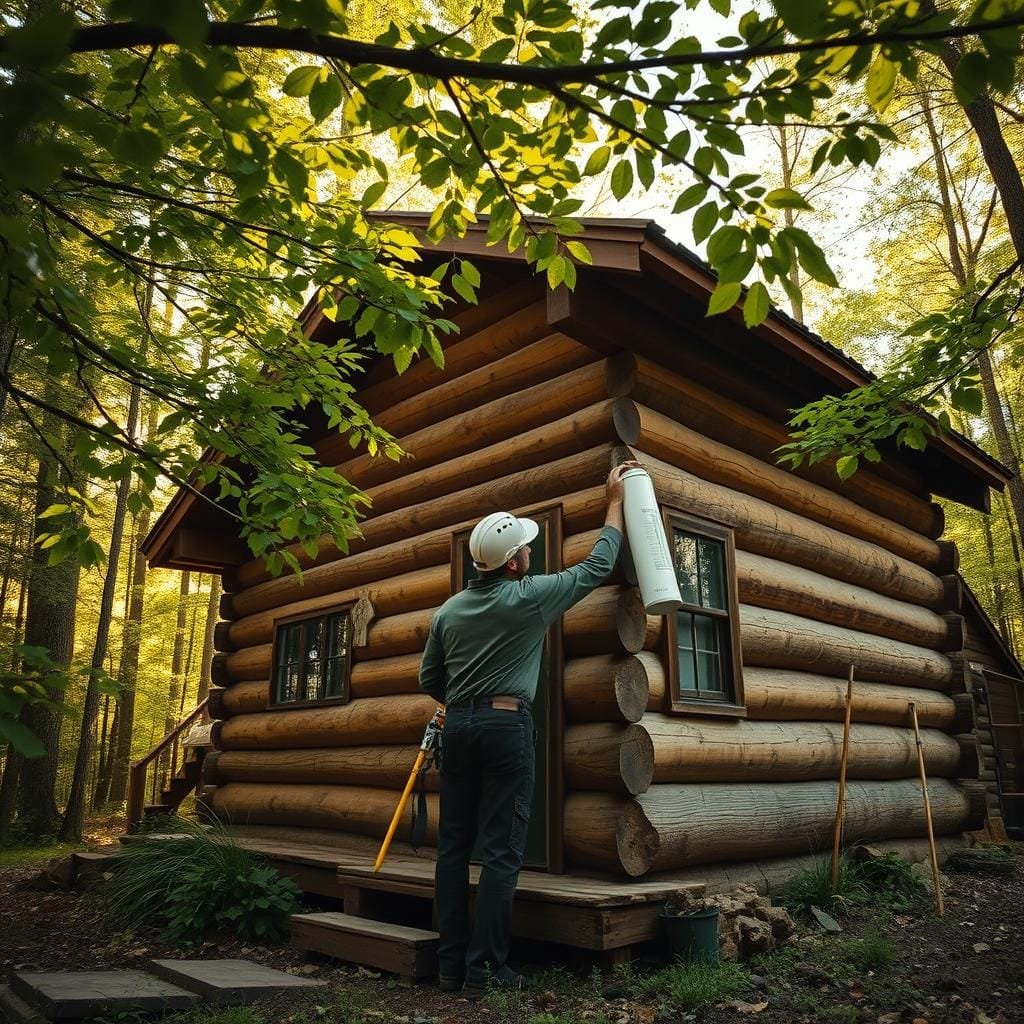
Welcome to your complete guide on protecting your cabin walls. Many owners face the challenge of decay, which is more than just an eyesore.
This issue poses a serious threat to your cabin’s structural integrity. Left unchecked, it can lead to expensive repairs and safety worries.
Whether you’re tackling existing decay or aiming to stop future problems, knowing the right approach is key. It helps every owner preserve their valuable investment.
This guide covers everything from spotting early warnings to applying professional-grade solutions. We’ll explore different types of decay and discuss moisture control.
You’ll get step-by-step maintenance strategies you can use now. Learn when a DIY fix is suitable and when to call in the experts.
By the end, you’ll have a clear action plan to shield your cabin from damaging fungus. Keep your retreat safe and sound for years to come.
Understanding Wood Rot in Cabin Walls
A fundamental step in cabin upkeep is grasping the science behind structural decay. Knowing your opponent is the first rule of effective defense. This knowledge empowers you to spot trouble early and take decisive action.
What is Wood Rot?
At its core, this problem is a fungal infection. Microscopic organisms feast on the cellulose within your cabin’s timber. They thrive wherever dampness persists.
This isn’t simple aging. It’s an active biological process. The fungus digests the material, weakening it from the inside out. As it grows, it releases tiny spores into the air.
These spores search for new damp surfaces to colonize. This is how a small issue can quickly spread throughout your walls.
Recognizing Early Signs in Timber
Catching this issue early makes all the difference. Look for subtle changes in your cabin’s walls. Discoloration is a common first clue.
The surface may feel softer or spongy when pressed. Even if the timber looks dry, a musty smell can be a warning. Pay close attention to painted areas.
Bubbling or peeling finish often means the material underneath is failing. Visible fungal growth, like white strands, is a clear red flag. Regular checks near windows and doors are your best strategy.
A Closer Look at Wet Rot and Dry Rot
The battle against cabin decay starts with identifying whether you’re dealing with moisture-dependent or self-sustaining fungal issues. Knowing which type affects your walls determines your entire approach.

These two fungal problems behave quite differently. One stays put while the other travels extensively. Their threat levels vary significantly.
Characteristics and Causes of Wet Rot
Wet rot needs constant moisture to survive. It typically appears as darkened, softened timber with a cracked surface. The most common culprit is Coniophora puteana, often called cellar fungus.
This type has a distinctive musty smell resembling damp earth. It comes in white and brown varieties. White rot digests lignin, while brown rot targets cellulose.
Common causes include leaky roofs, plumbing problems, and condensation. The fungus remains confined to wet areas only.
Identifying Dry Rot and Its Effects
Dry rot fungus (Serpula lacrymans) is far more aggressive. It can generate moisture internally, allowing it to spread beyond the original damp spot.
The stages of dry rot begin with spores developing into fine white hyphae. These form cotton-like mycelium masses. Eventually, mushroom-like fruiting bodies appear.
Look for fluffy white growth, grey skin with colorful patches, and timber that crumbles into cubes. The damage can compromise your cabin’s structural stability.
| Feature | Wet Rot | Dry Rot |
|---|---|---|
| Moisture Requirement | High (above 50%) | Lower (around 20%) |
| Spread Range | Confined to wet areas | Travels through masonry |
| Appearance | Darkened, cracked wood | White growth, cubic cracks |
| Smell | Earthy musty odor | Damp, fungal scent |
| Threat Level | Moderate | Severe |
Identifying the Main Sources of Moisture
The key to maintaining healthy cabin walls lies in pinpointing how moisture finds its way inside. Without addressing the root cause, any preservation efforts will fall short. You must stop the flow before it creates problems.
Roof defects often lead the list of culprits. Missing shingles or damaged flashing allow water to seep into wall cavities. This creates ideal conditions for fungal growth.
Plumbing issues can go unnoticed until significant damage occurs. Regular inspection around bathrooms and kitchens is essential. Look for subtle warning signs like discoloration or musty odors.
Gutters and downspouts deserve special attention. When blocked or leaking, they direct gallons of water against your structure annually. Proper maintenance prevents saturation of surrounding materials.
| Moisture Source | Common Locations | Visible Signs | Risk Level |
|---|---|---|---|
| Roof Defects | Chimneys, vents, valleys | Water stains, damp spots | High |
| Plumbing Leaks | Bathrooms, kitchens, utility areas | Peeling paint, soft surfaces | Moderate to High |
| Gutter Issues | Exterior walls, foundations | Erosion, water pooling | Moderate |
| Condensation | Poorly ventilated areas | Foggy windows, damp feel | Low to Moderate |
Condensation often gets overlooked but poses real risks. Warm, humid air meeting cold surfaces creates persistent dampness. Proper ventilation solves this common issue.
Each source requires specific solutions tailored to your cabin’s unique situation. Addressing the underlying water problem ensures long-term protection for your valuable retreat.
The Importance of Professional Diagnosis
While DIY approaches have their place, certain situations demand professional expertise. Getting the right assessment early can save you significant money and stress down the line.

Specialists bring trained eyes to your cabin’s issues. They spot subtle differences between fungal types that homeowners often miss. This accuracy matters greatly for effective solutions.
When to Consult a Specialist
Consider professional help when you notice widespread softening or structural sagging. Visible fungal growth is another clear signal. These signs suggest deeper problems needing expert attention.
A thorough inspection typically costs $250-$500. This investment pays off by accurately mapping the full extent of any infestation. Experts use moisture meters and infrared cameras to find hidden issues.
They can distinguish between active decay and old, dried-out problems. This prevents unnecessary panic and expense. Professional documentation also helps with insurance claims and property transactions.
| Assessment Factor | DIY Approach | Professional Diagnosis |
|---|---|---|
| Detection Accuracy | Surface-level observations | Comprehensive hidden damage scanning |
| Fungal Identification | Basic visual guessing | Precise species differentiation |
| Cost Range | Minimal upfront expense | $250-$500 initial investment |
| Long-term Value | Potential for missed issues | Complete problem mapping |
| Structural Safety | Limited risk assessment | Full integrity evaluation |
If you’re unsure about a diagnosis, don’t hesitate to seek a second opinion. Reputable professionals understand this due diligence. For detailed guidance on addressing different fungal types, trusted resources can provide additional clarity.
Step-by-Step Guide for Cabin Wall Maintenance
Consistent upkeep forms the foundation of a healthy cabin structure. A simple, twice-yearly check in spring and fall helps you spot issues early. This routine is your strongest shield against decay.
Begin outside, walking the perimeter. Pay close attention to spots where different materials connect. These junctions are common entry points for water.
Inspect all horizontal timber surfaces like window sills. Use a tool to gently test the material’s firmness. Soft spots indicate potential trouble areas.
Move inside to check moisture-prone rooms. Look under sinks and around exterior wall closets. A musty smell often signals hidden problems.
Always document your findings with photos and notes. This log helps you track changes over time. It’s also valuable for insurance records.
Address minor issues right away. Recaulk gaps and clean gutters promptly. Good ventilation is crucial to stop dampness from building up.
| Maintenance Task | Frequency | Key Action |
|---|---|---|
| Exterior Inspection | Twice per year | Check material junctions for gaps |
| Surface Sealing Check | Annually | Look for peeling paint or stain |
| Ventilation Verification | Seasonally | Ensure airflow in attics/crawlspaces |
| Gutter Cleaning | Spring and Fall | Remove debris to direct water away |
Keep all timber surfaces properly sealed. If you find damp material, identify the source immediately. Let the area dry fully before any repair work begins.
How to Apply Treatment to Prevent Wood Rot
Getting your hands dirty with the right application techniques makes all the difference in cabin preservation. Before any product touches your walls, address moisture sources completely. Fix leaks and improve ventilation first.

For moisture-dependent issues, use fungicide during the drying phase. Choose between concentrated formulas for large areas or ready-to-use products for smaller projects. Apply with a brush for precision or sprayer for coverage.
Always extend your application beyond visibly affected wood. Go two to three feet past any signs of trouble. This kills hidden spores before they create fungal growth.
Wood hardeners soak into softened timber to restore strength. They work well on window sills and door frames where replacement is difficult. These products penetrate deep into the material.
When you treat dry rot problems, more extensive work is needed. Open walls by removing plaster and flooring. Trace the fungus’s path through your cabin structure.
Cut infected timber at least 20 inches beyond visible damage. Remove all compromised material that could allow recurrence. Scrub surfaces with a stiff brush to eliminate spores.
Apply dual-purpose solutions liberally to all sound material. Cover both original and replacement pieces completely. For adjacent masonry, use high-strength sterilizing products.
An innovative approach uses ethylene glycol and borate solutions. These penetrate both wet and dry material effectively. The glycol works through existing finishes without damage.
For detailed guidance on addressing damaged material, trusted resources provide step-by-step instructions. Proper application ensures long-lasting protection for your cabin.
Treatment Options: DIY vs Professional Approaches
Successfully addressing cabin wall concerns begins with selecting the right approach for your specific needs. The choice between handling things yourself or bringing in experts depends on several practical factors.
Consider your comfort level with construction tasks and the project’s scale. An honest assessment of available time and tools helps guide your decision.
Pros and Cons of DIY Methods
Handling repairs personally offers significant benefits. You save on labor costs and gain flexibility to work around your schedule.
The satisfaction of solving problems yourself is rewarding. Basic home improvement skills suffice for minor issues like window sills.
However, larger infestations present challenges. Misidentifying the problem type or missing hidden damage can lead to recurrence.
DIY approaches require proper safety gear and quality materials. The time investment includes research, application, and drying periods.
When to Seek Expert Help
Certain situations clearly demand professional intervention. Dry rot problems require immediate specialized attention.
Structural elements like floor joists need expert assessment. Widespread damage across multiple areas also signals professional help.
Experts bring accurate diagnosis and industrial-grade solutions. They complete complex projects efficiently with specialized equipment.
| Decision Factor | DIY Approach | Professional Service |
|---|---|---|
| Cost Consideration | Materials only, no labor fees | Higher upfront investment |
| Time Commitment | Multiple weekends typically needed | Often completed within days |
| Skill Requirement | Basic home improvement knowledge | Specialized training and experience |
| Equipment Needed | Consumer-grade tools and products | Industrial-grade solutions |
| Risk Level | Potential for missed issues | Comprehensive problem resolution |
Insurance claims and historically valuable cabins benefit from documented professional work. Choose based on your specific situation for optimal results.
Innovative Products and Solutions for Wood Preservation
Innovative formulas now target the core of the problem, offering superior protection against fungal threats. These modern solutions are a huge leap from older, less effective methods.

Dual-purpose products are a game-changer. They tackle destructive fungus and wood-boring insects in one application. This simplifies your preservation strategy significantly.
Universal preservers provide broad-spectrum defense. They are ideal for new timber or recently repaired areas. This stops rot before it can establish a foothold.
Masonry biocides are crucial for complete eradication. They sterilize adjacent brickwork where fungus hyphae might hide. This prevents the problem from returning.
Ready-to-use options are perfect for homeowners. Concentrated versions offer professionals cost-effective solutions for larger projects. You can find a product for every need.
Some of the most exciting advances involve common chemicals. Ethylene glycol, for instance, penetrates through existing finishes. This allows you to address decay without major stripping.
Borate mixtures are also highly effective. They are water-soluble, meaning they work in damp wood where oil-based products fail. Their long-term record is excellent.
For structural integrity, consider polymer-based hardeners. They soak into softened timber, binding its cellular structure back together. This restores strength for non-critical applications.
These innovations make safeguarding your cabin more manageable. Choosing the right product depends on the specific type of rot fungus and the extent of the growth. A targeted approach yields the best results.
Insights from Timber Preservation Web Sources
Real-life case studies demonstrate the effectiveness of preservation methods when applied to challenging outdoor conditions. These documented examples move beyond laboratory claims to show what works in actual practice.
Real-World Case Studies and Examples
One fascinating project involved historic longleaf pine trees destined for museum display. They showed significant fungal growth when first cut. The preservation team applied ethylene glycol every few days for three weeks.

Remarkably, the trees remained free of insects and fungus for over four years indoors. This demonstrates long-term effectiveness against dry rot fungus and its fruiting bodies.
Another practical test used antifreeze and borate solutions on dock float pieces. The material had heavy fungal growth and lichens. After two months outdoors, the treated pieces showed completely dead growth.
Perhaps most relevant is the case of a wooden skiff where rot developed after ten years. The frame showed significant deterioration. Rather than replace affected timber, the owner saturated everything with ethylene glycol.
Four years later, with the boat continuing in wet conditions, there was no further damage. This proves proper methods can halt rot spreads even in challenging environments.
These examples show that when you control moisture sources and apply effective solutions, you preserve structural integrity for many years. The documented cases provide confidence for cabin owners facing similar challenges.
Final Thoughts on Protecting Your Cabin Walls
Your cabin’s long-term health depends on a simple but consistent care routine. It all connects back to controlling moisture, performing regular checks, and acting fast when you spot trouble.
Remember, this kind of decay is a living process. A fungus releases tiny spores, and its hyphae can spread through timber and even masonry. Stopping it early prevents major damage.
Think of this upkeep as protecting your investment. The small effort of sealing surfaces and fixing any water source saves you from huge repair bills later. Modern products make this easier than ever.
Establish a solid routine. Inspect your cabin each spring and fall. Keep gutters clean and ensure good airflow. Documenting your efforts is also smart for insurance and future sales.
Your cabin walls can stand strong for generations. With the right knowledge and habits, you hold the power to keep your retreat safe and sound.


