Your cozy retreat shouldn’t feel like an icebox in winter or an oven in summer. Heat loss through openings is the biggest culprit behind uncomfortable temperatures and sky-high energy bills in log cabins.
Most cabin owners don’t know this: log walls have an r-value of about 8. That’s below the recommended minimum of 13 for exterior walls. Your windows and entryways lose even more warmth, creating cold drafts that no fireplace can overcome.
The good news? Improving your cabin’s thermal performance is totally doable. You don’t need professional contractors or a massive budget.
This guide walks you through everything you need to know about window insulation and sealing entry points effectively. You’ll discover which materials work best, get step-by-step installation instructions, and learn seasonal maintenance tips that keep your space comfortable year-round.
By tackling these problem areas, you’ll slash heating costs and enjoy your mountain getaway in every season. Let’s get started with practical solutions that actually work.
1. Why Proper Insulation Matters for Your Cabin
When you enter your cabin, you seek warmth and comfort, not drafts. Insulating your doors and windows well keeps your space cozy. It also saves you money and protects your cabin.
Knowing why insulation is key helps you focus on it. Let’s look at the three main reasons why cabin weatherproofing is essential.
Energy Efficiency and Cost Savings
Windows and doors without insulation waste your money. Heat leaks out, making your heater work too hard in winter. Studies show that insulated windows save a lot of energy by keeping your home warm.
In summer, cool air leaks out, making your AC work harder. This wastes energy and raises your bills.
Good insulation saves you money on heating and cooling. Many see big energy savings right after they insulate.
Comfort Throughout the Seasons
Consistent temperatures make your cabin great. Insulation keeps your home evenly warm or cool. You won’t feel cold spots or drafts.
In winter, cold air gets in, and warm air escapes. This makes your home uncomfortable. Summer brings hot air in and cool air out, making it hard to stay cool.
Insulated doors and windows fix these problems. Your cabin becomes a cozy place to relax, no matter the weather.
Preventing Moisture and Condensation Issues
Cabin weatherproofing also stops moisture damage. Frost on windows means heat is leaking out. This moisture can harm your cabin over time.
Moisture from cold air damages windows faster. It can rot wood and cause mold. These problems hurt your cabin’s structure and health.
Insulation stops moisture by keeping temperatures steady. This prevents moisture problems from starting.
| Season | Without Proper Insulation | With Quality Insulation | Key Benefit |
|---|---|---|---|
| Winter | Cold drafts, heat loss, high heating bills | Consistent warmth, lower energy use | 30-40% heating cost reduction |
| Spring | Temperature fluctuations, moisture buildup | Stable indoor climate, dry conditions | Prevents mold and condensation |
| Summer | Hot air infiltration, AC overwork | Cool air retention, efficient cooling | 25-35% cooling cost savings |
| Fall | Uneven temperatures, draft detection | Comfortable transition period | Extended shoulder season comfort |
2. Understanding Heat Loss in Cabin Doors and Windows
Knowing where heat escapes from your cabin is key to a cozy, energy-saving space. Most wood types don’t insulate well on their own. Log cabin walls have a low R-value of 8, which is less than the recommended R-value 13 for exterior walls.
Log walls do hold heat during the day and release it at night. But, this isn’t enough to keep your cabin warm in cold climates. Windows are big heat loss culprits in winter. Without insulation, cold air gets in and warm air goes out. Let’s explore how this happens and where to focus.
How Air Leaks Occur Around Frames
Air leaks form around door and window frames for several reasons. Even small gaps can cause big problems. Cabin settling is a main cause, more so in newer log structures that haven’t settled yet.
Wood expands and contracts with humidity and temperature changes. This movement loosens weatherstripping and creates gaps. Poor installation also leads to air leaks, if the installer didn’t plan for settling or used the wrong materials.

Over time, materials wear out and lose their seal. Door frames that once fit well now have gaps. Even a small gap can let a lot of air in, making your cabin less energy-efficient.
The Science Behind Thermal Transfer
Heat moves from warm to cold through three ways. Knowing this helps you choose the right insulation for your cabin.
Conduction is when heat moves through materials like glass, wood, and metal. Single-pane windows lose heat fast. Convection is when air movement takes heat away from your cabin, making it feel drafty.
Radiation is heat energy that goes through glass without warming it. In winter, your cabin’s heat radiates out through windows. In summer, solar radiation warms your cabin. Each type needs different insulation to work well.
Identifying Problem Areas in Your Cabin
Finding where your cabin loses heat needs a careful plan. Start by looking at which walls face the wind. North-facing doors and windows are often the biggest challenges in cold weather.
Think about which doors you use most. Doors that open and close a lot wear out weatherstripping faster. Older or poorly conditioned windows should be your top priority for insulation. Look for windows with condensation, as this means they’re not insulating well.
Walk around your cabin on a windy day to find drafts. Check corners where frames meet walls, as gaps often start there. The table below shows common heat loss types and where they happen in cabins.
| Heat Loss Type | Primary Location | Estimated Energy Loss | Detection Method |
|---|---|---|---|
| Air Leaks | Door and window frames | 25-40% of total heat loss | Visual inspection, candle test |
| Conduction Through Glass | Single-pane windows | 15-30% of total heat loss | Touch test, infrared thermometer |
| Thermal Transfer at Thresholds | Bottom of doors | 10-15% of total heat loss | Visible gaps, draft detection |
| Frame Conduction | Metal or poorly insulated frames | 8-12% of total heat loss | Condensation patterns, temperature readings |
3. Assessing Your Cabin’s Current Insulation
Knowing where air leaks hide in your cabin is key. A good insulation check helps find problem spots before you buy materials. This way, you focus on the right areas for draft prevention.
First, learn about your cabin’s current state. Look for signs of insulation issues in your space.
Visual Inspection Techniques
Walk through your cabin in daylight and check every door and window. Look for gaps, cracked caulk, and worn weatherstripping. Focus on corners and joints.
Check both sides of each opening. Watch for rattling frames, condensation, and light coming through closed openings. These signs show where cold air gets in.
The Candle Test for Air Leaks
This method is simple and free. On a windy day, light a candle near doors and windows. Watch the flame as you move it.
If the flame flickers or leans toward the frame, you’ve found a leak. Mark these spots with tape for your insulation work. This method shows where to focus on draft prevention.
Using Infrared Thermometers and Thermal Cameras
For better detection, use temperature tools. Infrared thermometers show surface temperature differences. They cost $20-40 and are quick to use.
Thermal cameras give more detail with heat maps of walls. They show temperature differences not seen by the eye. While they cost more, some stores rent them for projects.
Keep records of your findings with photos or notes. This helps you plan repairs and track progress after your insulation assessment.
4. Tools and Materials You’ll Need
Insulating your cabin doors and windows starts with the right tools and materials. Having everything ready before you start saves you from trips to the store. This guide will help you get all the insulation tools and materials you need for a top-notch job.
Essential Tools for the Job
The right tools make weatherstripping and sealing easier. You’ll need tools for measuring, applying materials, and protecting yourself. Let’s look at what you should have in your toolkit.
Measuring and Application Tools
You’ll need a reliable tape measure for sizing. A sharp utility knife cuts through most insulation materials cleanly. A quality caulking gun is key for smooth sealant application.
For smoothing caulk and removing old materials, a putty knife is essential. Scissors are great for cutting weatherstripping to the right length. Keep a screwdriver set and hammer for installing door sweeps and thresholds.
A hair dryer is vital for window insulation film. It makes the plastic tight for a professional look.

Protecting yourself is a must. Safety glasses protect your eyes from debris and caulking materials splatter. Durable work gloves keep your hands safe from sharp edges and chemicals.
A dust mask is critical when using spray foam or removing old weatherstripping. Knee pads make floor work around door bottoms more comfortable during long projects.
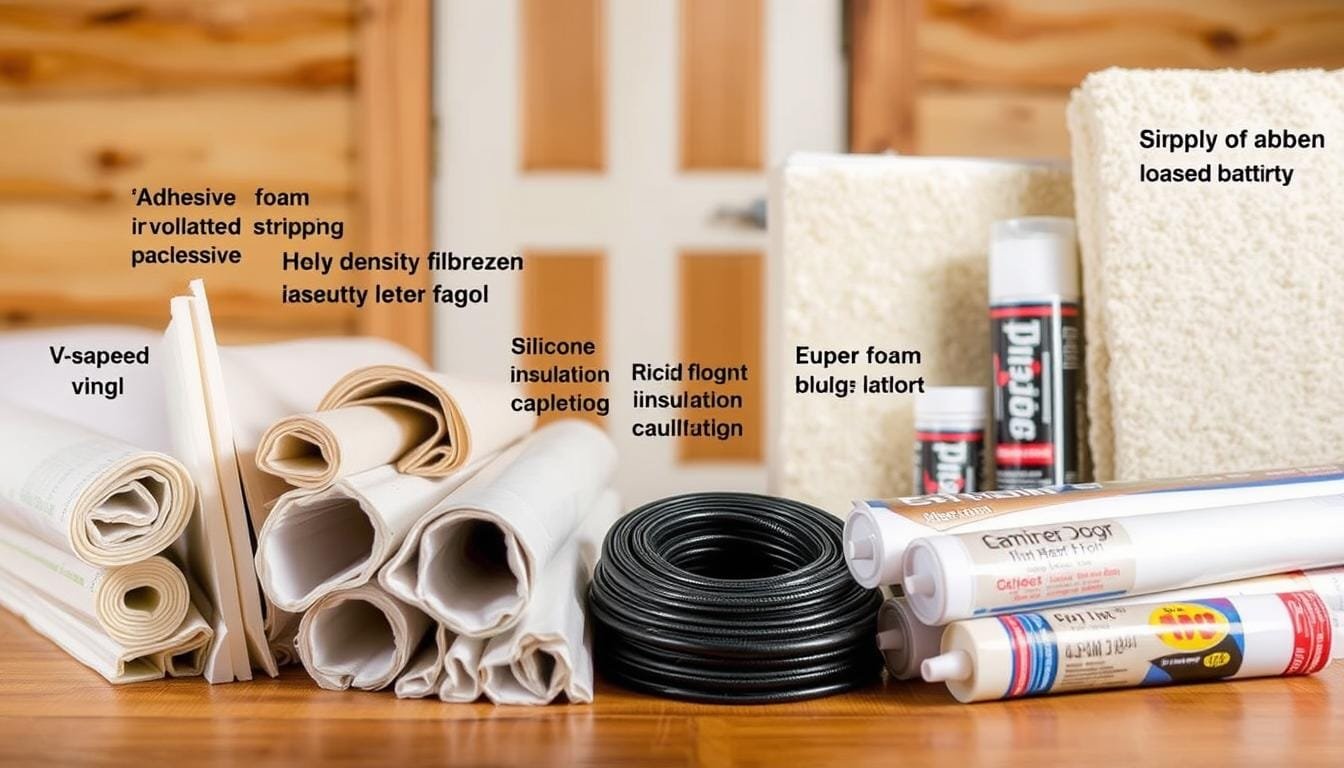
Insulation Materials Overview
Knowing your insulation materials options helps you choose the best for your cabin. Different areas need different products for the best results. Quality materials last longer and are worth the investment.
Weatherstripping Types
Adhesive-backed foam tape is the most affordable option for doors and windows. V-strip weatherstripping seals well in sliding channels. Tubular rubber or vinyl is durable for busy doors.
Felt strips are good for temporary sealing but don’t last as long. Door sweeps target the gap at the bottom where cold air enters most.
Sealants and Caulks
Silicone caulk is flexible and weather-resistant for exterior use. It stays elastic through temperature changes. Acrylic latex caulk is paintable and great for interior gaps.
Expanding spray foam fills big gaps between frames and openings. Use it carefully—it expands a lot. Different caulking materials are for specific purposes based on location and gap size.
Insulating Films and Covers
Plastic window insulation kits add a barrier against heat loss in winter. They include shrink film and double-sided tape for easy install. Rope caulk is for removable, temporary sealing of windows you’ll open in spring.
Heavy-duty plastic sheeting is another affordable option for single-pane windows. With proper weatherstripping, these covers greatly reduce drafts and energy costs in cold months.
5. How to Insulate Cabin Doors: Step-by-Step Guide
Insulating your cabin doors makes your home cozy and saves energy. You need to seal every gap to keep air out. Follow these five steps to seal your cabin doors well.
Step 1: Inspect and Clean Door Frames Thoroughly
Begin by cleaning your door frames. Remove old weatherstripping and scrape off old caulk. This makes a fresh start for your project.
Wipe the frames with a damp cloth to remove dirt and dust. Focus on corners where dirt builds up. Make sure everything is dry before you proceed.
Look for any wood damage and fix it. Use wood filler and sand it smooth. This is important for your insulation to stick well.
Step 2: Install Door Sweeps at the Bottom
The gap at the bottom of your door lets cold air in. Door sweeps are key to keeping it out.
Choosing the Right Door Sweep
There are three types of door sweeps for cabins. Brush-style sweeps work on uneven surfaces. Vinyl or rubber sweeps seal best on smooth surfaces.
Under-door draft stoppers are a quick fix. Pick one based on your door’s size and the threshold. Some sweeps attach to the door, others to the interior.
Proper Installation Technique
Measure your door and cut the sweep to fit. Make sure it touches the threshold when the door closes. This prevents the door from sticking.
Mark screw holes and drill pilot holes to avoid splitting wood. Screw the sweep in place and check the seal. Make sure the door moves smoothly.
Step 3: Apply Weatherstripping to Door Jambs
Weatherstripping seals the door jambs. It’s precise but worth it for better insulation.
Measure each jamb section separately. Cut the weatherstripping a bit longer than needed. This covers all corners without gaps.
Use sharp tools for clean cuts. Test each piece before sticking it down. The goal is a continuous seal around the frame.
Adhesive Application Tips
Peel off a small part of the adhesive at a time. Press the weatherstripping firmly into place. Start from one end and work your way down.
Apply steady pressure for 10-15 seconds. Let the adhesive cure for 24 hours. Gently close the door to test the seal without disturbing the bond.
Step 4: Seal Gaps with Expanding Foam
Use expanding foam for big gaps. It’s best for gaps wider than 1/4 inch.
Choose minimal-expanding foam for doors. Standard foam can damage frames. Fill the gap halfway with the foam. It expands as it dries, filling the gap.
Work in sections and wipe away excess foam with a damp cloth. Once dry, trim the foam to fit the frame. This makes it ready for painting or trimming.
Step 5: Add or Replace Door Thresholds
The threshold seals the bottom of your door. Replace old or damaged ones for a better fit with your door sweeps.
Remove the old threshold and clean the subfloor. Check for rot and fix it if needed. Cut the new threshold to size and test it before sticking it down.
Apply adhesive to the back of the threshold and press it into place. Use screws every 8-10 inches. The threshold should match your door sweep for the best seal.
6. Insulating Around Door Frames and Trim
Your cabin door might be sealed well, but the space around it can lose heat. The gap between your door and the wall is a big energy leak. Adding door frame insulation helps keep your cabin warm.
This area needs extra care because cabin walls settle over time. Wood expands and contracts with temperature changes, making gaps.
Sealing Exterior Door Frame Gaps
Begin by checking where your door frame meets the wall. Look for daylight, feel for air, or check for stains. These signs show where cold air gets in and warm air escapes.

For big gaps, use backer rod first. This foam helps caulk stick better. Then, apply caulk all around to seal out air and water.
Smooth the caulk with a wet finger or tool for a neat look. This also helps it stick well to both surfaces.
Addressing Interior Gaps and Cracks
The interior gaps are hidden behind trim. Remove it to reach these spots. Injector foam insulation is great for filling these gaps.
Use expanding foam carefully. Too much can warp your door. Fill only a little at a time, letting it expand to fill the gap.
Open-cell foam is flexible and seals well where walls meet floors and ceilings. Trim off excess foam before putting back the trim.
Adding Insulated Door Wraps
For doors in harsh weather or with interior gaps, try insulated door panels. They add warmth without needing to replace the door. Magnetic seals on metal frames keep cold air out.
Insulated door wraps are great for exterior sealing in cold places. They’re easy to put on and take off, perfect for changing seasons.
7. Insulating Windows: Complete Process
Insulating windows makes them efficient barriers. They keep your cabin comfy all year. This method covers every weak point, from prep to final layers. Doing each step well saves energy and lasts long.
Step 1: Clean and Prepare Window Frames
Begin by removing old caulk, paint, and weatherstripping. Use a putty knife or scraper to remove debris without harming the wood. Clean with a mild detergent and let dry before moving on.
Check each window for rot, cracks, or damage. Fix any issues now. This prep is key for good insulation. Make sure to check both sides.
Step 2: Apply Caulk to Exterior Gaps
Caulk on the outside stops water and air leaks. Focus on gaps between the frame and siding. This area is most exposed to weather.
Selecting Exterior-Grade Caulk
Use silicone caulk for its flexibility and weather resistance. It handles extreme temperatures without issues. Polyurethane caulk is good for wood-to-wood areas.
If you want to paint, choose caulk that can be painted. There’s special caulk for windows and doors that balances flexibility and adhesion.
Application Best Practices
Trim the caulk tube tip at 45 degrees for better control. Apply steady pressure for a consistent bead. Work in temperatures between 40°F and 80°F for best curing.
Tool the caulk right after with a wet finger or tool. This ensures good adhesion and a smooth look that sheds water well.
Step 3: Install Weatherstripping Around Window Sashes
Weatherstripping seals where air leaks happen. Pick materials based on your window type and use.
V-Channel Weatherstripping Installation
Measure and cut V-channel strips for where the sash slides. Clean the surface before applying. Press firmly, making sure the V opens toward air pressure.
This material compresses to seal when the window closes. It’s great for double-hung windows that get used a lot.
Foam Tape Application
Use foam tape for areas needing compression sealing. It’s good for window stops and meeting rails. Cut pieces a bit longer, then trim excess.
Step 4: Add Rope Caulk for Temporary Sealing
Rope caulk is removable for winter. Press it into gaps for an immediate seal. It comes off easily in spring, perfect for seasonal use.
This is a cheap fix for older windows with hard-to-seal gaps.
Step 5: Install Interior Storm Windows or Inserts
Storm windows add an insulating air space. They reduce heat transfer while letting in light. Permanent ones attach with hardware for all-year protection.
Removable inserts are flexible for seasonal use. They seal with magnets or compression fittings. They’re good for single-pane windows where replacement isn’t easy.
8. Choosing the Right Weatherstripping Materials
There are many weatherstripping options in hardware stores. Finding the best one for your cabin doors and windows is easy. Each material has its own benefits for different uses. Knowing these differences helps you get a lasting seal.
It’s important to match the weatherstripping type to where you’ll use it. Think about the gap size, surface texture, and how much wear the area gets. Let’s look at the most popular options and when to use them.
V-Strip Weatherstripping for Doors and Windows
V-strip weatherstripping makes a tight seal on sliding surfaces. This includes window sashes and door edges. When pressed, the V-shape opens to fill gaps and block air leaks.
V-strips come in metal and plastic types. Metal V-strips last 10-15 years with proper installation. Plastic V-strips cost less and work well in moderate climates, but may need to be replaced every 3-5 years.

Foam Tape Options and Applications
Foam weatherstripping has different types for various needs. Open-cell foam is great for uneven surfaces but absorbs moisture. It wears out faster than other types.
Closed-cell foam is better at resisting moisture and keeps its shape longer. It’s perfect for outside use. Reinforced foam tape has adhesive for easy installation on door frames and window tracks.
Choose foam tape thickness based on your gap size. Thin foam (1/4 inch) is for tight spaces, while thick foam (3/4 inch) fills larger gaps well.
Door Sweeps and Bottom Seals
The bottom of your door needs special care because of large gaps. Several options can help:
- Brush sweeps work well for carpet or uneven floors while blocking drafts
- Rubber or vinyl blade sweeps seal tight on smooth, level surfaces
- Automatic door bottoms rise when opening and drop to seal when closed
- U-shaped door bottom seals slide over the door edge for full coverage
For cabins with thresholds, blade sweeps are usually the best choice. If you have clearance issues, adjustable sweeps can be adjusted for a better fit.
Compression Seals and Felt Strips
Traditional weatherstripping materials are also good for cabin insulation. Felt strips are good for interior use and light sealing. They’re cheap and easy to put up but don’t handle moisture or heavy use well.
Modern compression seals from rubber or vinyl are more durable and weather-resistant. They compress when closed, creating a tight seal. They spring back to their original shape when opened, lasting for thousands of cycles.
Magnetic Weatherstripping for Metal Doors
Magnetic seals are great for steel doors. They use magnetic attraction to seal every time the door closes. The magnetic force pulls the door tightly against the weatherstripping.
This option is perfect for refrigerator-style cabin doors or heavy metal entry doors. It’s more expensive than standard options but works well in extreme weather.
| Weatherstripping Type | Best Application | Typical Lifespan | Climate Suitability |
|---|---|---|---|
| Metal V-Strip | Window sashes, door sides | 10-15 years | All climates, extreme weather |
| Closed-Cell Foam | Door frames, irregular gaps | 3-5 years | Moderate to cold climates |
| Rubber Blade Sweep | Door bottoms on smooth floors | 5-7 years | All climates |
| Compression Seals | Door jambs, window stops | 5-8 years | Cold and wet climates |
| Magnetic Strips | Metal doors, heavy doors | 8-12 years | Extreme weather conditions |
Choosing the right weatherstripping depends on your cabin’s needs and local climate. Invest in quality materials for doors and windows that get a lot of use or face harsh weather.
9. Installing Window Insulation Film
Window film is a cheap way to keep your cabin warm. You can put it on yourself in minutes. It traps warm air and lets in light.
Most films cost under $15 per window. You’ll need basic tools you likely have at home.
It’s easy to do and works well. You’ll feel less cold near your windows. Plus, it’s easy to take off in spring.
Benefits of Heat-Shrink Plastic Film
Heat-shrink film is a great deal. It makes an insulating air pocket that blocks cold. This reduces heat loss through windows.
Unlike curtains, it lets you see outside. It’s almost invisible once on. You won’t lose natural light for warmth.
It’s perfect for renters or temporary situations. The film comes off without damage. Many use it on windows they don’t open in winter.

Step-by-Step Application Process
Getting window film right needs prep and technique. It takes about 15 minutes per window. Follow these steps for great results.
Measuring and Cutting the Film
Measure your windows. Add four inches to both dimensions for overlap. Most kits have pre-cut sheets, but you can trim them.
Place the film flat before cutting. Straight cuts help with sticking. Keep extra for any mistakes.
Applying Double-Sided Tape
Clean your window frame well. Use rubbing alcohol or glass cleaner. Wait for it to dry before applying tape.
Put double-sided tape around the entire window perimeter. Press hard for a good bond. Make sure there are no gaps at corners.
Heat-Shrinking for a Tight Seal
Peel off the tape backing. Start at the top corner with the film. Work around the window, smoothing as you go. Wrinkles will come later.
Use a hair dryer on medium-high heat. Hold it six inches away and move it slowly. The film will tighten and smooth out.
When to Use Window Film vs. Other Methods
Window film is best in certain situations. It’s great for renting your cabin or moving soon. It’s easy to remove.
Use it on windows you won’t open in winter. For ventilation, choose storm windows or shades. It’s cheaper than new windows or storm panels.
It works best with other insulation. Use it with weatherstripping and caulking for better energy savings. Here’s a comparison of window film with other methods:
| Method | Cost Range | Effectiveness | Removal Ease | Best Use Case |
|---|---|---|---|---|
| Window Film | $10-$20 per window | Reduces heat loss by 25-35% | Very Easy | Temporary seasonal insulation |
| Interior Storm Windows | $75-$150 per window | Reduces heat loss by 40-50% | Moderate | Long-term without replacement |
| Thermal Curtains | $30-$100 per window | Reduces heat loss by 20-30% | Easy | Blocking light and drafts |
| Window Replacement | $300-$1,000 per window | Reduces heat loss by 50-70% | Permanent | Major renovations or upgrades |
Think about your needs, budget, and time before choosing. Many start with window film to see if it works. This simple project helps you feel ready for bigger insulation jobs.
10. Adding Thermal Curtains and Cellular Shades
Weatherstripping and caulk are just the start. Adding fabric insulation makes your cabin windows look good and work better. Window treatments block cold air and keep warmth in.
They’re flexible, too. You can open them to let in sunlight on sunny days. Or close them at night to keep the heat in.

Blocking Heat Movement with Insulated Fabric
Thermal curtains have layers to stop heat. They use heavy fabrics and foam to keep warmth in. This stops cold air and keeps heat from escaping.
Good insulated drapes can have R-values of 2 to 4. Make sure they hang a bit over the window frame. This stops air from getting through.
These window treatments keep your home warm in winter and cool in summer. They have special fabrics or coatings to help.
Choosing Honeycomb Window Coverings
Cellular shades are known for their honeycomb design. The air pockets inside act like insulation. Double-cell shades are even better because they have more air space.
When picking cellular shades, measure well. Inside mounts look clean, while outside mounts stop air leaks. You can choose shades that let in light or block it out.
Maximizing Performance Through Proper Setup
How you install window treatments matters a lot. Mount curtain rods high and wide. This makes sure the fabric covers the whole window and some wall.
Long curtains are better than short ones. They fill gaps and stop air leaks. Use side channels or wraparound rods to seal edges.
Layering Multiple Protection Methods
Using more than one method is best. Start with caulk and weatherstripping. Then add window film. Finish with thermal curtains or cellular shades.
This way, you tackle different heat loss types. Close all treatments in cold weather. Open curtains on sunny days to warm up your home.
11. Sealing and Caulking Techniques for Long-Lasting Results
The right caulking techniques can make a big difference. They can turn a drafty cabin into a cozy home. Caulk seals stationary parts, while weatherstripping handles moving parts.
Choosing the right caulk and applying it correctly is key. This ensures your insulation lasts for years.
Choosing the Right Caulk for Each Application
Not all caulks are the same. The right one depends on the job. Knowing the strengths of each type helps you choose the best for your cabin.
Silicone vs. Acrylic Latex Caulk
Silicone and acrylic latex caulks are the most common. Silicone caulk is flexible and weather-resistant. It works well in extreme temperatures.
But, it can’t be painted and needs mineral spirits for cleaning. Acrylic latex caulk can be painted and is easy to clean with water. It’s better for inside use but not as durable outside.
| Feature | Silicone Caulk | Acrylic Latex Caulk |
|---|---|---|
| Flexibility | Excellent throughout temperature extremes | Moderate, may crack in severe conditions |
| Paintability | Cannot be painted | Accepts paint after curing |
| Cleanup | Requires mineral spirits | Water-based, easy soap and water cleanup |
| Weather Resistance | Superior moisture and UV protection | Good indoors, limited exterior durability |
Siliconized acrylic latex caulks offer a mix of benefits. They are flexible and can be painted.
Paintable and Weather-Resistant Options
There are caulks for special needs. Polyurethane caulk is very durable and flexible. It’s great for areas that move a lot.
Butyl rubber is best for metal-to-masonry areas, like around steel door frames. Window and door caulks are weather-resistant and can be painted. They use technology similar to closed-cell spray foam insulation to create barriers while staying flexible.

Proper Caulk Application Methods
How you apply caulk is as important as what you use. Cut the tube tip at a 45-degree angle. This size should match your gap.
Apply caulk with steady pressure and speed. This ensures even thickness. Push caulk into gaps for better adhesion. Use a wet finger or caulk tool to smooth it out right away.
For deep gaps, use foam backer rod first. This prevents caulk from sinking.
Interior vs. Exterior Sealing Strategies
Interior and exterior caulking needs differ. Exterior caulking keeps water out. It also lets moisture escape through special formulas.
Interior caulking seals air without needing to fight weather. Use paintable latex caulk for a clean look around windows and doors.
Common Caulking Mistakes to Avoid
Bad preparation can ruin even the best caulk. Never apply caulk to dirty or wet surfaces. It needs clean, dry areas to stick well.
Don’t caulk in extreme temperatures. Caulk needs moderate conditions to cure right. Avoid making beads too big. It wastes material and doesn’t fill gaps well.
Tool caulk within minutes for best adhesion. Let it cure before painting or exposing it to weather.
12. Insulating Old Single-Pane Windows Without Replacement
Old single-pane windows don’t have to cost a lot to fix. Many cabin owners face the challenge of windows that leak heat. But, there are affordable ways to make them better without replacing them.
These solutions add barriers to keep heat in. Each one has its own benefits based on your budget and needs.

Installing Removable Window Inserts
Window inserts are a great way to insulate your windows. They fit inside your frames and block heat. Plus, they’re easy to take out for cleaning or when the seasons change.
You can make your own inserts or buy them. To make your own, measure your window, cut acrylic sheets, and attach foam or magnets. Ready-made inserts are also available for your exact window size.
These inserts are simple to use. Just pop them in when it’s cold and take them out for fresh air. They can cut heat loss by 40-50%, making your cabin warmer.
Adding Secondary Glazing Panels
Secondary glazing is a more lasting solution. It’s like an interior storm window. It attaches to your frame and opens for air or cleaning. It looks nice and works all year.
You can pick from glass, acrylic, or polycarbonate for your panels. Glass is clear and strong, while acrylic and polycarbonate are lighter and better for impacts. You can choose from simple to sliding or hinged frames.
Secondary glazing can be as good as new windows but costs less. Make sure there’s enough space between the old and new windows for best insulation.
Using Heavy-Duty Plastic Sheeting
For cheap fixes, use heavy-duty plastic sheeting. It’s a simple way to keep windows warm. It’s good for areas you don’t use much.
Just clean the frame, cut the plastic, and attach it with staples or tape. It’s a quick fix that’s easy on the wallet. It costs just a few dollars per window.
Heat-shrink plastic looks better. Use a hairdryer to shrink it tight. It keeps the air space and looks smooth.
When Window Replacement Makes Financial Sense
Not all windows can be fixed. Sometimes, it’s better to replace them. Compare your energy costs before and after new windows. This helps you decide if it’s worth it.
Think about how long it’ll take for new windows to pay off. If it’s less than 10-15 years, and your windows are old, it might be a good choice. New windows also improve your cabin’s look and value.
Replace windows if they’re rotten, glass is broken, or they won’t open. New windows save energy all year. They make your cabin cozy and cut down on bills.
| Insulation Method | Cost Range | Heat Loss Reduction | Installation Difficulty |
|---|---|---|---|
| Removable Window Inserts | $8-25 per window (DIY) or $50-150 (custom) | 40-50% | Easy (DIY) to Moderate |
| Secondary Glazing Panels | $100-300 per window | 50-60% | Moderate to Advanced |
| Heavy-Duty Plastic Sheeting | $3-10 per window | 25-35% | Very Easy |
| Complete Window Replacement | $300-1000+ per window | 60-70% | Professional Installation |
13. Seasonal Maintenance and Adjustments
Insulation is like a living thing that changes with the seasons. Your cabin’s doors and windows face different challenges all year. Regular maintenance keeps your insulation working well, adapting to these changes.
Being proactive with simple changes saves energy and keeps your cabin comfy all year. Most tasks take just a few hours and can cut down on heating and cooling costs.
Getting Ready for Cold Weather
Your winter preparation checklist starts in early fall. Look around your cabin for any weatherstripping that’s compressed, cracked, or loose.
Check caulk lines around exterior frames for gaps. Re-caulk any gaps when it’s not too cold for it to cure right.
Install window film or storm windows now. Test door sweeps to make sure they seal well. Add fresh rope caulk around windows you won’t open in winter. Hang thermal curtains if you took them down for summer.

Warm Weather Airflow Needs
Summer means your cabin needs more air. Remove window film and open windows often to keep air moving and prevent moisture.
Regularly going in and out is usually enough air exchange. But if your cabin is very airtight, you might need to adjust or remove door sweeps. This lets screens work better.
A high vent helps get rid of heat inside. It lets hot air out and pulls cooler air in through lower openings.
Yearly Checkup Routine
Make time each year for a detailed annual inspection of insulation. This helps find problems early, before they cost a lot.
Your inspection should include:
- Examining all caulked areas for separation or cracking
- Testing weatherstripping compression and adhesion around doors
- Checking door sweeps for visible wear or gaps
- Inspecting window inserts or storm windows for damage
- Looking for new gaps or cracks around frames
- Testing smooth operation of all doors and windows
- Noting any areas where performance has declined
Take photos and notes of your findings. This helps you plan for maintenance and repairs.
When to Replace Seals
Weatherstripping replacement is needed when you see certain signs. Look for compression that doesn’t bounce back, meaning it’s lost its shape.
Cracking, tearing, or poor adhesion mean it’s time for new weatherstripping. If you see daylight through closed doors or feel drafts, it’s failed.
Remove old weatherstripping before putting on new. Clean the surface well for good adhesion. Remember, weatherstripping needs to be replaced every three to five years, depending on use and weather.
14. Keeping Your Cabin Warm and Energy-Efficient
Insulating doors and windows makes your cabin cozy. Weatherstripping, caulking, and window treatments keep cold out and warmth in. Together, they make your cabin snug and warm.
Lower heating bills and cooling costs are just the start. Your cabin will feel warmer in winter and cooler in summer. This means less work for your heating and cooling systems.
Think about getting energy-efficient cabin features. Double-glazed windows with special coatings can cut heat loss by over 50%. They also reduce condensation and keep glass warm.
Begin with the worst spots, like a drafty door or a leaky window. Fix your cabin room by room. You’ll need basic tools and materials from your local store.
An energy-efficient cabin keeps your family comfortable all year. The effort you put in today will make your cabin a place of happy memories, no matter the weather.


