Imagine living in a quiet place surrounded by nature, away from city sounds. Many dream of cabin living for its peace and simplicity. But, you first need a reliable source of fresh water.
When planning a self-sufficient home, getting a good cabin water system is key. These systems are like city water but smaller and independent. They give you clean water all year, without needing city water or electricity.
To have a self-sufficient home, you need three things. First, a source like wells, springs, or rainwater. Second, treatment to make the water safe. Third, a way to get the water to your home, like pumps or gravity.
This guide covers all you need to know about water systems. It’s for anyone building a homestead or adding a backup water supply. You’ll find practical solutions for your specific needs.
Understanding Your Water Needs for Cabin Living
How much water does your cabin need? This question guides every choice about your off-grid water supply. Getting it right avoids costly errors like too small systems or unused capacity.
Your water needs vary based on how you use your cabin. A weekend home needs less than a year-round home. Knowing this helps plan the right system from the start.
Let’s look at water usage basics. The average person uses 50 to 100 gallons per day for drinking, cooking, and cleaning. A family of four should plan for 200 to 400 gallons daily, plus more for animals or gardens.
Different activities use different amounts of water. Here’s a breakdown:
- Drinking and cooking: 2-4 gallons per person daily (minimal impact)
- Bathing and personal hygiene: 20-40 gallons per person daily (moderate to high)
- Laundry: 15-40 gallons per load (variable based on frequency)
- Dishwashing: 4-10 gallons daily (depends on method)
- Toilet flushing: 20-30 gallons per person daily (if using conventional toilets)
- Outdoor uses: Highly variable, from zero to hundreds of gallons
Your lifestyle greatly affects water use. A minimalist cabin might use 10 to 20 gallons per person per day. But a cabin with modern amenities could use 50 to 100 gallons per person daily.
Seasonal patterns also matter. Summer use goes up with outdoor activities and more showers. Winter use might drop, but animals need water all year. Accurate calculation accounts for these changes.
Here are some real-world examples to help estimate your needs:
| Cabin Type | Daily Usage Per Person | Key Features | Best Cabin Water Source |
|---|---|---|---|
| Weekend Retreat | 15-30 gallons | Basic amenities, short stays, conservation-minded | Rainwater or small well |
| Seasonal Residence | 40-60 gallons | Comfortable amenities, 3-6 month occupation | Drilled well or spring |
| Year-Round Home | 50-100 gallons | Full modern conveniences, permanent living | Deep well with backup |
| Homestead with Livestock | 75-150+ gallons | Humans plus animals, irrigation needs | High-yield well or multiple sources |
Remember to add extra for guests, emergencies, and growth. Plan for 25% more than your baseline. This gives you flexibility and peace of mind.
Being honest about your water habits now saves trouble later. Track your water use for a week if you can. Use real data to avoid guessing.
Understanding these numbers helps size your off-grid water system right. You’ll choose the right storage, pumps, and treatment. This means a system that works well without wasting money.
Conservation doesn’t mean giving up. Simple steps like shorter showers and fixing leaks can cut water use by 30% or more. These habits make your water last longer and reduce system stress.
Assessing Your Property’s Water Resources
Smart cabin owners start by mapping all water sources on their land. This step might seem like extra work. But it prevents mistakes like drilling a dry well or building a rainwater system when a spring exists.
Think of this as detective work. You’re finding clues about where water naturally occurs. This impacts which system is best for your situation.
Walking Your Land and Observing Natural Signs
Start by walking your land in different seasons. Look for water features like streams or ponds. These spots often show groundwater availability near the surface.
Also, watch where plants grow. Water-loving plants like willows and cattails show moisture. Snow melting first in spring also points to underground water.

Look at your land’s topography. Water flows to low points, so valleys are good for ponds or springs. If you’re collecting rainwater, check your cabin’s roof size and pitch.
Talk to neighbors about their water sources. Ask about well depths and yields. Local knowledge can save you from mistakes. When building or remodeling your off-grid cabin, knowing these patterns helps you place structures well.
Evaluating and Testing What You Find
After finding water sources, test them properly. For springs or streams, measure flow rate with a bucket test. Test in different seasons to see changes.
For streams or ponds, observe water levels after rains and in dry spells. Seasonal reliability is key, not just volume.
Test water quality by collecting samples and sending them to a lab. Basic tests check for bacteria, nitrates, and pH. This data helps you choose the right treatment systems.
Professional water testing costs $200 to $500. While you can observe some things yourself, professional tests save you from costly mistakes later.
Digging Deeper into Groundwater
Understanding water table depth is key for well planning. The water table is where soil is saturated with water. Depth varies by geography and season.
In some areas, the water table is just 10-20 feet down. In others, you might need to drill 200-300 feet. This affects drilling costs, which can be tens of thousands of dollars.
A hydrogeological survey gives detailed info on aquifers. Hydrogeologists use maps and surveys to assess groundwater availability.
Contact your county’s water resources department for well logs. These logs show depths, yields, and geology. This info is usually free and very helpful.
Consider a professional well driller or hydrogeologist for advice. They can review surveys and give realistic estimates. This consultation costs $300-800 but can save you from drilling in the wrong spot.
| Assessment Method | Information Gained | Typical Cost | When to Use |
|---|---|---|---|
| DIY Site Survey | Surface water features, topography, vegetation patterns | $0 (your time) | Initial property evaluation for all cabin owners |
| Neighbor Interviews | Local well depths, yields, seasonal variations, water quality | $0 (your time) | Understanding proven water sources in your area |
| Water Quality Testing | Bacteria, minerals, pH, contaminants in existing sources | $200-500 | Before using any natural water source |
| County Well Log Review | Nearby well depths, geological formations, water table depth | $0-50 | Planning well drilling or assessing feasibility |
| Professional Hydrogeological Survey | Precise aquifer location, recharge rates, yield predictions | $800-3,000 | Large investments or challenging properties |
Remember, rules for wells and water use vary by location. Always check with local health and water boards before planning your water system.
Investing time in property assessment pays off. You’ll make smart choices, avoid mistakes, and create a water system that fits your land and needs.
Drilled Wells: Your Reliable Underground Water Source
Drilled wells are a great choice for cabin owners. They provide steady water all year. Unlike surface water, drilled wells tap into deep aquifers for consistent water levels.
A drilled well reaches water in rock formations deep underground. This keeps the water clean and steady. Your well system includes a casing, screen, pump, and pressure tank.
The cost to drill a well varies based on depth and local conditions. But, it’s a good investment for reliable water. It’s better than hauling water or using less reliable systems.
Hiring a Professional Well Driller
Finding the right professional well driller is key. Well drilling needs special skills and equipment. A good driller knows your area’s geology well.
Check if the driller is licensed and insured. Ask about their experience in your area. Local knowledge helps predict drilling challenges.
Get detailed quotes from at least three contractors. A good quote should list costs for drilling, casing, and labor. Choose based on reputation and what’s included.
Ask important questions during interviews:
- How deep do wells go in this area?
- What’s the average water yield for wells near my property?
- What type of casing do you recommend?
- Do you handle permitting, or is that my responsibility?
- What warranty do you provide on your drilling work?
Drill your well before building your cabin. This lets you choose the best location. It also ensures you have enough water before building.
Determining Well Depth and Yield
Knowing your well’s depth and yield is important. Well depth varies by local geology. Some wells hit water at 50 feet, while others need 300 feet or more.
Your professional well driller will use local well logs to estimate depth. These logs show where nearby wells found water. But, your well may vary due to underground differences.
Water yield is how many gallons per minute your well can produce. Most wells yield between 5 and 20 gallons per minute. For a cabin with 2-4 people, 6 gallons per minute is usually enough.
Two important measurements affect your well’s performance:
- Static water level: The depth to water when the pump isn’t running, showing the natural water table position
- Pumping level: How far the water level drops when the pump operates, indicating how quickly the aquifer recharges
A smaller difference between static and pumping levels means a more productive well. Your driller will explain these measurements and their impact on your well.
Installing the Well Casing and Screen
Once drilling reaches the desired depth, the well casing installation starts. The casing protects the well from contamination and collapse. It’s a key part of keeping your water clean and well working.
Most wells use steel or PVC casing. Steel is strong for rocky areas, while PVC is better for stable soil and resists corrosion. Your driller will choose based on what they found during drilling.
The casing diameter is usually 4 to 6 inches for homes. A 6-inch casing gives more flexibility for pump selection and maintenance. The casing must stick out at least 12 inches above ground to prevent surface water from getting in.
Near the bottom, the solid casing turns into a well screen. This screen has slots for water to flow in while keeping out sediment. The screen design matches the surrounding geology to maximize water entry.
After installing the casing and screen, the driller seals the space with grout. This prevents contaminants from entering your water supply. Proper sealing is required by most states and is a critical step.
Selecting and Installing a Well Pump
With your well ready, you need a reliable pump to bring water up. The pump type depends on your well’s depth, water needs, and power source. Most cabins use submersible or jet pumps.
Your pump system also needs a pressure tank. This tank stores water under pressure, reducing pump cycling. Tank sizes range from 20 to 80 gallons, with larger tanks better for performance.
Consider these factors when picking your pump:
- Total vertical distance (well depth plus height to cabin if uphill)
- Peak water demand in gallons per minute
- Power source availability (AC power, solar, generator)
- Budget for initial purchase and long-term operating costs
| Pump Feature | Submersible Pump | Jet Pump | Best Application |
|---|---|---|---|
| Maximum Depth | Up to 400 feet | 25 feet (shallow) or 100 feet (deep jet) | Submersible for deep wells |
| Installation Location | Underwater in well | Above ground in cabin/pump house | Jet for accessible maintenance |
| Noise Level | Nearly silent | Moderate to loud | Submersible for quiet operation |
| Maintenance Access | Requires pulling from well | Easy access for repairs | Depends on DIY skill level |
| Energy Efficiency | Higher efficiency | Lower efficiency | Submersible for solar systems |
Submersible Pump Installation
A submersible pump is installed deep in your well. It pushes water up to your cabin. This pump type is reliable at any depth and is quiet because it’s underwater.
The pump is lowered on a special pipe. The pipe carries water up, and the electrical cable powers the pump. A professional installer ensures the cable is safe and the pump is at the right depth.
Submersible pumps come in various horsepower ratings for homes. Your driller will choose the right size based on your well’s depth and flow rate. The wrong size can waste energy or not work well.
Submersible pumps are good because they’re protected from freezing and prime automatically. They’re more efficient than surface pumps. But, they need maintenance, which means pulling the whole pump from the well.
Jet Pump Setup for Shallow Wells
If your well is 25 feet or less, a jet pump is a good choice. These pumps install above ground and pull water up like a straw. They’re easy to maintain and less expensive than submersible pumps.
Jet pumps have a pump body and motor above ground and a jet assembly at the well. For shallow wells, the whole system is easy to access.
Installation involves connecting the pump to the well and setting up the pressure tank and controls. The pump needs protection from freezing, so it should be in a heated space. Proper ventilation prevents moisture buildup.
Jet pumps are good for shallow wells because they’re easy to maintain and less expensive. They make more noise and use more electricity than submersible pumps. But, they’re reliable and easy to service.
Hand-Dug Wells and Shallow Wells
Not every off-grid cabin needs a costly, complex well. A hand-dug well can be a cost-effective option. These wells usually go down less than 30 feet and reach shallow aquifers.
Shallow wells work best where the water table is always high. They’re a good backup even with other water sources. The hard work is worth it for many cabin owners.
Consider a hand pump well system without electricity. These pumps have a threaded end and check valve. They can fill buckets or connect to a hose for indoor plumbing.
Appropriate Scenarios for Shallow Systems
A shallow well cabin is best for certain properties. The water table should be within 25 feet. Look for wetlands or lush areas to find these conditions.
Small families with low water use can thrive with a shallow well. The flow rates are enough for basic needs.
Hand-dug wells are best for hard-to-reach areas. Narrow trails or rocky terrain make them the only choice. They’re also cheaper than drilling, which costs $15 to $30 per foot.

Backup water systems are another good use. They’re safe during dry times. This gives you peace of mind when main sources are low.
Safe Digging Methods and Essential Precautions
DIY well digging is risky. Cave-ins and toxic gases are big dangers. Always be careful and prepared.
Oxygen levels drop as you dig deeper. Never go into a well without proper ventilation and gas testing. These tools are not optional.
Always have a partner at ground level. They help with ventilation and can call for help. Use hand signals or a bell to communicate.
Use proper shoring to prevent collapse. Wooden frames or metal rings support the walls. Skipping this step is dangerous.
Essential tools for DIY well digging include:
- Post hole digger and sharpshooter shovel for breaking ground
- Buckets and rope system for removing soil
- Portable gas detector for monitoring air quality
- Ventilation fan or blower to force fresh air into the shaft
- Ladder with secure anchoring at the top
- Shoring materials cut to size before starting
Work in sections and take breaks often. The deeper you dig, the harder it gets. Most people can remove about one to two feet of material per day safely.
Structural Protection and Contamination Prevention
Lining your hand-dug well with concrete rings or blocks is key. These sections stack as you dig. Each ring is 3-4 feet in diameter and 2-3 feet tall.
Start with a ring at ground level and dig out the soil. The ring settles as you dig deeper. Add more rings on top to keep safe.
Create a sanitary seal around the top of the well. Pour a concrete pad that slopes away from the well. This keeps out surface water and contaminants.
Install a professional well cap that seals well. It includes a screened vent to keep out insects and debris. Never use plywood or metal sheets.
The well casing should stick out 12 inches above the ground. This prevents surface water from getting in during heavy rains. Some places need 18-24 inches of clearance.
Check the seal and cap regularly. Look for cracks or damage. Small problems can become big contamination issues if ignored.
Rainwater Harvesting Systems from Start to Finish
Your cabin’s roof is a treasure trove of water. With the right system, it can give you thousands of gallons of water all year. Rainwater harvesting turns every storm into a chance to fill your water tanks. It helps you not rely so much on other water sources.
Setting up a rainwater system for your cabin has four key parts: your roof, gutters, downspouts, first flush diverters, and storage tanks. Each part is important for catching clean water. You can start small and grow your system as you need more water.
Metal roofs are best for catching clean water because they don’t leach chemicals like asphalt shingles do. Steel and aluminum roofs keep water clean for a long time. Even if your cabin has asphalt shingles, you can use rainwater for things like watering plants and animals.
Figuring Out Your Collection Capacity
To know how much water your roof can collect, you need to plan. The formula is simple. Every 1,000 square feet of roof can collect about 620 gallons of water per inch of rain.
First, measure your cabin’s roof area. Then, find out how much rain your area gets each month. Use this info to figure out how much water your roof can collect.
For example, a 800-square-foot roof in a rainy area could collect 14,952 gallons a year. That’s about 1,246 gallons a month. But, the actual amount can change with the seasons.
This formula is for ideal conditions. In real life, you might collect 75-90% of that amount because of evaporation and other losses. So, plan your storage tanks and water use wisely.
Getting Your Gutters and Downspouts Right
Gutters are key for collecting water from your roof. They need to be made of good materials for lasting performance. Aluminum gutters are durable and cost-effective, and they don’t rust easily.
Vinyl gutters are cheaper and work well in mild weather. But, they can crack in extreme temperatures. Copper gutters last a long time and look good, but they cost more.
Make sure your gutters slope slightly to keep water flowing. This prevents water from pooling and breeding mosquitoes. Use a level to check the slope.
Gutter guards are important for keeping your water clean. They stop leaves and debris from getting into your system. Choose guards with small holes to keep out dirt but let water through.
Size your downspouts right for your roof size. One downspout can handle 600-800 square feet of roof. Place them at corners or low points to direct water flow.
Installing First Flush Diverters for Clean Water
First flush diverters are a smart choice for your system. They separate the first dirty water from the rest. The first water from your roof has the most dirt and contaminants.
A diverter fills a chamber with the first water, then lets cleaner water go to your tank. The dirty water slowly drains out between rainfalls. This keeps your tank clean.
Commercial diverters cost between $50 and $200. You can also make one yourself for under $30. Mount it on a downspout before the water reaches your tank.
Size your diverter based on your roof size. Aim for 10 gallons of diversion per 1,000 square feet. Larger roofs or dirty conditions might need more. Make sure you can easily clean and maintain it.
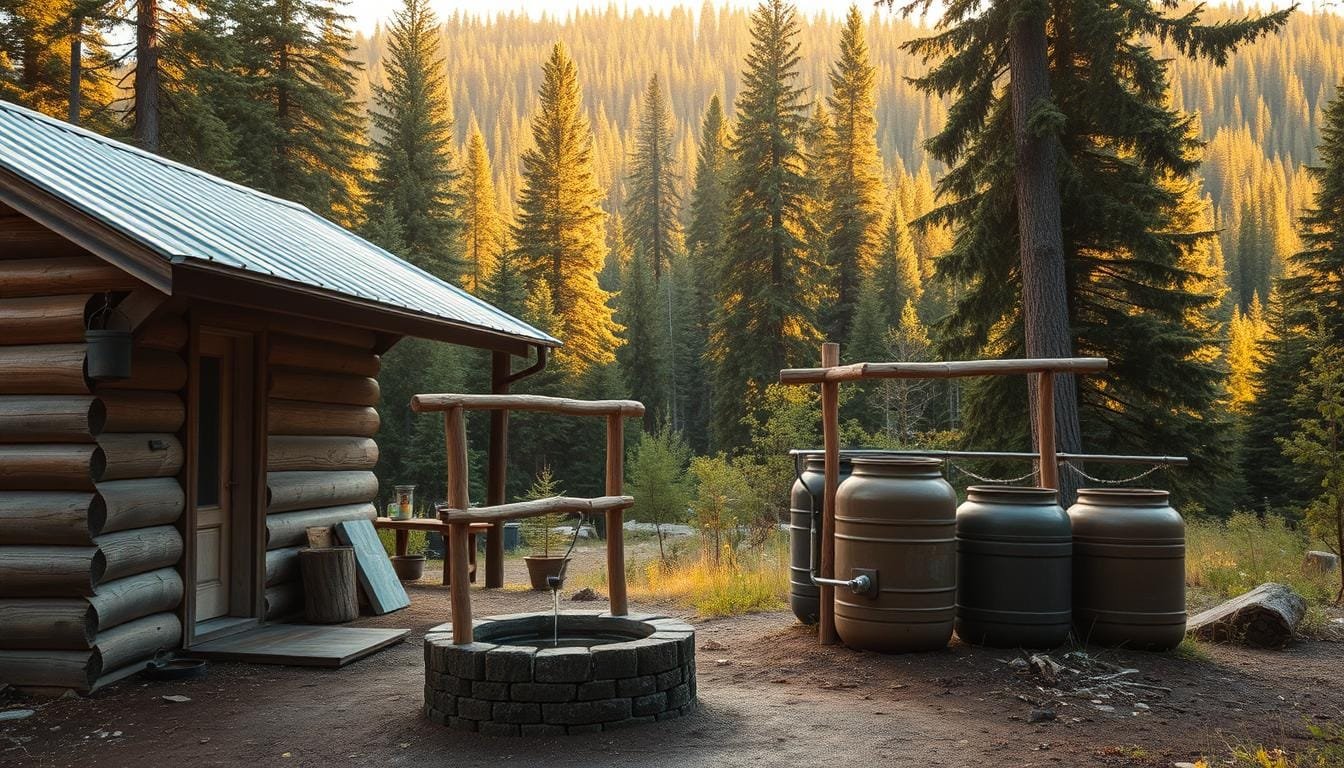
Selecting and Setting Up Storage Tanks
The size of your storage tanks determines how independent you can be from other water sources. Choose tanks based on space, budget, and how much rain you get. You can have small tanks for irrigation or big ones for all your water needs.
Calculate your tank size by multiplying your daily water use by the longest dry spell in your area. Add 20-30% for unexpected droughts. Most people find 500-2,000 gallons a good balance between cost and water security.
| Storage Capacity | Best Applications | Typical Cost Range | Installation Complexity |
|---|---|---|---|
| 50-100 gallons | Garden watering, washing equipment, backup supply | $50-$200 | Simple, DIY-friendly |
| 200-500 gallons | Extended irrigation, livestock water, seasonal cabin use | $200-$800 | Moderate, may need help moving |
| 1,000-3,000 gallons | Year-round cabin living, complete household needs with filtration | $800-$3,000 | Professional delivery recommended |
| 5,000+ gallons | Full off-grid water independence, drought resilience | $2,500-$8,000+ | Requires excavation or reinforced foundation |
Plastic vs. Metal Tank Selection
Polyethylene plastic tanks are popular for storing rainwater. They’re light, don’t rust, and are cheaper than metal. They’re also safe for drinking water. Plastic tanks last 10-20 years with UV protection.
But, plastic tanks can degrade in sunlight, becoming brittle and cracking. Most have UV inhibitors, but shade helps them last longer. Plastic tanks also don’t keep water temperature stable.
Galvanized steel and stainless steel tanks last 30-50 years. They handle more water and are strong for underground use. They also keep water temperature steady.
But, metal tanks cost more and are heavier, needing professional installation. They need regular checks for rust. Choose metal for long-term use where cost is not a big issue.
Proper Tank Placement and Foundation
Where you place your tanks is very important. Put them close to your cabin but leave enough space for maintenance. Shorter pipes mean less pressure loss and less freezing risk. Leave three feet of space around tanks for cleaning.
Foundation needs depend on tank size and weight. Water is heavy, so big tanks need strong foundations. Small tanks can sit on a simple surface, but bigger ones need special foundations.
Use crushed gravel or concrete for foundations. Make them six inches bigger than the tank on all sides. Compact the base well to avoid settling damage. For very big tanks, get a structural engineer’s advice.
Putting your tank higher than your cabin gives you natural water pressure. Each foot of height adds 0.43 PSI. Even a small height difference can provide enough pressure for your plumbing.
Install overflow pipes at the top of the tank to handle extra water. Route them away from your cabin to avoid damage. Add screens to the outlets to keep mosquitoes out while letting water flow.
Spring Water Collection and Development
For cabin owners with a spring on their land, this water source is key. Natural springs have supplied communities for centuries. They offer groundwater without drilling or pumping.
Spring water collection is different from wells. It uses what nature gives. Turning a raw spring into a safe water source is the goal.
Identifying and Evaluating Springs on Your Property
Not every wet spot is a reliable spring. True springs flow all year. Seeps and runoff dry up in dry seasons.
Look for lush vegetation and cooler ground temperatures. These signs point to a spring. Unusually wet areas or water coming from hillsides also hint at a spring.

Water from rock formations or wet ground is a sign. Testing your spring’s reliability takes patience and observation. Measure flow rates in different seasons.
Spring flow peaks in spring and after heavy rains. But it’s important to measure during late summer or early fall. Your spring must provide enough water then.
Testing water quality is a must. Never assume spring water is safe. Send samples to a lab for analysis.
Runoff, wildlife, or geology can harm springs. Regular water quality tests keep your source safe.
Constructing Your Spring Protection System
A well-built collection chamber protects your spring. It captures water and filters it. This structure is the heart of your spring water collection system.
The chamber must capture water, filter it, and keep animals out. It also manages overflow during high-flow times.
Spring box construction uses concrete, stone, or plastic. Concrete is durable but hard to install. Plastic boxes are easier but come in limited sizes.
| Material | Advantages | Disadvantages | Typical Cost |
|---|---|---|---|
| Poured Concrete | Highly durable, custom sizing, excellent seal | Labor-intensive, requires mixing and forming skills | $400-$800 |
| Mortared Stone | Traditional aesthetic, uses local materials, long-lasting | Time-consuming, requires masonry experience | $300-$600 |
| Food-Grade Plastic | Quick installation, lightweight, resistant to cracking | Limited sizes, less customizable, UV degradation | $200-$500 |
| Concrete Block | Modular construction, accessible materials, repairable | Requires waterproof coating, possible leaks at joints | $250-$550 |
Your chamber design should let water in but keep surface water out. Add a screened overflow pipe for excess water. This pipe should discharge downhill to prevent contamination.
Include a removable lid to keep animals and debris out. The lid must block sunlight to prevent algae. Build an access hatch for cleaning and inspection.
Position the intake pipe above the chamber floor to avoid sediment. A gravel bed at the bottom filters the water and protects the spring.
Designing Your Gravity-Powered Water Delivery
Spring development can lead to gravity-fed systems. These systems work without electricity if your spring is higher than your cabin.
Calculate pressure using elevation. Every foot drop gives 0.433 PSI. A 100-foot drop provides about 43 PSI, enough for most fixtures.
Measure the vertical distance from your spring to your cabin’s lowest outlet. Even small drops of 50-60 feet can provide enough pressure. Gravity-fed water systems work even when power is out.
Pipe size affects flow and pressure. Use larger pipes for longer distances. For runs over 500 feet, use 1.5-inch or 2-inch pipes.
Bury lines below the frost line to prevent freezing. In cold areas, this is 3-4 feet deep. Insulate pipes in shallow sections or where they enter buildings.
Install valves at the spring and where pipes enter your cabin. These valves help with maintenance. Add a drain valve for winterizing.
If pressure is too high, use a pressure-reducing valve. High pressure can damage fixtures and waste water. Most systems work best with 40-50 PSI.
Consider a small storage tank. A 500-1,000 gallon tank helps with flow variations and provides reserve water. Position the tank between the spring and cabin for good pressure and storage.
Spring water collection is simple and reliable. Once set up, your system works without maintenance for years. It provides fresh water without monthly bills or fuel needs. This approach to off-grid water is a timeless choice for self-sufficiency and connection to nature.
Surface Water Sources: Ponds, Lakes, and Streams
Having a cabin near a natural body of water is a big plus. It means you can have lots of water for washing dishes and watering plants. But, you need to know how to get it legally and safely.
Lakes, ponds, and streams get hit with everything nature throws at them. This includes pollution, algae, and debris. But, with the right treatment and permits, you can use this water for years.
Understanding three key areas is important. You need to know the legal rules, how to get the water to your cabin, and how to make it safe. Let’s look at each part so you can decide if surface water is right for you.
Legal Considerations for Surface Water Use
Before you start, you must understand the water laws in your area. Using water without permission can lead to big fines and legal trouble. Water laws vary a lot depending on where your cabin is.
In western states, the prior appropriation doctrine applies. This means water rights are based on who used the water first. Even if a stream runs through your land, you might not have the right to use it.
In eastern states, riparian rights apply. This gives landowners near water bodies the right to use some of that water. But, you can’t use too much or harm the water downstream.
- Permit requirements: Contact your state’s water resources department or environmental agency to learn what permits you need
- Usage limits: Many permits specify maximum daily or annual withdrawal amounts
- Seasonal restrictions: Some areas prohibit or limit withdrawals during low-flow periods to protect aquatic ecosystems
- Water quality obligations: You may be required to monitor and report on water quality, specially if you’re near protected waterways
- Downstream considerations: Your use cannot unreasonably harm other water rights holders or the environment
Getting a permit involves a site plan and possibly an environmental impact assessment. Processing times can vary, so start early.
Some small uses might not need permits. But, always check with local authorities before starting.
Installing Intake Systems
After getting legal clearance, focus on the technical side. You need to design a reliable intake system that works all year with little maintenance.
The first step is intake pipe placement. Your pipe should be deep enough to avoid surface debris but not so deep it pulls up sediment. Aim for 3-4 feet below the lowest water level but at least 2 feet above the bottom.
In deeper water, place your intake in the middle zone. This avoids algae and sediment.
Protecting your intake is key for long-term use:
- Install a screened intake: Use a commercial foot valve with screening or build a screened cage around your intake pipe. The screen prevents fish, frogs, and large debris from entering your system.
- Use appropriate materials: PVC, HDPE, or polyethylene pipes resist corrosion and algae growth better than metal pipes. Size your pipe based on flow requirements and distance to your cabin.
- Consider a floating intake: For water bodies with significant seasonal level changes, a floating intake system adjusts automatically, maintaining optimal depth regardless of water levels.
- Weight and anchor properly: Your intake needs to stay in position during storms, floods, and ice-out conditions. Use concrete blocks or anchoring systems designed for underwater use.
Pump selection depends on several factors. For lake water source applications, a jet pump often works well for distances up to 100 feet and elevations up to 25 feet. For longer distances or higher elevations, you might need a submersible pump at the water source or a more powerful surface pump.
If your cabin sits significantly above the water level, consider the total dynamic head—the vertical distance plus friction losses from pipe length and fittings. Your pump must overcome this resistance while delivering adequate flow.
Many stream water collection setups benefit from a small collection box or sump at the intake point. This creates a calm water reservoir that reduces sediment entering your system and makes pump operation more stable during flow variations.
Dealing with Sediment and Debris
Surface water’s biggest challenge is what it carries with it—sediment, organic matter, microorganisms, and sometimes chemical contaminants. A complete treatment strategy is non-negotiable if you’re using surface water for drinking, cooking, or bathing.
Think of treatment as multiple barriers between contaminants and your tap. Each stage removes different types of problems:
Pre-filtration stage: Before water even enters your cabin’s plumbing, it should pass through a coarse filter. A 50-100 micron sediment filter removes larger particles, protecting your pump and downstream filters. Check and clean this filter frequently—weekly during high-sediment seasons.
Settling and clarification: Many surface water cabin systems benefit from a settling tank where water sits for several hours. Gravity pulls suspended sediment to the bottom, significantly reducing the load on your filters. A simple 100-200 gallon tank with baffles can remove 60-80% of suspended solids.
For heavily silted water sources, consider these additional pre-treatment options:
- Sand filters: Gravity-fed sand filters polish water before it reaches finer filtration stages
- Bag filters: Disposable bag filters are inexpensive and effective for removing particles down to 1-5 microns
- Centrifugal separators: These spin-based systems remove sand and grit without filter media that needs replacement
Primary filtration: After pre-treatment, water should pass through a 5-10 micron filter. This removes most remaining sediment, algae, and organic particles. These cartridge filters need regular replacement—monthly to quarterly depending on water quality and usage.
Final purification: Even crystal-clear water from a pristine mountain stream can harbor harmful microorganisms. For drinking water, you need either UV purification, chlorination, or both. UV systems kill bacteria, viruses, and protozoa without chemicals, but they only work on water that’s already been filtered clear. Chlorine-based systems work even in slightly turbid water and provide residual protection in your storage tank.
Keep detailed maintenance records for your filtration system. Note when you replace filters, when you clean screens, and any water quality issues you observe. This helps you spot patterns and predict when maintenance will be needed.
Testing is equally important. Have your water tested professionally at least annually for bacteria, nitrates, and common contaminants. If your water source is near agricultural land or development, test more frequently and consider testing for pesticides and heavy metals.
Surface water requires more attention than a deep well, but for cabins with good access to lakes or streams, it can provide abundant water for all your needs. The investment in proper intake systems and multi-stage treatment pays off in reliable, safe water that takes full advantage of the natural resources surrounding your property.
Comparing Off-Grid Water Options for Cabin Setups
Choosing the right water system for your cabin starts with looking at costs, reliability, and how well it fits your area. Each water source has its own strengths. Knowing these helps you pick the best system for your budget and property.
When thinking about off-grid water costs, don’t just look at the price tag. Consider the cost of installation, upkeep, and how each system performs all year. The best choice balances the initial cost with long-term reliability.
Breaking Down System Expenses
Drilled wells are the biggest upfront cost, ranging from $3,000 to $15,000 or more. This includes drilling, casing, and pump equipment costs.
Rainwater harvesting systems have more flexible pricing. A basic setup might cost $500, while a full system can be over $10,000. The size of your tanks is the biggest factor in cost.
Spring development costs are in the middle, at $1,000 to $5,000. This includes building a spring box and installing pipes. Hand-dug wells can be very affordable, costing $500 to $2,000 for DIY setups.

Surface water systems vary a lot. The distance to the source and elevation changes affect your investment.
| Water Source | Initial Investment | Annual Maintenance | Ongoing Costs |
|---|---|---|---|
| Drilled Well | $3,000 – $15,000+ | $100 – $300 | Pump electricity, occasional repairs |
| Rainwater System | $500 – $10,000+ | $50 – $200 | Filter replacements, tank cleaning |
| Spring Development | $1,000 – $5,000 | $50 – $150 | Pipe maintenance, minimal treatment |
| Hand-Dug Well | $500 – $2,000 | $30 – $100 | Hand pump maintenance, testing |
| Surface Water | $2,000 – $8,000 | $200 – $500 | Treatment chemicals, filter changes, pump power |
After setup, costs vary a lot. Wells have low ongoing costs, mainly for pump electricity and occasional visits. Rainwater systems need filter replacements and tank cleaning, but costs are low.
Surface water sources need the most maintenance. They require sediment filters, UV systems, and chemicals, adding up over time.
Year-Round Performance Factors
Water source reliability changes with the seasons. Wells with stable aquifers provide consistent water all year. But, droughts can lower water tables.
Rainwater collection depends on local rainfall. Wet months fill your tanks, but dry seasons can quickly deplete them.
Natural springs vary with the seasons. They flow well in spring and rainy periods, then slow down in late summer. Knowing your spring’s cycle helps plan storage.
Surface water levels change a lot with the seasons. Lakes and ponds drop during dry months. Streams slow down or dry up in summer and fall.
The best setups often use two sources together. A well with rainwater collection reduces pump usage. Spring water with stored rainwater is secure when spring flow drops.
Selecting Systems for Your Regional Conditions
Your local climate is key in choosing climate water systems. Wells are best in dry areas. Rainwater harvesting is less practical in dry, unpredictable climates.
Places with wet and dry seasons do well with rainwater collection and storage. A big tank can carry you through dry times. A 2,000 to 5,000-gallon tank is common in many climates.
Areas with year-round rain can mostly use rainwater systems. A well-sized collection and storage setup meets all needs. This approach can save a lot on water bills.
Cold climates need special care to prevent freezing. Underground springs stay warm and don’t freeze. Wells work well in winter with proper insulation. Rainwater systems need heated storage or buried tanks.
Coastal areas with high humidity but low rain face challenges. They get morning dew but not enough rain for harvesting. Wells or springs are better than rainwater here.
Mountain areas often have great spring sources. The terrain allows for gravity-fed systems, saving on pumping costs. These places are ideal for spring development.
When comparing water systems, match your choice to your local conditions. A system great in the Pacific Northwest might not work in the Southwest desert. Consider rainfall, droughts, winter temperatures, and seasonal water table changes in your area.
Water Storage Solutions for Off-Grid Cabins
You need a reliable way to store water for your off-grid cabin. This keeps your water safe and ready to use. A good storage system gives you peace of mind, even when it’s dry or your main source is down.
Choosing the right storage affects water quality and system reliability. You must think about where to put your tanks, how much water you need, and how to keep it fresh. These choices depend on your climate, budget, and how your cabin works all year.
Choosing Between Surface and Buried Options
First, decide if you want your tanks visible or hidden underground. Above-ground tanks are easy to check and maintain. They cost less to install because you don’t have to dig.
These tanks work well with gravity-fed systems. Elevating your tank a bit creates natural pressure without needing pumps. But, above-ground tanks face temperature swings that can cause algae in summer and freezing in winter.
They also need protection from UV rays, which harm plastic. Most setups require concrete pads or strong platforms to spread the weight. The look of your cabin is also important, as tanks are a big feature.

Underground storage has its own benefits. It keeps temperatures stable, dramatically reduces algae problems, and avoids freezing in most places. The earth protects your tank from damage and keeps it cool.
Underground storage makes your property look cleaner. But, it costs more to install and maintain. You’ll need to dig, handle rocky soil, and deal with high water tables. Finding leaks is harder, and fixing them is more work.
Plan how you’ll access your tank for cleaning and checks. Make sure the soil drains well to avoid water around your tank.
| Storage Type | Best Climate | Installation Cost | Maintenance Access |
|---|---|---|---|
| Above-Ground Plastic | Moderate temperatures | $500-$2,000 | Easy, visual inspection |
| Above-Ground Steel | Variable conditions | $1,500-$4,000 | Easy, requires rust checks |
| Underground Plastic | Extreme temperatures | $2,000-$5,000 | Difficult, needs access ports |
| Underground Concrete | All climates | $3,000-$8,000 | Difficult, very durable |
Calculating How Many Gallons You Need
Figuring out your water storage needs is simple math. Start by figuring out how much water you use each day. Most off-grid cabin users use 20-50 gallons daily, depending on how much they conserve.
Use this formula to find your minimum storage: Daily usage × Number of people × Days of autonomy = Required gallons. Days of autonomy is how long you want to go without refilling or rain.
For wells, 3-7 days of storage is enough for maintenance. Rainwater systems in dry areas need 30-60 days. Always add 20-30% extra for emergencies.
For example, a couple using 50 gallons daily for 5 days needs 500 gallons plus 100 gallons extra. A family of four using 200 gallons daily for 5 days needs 1,000 gallons plus 300 gallons extra.
Think about these factors when sizing your storage:
- Seasonal variations in water availability and usage patterns
- Guest visits that temporarily increase consumption
- Garden or livestock needs beyond household use
- Fire suppression reserves if you’re in wildfire-prone areas
- System maintenance windows when collection stops temporarily
Using multiple small tanks is often better than one big one. It gives you flexibility for maintenance and backup. You can also use separate tanks for drinking water, washing, or irrigation.
Keeping Your Stored Water Fresh
Preventing algae and contamination is key. You need to manage light and air circulation. Simple steps can keep your water fresh for months.
Blocking Light From Your Tanks
Algae grows with light, so keep tanks dark. Use dark plastic or metal containers for best results. If you have clear tanks, paint them with dark latex paint for UV protection.
Painting tanks in dark colors like green, blue, or black blocks light. Apply two coats for full coverage and reapply every few years. Wrapping tanks in UV-resistant tarps or covers is another option. Make sure they’re tight to prevent wind from letting light in.
For above-ground tanks, building a shelter around them blocks light and protects from weather. Underground tanks automatically solve the light problem, keeping them cleaner.
Setting Up Proper Airflow
Tanks need to breathe, but not in ways that let in contaminants. Proper ventilation prevents vacuum formation and keeps out insects and debris. Most tanks need two vent points for good air exchange.
Install screened overflow vents at the top of your tank. Use fine mesh (20-30 mesh size) to keep mosquitoes out while letting air in. Position vents to face downward or add protective hoods that shed rain while allowing airflow.
Your tank’s inlet connection also needs screening. Use inline filters or mesh screens to catch debris before it reaches storage. Clean these screens monthly during active collection seasons.
Creating slight positive pressure helps too. Some cabin owners install small activated carbon filters on vent openings. This cleans incoming air while maintaining necessary airflow. This extra step is important for drinking water storage, where contamination prevention is critical.
Check vent screens quarterly for clogs, damage, or deterioration. Replace any screening that shows tears or excessive debris buildup. Well-maintained ventilation keeps your stored water fresh without introducing new problems.
Water Pumping Options Without Grid Power
Your cabin’s water pumping setup doesn’t need grid power to deliver modern convenience and reliability. The key is matching your pumping method to your available natural resources—whether that’s sunshine, wind, or good old-fashioned elbow grease. Each off-grid water pumping solution brings its own advantages, and many cabin owners combine multiple methods for year-round security.
Choosing the right pump depends on several factors including your water source depth, daily consumption needs, and which energy sources shine brightest at your property. Let’s explore the options that keep water flowing without flipping a switch connected to the utility company.
Solar-Powered Pumps
Solar water pumps have become the go-to choice for cabin owners seeking reliable, low-maintenance water delivery. These systems convert sunlight directly into pumping power through photovoltaic panels, eliminating ongoing fuel costs and noisy generators. The beauty of solar pumping lies in its simplicity—when the sun shines, water flows.
Three main types of solar pumps serve different applications. Surface pumps work for shallow wells, ponds, or storage tanks up to 20 feet deep. Submersible pumps handle deep wells, dropping down into the water source itself and pushing water upward through pipes. Booster pumps add pressure to existing systems, ensuring good flow at your faucets and showerheads.

The advantages stack up quickly. You’ll enjoy independence from fluctuating fuel prices, whisper-quiet operation, and remarkable reliability in sunny climates. Modern solar pumps require minimal maintenance—no oil changes, spark plug replacements, or carburetor adjustments. For more details on selecting the right water pump options for off-grid living, exploring various power sources can help match your specific needs.
DC motors in solar pumps deliver efficient performance by running directly from panel output without inverters. This direct connection reduces energy loss and system complexity, making solar setups elegant for your cabin well pump needs.
Sizing Your Solar Array
Getting your solar array size right ensures consistent water delivery throughout the day. Start by checking your pump’s wattage rating, typically found on the specification plate or manual. A common cabin submersible pump might require 200-400 watts during operation.
Next, calculate your daily runtime needs. If you need to pump 300 gallons daily and your pump delivers 5 gallons per minute, you’ll need 60 minutes of pumping time. Multiply pump watts by runtime hours to get your daily watt-hours requirement.
Here’s where local sun exposure matters. Peak sun hours vary by location and season—Phoenix gets about 6 hours in winter, while Seattle might see only 2. Check online solar maps for your area’s average peak sun hours.
The golden rule: oversize your solar array by 20-30% beyond calculated needs. This cushion accounts for panel efficiency losses, dust accumulation, winter sun angles, and cloudy days. If calculations suggest 400 watts, install 500-520 watts of panels. This buffer keeps water flowing even when conditions aren’t perfect.
Battery Backup Systems
Adding battery storage transforms your solar pumping system from sunshine-dependent to all-weather reliable. Batteries store excess solar energy during sunny periods, powering your cabin well pump during cloudy stretches or nighttime hours. This backup capability proves valuable in climates with variable weather.
Two battery types dominate off-grid installations. Lithium batteries cost more upfront but deliver longer lifespans (10-15 years), deeper discharge cycles, and lighter weight. Lead-acid batteries offer lower initial investment but require more maintenance and replacement every 3-7 years. Most cabin owners find lithium worth the extra investment for hassle-free operation.
Sizing your battery bank depends on desired autonomy days—how long you want pumping capability without sun. Two to three days of backup suits most applications. Multiply daily watt-hours by autonomy days, then divide by usable battery capacity (typically 50% for lead-acid, 80% for lithium).
Don’t forget the charge controller—this essential component regulates power flow between panels, batteries, and pump. MPPT controllers cost more than PWM types but deliver 20-30% better efficiency, important when every watt counts off-grid.
Hand Pumps and Manual Systems
Sometimes the simplest solution proves the most reliable. Hand pump systems require zero electricity, never run out of fuel, and work perfectly during power outages or equipment failures. Modern designs have evolved far beyond the classic farmyard pump, showing impressive capabilities for off-grid cabins.
Today’s hand pumps can lift water from depths reaching 300 feet through clever mechanical advantage. Deep-well models use sucker rod systems—long connecting rods that transfer your pumping motion to a cylinder deep in the well. Each stroke pulls water upward in stages, making even deep sources accessible without power.
Installation requires a separate pipe alongside any existing powered pump system, allowing hand pumps to serve as excellent emergency backups. During winter months when you’re not at the cabin, hand pumps eliminate concerns about frozen electric pump components or depleted batteries.
The physical effort varies by depth and pump quality. Shallow wells under 50 feet pump easily with minimal exertion. Deeper sources require more strokes and effort, though ergonomic handle designs reduce fatigue. For minimalist cabin owners or those seeking ultimate independence, hand pump systems deliver water security that never depends on equipment working perfectly.
Consider hand pumps as your primary system if daily water needs stay modest—cooking, drinking, and basic washing. They also excel as backup systems for powered setups, providing peace of mind that water access continues regardless of equipment status.
Wind-Powered Pumping Solutions
Wind energy has powered water pumps for over a century, and modern versions continue this reliable tradition. If your cabin sits in consistently breezy territory—coastal areas, plains, or mountain passes—wind pumping deserves serious consideration as part of your off-grid water pumping strategy.
Traditional windmill-style pumps feature the iconic multi-blade design that catches even light breezes. These mechanical marvels convert rotational motion directly into up-and-down pumping action through a crankshaft system. They’re incredibly durable, with some installations running 50+ years with minimal maintenance. The steady, slow pumping action suits livestock watering and storage tank filling perfectly.
Modern wind turbine systems take a different approach, generating electricity that powers standard electric pumps. These setups offer more flexibility—the turbine can be located wherever wind blows strongest, with power transmitted by wire to pumps at your water source. They also integrate easily with battery banks for 24/7 pumping capability.
Wind pumping shines brightest in specific conditions. Consistent winds averaging 10-15 mph make wind systems highly productive. Open terrain without tree interference ensures turbines catch maximum breeze. Coastal cabins and prairie properties often hit the wind-power sweet spot.
The limitations matter too. Calm periods mean no pumping without battery backup. Trees, hills, and buildings create turbulence that reduces efficiency. Initial costs run higher than solar for comparable output. Many successful wind-powered cabin systems pair with solar panels, creating a hybrid renewable energy setup that pumps water whenever either sun or wind shows up.
For maximum reliability, consider which natural resource flows most consistently at your property throughout the year. Some cabin owners discover that winter brings strong winds when solar production drops, making wind and solar the perfect complementary pair for year-round water security.
Water Filtration and Purification Systems
Your off-grid water might look clear, but it can have hidden contaminants. Knowing the difference between filtration and purification is key. Filtration removes physical particles like dirt and rust. Purification eliminates microorganisms that cause illness.
Most cabins need both filtration and purification for safe water. Raw water from wells and rain can have harmful elements. Modern tech makes safe drinking water possible without grid power.
Proper water purification off-grid keeps you healthy. It gives you confidence in every glass of water. Let’s look at the treatment options for clean, safe water in your cabin.
Physical Barriers: Pre-Filtration and Sediment Removal
The first step in water treatment removes visible particles. Sediment filters capture dirt and debris that can clog systems. This protects your equipment.
Filter ratings show how well they work. A 50-micron filter removes visible sediment. A 5-micron filter is needed before UV or reverse osmosis systems.
Spin-down filters are easy to maintain. They let you see sediment and clean the filter by opening a valve. No cartridge replacements needed.

Standard cartridge filters need regular replacement. They provide finer filtration. Activated carbon cartridges remove chlorine and improve taste.
Install sediment filters near your water source. This protects everything downstream from debris. Check and clean pre-filters monthly to keep flow and pressure up.
Destroying Microorganisms with UV Light Technology
UV water purification kills bacteria and viruses without chemicals. The UV-C wavelength disrupts microorganism DNA. This technology is reliable and uses little power.
A UV system has three main parts. The UV lamp generates the light. The quartz sleeve protects the lamp. The stainless steel chamber forces water to flow past the lamp.
Power needs range from 30 to 100 watts. Solar systems can handle this load. Most units need 120V AC power, but DC models work with battery banks.
UV effectiveness depends on water clarity. Particles can block the light. Always use sediment and carbon pre-filters before your UV unit.
Maintenance includes annual bulb replacement. Clean the quartz sleeve every 3-6 months. Size your system based on peak flow rate.
Advanced Purification: Reverse Osmosis Systems
Reverse osmosis provides top-level purification. It removes dissolved solids and heavy metals. Many cabins use it for drinking and cooking water.
RO systems have multiple stages. Stage one uses sediment filtration. Stage two uses carbon filtration. Stage three forces water through the RO membrane.
The membrane rejects contaminants into waste. This process makes RO impractical for whole-house use. Use RO for drinking water only and save less-treated water for other uses.
RO systems need 40-60 PSI pressure. Storage tanks hold purified water for easy access. Membrane lifespan ranges from 2-5 years.
Chemical Treatment for Emergency Backup
Chemical disinfection is a reliable backup. It’s useful when mechanical systems fail or power isn’t available. Knowing your options helps keep water safe.
Chlorine bleach is the most common treatment. Regular household bleach kills bacteria and viruses. Add 8 drops per gallon of clear water or 16 drops per gallon of cloudy water. Mix well and wait 30 minutes before drinking.
Chlorine taste and odor are drawbacks. But it’s perfect for treating storage tanks or emergencies. The chemical dissipates, leaving safe water with minimal taste.
Iodine tablets are a portable option. They kill most organisms in 30 minutes. But pregnant women and people with thyroid conditions should avoid it.
Hydrogen peroxide is a less common but effective alternative. It breaks down into water and oxygen. Use 3% food-grade hydrogen peroxide at one ounce per 10 gallons for disinfection. This method works best for storage tank treatment.
Chemical treatment works best with other methods. Combine it with filtration to remove particles. Never rely solely on chemicals when mechanical options are available.
| Treatment Method | Best Application | Power Required | Maintenance Level |
|---|---|---|---|
| Sediment Filtration | Pre-treatment for all systems | None | Monthly cleaning or cartridge changes |
| UV Purification | Whole-house disinfection | 30-100 watts | Annual bulb, quarterly sleeve cleaning |
| Reverse Osmosis | Drinking water only | 40-60 PSI pressure | Filter changes every 6-12 months |
| Chemical Treatment | Backup or emergency use | None | Minimal—maintain chemical supply |
Building a complete treatment system means layering technologies. Test your raw water first. Then design your strategy based on your needs. This ensures safe water while keeping maintenance manageable for long-term cabin living.
Permits, Regulations, and Legal Requirements
Water law in the United States is complex. Knowing the permits and regulations can save you from legal troubles. Different places have different rules about water use and permits needed.
Before spending thousands on a water system for your cabin, research local permits and compliance requirements. What’s legal in one state might not be in another. Most permitting processes are straightforward once you know what’s needed, and working with licensed pros can make it easier.

State-Specific Well Drilling Requirements
Nearly every state requires permits for new wells. These rules protect groundwater and keep records of water resources. The specific rules vary by location.
Most states need detailed site plans for well locations. You must keep wells away from septic systems and property lines. Some states also require soil tests before approving permits.
Permit fees vary a lot. You might pay $50 in some places or over $500 in others. Always include permit costs and waiting times in your budget.
Working with licensed well drillers is a big advantage. They know the local rules and handle permits for you. Most states have online databases to check a driller’s license.
After drilling, you’ll need to file completion reports. These reports include the well’s details and water quality. Some states require follow-up inspections before you can use the well water. Keep these documents forever, as they are part of your property records.
Rainwater Collection Legal Landscape
Rainwater harvesting laws surprise many cabin owners. Some states used to restrict it, but now most allow it. This is good news for those wanting to harvest rainwater.
Most states now support rainwater harvesting for homes. Texas, Ohio, and Virginia have laws that encourage it. These laws help reduce the demand on municipal and groundwater supplies.
But, some western states have old rules that restrict rainwater collection. Colorado used to have strict rules but has relaxed them. Always check the current laws in your state and county before installing rainwater systems.
Even in states that allow rainwater harvesting, local rules can apply. Coastal areas and places with water scarcity might have extra rules. Urban areas might have building codes for rainwater systems.
If your state allows rainwater harvesting, you might not need special permits for small systems. But, large systems or those for drinking water might need health department approval and regular testing.
Understanding Water Rights for Your Cabin
Water rights laws vary across the United States. Knowing these laws is key, mainly if you plan to use surface water from streams or lakes near your cabin.
The country has two main water rights systems. Eastern states follow riparian rights doctrine, which lets property owners use nearby water. If your cabin is near a stream, you can use that water, as long as it doesn’t harm others.
Western states use prior appropriation doctrine, or “first in time, first in right.” This means water rights are based on when you first used the water. Older rights holders get their water first, which is important during droughts.
Surface water rights are heavily regulated in most of the country. Even if a stream runs through your property, you might need permits to use its water. These permits specify how much water you can take and when.
Groundwater rights are less regulated in eastern states, where landowners often have broad rights. Western states regulate groundwater more, requiring permits and limiting how much you can take. Some areas have strict management districts for groundwater.
| Water Rights System | Geographic Region | Key Principle | Cabin Owner Impact |
|---|---|---|---|
| Riparian Rights | Eastern United States | Adjacent landowners share reasonable use rights | Generally easier surface water access with fewer permits |
| Prior Appropriation | Western United States | First users have senior rights regardless of land ownership | Requires permits; junior rights may have limited access during drought |
| Groundwater (Eastern) | Most Eastern states | Landowner rights to reasonable use of underlying water | Well drilling usually permitted with basic regulations |
| Groundwater (Western) | Most Western states | Regulated similar to surface water with permits required | May require permits specifying withdrawal limits and monitoring |
When buying a cabin, check the water rights. Some properties have established rights that transfer with the deed. Others may have no formal rights, limiting your options.
Consult local water authorities or a water law attorney before assuming your water rights. Water rights laws vary by state and even by specific areas. Getting advice early can save you from legal trouble later.
Water rights can be complex with neighbors. Disputes can arise over shared water sources. Documenting your rights and respecting others’ can help keep peace and follow the law.
The key is to do your homework before starting any project. Talk to your state’s environmental department, local well drillers, and consider a water rights attorney for complex cases. Spending time and money on legal compliance protects your investment in your cabin’s water system.
Winterizing Your Off-Grid Water System
Water freezing can break metal pipes and crack concrete tanks. This makes winterizing your water system very important. Water expands about 9% when it freezes, which can cause pipes to burst and pumps to break.
Protecting your water system from freeze damage is key. This is true whether you use your cabin all year or just in warmer months. You need to plan and execute well to keep your water system safe.
Knowing your frost depth is the first step in winterizing. The frost line varies a lot in the United States. It can be as low as 12 inches in the south and over 60 inches in the north. Your local building department can tell you the frost line for your area.

Preventing Frozen Pipes and Equipment
To protect your water system, you need a few strategies. Burying supply lines below the frost line is a good start. This keeps pipes at a stable temperature all winter.
For parts above ground, you need different plans. Frost-proof yard hydrants have special valves that drain water when you turn them off. This stops water from freezing in the exposed pipe.
Well heads and pump houses need extra care. Insulated well covers keep the pipes from freezing. For pump houses, a small heater keeps the equipment warm during cold weather.
Storage tanks also need special care. Wrap above-ground tanks with insulation for your area’s coldest temperatures. For big tanks, use submersible heaters. The best solution is to bury tanks below the frost line, but that’s a big job.
Check valves and drain points help prevent freeze damage. They let you drain water from pipes during cold weather. Make sure to label each drain point so you can find them easily.
Insulation and Heating Cable Installation
Insulation and heating cables are great for protecting exposed pipes. Foam insulation comes in different R-values and sizes. Choose the right size for your pipes to keep cold air out.
Fiberglass wrap is good for odd shapes like valves and pump bodies. Wrap them well and cover with waterproof tape or plastic. Make sure there are no gaps where cold air can get in.
Heating cables are another option for pipes that can’t be buried or insulated well. Self-regulating heating cables adjust their heat based on temperature. They’re energy-efficient and safe to use all the time.
Constant-wattage cables give steady heat. They’re cheaper upfront but use more energy. Never overlap heating cables to avoid damage or fires.
Attach heating cables correctly for them to work well. Put them on the bottom of horizontal pipes. Use aluminum tape or cable ties, but don’t stretch them too tight.
Heating cables need power, which can be a problem for solar systems in winter. A 50-foot run uses 5-8 watts per foot. You’ll need a lot of battery power. Many off-grid solutions use solar power and backup generators to keep systems running.
| Protection Method | Best Application | Approximate Cost | Effectiveness Rating |
|---|---|---|---|
| Below Frost Line Burial | Permanent supply lines | $15-25 per foot | Excellent (year-round) |
| Self-Regulating Heat Cable | Exposed pipes, tanks | $8-12 per foot | Very Good (requires power) |
| Foam Pipe Insulation | All above-ground pipes | $2-5 per foot | Good (passive protection) |
| Heated Pump House | Well equipment, pressure tanks | $300-800 annually | Excellent (year-round) |
| Complete System Draining | Seasonal cabins | $0 (DIY labor) | Perfect (when closed) |
Draining Procedures for Seasonal Cabins
Seasonal cabins need to be drained to prevent freeze damage. Start by turning off the water supply at the source. For wells, shut off the pump power. For gravity-fed systems, close the main valve.
Open all faucets and drains from the highest points down. This lets gravity drain the water. Make sure to leave faucets open to prevent pressure buildup if water freezes.
Pressure tanks need special care. Drain them completely through the bottom valve. Then, open the top air valve to ensure no water is left inside. Even a little water can freeze and damage the tank.
Water heaters hold a lot of water that must be drained. Turn off the power or gas first. Then, attach a hose to the drain valve at the bottom. Open the top pressure relief valve to let air in for complete drainage. Remove the hose when done to prevent freezing.
Use RV antifreeze in all drain traps to prevent freezing and sewer gas. Pour one cup into each sink, shower, and floor drain. The antifreeze seals the trap against gases while staying liquid in cold temperatures.
Remove and store cartridge-style filters to prevent freezing damage. Water in the filter housings expands when frozen, breaking the plastic. Unscrew the housings, remove the cartridges, drain them, and store them indoors or in a heated space.
Don’t forget outdoor equipment when winterizing your cabin’s water system. Disconnect and drain garden hoses, sprinkler systems, and outdoor showers. Store hoses indoors to protect them from UV damage and extend their life. Drain backflow preventers and remove batteries from timers.
Keep a record of your shutdown steps with photos and notes. This guide helps you remember how to close the cabin for winter. It also helps in spring when you start everything up again.
When starting up in spring, be careful not to damage equipment. Close all drains and faucets before turning on the water. Turn on the water slowly to fill pipes while checking for leaks. Listen for unusual sounds that might mean damage happened during winter.
Run water through all fixtures for a few minutes to flush out antifreeze and stagnant water. Check the pressure tank and adjust the air pressure if needed. Look for cracks or damage on exposed pipes and equipment.
Routine Maintenance and System Care
Preventive maintenance keeps your cabin’s water system running smoothly. Regular off-grid water maintenance ensures clean, safe water for years. Most maintenance tasks are simple and quick when done regularly.
Think of maintenance like changing your truck’s oil. Skipping it leads to big problems. Stay on top of basic tasks for reliable performance.
Break maintenance into monthly, annual, and specific tasks. You won’t need special tools or expertise for most tasks. Just commit to regular checks and act quickly when issues arise.
Quick Monthly Checks That Prevent Big Problems
A monthly water system inspection takes 15-20 minutes. It catches small issues before they become big problems. The specific checks depend on your system type, but the goal is the same: spot problems early.
For rainwater harvesting systems, start at the roof and work your way down. Check gutters and downspouts for leaves, debris, or damage. Inspect your first flush diverter to ensure it’s working properly.
Look at your storage tanks for any signs of leaks, cracks, or damage. Check the water level and note whether it seems consistent with recent rainfall. Examine inlet screens and pre-filters for buildup that could restrict flow.
For well systems, monthly checks focus on performance indicators. Note the pressure gauge reading—significant drops might signal pump or pressure tank problems. Listen when the pump runs. Unusual noises or frequent cycling often indicate developing issues.
Inspect visible piping for leaks, and check water clarity by filling a white container. Changes in color or cloudiness deserve investigation. If your well has an accessible pressure tank, verify the pre-charge pressure matches manufacturer specifications.
All off-grid water systems benefit from these universal monthly checks:
- Test water pressure at fixtures to ensure consistent performance
- Verify treatment systems are operating (UV lights glowing, no filter clogs)
- Check GFCI outlets for proper function if you have electrical components
- Look for leaks at all accessible connections and fixtures
- Keep a simple log noting observations and any changes from previous months
This documentation helps you spot trends and provides valuable information for troubleshooting later. Note dates, observations, and any actions taken.
Annual Deep Cleaning and Testing
Once yearly, dedicate time to more intensive maintenance tasks. Spring or early summer works well for most cabin owners. This gives you the full season to address any issues discovered during inspection.
Start with water quality testing. Send samples to a certified lab for bacteria, mineral content, and contaminant screening. This is essential for wells and surface water sources. Testing costs $50-150 but provides peace of mind and catches problems before they affect health.
Tank cleaning is a key annual task. Drain your storage tank completely and scrub the interior surfaces with a stiff brush. Remove accumulated sediment from the bottom. Disinfect the tank with a dilute bleach solution, then flush thoroughly before returning it to service.
Most tanks need this deep cleaning every 2-3 years, but annual inspection helps you decide when it’s necessary. Heavy sediment buildup or visible algae growth means cleaning can’t wait.
Inspect pump intake screens and clean away any debris or mineral buildup. Service your pressure tank by checking and adjusting the air pre-charge to manufacturer specifications. Incorrect pressure causes pump cycling problems and shortens equipment life.
Don’t forget your water heater if you have one. Drain several gallons to flush sediment that accumulates at the bottom. This simple task improves efficiency and extends heater life significantly.
Walk your entire system looking for wear, damage, or deterioration. Check hoses for cracks, fittings for corrosion, and supports for stability. Compare current performance against your original system specifications—significant changes deserve investigation.
Keeping Pumps and Filters in Top Shape
Pumps and filters are your system’s workhorses, and they need specific attention. A proper filter replacement schedule prevents clogs that stress pumps and compromise water quality.
Filter replacement timing depends on your water source and filter type:
- Sediment filters: Every 1-3 months for surface water, 3-6 months for wells
- Carbon filters: Replace every 6-12 months or when water taste changes
- UV sterilizer bulbs: Annual replacement regardless of appearance
- Reverse osmosis membranes: Every 2-3 years with proper pre-filtration
UV bulbs deserve special mention. They don’t burn out like regular bulbs—instead, their germicidal output gradually decreases. After a year, they might look fine but no longer effectively sterilize water. Mark your calendar and replace them on schedule.
Pump maintenance focuses on monitoring performance and catching wear early. Check motor condition and listen for unusual sounds during operation. Bearing wear produces grinding or squealing noises that warn of impending failure.
Inspect all wiring connections for corrosion or looseness. Monitor how long the pump runs and how often it cycles. Excessive cycling indicates pressure switch problems, leaks, or waterlogged pressure tanks.
Submersible well pumps typically last 10-15 years with minimal maintenance. Jet pumps and surface pumps may need more frequent service, including seal replacement and motor maintenance every 3-5 years.
| Component | Maintenance Task | Frequency | Warning Signs |
|---|---|---|---|
| Sediment Filters | Replace cartridge, clean housing | 1-6 months | Reduced pressure, slow flow |
| Carbon Filters | Replace cartridge | 6-12 months | Bad taste, odors return |
| UV Sterilizer | Replace bulb, clean quartz sleeve | Annually | Light not glowing, 12 months passed |
| Well Pump | Inspect wiring, monitor performance | Monthly check | Frequent cycling, unusual noises |
| Pressure Tank | Check/adjust air pressure | Annually | Rapid pump cycling, waterlogged tank |
Smart cabin owners keep critical spare parts on hand. Stock extra filters, a replacement pressure switch, check valves, and basic fittings. When you’re off-grid, waiting days for parts delivery means no running water—a situation worth avoiding with a small investment in backup supplies.
Create a simple maintenance log that tracks all tasks completed, parts replaced, and observations made. This record helps you optimize your schedule based on actual conditions and provides valuable information when troubleshooting problems or planning upgrades.
The beauty of consistent off-grid water maintenance is that it becomes routine. Tasks that seem overwhelming at first become second nature after a few cycles. Your reward is a reliable water system that serves your cabin for decades with minimal disruption and maximum performance.
Troubleshooting Common Off-Grid Water Problems
Your cabin’s water system works well most of the time. But knowing how to fix common problems saves stress and money. Having good skills in fixing water problems means you won’t be left waiting for help.
Start by observing the symptoms and checking simple solutions first. This method helps you find the problem area quickly. You’ll know if you can fix it yourself or need professional help.
Most water system troubles have simple causes. A calm, step-by-step investigation usually finds the problem faster than panicking or randomly changing parts.
Fixing Pressure Problems
Low water pressure is a common problem for cabin owners. First, find out if the problem is with your whole system or just one faucet.
If only one faucet has weak flow, it might be a clogged aerator or a fixture-specific problem. Clean out any sediment or mineral buildup from the aerator. This simple fix solves most single-fixture issues.
When low water pressure affects your whole cabin, the problem is in your main system. Here’s what to check:
- Sediment filters: Clogged filters are the main cause of system-wide pressure loss. Check and clean or replace your filters first.
- Pressure tank condition: A waterlogged tank loses its air charge and can’t maintain proper pressure. Tap the tank with your knuckle—a hollow sound means it’s working correctly, while a dull thud indicates waterlogging.
- Pressure switch settings: These can drift over time. Verify your cut-in and cut-out pressures match your system specifications.
- System leaks: Even small leaks reduce pressure throughout your cabin. Inspect all visible pipes and connections for moisture.
- Pump performance: Aging or failing pumps gradually lose their ability to generate adequate pressure.
- Valve positions: Someone may have partially closed a main valve during maintenance.
For a waterlogged pressure tank, you’ll need to drain the system and recharge the tank with air. This process involves shutting off power, draining water below the tank level, and adding air through the tank’s valve until you reach the proper pressure (typically 2 PSI below your cut-in setting).
Addressing Water Quality Concerns
Water quality problems can range from minor annoyances to serious health concerns. Identifying the specific issue helps you apply the right solution quickly.
Cloudy or murky water usually indicates sediment in your system. Check your sediment filters first and replace them if needed. If you just drilled a new well or experienced heavy rain, allow time for stirred-up particles to settle naturally. Verify that surface water isn’t entering your system through damaged well casings or unsealed storage tanks.
Bad odors require detective work to trace their source:
- Rotten egg smell: This sulfur odor comes from hydrogen sulfide bacteria in wells or water heaters. Shock your well with chlorine or drain and disinfect your water heater.
- Musty or earthy odors: These point to algae growth in storage tanks. Clean your tanks thoroughly and ensure they’re properly sealed and light-blocked.
- Chemical smells: Any petroleum or chemical odor requires immediate testing and source investigation, as this could indicate contamination.
Staining problems tell you what minerals are in your water. Reddish-brown stains mean iron, black stains indicate manganese, and blue-green stains point to copper. Each requires specific treatment—iron filters for iron, water softeners for manganese, or pH adjustment for copper issues.
Taste problems with your drinking water often stem from high mineral content or old carbon filters. Test your water and replace carbon filters every six months to maintain fresh-tasting water. If problems persist after filter replacement, professional water testing identifies the specific contaminants causing unpleasant taste.
Quick Equipment Repairs
Equipment failures can disrupt your entire water supply, but many pump failure fixes are simpler than you might expect. Understanding common problems helps you restore service quickly.
When your pump won’t start, work through this checklist:
- Verify your power source is working—check solar panels, batteries, or generator
- Inspect circuit breakers and reset any that have tripped
- Test the pressure switch by manually operating it (push the lever if equipped)
- Check pressure tank air charge—low pressure prevents the switch from engaging
- Examine control box connections for loose wires or corrosion
A pump that runs constantly signals different problems. Check your entire system for leaks, even small ones that waste water and overwork your pump. Verify your pressure switch settings haven’t drifted too high. Test your pressure tank for waterlogging, which forces the pump to cycle constantly to maintain pressure.
Filter housing leaks typically result from worn o-rings or cross-threaded housings. Turn off water pressure before opening any filter housing. Replace o-rings annually as preventive maintenance, and always lubricate them with food-grade silicone before reassembly.
| Problem | Common Cause | Quick Fix | Long-term Solution |
|---|---|---|---|
| No water flow | Clogged filter or failed pump | Use backup hand pump | Clean filters or repair pump |
| Intermittent pressure | Waterlogged tank | Reduce water usage | Recharge or replace tank |
| Brown water | Iron bacteria or sediment | Flush system thoroughly | Install iron filter or shock well |
| UV light off | Burned bulb or dirty sleeve | Boil water for drinking | Replace bulb and clean sleeve |
Tank leaks require immediate attention to prevent water damage. Small pinhole leaks in older tanks can’t be reliably repaired—replacement is usually necessary. Before removing a pressure tank, shut off all power and drain the system completely to avoid flooding.
UV purification system failures often have simple causes. Verify the power supply is working and check that the bulb hasn’t reached its replacement interval (typically 12 months). Clean the quartz sleeve if it appears cloudy or has mineral deposits. A dirty sleeve blocks UV light from reaching your water, even if the bulb is new.
Having backup water access methods provides peace of mind during system failures. A simple hand pump connected to your well ensures you can always access water, even during extended power outages or major equipment problems.
Remember that methodical troubleshooting usually identifies problems faster than random repairs. When issues persist despite your best efforts, or when safety concerns arise, calling a professional prevents further damage and ensures proper repairs.
Keep detailed records of your pump failure fixes and other repairs. These notes help you spot patterns and anticipate future problems before they cause major disruptions to your water supply.
Building a Sustainable Water Future for Your Cabin
Creating a self-sufficient water system changes how you see water. You’ll use less water and value every drop more. This leads to better water habits that help your system and the planet.
You don’t have to have everything right from the start. Many start with rainwater collection and grow their system over time. You might add a well or switch to solar-powered equipment as you can. Building your sustainable cabin water system is a journey, not just a goal.
Good long-term planning means having backup systems. This way, a single problem won’t leave you without water. Using less water and choosing efficient appliances helps your system last longer. This ensures you have water when you need it most.
Keep detailed records of your system. Note any seasonal changes and get to know local water experts. This info is key for fixing problems and making your system better.
Off-grid water systems need more care than city water. But they offer independence and the joy of providing your own water. Today’s systems are reliable and durable. Your efforts are both practical and good for the planet, lasting for years.


