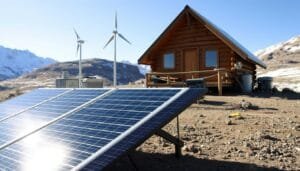
Turning your retreat into a cozy, functional space doesn’t have to be expensive. Many dream of a beautiful getaway but fear it’s too pricey. The truth is, smart planning and informed material choices can balance quality and economy.
OK Structures says DIY finishing costs between $5,000 and $15,000. Mid-range options are $15,000 to $30,000. Luxury features go over $30,000. Knowing these ranges helps plan a renovation that fits your budget.
Cost-effective doesn’t mean it looks cheap. With the right approach, you can make stunning spaces that last. Think about using laminate or luxury vinyl plank flooring for durability without the high cost. This guide will show you material choices, money-saving tips, and DIY strategies for affordable cabin decor at all levels.
Planning Your Cabin Interior on a Realistic Budget
Planning your cabin project wisely is key. Many owners start without a clear budget plan. This can lead to unfinished rooms and empty pockets.
First, figure out your total available funds for the project. Be honest about what you really have. Don’t count on future money that might not come.
Smart design means separating costs into must-haves and nice-to-haves. Must-haves are safety, structure, and basic needs. Nice-to-haves add beauty and comfort.
Here’s how to budget your cabin interior:
- Must-have investments: Insulation, moisture barriers, flooring, basic walls, and utilities
- Nice-to-have additions: Trim, light fixtures, accent walls, and built-ins
- Luxury elements: High-end finishes, specialty lighting, and premium hardware for later
Your cabin’s purpose affects your budget. A weekend home needs less than a full-time home. A hunting lodge focuses on durability and easy cleaning.
Consider these priorities:
| Cabin Type | Top Priority | Secondary Focus | Can Postpone |
|---|---|---|---|
| Weekend Retreat | Comfortable basics | Easy maintenance | Decorative details |
| Year-Round Home | Insulation & durability | Quality flooring | Luxury finishes |
| Rental Property | Durability first | Appealing aesthetics | Personal touches |
| Hunting Lodge | Easy-clean surfaces | Storage solutions | Decorative elements |
Use a spreadsheet to track every dollar. Include columns for costs, vendors, and dates.
Build in a contingency fund of 10-15% for surprises. This covers unexpected costs like extra materials or tools.
Common mistakes waste budgets. Owners often underestimate material needs and forget about tools and small items.
For tight budgets, finish main spaces first. Then add secondary areas as funds allow.
This approach avoids living in a construction zone. It also lets you improve your skills over time.
Be realistic about what you can afford now. Starting simple and upgrading later is better than never finishing.
Good planning saves money and headaches. The time spent on a budget will be worth it.
The Essential Guide to Budget Friendly Cabin Interior Finishes
“Interior finishes” is a broad term that includes all visible materials in a cabin. This includes wall coverings and floor materials, ceiling treatments, trim work, paint, stains, and protective coatings. Each part works together to create the cabin’s look and feel.
Knowing about budget friendly cabin interior finishes helps you plan better. You’re not just picking paint or flooring alone. You’re choosing materials that work well together and fit your budget.
To get beautiful rustic cabin finishes on a budget, spend wisely. Use premium materials in high-traffic areas like entryways and living spaces. Choose simpler options for bedrooms or storage areas. This way, you get the most visual impact and durability where it matters most.
Many cabin owners think affordable materials look cheap or wear out fast. But, budget-friendly options have improved a lot in the last decade. Now, you can find laminate flooring that looks like hardwood, vinyl planks with realistic textures, and engineered panels that look like solid wood.
Choosing between looks and durability is key. A cheaper material might need to be replaced soon. But, a more expensive option might last decades with little upkeep. Making smart choices is what makes a cabin project successful.
Use the “cost per year” method to compare materials. Divide the total cost by the expected lifespan in years. For example, a $2,000 floor lasting 20 years costs $100 per year. But, a $1,200 floor lasting 8 years costs $150 per year, making the more expensive option the better choice.
Here’s how different finish categories fit into a cabin budget:
- Wall finishes: Paneling, paint, or combination treatments that set the tone for each room
- Flooring materials: The foundation that handles daily foot traffic and defines comfort
- Ceiling treatments: Often overlooked but critical for visual interest and rustic character
- Trim and molding: The finishing details that give your cabin a polished, intentional appearance
- Protective coatings: Sealers, stains, and finishes that preserve your investment over time
Pinterest boards and cabin design galleries show many examples of beautiful spaces. These spaces prove that rustic cabin finishes don’t need a big budget. They need informed choices and creative techniques.
The key to successful budget finishing is understanding value, not just low prices. The cheapest material might cause more problems than it solves. Hidden costs can include difficult installation, frequent repairs, or early replacement.
Smart cabin builders look for materials that offer great looks, durability, and value. This might mean using reclaimed barn wood for a feature wall and painted plywood elsewhere. Or, choosing luxury vinyl planks over real hardwood for a warm look without the high cost.
Each section of this guide explores specific material categories. You’ll learn which products offer the best value, how to install them yourself, and where to find them at lower prices. This guide helps you make the many decisions involved in finishing your cabin interior.
Turning a cabin from rough framing to a finished home takes planning and research. It requires making choices that match your vision and budget. The information in this guide will help you make those choices confidently. This way, you can create a cabin that looks and feels exactly as you imagined, without financial stress or disappointment.
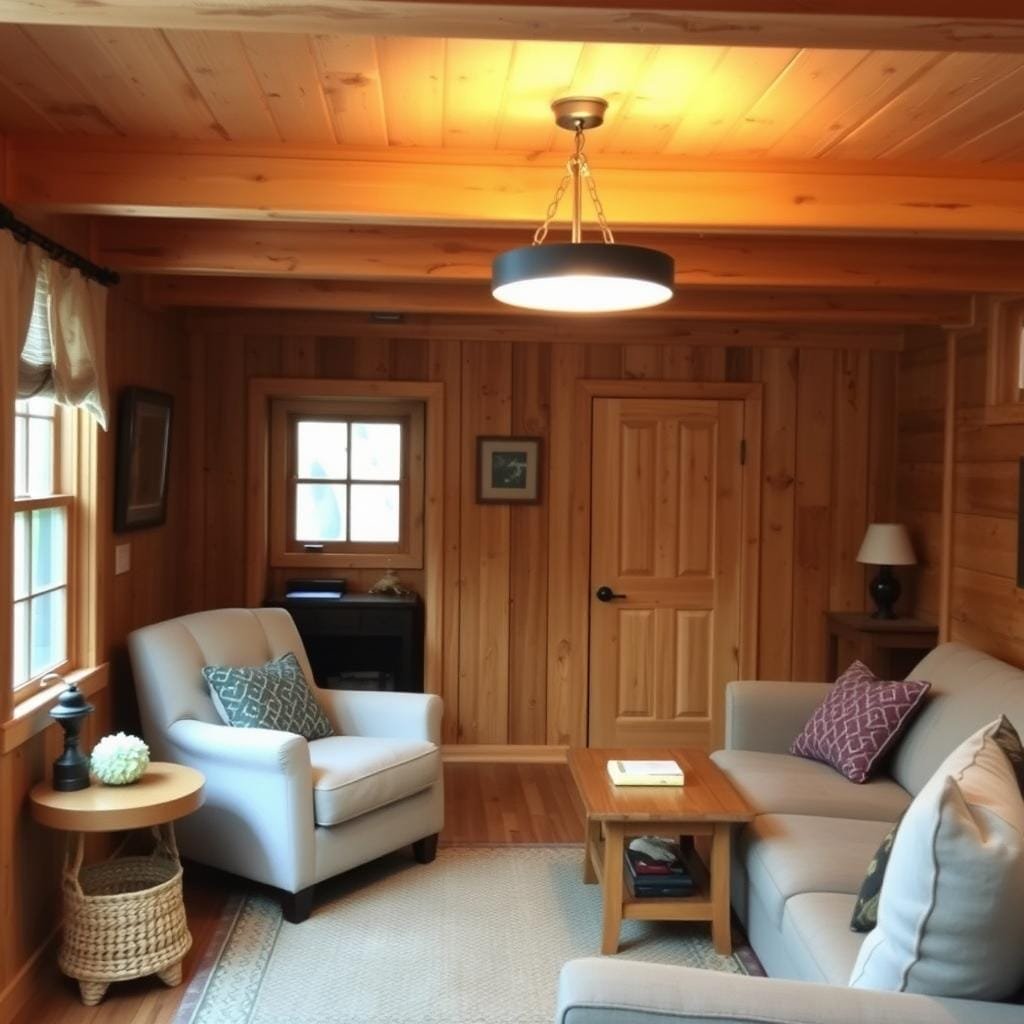
Affordable Wall Paneling Solutions for Every Cabin
Your cabin walls are a big area to cover, so picking the right materials is key to saving money. Inexpensive wood paneling can make your cabin look amazing without costing a lot. Whether you’re building or renovating, knowing the best wall treatments for your budget is important.
Many cabin owners face a challenge: keeping their space authentic yet affordable. The three paneling options we’ll discuss each have their own benefits. They offer durability and style while being easy on your wallet.
Tongue and Groove Pine: The Classic Choice
Tongue and groove pine is a top pick for cabin interiors. It’s known for seamless wall coverage that adjusts with temperature changes. The design ensures a smooth look without gaps.
This material comes in different grades. Clear pine is flawless but pricier. Knotty pine, though, offers 30-50% savings and a unique rustic charm.
You can find tongue and groove pine at most stores. Narrow boards give a refined look, while wider ones speed up installation. Its natural grain adds warmth and texture.
This material works well on walls and ceilings. Many cabins use it everywhere for a cohesive look. It’s better than drywall in unheated spaces, which tends to crack.
Plywood Paneling with Custom Staining
Plywood sheets are a budget-friendly option for affordable cabin decor. They can look like solid wood at half the cost. This is great for big areas where material costs add up fast.
Choose plywood with attractive veneers for the best look. BC or better grades are smooth and knot-free. You can install sheets vertically for height or horizontally for tradition.
Custom staining opens up endless design possibilities. Light or dark stains can change the whole look. Plywood veneer takes stain well, letting you try different techniques.
Edge finishing is important. Exposed plywood edges need trim to look polished. The prep work is worth it for the savings.
OSB Board as a Rustic Alternative
Oriented strand board (OSB) has become a design element for rustic cabins. Its distinctive textured surface gives an industrial look. It’s the most budget-friendly option for wall coverage.
Sealing and finishing OSB correctly is key. Raw OSB absorbs moisture and deteriorates. But sealed, it’s durable and adds visual interest without extra cost.
Many designers now use OSB for its unique look. It pairs well with smooth trim or metal accents for a modern cabin vibe. Clear sealers preserve the natural look, while tinted finishes can change the color.
OSB installs quickly, covering large areas fast. This saves time and money, making it a great choice for tight budgets.
Installation Tips for DIY Success
Proper installation ensures your paneling looks great and lasts long. Start by locating and marking all wall studs before you begin. This avoids mid-project headaches and ensures secure attachment.
Begin from a corner or a level reference point. Walls are rarely straight, so check often to avoid errors. Use a quality level throughout installation.
Here are essential installation steps for success:
- Acclimate wood materials to cabin conditions for 48-72 hours before installation
- Pre-drill nail holes in tongue and groove boards to prevent splitting at board ends
- Leave slight expansion gaps at ceiling and floor lines for seasonal wood movement
- Cut accurate openings for electrical outlets and switches before mounting panels
- Use construction adhesive in addition to nails for maximum hold and reduced squeaking
For tongue and groove, nail through the tongue at a 45-degree angle. This hides fasteners and creates a clean look. With plywood and OSB, plan fastener placement for uniform patterns or to hide them under trim.
Finishing Techniques for Maximum Durability
The finishing process turns raw materials into protected surfaces. It’s vital for cabins that face temperature and humidity changes. Proper sealing prevents moisture damage, the main enemy of wood.
For tongue and groove pine, start with light sanding. Apply wood conditioner before staining for even color. Choose between oil-based or water-based finishes based on your needs and budget.
Water-based polyurethanes are easier to clean up and have less odor. They dry fast, allowing for multiple coats in a day. Oil-based products offer better durability and richer colors but take longer to dry and need better ventilation.
Plywood paneling benefits from these finishing steps:
- Fill any visible seams or imperfections with wood filler matched to your stain color
- Sand smooth with 120-grit followed by 220-grit sandpaper for best results
- Apply pre-stain conditioner to prevent blotching on veneer surfaces
- Use gel stains for more control and richer color than liquid stains
- Seal with at least two coats of polyurethane, sanding lightly between coats
OSB needs a different approach because of its texture. Start with a clear penetrating sealer for moisture resistance. For color, try tinted sealers or diluted paint washes that settle into the texture.
Budget-friendly finishing products work well for cabin walls. You don’t need expensive brands for walls that won’t get heavy wear. Mid-range polyurethanes offer great protection at reasonable prices. Buying larger containers can save money, as the cost per ounce drops.
The finishing process also lets you get creative with affordable cabin decor. Whitewashing adds Scandinavian brightness, while distressing adds character. Try different techniques on scrap pieces before finishing your walls.
Cost-Effective Cabin Flooring That Withstands Heavy Use
Choosing cabin flooring doesn’t have to break the bank. Your cabin’s floor faces many challenges, like muddy boots and temperature changes. It’s important to find a material that balances cost with durability.
Today, you can find affordable cabin finishes that look professional. Options like waterproof vinyl and stained concrete offer unique benefits for different spaces. Knowing what matters most for your cabin is key.
Luxury Vinyl Plank: The Budget Champion
Luxury vinyl plank (LVP) has changed affordable flooring. It looks like hardwood or stone but costs less. Quality LVP costs between $1.50 and $4.00 per square foot, fitting most budgets.
LVP’s durability comes from its wear layer thickness. For busy areas, look for at least 12 mils. This layer protects against scratches and wear.
Installing LVP is easy with click-together planks. Most DIY projects finish in a weekend. Its waterproof nature is perfect for areas where moisture is a concern.
Keeping LVP clean is simple. Just sweep or vacuum and mop with water when needed. Unlike hardwood, it never needs refinishing, saving you money in the long run.
Laminate Flooring with Wood Appearance
Laminate flooring is a bit cheaper but looks like natural wood. It has photographic images under a protective layer. Prices range from $1.00 to $3.50 per square foot.
AC (Abrasion Criteria) ratings help choose the right laminate. AC3 is good for moderate traffic, while AC4 handles heavy use. For cabins with lots of guests, AC4 is a better choice.
The core material is important. Look for moisture-resistant or water-resistant cores. These cores prevent swelling from humidity or spills, making the floor last longer.
Proper installation is key. Use a quality underlayment and leave expansion gaps. These gaps help the laminate expand and contract without buckling.

Stained Concrete for High-Traffic Areas
Stained concrete is a budget-friendly option for cabins on a concrete slab. Acid staining or dyes can make plain slabs look attractive. DIY costs start at $2.00 per square foot.
Sealed concrete floors are very durable. They resist scratches, dents, and moisture. High-traffic areas like entryways and kitchens benefit from concrete’s strength.
Preparing the surface is important. Clean, etch, and sometimes grind the concrete. Apply several coats of sealer for protection. The process is time-consuming but doesn’t require special skills.
Comparing Durability and Installation Costs
Comparing flooring options helps you make a better choice. Each material has its own benefits based on your budget and needs. This comparison highlights the key factors to consider.
| Flooring Type | Cost Per Sq. Ft. | Expected Lifespan | Moisture Resistance | DIY Installation |
|---|---|---|---|---|
| Luxury Vinyl Plank | $1.50 – $4.00 | 15-25 years | 100% waterproof | Very easy (click-together) |
| Laminate Flooring | $1.00 – $3.50 | 10-20 years | Water-resistant (with proper core) | Easy (click-together) |
| Stained Concrete | $2.00 – $5.00 | 20+ years (with resealing) | Excellent (when sealed) | Moderate (requires surface prep) |
| Basic Carpet | $0.75 – $2.50 | 5-10 years | Poor (absorbs moisture) | Moderate (needs stretching tools) |
Choosing the right flooring depends on your cabin’s needs and your budget. For example, a vacation cabin might prefer LVP for its ease of maintenance. A year-round home might choose stained concrete for its durability.
Some cabin owners mix flooring types to save money. Use LVP in wet areas, laminate in living spaces, and concrete in entryways. This strategy uses each material’s strengths while keeping costs down.
Inexpensive Wood Paneling Options for Rustic Cabin Finishes
Creative cabin owners find ways to get stunning wood paneling without spending a lot. They use creative materials and simple installation methods. Inexpensive wood paneling can look great if you know where to find it and how to prepare it.
Cost-effective wall treatments can add more character than expensive ones. Reclaimed materials offer unique textures and stories. Your cabin walls can show off rustic cabin finishes that tell a story, saving money for other upgrades.
Pallet Wood Treatment and Application
Pallet wood is a cheap but effective paneling material. Warehouses and shipping companies often throw away pallets with usable lumber. You can find enough material for a whole wall without spending a dime.
Safety is key when working with pallets. Look for the “HT” stamp to ensure the wood is safe. Avoid pallets marked “MB” or without any stamps. Choose international pallets with IPPC stamps for safe interior use.
Preparing pallet boards takes patience but no special skills. Remove nails carefully to avoid splitting the wood. Use a reciprocating saw for stubborn nails. Clean the boards well to remove dirt and oils.
To get a uniform look, decide if you want to keep the weathered look or make it smooth. Light sanding can smooth out splinters while keeping the aged look. For a more polished look, use a planer to make the boards even.
Install the boards like regular paneling, using finish nailers or screws. Stagger the board lengths for a unique look and to save material. Small gaps between boards add to the rustic feel. Use clear polyurethane to preserve the natural look, or stains to unify the color.
Shiplap Alternatives Using Standard Boards
Shiplap looks great but can be expensive. You can get a similar look with standard pine boards at a lower cost. A 120-square-foot accent wall costs about $320 with pine boards, compared to $480 for shiplap.
Creating faux shiplap is easy with basic carpentry skills. Use 1×6 or 1×8 pine boards from home improvement stores. Install them horizontally with small gaps between boards. This creates the shiplap look without the high cost.
For real shiplap profiles, use a table saw or router to create rabbeted edges. This method requires more precision but saves about 35% compared to manufactured shiplap.
Start installing from the bottom up for a professional look. Use spacers to keep gaps even. Finish nail at each stud, then fill the holes with putty if needed.
| Paneling Option | Material Cost (120 sq ft) | Skill Level Required | Installation Time |
|---|---|---|---|
| Reclaimed Pallet Wood | $0-50 (fasteners/finish) | Beginner-Intermediate | 12-16 hours |
| Standard Pine Boards (faux shiplap) | $280-350 | Beginner | 8-10 hours |
| DIY Rabbeted Shiplap | $280-350 | Intermediate | 10-14 hours |
| Manufactured Shiplap | $450-550 | Beginner | 8-10 hours |
Paint can unify different boards, creating a modern look. White or light gray paint hides color and grain differences. Use pre-stain conditioner on pine boards before staining to get even coloring.
Budget-Friendly Ceiling Treatments That Add Character
Looking up can reveal a smart investment in your cabin renovation. Affordable ceiling treatments can dramatically change your space. The ceiling is your cabin’s fifth wall, yet many owners leave it plain.
Smart ceiling choices enhance your cost-effective cabin design. They make rooms feel larger, brighter, and more welcoming. Pinterest shows inspiring examples of painted ceilings in white or light colors.
Exposed beam treatments add architectural interest without a big expense. The key is to choose approaches that match your skill level and budget.
Painted Tongue and Groove Ceilings
The same tongue and groove material used for cabin walls is budget-friendly on ceilings. It costs about $1.50 to $3.00 per square foot. White or light-painted finishes reflect light and add warmth.
Installation is challenging, as you’re working overhead. Renting scaffolding costs $75 to $150 per week. Or, you can build temporary platforms using sawhorses and planks.
Apply primer before installation to avoid neck strain. Many cabin owners complete this affordable cabin decor project over a long weekend. The painted tongue and groove creates a perfect blend of cottage charm and modern brightness.
Beadboard Panels for Cottage Appeal
Beadboard panels are an economical option for ceiling coverage. Standard 4×8 sheets cost between $15 and $25 each. Their linear grooves add visual interest and traditional cottage character.
Calculate your ceiling square footage and divide by 32 to determine how many panels you need. Add 10% extra for cuts and mistakes. Locate ceiling joists accurately before starting installation, marking them with chalk lines for reference.
Attach panels directly to joists using construction adhesive and finish nails every 12 inches. Conceal seams with thin trim strips or wood filler. Creating professional transitions at walls requires cutting panels to fit snugly and adding crown molding or simple trim pieces.
This cottage-style treatment works beautifully in bedrooms, bathrooms, and covered porches. The installation goes quickly, making it ideal for DIY enthusiasts with limited time.
Exposed Joists with Drywall Infill
The most budget-conscious ceiling approach transforms structural elements into design features. Leaving joists exposed while installing drywall or painted boards only between joists creates architectural depth and visual interest. This method uses minimal materials while maximizing impact.
Material costs drop to $0.75 to $1.50 per square foot. This technique works well in loft spaces or cabins with attractive structural timbers. Sand and stain or paint the exposed joists to create a unified, intentional appearance.
Insulation requires careful planning with this approach. Install rigid foam insulation above the ceiling structure before adding the infill materials. Or, use spray foam insulation between joists before installing drywall sections. This maintains energy efficiency while preserving the exposed beam aesthetic.
Paint exposed joists and infill panels in coordinating colors to unify the look. Dark-stained beams with white infill panels create dramatic contrast. Painting everything the same light color maximizes brightness. Integrate lighting by running electrical through joist cavities and installing fixtures that complement the exposed structure.
| Ceiling Treatment | Material Cost per Sq Ft | Installation Difficulty | Best Applications | Character Impact |
|---|---|---|---|---|
| Painted Tongue and Groove | $1.50 – $3.00 | Moderate | Main living areas, bedrooms | High – classic cabin texture |
| Beadboard Panels | $0.50 – $0.80 | Easy to Moderate | Bathrooms, porches, smaller rooms | Medium – cottage charm |
| Exposed Joists with Infill | $0.75 – $1.50 | Moderate | Lofts, open-concept spaces | Very High – architectural drama |
| Standard Drywall (comparison) | $1.20 – $2.00 | Easy | Any room | Low – plain finish |
Your cabin’s ceiling doesn’t have to be boring or expensive to create stunning visual impact. These three approaches to cost-effective cabin design offer varying levels of investment and effort. Choose the method that matches your budget, timeline, and desired aesthetic to transform your space from the top down.
DIY Cabin Interior Upgrades That Slash Labor Costs
Labor costs often eat up a big chunk of cabin renovation budgets. But, with basic skills and the right approach, homeowners can save money and gain valuable experience. According to OK Structures, DIY cabin interior finishing can keep total project costs in the $5,000-$15,000 range. This is compared to $15,000-$30,000 when hiring contractors, saving up to 50% or more.
The secret is not trying to do everything yourself. Instead, focus on high-labor, low-complexity jobs. These are tasks that professionals charge a lot for but don’t need years of training for. DIY cabin interior projects can have a big budget impact while building skills for ongoing maintenance.
Even beginners can do many finishing tasks with good results. Your first tries might not be perfect, but they’ll be better than you think. Paint and caulk hide small mistakes, and your skills get better with each project.
Installing Your Own Baseboard and Crown Molding
Trim installation looks tough but is surprisingly easy. Contractors charge $2-$5 per linear foot for baseboard installation alone. This means a small cabin could cost $800-$2,000 just for baseboards. When you do it yourself, you only pay for materials.
Start by measuring each wall carefully and marking stud locations for secure attachment. A stud finder helps avoid missing nails. Cut your trim pieces using a miter saw for clean corners.
Inside corners are the biggest challenge, but coping joints deliver professional results even with imperfect walls. This technique involves cutting one piece square into the corner, then trimming the other piece to match. YouTube tutorials make this easier to understand than written descriptions.
Nail holes get filled with wood putty before painting, hiding small mistakes. Out-of-square corners are common in cabin construction, so don’t expect perfection. Caulk is your best friend for filling gaps where trim meets walls, creating clean lines.
Crown molding requires working overhead. Take breaks to avoid neck strain. Consider renting a pneumatic nail gun for this part. The rental cost of $30-$50 per day is worth it for the speed and reduced fatigue.
Hand-Applying Natural Oil Finishes
Professional spray finishing needs expensive equipment and skill, but hand-applied natural oil finishes are affordable and beautiful. Tung oil, Danish oil, and linseed oil enhance wood grain and protect against moisture and wear.
These finishes are forgiving of application mistakes. Unlike polyurethane, which shows every brush stroke and dust particle, oil finishes soak into wood. Mistakes disappear as the oil penetrates.
Application is simple. Pour a small amount onto a clean cloth and rub it into the wood surface following the grain direction. Let it penetrate for 15-20 minutes, then wipe away excess with a dry cloth. Multiple thin coats build protection gradually while maintaining the wood’s natural appearance.
The process takes time but requires no special skills. A single person can finish an entire cabin interior for $200-$400 in materials, compared to $2,000-$5,000 for professional spray finishing. The time investment is substantial, but you can work at your own pace between other projects.
Different oils offer varying characteristics. Tung oil provides excellent water resistance and durability. Danish oil combines tung oil with varnish for easier application. Linseed oil is the most affordable option but takes longer to cure fully. All three deliver authentic, natural-looking results that improve with age.
Creating Built-In Storage Solutions
Professional carpenters charge a lot for custom storage, but basic built-ins require only basic carpentry skills. Simple shelving units between wall studs, window seats with storage compartments, and rustic open shelving using reclaimed lumber transform unused cabin spaces into functional assets.
Built-in shelving between exposed studs requires minimal materials. Cut plywood or solid wood boards to fit the 14.5-inch gaps between standard 16-inch-on-center studs. Secure them with simple L-brackets or cleats screwed into the studs. This approach costs $30-$60 per section versus $200-$400 for professional installation.
Window seats combine seating with hidden storage in one DIY cabin interior project. Build a simple frame from 2×4 lumber at the desired height, typically 18-20 inches. Add a plywood top with piano hinges for access to storage below. Finish with a cushion, and you’ve created functionality contractors would charge $800-$1,500 to build.
Open shelving using reclaimed wood and pipe brackets delivers industrial-rustic charm at minimal cost. These budget friendly cabin interior finishes require only basic measuring, drilling, and leveling skills. Each shelf costs $20-$40 in materials compared to $100-$200 installed professionally.
Essential Tools You’ll Actually Need
Smart tool investment balances capability with affordability. You don’t need a fully stocked workshop to tackle DIY cabin interior projects successfully. Start with must-have tools and borrow or rent specialized equipment for occasional use.
| Tool Category | Must-Have Items | Estimated Cost | When to Rent Instead |
|---|---|---|---|
| Power Tools | Cordless drill, circular saw | $150-$250 | Table saw, compound miter saw |
| Hand Tools | Hammer, measuring tape, level, square | $60-$100 | Specialty clamps, pipe cutters |
| Finishing Tools | Paint brushes, rollers, putty knives | $40-$80 | Paint sprayer, floor sander |
| Safety Equipment | Safety glasses, dust masks, work gloves | $30-$50 | Respirator for major demolition |
Your initial tool investment of $300-$500 pays for itself on your first major project. Quality matters more for frequently used items like drills and measuring tapes. Tools used less often can start at budget-friendly prices and upgrade later if cabin projects become ongoing hobbies.
Start with lower-cost tool brands that offer decent performance. Once you’ve determined which tools you use most frequently, invest in premium versions. This approach prevents spending thousands on tools that might see limited use while ensuring you have everything needed to complete projects successfully.
The satisfaction of completing DIY cabin interior work extends beyond financial savings. You’ll gain skills applicable to future maintenance, understand your cabin’s construction intimately, and experience the pride of creation that hired work never provides. These intangible benefits make the time investment worthwhile even before calculating the substantial money saved.
Sourcing Reclaimed Materials for Authentic Character
Looking for reclaimed materials is a treasure hunt that saves money and adds character. Salvaged wood and architectural pieces bring history to your space. They also cut down on material costs, turning budget limits into creative chances for unique interiors.
Reclaimed materials have weathered textures and colors that take years to develop. The aged wood’s patina tells a story, connecting your cabin to local heritage. Plus, many of these materials are free or much cheaper than new lumber.

Finding Free or Low-Cost Barn Wood
Farmers and rural property owners often have old barns they want to remove. If you offer to dismantle these structures for the lumber, it’s a win-win. You get beautiful wood, and they get free demolition services.
Social media is a great place to find barn wood. Join local Facebook groups focused on building materials or homesteading. Craigslist also has listings for free materials, including teardown opportunities.
When looking at barn wood, check for structural soundness despite weathering. Boards should be straight and not severely warped. The best pieces have attractive grey or brown patinas, creating stunning rustic cabin finishes.
Always prioritize safety when harvesting barn wood. Wear gloves, safety glasses, and sturdy boots. Avoid wood with lead paint or chemicals that could be harmful. Be careful of structural hazards in old buildings before starting demolition.
Salvage Yards and Architectural Recyclers
Architectural salvage businesses have materials from old buildings. They sell everything from vintage doors to flooring and cabinetry. Habitat for Humanity ReStores sell new and used materials at low prices.
Successful salvage yard shopping takes strategy and patience. Visit often because inventory changes. Early weekday visits are best to find new items before weekend crowds.
Be ready to negotiate at most salvage yards, even for bulk purchases. Ask if prices can be adjusted, and many offer discounts for cash or end-of-month sales.
Check salvaged materials carefully before buying. Look for damage, missing parts, or structural issues. Bring a tape measure to ensure the items fit your space.
| Material Source | Average Cost Savings | Best Items to Find | Time Investment Required |
|---|---|---|---|
| Barn Demolition | Free to $0.50/board foot | Wall paneling, beams, flooring | High (8-16 hours per structure) |
| Salvage Yards | 40-70% below retail | Doors, windows, trim, fixtures | Medium (2-4 hours per visit) |
| Habitat ReStores | 50-80% below retail | Cabinetry, lighting, hardware | Low (1-2 hours per visit) |
| Online Marketplaces | Free to 60% below retail | Lumber, building materials, decor | Medium (ongoing monitoring) |
Cleaning and Preparing Salvaged Lumber
Preparing salvaged materials for your cabin is a big job. But the effort turns cheap materials into beautiful parts of your interior. Knowing these steps helps plan your project better.
First, remove all nails and screws from the wood. Use a cat’s paw and reciprocating saw for this. Be careful not to split the wood. Metal detection helps avoid hidden nails.
Then, clean the wood with pressure washing or hand-scrubbing. This removes dirt and debris. For barn wood, you might want to keep the grey patina. But if you prefer lighter wood, oxalic acid can remove the grey.
Planing or sanding the wood makes it ready for installation. A benchtop planer works well for large amounts. For smaller projects, hand sanding is better.
Always check the wood for damage or weakness before using it. This step prevents problems and ensures your renovation lasts.
Plan your time carefully. Cleaning and preparing each board takes about 30-45 minutes. Multiply this by your project size to estimate the total time. This effort is worth it for materials with unique character.
Cheap Cabin Renovation Strategies That Don’t Look Cheap
Renovating a cabin on a budget doesn’t mean it has to look cheap. Smart design choices can make your space look high-end, even if it cost less. The key is in choosing materials wisely and placing them thoughtfully.
Our eyes naturally follow certain paths in a room. We notice textures, surfaces we touch, and focal points first. By focusing on these areas, you can make your cabin look expensive without spending a lot.
Mixing High-Impact and Low-Cost Materials
Designers often mix expensive pieces with cheaper ones to create stunning spaces. This way, the eye focuses on the interesting parts while ignoring the rest. You can do the same in your cabin without spending a lot.
For example, a stunning stone fireplace surround can be the centerpiece of your living room. Paint the walls around it at a lower cost. This makes the fireplace stand out, while the walls blend in.
Hardwood flooring in key areas adds impact without breaking the bank. Use luxury vinyl plank in bedrooms for durability and savings. This mix of materials makes your cabin look great without costing too much.
Feature a single accent wall with expensive reclaimed wood. Paint the other walls a complementary color. This creates a dramatic look that suggests the whole space is high-end. When you build your dream cabin, this strategy maximizes your budget’s impact.
| Room Area | Statement Element | Supporting Materials | Cost Savings |
|---|---|---|---|
| Living Room | Reclaimed wood accent wall ($800) | Painted drywall other walls ($300) | 55% vs. all reclaimed |
| Kitchen | Butcher block island top ($600) | Laminate perimeter counters ($900) | 60% vs. all butcher block |
| Main Floor | Hardwood in living area ($2,200) | Vinyl plank in bedrooms ($800) | 45% vs. all hardwood |
| Bathroom | Tile shower surround ($650) | Painted beadboard walls ($180) | 70% vs. all tile |
Using Paint to Unify Mismatched Elements
Paint is a great equalizer in affordable cabin decor. It can turn different materials into a cohesive look. This is key when using salvaged materials or installing finishes as budget allows.
Paint all trim the same color, no matter the material. This creates consistency. A crisp white or warm cream can unify different wood grains and finishes.
Ceiling treatments also benefit from paint. Mixing tongue and groove, beadboard, and exposed joists with paint creates variety. Choose semi-gloss or satin finishes for cabins, as they handle moisture well and are easy to clean.
Color choice impacts perceived quality. Earth tones and muted shades complement rustic materials and hide imperfections. Consider these cabin-appropriate palettes:
- Warm neutrals: Greige, taupe, and warm gray create sophisticated backdrops that make wood tones pop
- Soft whites: Cream, ivory, and antique white brighten spaces without the sterile feel of pure white
- Nature-inspired accents: Sage green, slate blue, and warm terracotta add personality without overwhelming
- Rich darks: Charcoal, navy, and deep forest green create drama on accent walls
Strategic Splurging for Maximum Effect
Not all elements in your cabin need the same budget. Focus on areas where more money makes a big difference. These high-touch, high-visibility elements shape guest perceptions more than their size suggests.
Hardware and fixtures are critical. Upgrading from basic to mid-range options can transform your kitchen’s look without a huge cost. Think $8 per pull instead of $2.
Entrance areas make a big first impression. A beautiful front door, quality lighting, and durable flooring set a quality tone. Guests form opinions quickly, making this a key splurge area.
Kitchen countertops are key visual anchors. Using butcher block on an island and laminate elsewhere creates a premium look at a lower cost. The island becomes a focal point that draws attention away from the cheaper surrounding surfaces.
Consider this budget allocation framework for a balanced approach to your cheap cabin renovation:
- 60% to standard finishes: Quality but economical materials throughout most of the cabin
- 30% to enhanced finishes: Upgraded materials in main living areas and high-traffic zones
- 10% to statement pieces: Premium details and focal points that elevate the entire space
This distribution ensures enough budget for the whole project while saving for key visual elements. A $15,000 budget breaks down to $9,000 for basics, $4,500 for upgrades, and $1,500 for premium touches.
The most successful affordable cabin projects look intentional, not cheap. By choosing materials wisely, using paint for cohesion, and splurging on key elements, your cabin can look great without breaking the bank. The goal is to make design choices so deliberate that the budget becomes irrelevant to the final look.
Affordable Cabin Decor Through Creative Finishing Techniques
Using the right finishing technique can turn simple lumber and basic supplies into stunning rustic cabin finishes. Creative methods can make budget-friendly materials stand out, giving your cabin a premium look without the high cost. These techniques don’t need expensive tools or materials, just patience and practice.
Being creative with finishing methods is key. Test each technique on sample boards before tackling full walls or surfaces. This way, you avoid costly mistakes and build confidence in your skills.
What makes creative finishing special is its forgiving nature. Imperfections add character, making your cabin unique. Handcrafted touches give your cabin a personal touch that mass-produced finishes can’t match.
Whitewashing for a Scandinavian Look
Whitewashing can give new life to dark or dated wood paneling at a low cost. This classic technique lightens surfaces while preserving visible grain patterns, creating bright, airy interiors inspired by Scandinavian design. A single gallon of white paint diluted with water can transform entire rooms for under $30.
The simplest whitewash recipe combines one part white latex paint with three parts water. Adjust this ratio to control opacity—more water creates subtle tinting, while less water provides heavier coverage. Apply the mixture with a brush or cloth, working in manageable sections.
Professional results come from consistent application methods. Brush the whitewash onto wood surfaces following the grain direction. Immediately wipe excess with a clean cloth to achieve your desired transparency level.

Traditional lime-based whitewash offers enhanced durability for high-traffic areas. Mix hydrated lime with water and a pinch of salt for authentic historical results. This mixture penetrates deeper into wood fibers than paint-based alternatives.
Knotty pine paneling that feels outdated transforms dramatically with whitewashing. The technique updates 1970s-era cabins without removing existing materials. Dark spaces become welcoming retreats that feel larger and more modern.
- Sand surfaces lightly before application for better paint adhesion
- Work in thin layers, building coverage gradually for natural results
- Seal with clear polyurethane after drying for added protection
- Practice on scrap boards to perfect your preferred opacity level
Creating Faux Stone Accent Walls
Faux stone techniques deliver the visual impact of masonry at a fraction of the cost. Joint compound, basic paint colors, and creative texturing create realistic stone appearances for under $50 versus $500-1500 for authentic stone installation. These accent walls shine behind wood stoves, around fireplaces, or as focal points in living areas.
Start by sketching stone shapes directly onto your wall surface with pencil. Vary sizes and create irregular patterns that mimic natural stacking. Apply joint compound within these outlines using a trowel, building thickness randomly for dimensional depth.
Texture becomes key for believable stone appearance. Dab the wet compound with crumpled plastic bags, sponges, or brushes to create pitted, weathered surfaces. Some stones should appear smooth while others show rough, craggy texture for authentic variation.
Color application requires patience and layering. Base coat the entire wall in a medium gray or tan tone. Dry-brush lighter shades across raised areas and darker tones into crevices. Add subtle accent colors—rust, moss green, or charcoal—sparingly for natural mineral variations.
- Prime the wall surface with quality bonding primer
- Outline individual stone shapes in varied sizes
- Apply joint compound within outlines, varying thickness
- Texture each stone uniquely while compound remains workable
- Allow 24-48 hours for complete drying
- Paint base coat, then add layered color variations
- Seal with matte-finish polyurethane for durability
The grouting between stones adds final realism. Paint these areas darker than the stones themselves, creating shadow depth. Some installers apply actual grout for enhanced texture, though paint typically suffices for visual impact.
DIY Wood Staining and Aging Methods
Aging techniques give new lumber the character of expensive reclaimed wood through simple chemical reactions and artistic distressing. These affordable cabin decor methods allow you to use budget-friendly materials while achieving sought-after vintage aesthetics. New pine boards transform into weathered treasures with supplies from your kitchen and garage.
The vinegar and steel wool method creates authentic weathered gray finishes naturally. Soak steel wool pads in white vinegar for 24-48 hours until the solution turns dark. Brush this mixture onto raw wood and watch tannins react, producing silvery-gray tones within hours.
Tea and coffee staining provides instant aging for lighter woods. Brew strong black tea or coffee and apply multiple coats to bare wood, allowing each layer to dry completely. The tannins darken the wood progressively, creating rich, aged patinas without commercial stains.
Layered stain applications build complex color depth impossible with single-coat methods. Apply a dark walnut stain first, then immediately wipe most away. Follow with medium brown tones in random areas. Finish with light golden stains in selected spots for natural variation.
| Aging Technique | Materials Needed | Time Required | Best Applications |
|---|---|---|---|
| Vinegar & Steel Wool | Steel wool, white vinegar, brush | 48 hours prep + 4 hours application | Weathered gray exterior looks, barn wood effects |
| Tea/Coffee Staining | Black tea or coffee, brush, rags | 2-4 hours (multiple coats) | Subtle aging, antique furniture, light distressing |
| Layered Stain Application | 3-4 stain colors, brushes, rags | 6-8 hours with drying time | Rich depth, premium wood mimicry, feature walls |
| Mechanical Distressing | Chains, hammers, nails, sandpaper | 1-3 hours per section | Heavy wear patterns, rustic beams, reclaimed look |
Mechanical distressing adds physical wear patterns that complete the aged appearance. Hit boards with chains to create dents and dings. Drive finishing nails partially into surfaces, then extract them for authentic nail holes. Sand edges heavily where natural wear would occur over decades.
Selective distressing appears more authentic than uniform aging. Concentrate wear patterns around knots, edges, and areas that would receive the most handling. Leave some sections relatively pristine for realistic contrast.
These creative techniques prove that budget limitations inspire innovation. Sample boards become your testing ground for perfecting personal style. Each cabin develops distinctive character through handcrafted finishes that reflect individual creativity and resourcefulness.
Smart Shopping for Log Cabin Budget Makeover Materials
Knowing where and when to shop for materials can stretch your budget. Buying smart can save thousands without losing quality or style. It’s all about understanding seasonal sales, exploring different stores, and spotting deals others miss.
Many cabin owners buy at full price from big-box stores. But, smart shoppers can cut material costs by 25-40% with careful planning. This turns budget-friendly finishes into a chance to get top-quality materials at low prices.
Timing Your Purchases with Seasonal Sales
Building material prices change with the seasons. Knowing these patterns helps you buy when prices are low. This way, you save money by timing your purchases right.
In late winter, look for insulation and heating items on sale. Spring brings discounts on outdoor materials. Summer is the best time for insulation and interior items.
Fall offers big savings on flooring, paint, and finishes. Black Friday to New Year’s is the best time for appliances and fixtures. Cabin owners can save thousands by buying big items during this time.
| Season | Best Material Purchases | Average Savings | Shopping Strategy |
|---|---|---|---|
| Late Winter (Jan-Feb) | Insulation, vapor barriers, heating supplies | 20-35% | Clearance sales to make room for spring inventory |
| Spring (Mar-May) | Lumber, exterior finishes, outdoor materials | 15-25% | Pre-season promotions and bulk discounts |
| Summer (Jun-Aug) | Interior materials, drywall, paneling, trim | 25-40% | Low demand period for indoor materials |
| Fall (Sep-Nov) | Flooring, paint, stains, sealers | 20-30% | End-of-season clearances before holidays |
| Holiday Period (Nov-Jan) | Fixtures, appliances, lighting, hardware | 30-50% | Black Friday, Cyber Monday, year-end clearances |
Buy non-perishable materials when prices are low, even if you won’t install them right away. Paint, flooring, and fixtures store well and don’t lose value. This patient approach can save a lot of money over time.
Shopping Habitat for Humanity ReStores
Habitat for Humanity ReStores sell donated materials at 50-90% off retail prices. These stores get donations from manufacturers and homeowners. Shopping here supports affordable housing and stretches your budget.
ReStores have everything from paint to kitchen cabinets. Quality varies but often includes premium brands. Shopping here requires flexibility because inventory changes often.
To shop well, know your cabin’s measurements and material needs. Take photos and make a detailed list. Visit often because the best deals go fast.
Real savings show the power of ReStore shopping:
- Kitchen cabinets: $300-500 versus $2,000-3,000 retail
- Quality interior paint: $5-10 per gallon versus $35-50 retail
- Hardwood flooring: $1-2 per square foot versus $5-8 retail
- Light fixtures: $10-20 versus $100-200 for comparable new items
- Interior doors: $20-40 versus $150-300 retail
Some renovators furnish entire cabins from ReStores, saving thousands. The hunt for deals makes shopping fun. Many ReStores offer delivery, making it easier to get big items.
Buying Contractor Overstock and Returns
Contractors often have leftover materials from jobs or mistakes. These can be great deals for savvy buyers. Overstock usually sells for 40-60% off retail to help contractors clear space.
Wholesalers have sections for returned items and overstock. These materials are often in good shape but can’t be sold as regular items. Online marketplaces for construction closeouts help find deals nationwide.
Local classifieds show contractors selling leftover materials. They often price items low to sell quickly. Buying multiple items can lead to more discounts.
Check if discount materials fit your project needs. A contractor’s leftover flooring might be perfect for a bedroom but not the whole cabin. Inspect returned items for defects that caused the return.
Negotiate prices, even for bulk purchases. Contractors and wholesalers often accept reasonable offers. Cash payments can lead to more discounts.
Combining seasonal sales, ReStore shopping, and contractor overstock can save a lot. Smart shoppers take advantage of deals throughout the year. This approach is one of the best ways to cut renovation costs without sacrificing quality.
Moisture-Resistant Finishes That Protect Your Investment
Controlling moisture is key to a cabin’s long life. Without it, even the cheapest finishes will not last. Water damage can cause wood to rot, mold to grow, and paint to peel, leading to costly repairs.
But, you don’t have to spend a lot to protect your cabin. A few hundred dollars on barriers and sealers can save you tens of thousands in the future. This makes moisture control a smart investment in cabin design.
Knowing which products to use and where is important. Some areas need strong protection, while others are fine with basic coverage.
Affordable Vapor Barriers and Their Installation
Vapor barriers stop moisture from damaging your cabin’s walls and ceilings. These thin sheets create a barrier that keeps water vapor out of insulation and cavities.
The cheapest option is 6-mil polyethylene sheeting, costing just pennies per square foot. A 1,000-square-foot cabin needs about $50-75 worth. Thicker options or those with sealing tapes cost more but are easier to install.

Where to place vapor barriers depends on your climate. In warm areas, put them on the interior side of insulation. This stops indoor air from condensing in cold cavities.
How you install matters as much as what you use. Follow these steps for effective protection:
- Overlap seams by at least 6 inches and seal them with specialized vapor barrier tape
- Seal all penetrations around electrical boxes, pipes, and fixtures with acoustical sealant
- Run barriers continuously around window and door frames without gaps
- Secure barriers to framing with staples every 12-16 inches along studs and joists
- Avoid puncturing or tearing the material during and after installation
Vapor barriers add $100-200 to cabin projects but prevent costly damage. This is one of the best investments in cabin construction.
Water-Based vs. Oil-Based Sealers
Coatings protect your cabin’s wood surfaces. Choosing between water-based and oil-based sealers affects both cost and performance.
Water-based sealers are better for interior use. They dry fast, clean up easily, and have little odor. They cost less than oil-based options and work well for most areas.
These products cost $25-40 per gallon and cover 350-400 square feet per coat. Floors need three coats, while walls need only two.
Oil-based sealers penetrate wood deeper and offer stronger protection. They’re best for high-traffic and wet areas. They take longer to dry, require solvent cleanup, and have stronger odors. They cost more.
Expect to pay $35-60 per gallon for quality oil-based products. They cover slightly less area due to their thickness.
Use both types wisely. Water-based for bedrooms and living areas, and oil-based for wet areas. This strategy saves money without sacrificing protection.
| Feature | Water-Based Sealers | Oil-Based Sealers |
|---|---|---|
| Drying Time | 2-4 hours between coats | 6-8 hours between coats |
| Cost Per Gallon | $25-40 | $35-60 |
| Coverage Area | 350-400 sq ft per coat | 300-350 sq ft per coat |
| Best Applications | Living areas, bedrooms, standard walls | Bathrooms, kitchens, high-moisture zones |
| Cleanup Method | Soap and water | Mineral spirits or paint thinner |
High-Humidity Area Considerations
Bathrooms, kitchens, and laundry areas need extra moisture control. These spaces create constant humidity that tests even the best finishes.
Ventilation is key in these rooms. Install exhaust fans that vent outside, not into attics. Running fans during and after showers removes moisture.
Choose moisture-resistant materials in wet areas. Use green or purple board instead of standard drywall. Apply three coats of sealer to bathroom wood. Pay extra attention to end grain, which absorbs water most.
Make a maintenance schedule for these areas. Check sealers annually and reapply when needed. This simple touch-up prevents costly refinishing projects.
Additional protective measures include:
- Caulk all joints where walls meet tubs, showers, or countertops
- Use bath mats to protect floors near showers and tubs
- Wipe down surfaces after steam-generating activities
- Monitor for early signs of water damage like discoloration or soft spots
Moisture management adds modest costs but is worth it. Spending $300-500 on barriers, sealers, and ventilation protects your investment. These small investments ensure your finishes last for decades, not just years.
By managing moisture, even affordable materials can last long. When moisture is controlled, finishes look great year after year.
Country Cabin Budget Remodel: Trim and Detail Work
Adding trim and molding to your cabin is easy and affordable. You don’t need to be a master carpenter. Just use basic tools and know where to find cheap materials. Trim work is a key part of any country cabin budget remodel. It makes your cabin look professional without spending a lot.
Trim work is forgiving. Small mistakes can be fixed with caulk and paint. This makes it perfect for beginners. You can do a whole room’s trim in a weekend for just a few dollars.
Professional installers charge $3-6 per foot for baseboards. By doing it yourself, you save money. You can use that money for better materials or other projects in your cabin.
Standard Pine Molding as a Versatile Base
Pine molding is a great choice for cabins. It’s affordable and looks good with rustic styles. Basic pine baseboards cost $0.50-1.00 per foot. Door and window casing is $0.75-1.50 per foot. These profiles are perfect for affordable cabin decor that looks intentional.
Choosing the right molding scales can make your cabin look balanced. Small cabins need simple profiles. Larger cabins can have more detailed trim.
Here are some guidelines for different cabin sizes:
- Small cabins (under 600 sq ft): 3-4 inch baseboards, 2-3 inch window/door casing, minimal or no crown molding
- Medium cabins (600-1200 sq ft): 4-5 inch baseboards, 3-4 inch casing, simple crown molding in main living areas
- Large cabins (over 1200 sq ft): 5-6 inch baseboards, 4-5 inch casing, compound crown molding for formal spaces
Pine molding looks great with paint or stain. Painting gives a clean look. Staining keeps the wood grain and adds warmth.
Here are some budget-friendly finishing products:
| Finish Type | Coverage Rate | Cost Per Room | Best Application |
|---|---|---|---|
| Interior latex paint | 350-400 sq ft/gallon | $15-25 | Bright, clean cottage aesthetics |
| Water-based wood stain | 200-250 sq ft/quart | $12-20 | Natural wood grain emphasis |
| Polyurethane clear coat | 400-500 sq ft/quart | $15-30 | Durable protection over stain |
| Primer for painting | 300-350 sq ft/gallon | $12-18 | Sealing knots, ensuring coverage |
Even basic pine molding can make a big difference. The shadow lines from trim add depth. These details guide the eye and create interest without needing expensive decorations.
Creating Custom Profiles with Basic Tools
Custom millwork can be expensive, but you can make impressive profiles with basic tools. A good router bit can create custom trim from inexpensive lumber. This makes your country cabin budget remodel look professional.
Router bits come in many profiles. Running a bit along board edges creates unique profiles. Combining different bits can make elaborate designs from standard lumber.
Building layered baseboards can rival crown molding:
- Start with a flat 1×6 or 1×8 board as the main baseboard body
- Add a simple cove or quarter-round molding along the top edge
- Install a small cap piece (ripped from 1×2 stock) above the cove
- Paint or stain the assembly as a unified piece
This three-piece approach costs about $1.50-2.00 per foot. It creates rich shadow lines that look great in photos.
Using a table saw and router opens up more possibilities. You can rip boards to custom heights and add decorative details. These techniques require patience but no advanced skills.
Door and window casing is another chance for custom work. Use a decorative router bit on the inside edge. This adds visual interest that standard profiles lack.
Corner Bead and Edge Finishing on a Budget
Corner bead is key to professional-looking work. Metal or vinyl corner bead is cheap but makes corners crisp and durable. Skipping this step can lead to chipped corners.
Standard metal corner bead costs $2-4 per foot. Paper-faced corner bead is easier for beginners but costs a bit more. Both types install quickly with joint compound or special adhesive.
Edge finishing hides exposed plywood or OSB edges. Several affordable solutions exist:
- Iron-on edge banding: Thin veneer strips with heat-activated adhesive, costing $5-15 per roll, perfect for shelving and built-ins
- Thin trim strips: Quarter-round or small cove molding painted to match, hiding edges while adding decorative detail
- Wood putty and paint: Fill edge voids, sand smooth, and paint for seamless appearance on less-visible areas
Caulking is the final detail that makes DIY work look professional. Quality painter’s caulk costs $3-5 per tube. It fills gaps between trim and walls, creating seamless transitions.
This finishing step takes minimal time but makes a big difference. Gaps disappear, giving the illusion that trim grew from walls. This unified look elevates your cabin’s finish beyond what materials suggest.
Trim work requires patience more than skill. It’s perfect for cabin owners who want to save money. Measure carefully, cut accurately, and focus on finishing details. The professional results will inspire you to tackle more projects while keeping your budget in check.
Common Mistakes in Cost-Effective Cabin Design
Building or renovating a cabin on a budget needs careful planning. But, many common errors can ruin even the best plans. OK Structures warns that being too focused on saving money can lead to expensive problems. These mistakes often involve cutting corners, poor planning, and skipping important steps.
Knowing where to save and where to spend is key. This difference can turn a budget project into a success or a disaster. Let’s look at the most common mistakes and how to avoid them.
Sacrificing Quality in Structural Elements
The biggest mistake is skimping on hidden but essential components. Saving money on visible parts is smart, but not on structural, moisture, or safety systems. These areas can cost much more to fix than you saved.
For example, not insulating enough can cost $200 a month in heating bills. In just three months, you’ll lose your savings and keep paying for years. Skipping vapor barriers to save a few hundred dollars can lead to mold costs over $5,000.

- Insulation: Use proper R-values for your climate zone, even if it means adjusting other budget areas
- Vapor barriers: Install complete moisture protection systems to prevent hidden water damage
- Subflooring: Choose adequate thickness and quality to support finish flooring and prevent squeaks
- Structural supports: Never eliminate or downsize load-bearing elements to save money
- Electrical and plumbing systems: Meet all code requirements without shortcuts that create safety hazards
Save your budget-cutting efforts for visible finishes and decorative elements. These areas offer many ways to save without compromising your cabin’s safety or quality.
Underestimating Material Quantities
Buying too little material is a common and frustrating mistake. It causes delays, wasted time, and the risk of materials being out of stock when you need them.
Proper material estimation requires adding waste factors to your needs. Most materials need 10-15% extra for cuts, mistakes, and irregular spaces. Diagonal installations or complex layouts may need up to 20% more.
Use these calculation guidelines for accurate material estimates:
| Material Type | Base Calculation | Waste Factor | Final Formula |
|---|---|---|---|
| Flooring | Room square footage | 10-15% | Square feet × 1.10 to 1.15 |
| Wall Paneling | Wall square footage | 15% | Square feet × 1.15 |
| Trim and Molding | Linear measurements | 10% | Total feet × 1.10 |
| Diagonal Tile/Flooring | Room square footage | 15-20% | Square feet × 1.15 to 1.20 |
Buying a little extra of returnable items is better than risking shortages. Most stores accept returns of unopened materials. This way, you can return excess without penalty. It also helps avoid the problem of finding discontinued products.
Ignoring Proper Surface Preparation
Surface preparation is key to professional-looking finishes that last. No matter the quality of your materials, inadequate preparation undermines everything.
Paint peels off surfaces not properly cleaned or primed. Flooring fails on uneven subfloors. Paneling looks bad on uneven walls. These issues aren’t about the materials but about skipping prep work.
Different materials need specific prep steps:
- Painting: Clean all surfaces, fill holes, sand smooth, apply primer appropriate to the surface type
- Flooring installation: Level subfloors within 3/16 inch over 10 feet, repair any soft spots or damage
- Wall paneling: Shim walls to create flat surfaces, repair major imperfections, ensure proper fastening substrate
- Staining wood: Sand to appropriate grit (usually 120-150), remove all dust, apply wood conditioner on soft woods
Plan enough time for preparation in your project timeline. This phase often takes longer than the actual finish installation. It’s the foundation of quality results.
When to Hire a Professional
Knowing your DIY limits saves money in the long run. Some projects need professional expertise for better results and less cost. Complex electrical work, plumbing, structural changes, and specialized techniques like drywall finishing are examples.
Consider a compromise approach for cheap cabin renovation projects: hire professionals for complex parts and do simpler tasks yourself. For example, have an electrician install new circuits and the panel, but do basic outlets and fixtures yourself. Have a plumber rough-in bathroom plumbing, but install your own vanity and toilet.
When hiring contractors, get detailed quotes, check references, and verify licensing and insurance. A good contractor costs more upfront but offers value through proper execution, code compliance, and warranty protection. The cheapest quote often means corners will be cut, leading to the problems mentioned.
Remember, building codes are for safety. Projects needing permits must have professional work or at least professional inspection. Trying unpermitted work or hiring unlicensed contractors to save money can lead to liability issues, complicate future sales, and void insurance coverage if problems occur.
Long-Term Maintenance for Budget Interior Finishes
By taking care of your cabin’s interior, you make the most of your budget. Simple upkeep practices can save you a lot of money. Regular maintenance keeps your cabin looking great for years.
Most cabin owners spend less than $150 a year on upkeep. This small investment can save you from expensive repairs that cost thousands. Catching small problems early is key.
Regular care makes budget-friendly materials last longer. A few hours each season can keep your cabin looking new. This protects your investment and keeps your cabin looking fresh.
Annual Inspection and Touch-Up Schedule
Having a seasonal maintenance routine keeps your cabin in top shape all year. Each season brings specific tasks to address before problems arise. This approach ensures nothing is overlooked.
Spring inspections focus on winter damage. Check all interior surfaces after the heating season ends. Look for signs of moisture, wood movement, or finish wear.
- Wall surfaces for cracks, water stains, or finish wear patterns
- Floor boards checking for scratches, loose sections, or water damage
- Ceiling panels looking for stains that indicate roof leaks
- Trim pieces examining separation from walls or paint failure
- All wood surfaces inspecting for moisture absorption or pest activity
Summer is the best time for maintenance. Warm, dry weather helps finishes cure properly. Do any repairs from spring inspections while conditions are good.
Simple touch-ups prevent minor wear from becoming major projects. Spot-sand damaged floor areas and apply matching finish. Caulk small gaps or cracks before they expand. Repaint worn trim sections to maintain uniform appearance.
A weekend of annual touch-ups typically costs under $100 in materials. This prevents expensive refinishing projects. Keep small inventories of matching paints, stains, and sealers for quick repairs.
Fall preparations protect finishes before winter arrives. Apply additional sealer coats to wood showing weathering. Ensure all gaps around windows and doors are properly sealed. Check that ventilation systems function correctly to manage winter moisture.
Winter monitoring involves watching for problems requiring immediate attention. Address any water intrusion immediately. Monitor humidity levels to prevent condensation damage. Quick responses during cold months prevent expensive spring repairs.
| Season | Primary Focus | Key Tasks | Estimated Cost |
|---|---|---|---|
| Spring | Damage Assessment | Complete interior inspection, identify winter damage, plan repairs | $0 (inspection only) |
| Summer | Active Repairs | Touch-up painting, refinish worn areas, seal gaps | $75-125 |
| Fall | Winterization | Apply protective sealers, check weatherstripping, verify ventilation | $50-100 |
| Winter | Monitoring | Watch for moisture issues, maintain humidity control, address leaks | $25-75 |
Protecting Wood from Moisture and Pests
Wood finishes face two main enemies: moisture and pests. These threats can damage your cabin’s interior. Knowing how to protect against them is key.
Moisture control starts with good ventilation. Air circulation prevents wood rot and finish failure. Run exhaust fans in kitchens and bathrooms during and after use.
Fix any leaks right away. Water damage gets worse fast, turning small repairs into big ones. Check plumbing, roof flashing, and window seals during seasonal inspections.
Keep an eye on indoor humidity levels, which are ideal between 30-50% for wood preservation. Use dehumidifiers if readings are too high. High moisture causes wood to swell and finishes to fail, attracting pests.
Exterior drainage is also important for interior finishes. Make sure gutters work and downspouts direct water away from foundations. Poor drainage can lead to basement moisture that gets into living spaces.
Pest protection starts with spotting signs of insects. Look for small holes, fine powder, or hollow-sounding wood. Common pests include powder post beetles, carpenter ants, and termites.
Preventive treatments are best applied before pests infest. Natural deterrents like cedar oil or borate solutions protect without harsh chemicals. Apply these to high-risk areas like foundations, crawl spaces, or moisture-prone spots.
Early detection and treatment save a lot of money. Most pest issues caught early cost $100-300 to treat, compared to thousands for repairs. Annual inspections help catch problems before they get expensive.
Chemical treatments are needed when natural methods fail. For serious infestations, consult pest control professionals. Their treatment protects your finishes and structure.
Realistic maintenance budgeting helps plan for ongoing care. Annual touch-up supplies cost $50-150. Periodic deep cleaning or resealing might cost $100-300 every few years. These small expenses prevent big problems that would cost thousands to fix.
Maintenance is about simple practices, not big chores. Small efforts protect your cabin investment and keep budget friendly cabin interior finishes beautiful for decades. Your smart choices during construction continue to pay off with consistent, affordable maintenance.
Transforming Your Cabin Without Breaking the Bank
Creating a beautiful cabin space doesn’t need a lot of money or professional help. This guide shows that smart planning and choosing the right materials can lead to amazing results. You can do it all yourself and save a lot of money.
Start by planning well. Match your finishing choices to how you’ll use the space. Pick materials that are affordable but last long. Do DIY projects where you can save on labor. Look for reclaimed materials to add character without spending a lot.
DIY cabin interiors are special because they’re personal. Every board and finish you add makes your space unique. People have successfully transformed spaces on a tight budget. They use thrifted items, paint tricks, and upcycling to save money.
Start your project with confidence. Fix the essential systems first, then add more as you can. Celebrate each step you complete. Your cabin is more than just walls and floors. It’s your retreat, a place for creativity, and a gathering spot. The joy of creating something beautiful on your own budget lasts much longer than any money worries.