Imagine waking up in your mountain home on a cold winter morning. You want to feel warm and cozy, not cold under blankets. The key to staying warm all year is choosing the right insulation for your cabin.
Many people don’t know this: standard log walls only provide an R-value of around 8. This is less than the needed R-13 for exterior walls. Wood is pretty, but it can’t keep the cold out alone.
When insulating a cabin, you have many options. Each material works differently and suits different needs. You can choose from fiberglass batts, spray foam, rigid boards, or cellulose.
This guide explains cabin insulation options simply. We’ll show you which energy-efficient cabin insulation fits your climate, budget, and style. You’ll learn to save on heating while making your cabin a cozy place to visit all year.
Why Proper Insulation Is Critical for Your Cabin
Without good insulation, even the most beautiful cabin can be uncomfortable and expensive. Insulation keeps your cabin cozy and protects your investment. It’s like a shield that works all the time.
Many cabin owners find out too late that bad insulation causes big problems. But knowing the benefits of insulation helps you make smart choices. Whether you’re building or upgrading, insulation is key to a great cabin experience.
Year-Round Temperature Control and Comfort
Your cabin faces extreme temperatures all year. Without enough insulation, it can be freezing in winter and hot in summer. Quality insulation creates a thermal barrier that keeps your cabin at a comfortable temperature.
Seasonal comfort is more than just staying warm or cool. It means waking up warm in winter and cool in summer. It means enjoying your cabin without discomfort.
Insulated cabins heat and cool quickly. Your furnace or air conditioner doesn’t have to work as hard. This makes your cabin a cozy sanctuary.
The difference in an insulated versus uninsulated space is clear right away. Guests feel it as soon as they enter. A consistent temperature makes your cabin welcoming.
Protection Against Water Damage and Decay
Moisture is a big problem for cabins. Even treated logs can’t stop condensation inside walls. Strategic moisture prevention cabins require proper insulation placement and vapor control.
Temperature differences cause condensation. This moisture builds up in hidden places. Over time, it leads to mold, rot, and damage.
Good insulation reduces temperature differences. This lowers the risk of condensation. Your cabin’s structure stays dry and strong for years.
Insulation also helps manage moisture in walls. Some insulation lets water vapor pass through, while others block it. Knowing this helps you choose the right insulation for your climate and cabin design.
Lower Utility Bills and Operating Expenses
Heating costs are a big expense for cabin owners. Poor insulation means your heating system works hard, wasting energy. This makes your cabin expensive to maintain.
Insulated cabins save 40-60% on heating and cooling costs. These savings add up over time. The right insulation pays for itself through lower bills, often in just a few years.
Insulation also means your heating and cooling systems last longer. They need fewer repairs and last longer. This saves money in the long run.
Think about the big picture over your cabin’s life. Insulation saves money, reduces maintenance, and keeps your cabin’s value high. Insulated cabins sell for more because they’re efficient and comfortable.
| Insulation Benefit | Impact on Cabin | Long-Term Value | Payback Period |
|---|---|---|---|
| Temperature Stability | Consistent comfort in all seasons | Enhanced livability and enjoyment | Immediate |
| Moisture Control | Prevents mold, rot, and structural damage | Protects investment and health | 5-10 years |
| Energy Savings | Reduces heating/cooling costs by 40-60% | Thousands saved over cabin lifetime | 3-7 years |
| Equipment Longevity | HVAC systems last 30-50% longer | Delayed replacement costs | 10-15 years |
| Property Value | Increases resale appeal and price | Higher return on investment | At sale time |
Insulation brings many benefits beyond saving energy. It makes your cabin comfortable, durable, and valuable. These benefits make insulation essential for smart cabin ownership.
Understanding insulation’s importance helps you focus on it during construction or renovation. The right insulation affects your cabin’s comfort and value over time.
Understanding R-Values and Insulation Performance
Before buying insulation, you need to understand R-value ratings. This number shows how well insulation keeps your cabin warm or cool. Choosing the right insulation saves money and avoids mistakes.
Choosing insulation is like picking a winter coat. You wouldn’t wear the same coat in Alaska as in Texas. Your cabin’s insulation needs vary by location and building area.
What R-Value Actually Means
The insulation r-value measures how well a material resists heat flow. The “R” stands for resistance. Higher numbers mean better insulation.
An R-13 insulation product offers less resistance than an R-21 product. This difference affects how much heat stays inside or outside.
Most wood doesn’t insulate well. Log cabin walls typically have an R-value of only 8. This is less than the recommended R-13 for exterior walls. So, log cabins need extra insulation to stay efficient.

Insulation thickness and density affect its R-value. A 2×4 wall can have R-13 or R-15 batts. A 2×6 wall can have R-19 or R-21. Proper installation is key to avoid gaps and compression.
Recommended R-Values for Cabin Components
Different parts of your cabin need different insulation levels. Roofs lose heat faster than walls. Floors face challenges from ground temperatures. Knowing these needs helps budget your insulation.
The numbers below are minimum recommendations for most climates. Your location might need different levels. Think of these as starting points.
Wall R-Value Requirements
Exterior walls need a minimum R-value between R-13 and R-21. Standard 2×4 framing fits R-13 or R-15 insulation. 2×6 framing allows for R-19 or R-21.
Many builders choose 2×6 for better thermal resistance. This makes installation easier and boosts energy efficiency. Interior walls usually don’t need insulation unless for soundproofing.
Floor and Crawl Space R-Values
Floors above unheated spaces need R-25 to R-30 insulation. This prevents cold drafts and heat loss. Crawl spaces are challenging because cold air and moisture can get in.
Cabins on pier foundations or over crawl spaces need higher R-values in floors. This makes floors warmer and lowers heating costs. Slab-on-grade foundations use rigid foam boards for insulation.
Roof and Attic R-Values
Your roof is critical for insulation. Heat rises and accumulates at the highest point of your cabin. Attics should have R-38 to R-60 insulation, with colder areas needing the higher end.
Cathedral ceilings are hard to insulate because they lack attic space. High-performance materials like spray foam are often needed. Proper ventilation is also key to prevent moisture and ice dams.
| Cabin Component | Minimum R-Value | Recommended R-Value | Cold Climate R-Value |
|---|---|---|---|
| Exterior Walls | R-13 | R-19 to R-21 | R-21 to R-25 |
| Floors/Crawl Spaces | R-19 | R-25 to R-30 | R-30 to R-38 |
| Attic/Roof | R-30 | R-38 to R-49 | R-49 to R-60 |
| Cathedral Ceilings | R-22 | R-30 to R-38 | R-38 to R-49 |
How Climate Zones Affect Your R-Value Needs
Your location greatly affects insulation needs. Climate zone insulation requirements vary significantly across the United States. This includes the hot winters of Minnesota and the humid summers of Florida.
The Department of Energy divides the country into climate zones numbered 1 through 8. Zone 1 includes the hottest regions like southern Florida. Zone 8 covers the coldest areas in Alaska. Most of the continental United States falls into Zones 3 through 6.
Cabins in northern states (Zones 5-7) need higher R-values than those in southern regions. A Minnesota cabin might need R-49 attic insulation. A Georgia cabin performs well with R-38. Local building codes usually specify minimum requirements based on climate.
Elevation also affects insulation needs. A mountain cabin at 8,000 feet experiences colder temperatures than valley locations in the same region. Factor in your specific microclimate when determining thermal resistance needs, not just your state or county location.
Insufficient insulation increases heating and cooling costs. Adequate R-values save money on energy bills over time. Most cabin owners find that exceeding minimum requirements by one step provides the best balance between cost and comfort.
Fiberglass Batt Insulation: The Traditional Choice
When you walk into a hardware store, you’ll see lots of fiberglass batt insulation. It’s a favorite among cabin builders because it’s affordable and works well. Whether you’re building a weekend home or a year-round cabin, knowing about fiberglass batts is key.
The pink or yellow rolls you see are fiberglass insulation. They fit well between wall studs and ceiling rafters. The sizes match standard framing, making it easy to install.
How Fiberglass Batts Work
Fiberglass batts trap air with tiny glass fibers. This air is a poor heat conductor. So, it slows down heat transfer.
The glass fibers themselves don’t insulate much. But they hold air in place. This stops warm air from moving to cold areas, which is good for your cabin walls.
The air pockets in fiberglass insulation are key to its effectiveness. If these pockets get squished, the insulation doesn’t work as well. So, it’s important to install it right.
Faced vs. Unfaced Fiberglass
When buying batt insulation, you’ll choose between faced and unfaced. This choice affects how you install it and how it handles moisture in your cabin.
Faced insulation has a barrier on one side. This barrier is usually kraft paper or foil. It helps control moisture and makes installation easier.
Unfaced insulation doesn’t have a backing. Use it when you already have a vapor barrier. It’s also good for interior walls where moisture isn’t a big concern.
| Feature | Faced Insulation | Unfaced Insulation |
|---|---|---|
| Vapor Barrier | Built-in kraft paper or foil backing | No barrier included |
| Best Use | Exterior walls, attics, first insulation layer | Interior walls, additional layers, retrofit projects |
| Installation | Staple flanges to studs | Friction-fit between framing members |
| Cost | Slightly higher per square foot | More economical option |
Best Applications in Cabin Construction
Fiberglass batts are great for certain areas in cabins. They fit well in wall cavities and attics. The sizes match standard framing, making installation easy.
Attics with accessible joists are another good spot for batt insulation. You can lay batts between joists or rafters easily. The material bends a bit to fit irregularities in framing.
Floor insulation between joists also benefits from batt insulation. It keeps floors warm and reduces heat loss through the foundation. Many builders choose different insulation types for specific needs.
But, fiberglass batts aren’t for every situation. They struggle with irregular framing or many obstructions. Gaps and compression can lower their effectiveness.
Installation Process and DIY Considerations
DIY cabin insulation often starts with fiberglass batts. They’re easy to install without special tools or training. But, you need safety gear and to pay attention to detail.
Here’s how to install them in wall cavities:
- Measure and prepare your wall cavities, ensuring they’re clean and free of debris or protruding nails.
- Cut batts to length using a sharp utility knife and a straight edge for clean cuts when needed.
- Insert the insulation between studs, ensuring it fills the entire cavity without compression or gaps.
- Secure faced batts by stapling the flanges to the inside edges of studs, creating a continuous vapor barrier.
- Seal around obstacles like electrical boxes and pipes by carefully cutting and fitting the material.
Safety is key when installing DIY cabin insulation. The glass fibers can irritate your skin, eyes, and lungs. Always wear long sleeves, gloves, safety glasses, and a dust mask rated for fine particles.
Work in well-ventilated areas and avoid touching your face until you’ve washed thoroughly. Fiberglass can itch, but proper gear prevents this.
Pros and Cons of Fiberglass Batts
Every insulation material has its good and bad points. Knowing these helps you decide if fiberglass insulation fits your cabin’s needs and budget.
Advantages of fiberglass batts include:
- Affordability – It’s one of the least expensive options, making it budget-friendly for big projects
- Wide availability – You can find it at almost every home improvement store
- DIY-friendly installation – You don’t need special tools or training for basic use
- Non-combustible material – It won’t burn or support flames, providing fire safety
- Proven performance – It’s been reliable for decades in homes
- Standard sizing – Its pre-cut dimensions fit common framing perfectly
Disadvantages to consider:
- Air sealing limitations – It doesn’t seal air gaps well and needs a separate air barrier
- Moisture sensitivity – It loses effectiveness when wet and can grow mold if moisture stays
- Installation challenges – It’s hard to fit around obstacles without gaps that reduce its performance
- Settling over time – It may compress slightly in vertical spaces, creating small gaps
- Skin irritation – Handling it requires protective gear
- Lower R-value per inch – It needs more thickness than some alternatives to achieve the same insulation value
Fiberglass batts are popular because their benefits outweigh their drawbacks for many cabins. They’re cheap and easy to install, making them great for owner-builders on a tight budget. When installed right in the right places, batt insulation keeps your cabin warm for decades without costing too much.
Spray Foam Insulation: Maximum Performance
If you want your cabin to stay comfy all year and save on energy, spray foam insulation is key. It’s a liquid that turns into a tight seal when it dries. This means your cabin will keep its temperature better than other insulation can.
Spray foam fills every gap as it expands. This makes it great at keeping cold out and warmth in. It uses environmentally friendly foaming agents that are better for the planet.
Understanding Open-Cell Characteristics
Open-cell foam is cheaper but soft. It expands a lot to fill big gaps in your cabin. This makes it perfect for hard spots.
It insulates well, but not as much as closed-cell. Yet, it’s great at soundproofing. This is good if you live near a busy road or want quiet rooms.
But, it lets some moisture through. So, it’s best where moisture isn’t a big problem. Or use it with a good vapor barrier.
Closed-Cell Foam Advantages
Closed-cell foam is the top choice for spray insulation. It’s denser and insulates better than open-cell. This is important when you don’t have much room.
It also stops moisture. Its tight cells block water vapor. This is great for cabins in wet or humid places. It keeps mold away and protects your cabin from water damage.

Closed-cell foam also makes your cabin walls and roof stronger. Once it’s dry, it becomes solid. This is great for cabins in windy or snowy areas.
Superior Air Sealing Benefits
Spray foam is amazing at sealing air leaks. Traditional insulation leaves gaps. These gaps let air in, making your cabin less efficient.
Spray foam fills these gaps, making a continuous air barrier. This stops drafts. It’s perfect for cabins where air leaks cost a lot to heat and cool.
This means you don’t need to caulk or weatherstrip separately. The foam does it all as it expands.
Why Professionals Must Handle Installation
Spray foam isn’t for DIY. Professional installation is a must. It needs special equipment and training.
Installers must mix the chemicals right. If they don’t, the foam won’t work well. It could even be dangerous.
Pros know how to apply the right amount for your area. They also follow safety protocols. This keeps everyone safe and your air quality good.
Evaluating Cost Versus Performance
Spray foam costs more than traditional insulation. But, it lasts longer and saves more energy. This can save you money over time.
It’s worth the extra cost for better insulation and air sealing. This means you won’t need to spend more on weatherizing. Plus, you’ll save on heating and cooling.
| Feature | Open-Cell Foam | Closed-Cell Foam | Fiberglass Batts |
|---|---|---|---|
| R-Value per Inch | 3.5 – 3.7 | 6.0 – 7.0 | 3.0 – 3.8 |
| Air Sealing | Excellent | Excellent | Poor |
| Moisture Resistance | Moderate | Excellent | Poor |
| Cost per Square Foot | $1.50 – $2.50 | $2.50 – $4.00 | $0.50 – $1.00 |
| Lifespan | 80+ years | 80+ years | 15-25 years |
Choosing between open-cell and closed-cell foam depends on your needs and budget. Closed-cell foam is more expensive but lasts longer and insulates better. Open-cell foam is cheaper but works well too. Spray foam is a smart choice for long-term savings and comfort.
Rigid Foam Board Insulation Options
Rigid foam insulation is like a Swiss Army knife for cabin insulation. It’s versatile, efficient, and works well in many places. These foam boards are thin but pack a lot of insulating power.
They are different from fluffy insulation like fiberglass. Rigid foam boards offer continuous insulation that reduces thermal bridging. This means fewer cold spots and better energy efficiency.
There are three main types of foam board. Each has its own strengths and best uses in cabin construction.
Polyisocyanurate Foam Boards
Polyiso insulation is the top choice for rigid foam. It has the highest R-value per inch of any insulation material. Cabin builders love it for its thermal protection in tight spaces.
The foam has a closed-cell structure with aluminum foil facings. These facings boost its insulating power. They also provide a vapor barrier and make the boards more durable.
R-Value and Performance
Polyiso insulation has an impressive R-6.5 to R-6.8 per inch. This is about 50% better than other foam boards. A single 2-inch polyiso panel has the same insulating power as a 3-inch panel of other foam boards.
This high R-value makes polyiso very space-efficient. You can meet insulation code requirements without building out walls. It works well in moderate and warm climates.
But, polyiso loses some R-value in very cold temperatures. If your cabin often sees temperatures below 20°F, you might want to choose another option or use polyiso with other insulation.
Best Use Cases
Polyiso insulation is great for several cabin applications. It’s the top choice for continuous exterior insulation over wall sheathing. This placement eliminates thermal bridging and creates a thermal break around your cabin.
It’s also excellent for roof and attic applications. The high R-value per inch lets you achieve excellent roof insulation without excessive buildup. This is important for cathedral ceilings where space is precious.
Many builders use polyiso for basement ceiling insulation too. The foil facings resist moisture better than paper-faced alternatives. Just make sure your building inspector approves it for your specific application, as some jurisdictions require thermal barriers over exposed foam.
Extruded Polystyrene Boards
XPS insulation is the blue or pink foam board you see at home improvement stores. It’s a great balance of insulating power, moisture resistance, and workability.
XPS insulation has a uniform closed-cell structure. This gives it consistent properties and makes it easy to cut with standard tools. The material is denser and stronger than expanded polystyrene, making it more durable during installation.
Moisture Resistance Properties
XPS insulation really shines in moisture resistance. The closed-cell structure doesn’t absorb water like some other insulation materials. This makes XPS the go-to choice for applications where moisture exposure is likely.
The material maintains its R-value even when exposed to moisture. Other insulation types can lose effectiveness when wet, but XPS keeps performing. This reliability makes it ideal for protecting your cabin in humid climates or wet conditions.
XPS provides an R-value of approximately R-5 per inch. While not as high as polyiso, it’s excellent. The consistency of performance across temperature ranges gives XPS an advantage in cold climates where polyiso might underperform.
Installation Applications
XPS insulation works beautifully for below-grade applications around cabin foundations. Its moisture resistance protects foundation walls while preventing thermal loss through the ground. Many builders use it for insulating basement walls both inside and outside.
Under-slab applications are another perfect fit. Installing XPS insulation beneath your cabin’s concrete slab creates a thermal break from the ground. This prevents heat loss and helps maintain comfortable floor temperatures year-round.
Exterior wall sheathing is another common use. XPS boards can go directly over wall studs before your exterior siding. This creates continuous insulation while protecting against water infiltration. The material is also popular for insulating crawl spaces and rim joists where moisture control matters.
Expanded Polystyrene Boards
EPS insulation is the budget-conscious builder’s secret weapon. This white foam board costs significantly less than polyiso or XPS while delivering solid insulating performance. It’s made from expanded polystyrene beads fused together, creating a lightweight but effective insulation material.
The material looks like the foam used in disposable coolers, but don’t let that fool you. EPS insulation is much denser and more durable. It provides an R-value of approximately R-3.6 to R-4.2 per inch, depending on density.
Budget-Friendly Option
EPS insulation typically costs 30-40% less than XPS and even more compared to polyiso. This makes it an attractive option when you’re insulating large areas and watching your budget. The savings can really add up on a full cabin project.
Despite the lower cost, EPS performs well in most cabin applications. It provides reliable insulation that won’t degrade over time. The material is also environmentally friendlier because it doesn’t contain the blowing agents used in other foam boards.
The main trade-off is lower R-value per inch compared to other foam boards. You’ll need thicker EPS panels to achieve the same insulation level. This might matter in space-constrained applications, but for most cabin walls and other areas, the extra thickness isn’t a problem.
EPS works great for exterior wall insulation, even when combined with other insulation in the stud cavities. Many builders use it for insulating concrete forms and as perimeter insulation around foundations. It’s also suitable for roof insulation when you have enough space for the required thickness.
| Foam Board Type | R-Value Per Inch | Moisture Resistance | Best Applications | Relative Cost |
|---|---|---|---|---|
| Polyiso | R-6.5 to R-6.8 | Good (with facings) | Exterior walls, roofs, continuous insulation | Highest |
| XPS | R-5.0 | Excellent | Below-grade, foundations, under-slab, moisture-prone areas | Medium |
| EPS | R-3.6 to R-4.2 | Moderate | Above-grade walls, large areas, budget projects | Lowest |
Choosing the right rigid foam board depends on your specific cabin needs. Consider where you’re installing it, your climate conditions, and your budget. Polyiso gives you maximum R-value where space is tight. XPS provides unbeatable moisture resistance for wet applications. EPS delivers solid performance when cost matters most.
Many cabin builders mix and match these materials throughout their project. You might use XPS for the foundation, polyiso for exterior walls, and EPS for less critical areas. This approach lets you optimize performance and budget across your entire cabin insulation strategy.
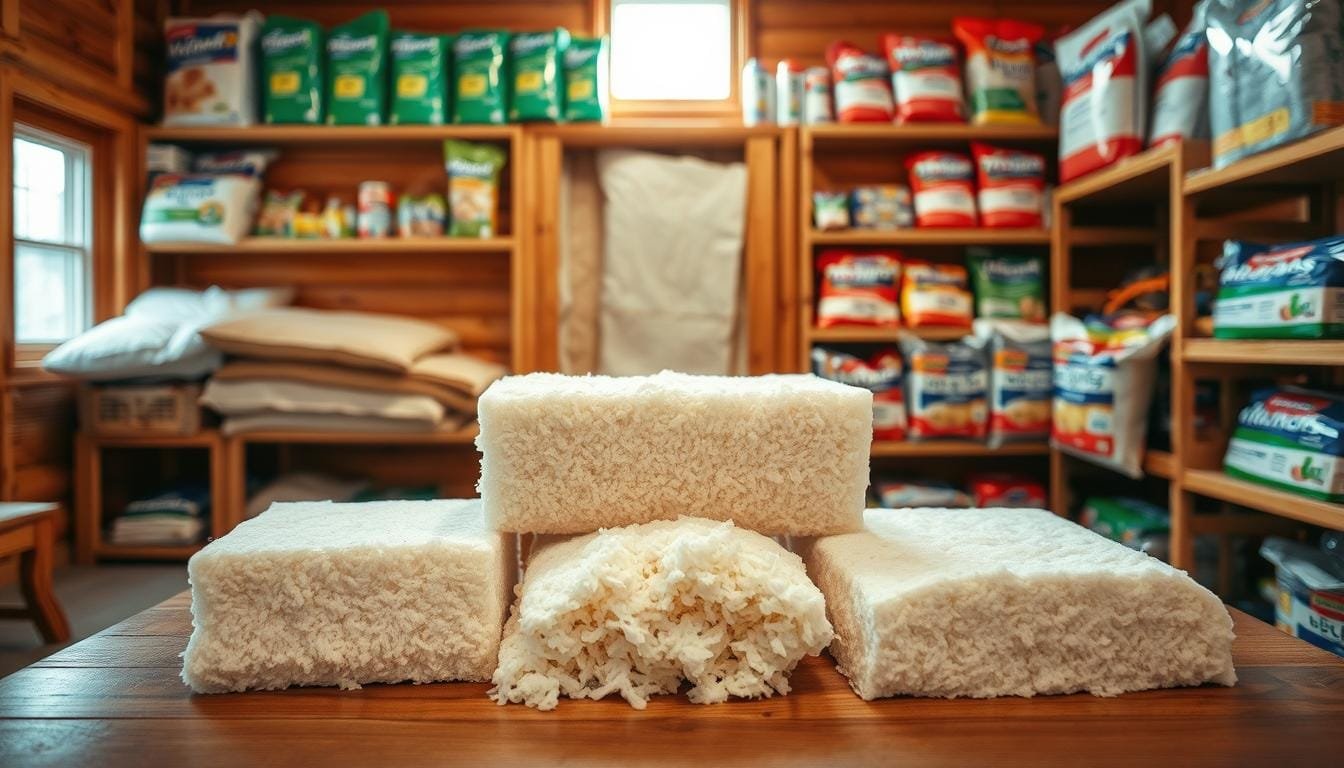
Blown-In Cellulose Insulation
Blown-in cellulose insulation is eco-friendly and performs well. It’s a great choice for cabin owners who want to keep warm and protect the environment. Knowing how it works and where it’s best used can help you decide if it’s right for your cabin.
This insulation is made from recycled newsprint treated with fire retardants. Old newspapers are turned into fluffy particles. These particles are then blown into your cabin’s walls and attics by professionals.
The Science Behind Cellulose Performance
Cellulose insulation is made of small particles that fit into tight spaces. It’s perfect for retrofit projects where you can’t tear out walls. The particles fill every nook, creating a solid thermal barrier.
The density of cellulose changes with thickness. As it gets thicker, it compresses. This affects its R-value, or thermal performance.
Manufacturers give R-value at settled density. They provide charts to help installers get the right density for your cabin.
Where Cellulose Works Best
Some areas in your cabin are ideal for blown-in insulation. Knowing these spots helps plan your insulation strategy.

Attic floors are the best place for loose-fill cellulose. It’s easy to install and can achieve high R-values. It fills around obstacles that batt insulation can’t.
Cellulose is also great for existing wall cavities. Installers drill holes, blow in the material, and then patch the holes. This way, you can upgrade insulation without big renovations.
- Open attic spaces above living areas
- Cathedral ceilings with access points
- Existing walls during renovation projects
- Rim joists and band joists around foundations
- Irregular spaces around plumbing and wiring
Environmental and Safety Advantages
Cellulose insulation is eco-friendly. It’s made from up to 85% recycled newspaper content. This reduces waste and environmental impact.
Cellulose is also fire-resistant. The treatment process adds compounds that help it resist flames. It chars instead of melting or releasing toxic fumes.
The treatment also keeps pests away. Insects and rodents don’t like treated cellulose. This means fewer chemicals are needed to protect your insulation.
Installation Methods Comparison
There are two ways to install blown-in cellulose. Dense-pack is for closed spaces, while loose-fill is for open areas. Knowing the difference helps choose the right method.
| Feature | Dense-Pack Cellulose | Loose-Fill Application |
|---|---|---|
| Installation Pressure | High-pressure application creates solid fill | Low-pressure application allows settling |
| Best Applications | Wall cavities, enclosed spaces, retrofit projects | Open attic floors, horizontal applications |
| Density Range | 3.0-4.0 pounds per cubic foot | 1.5-2.2 pounds per cubic foot |
| Settling Factor | Minimal settling due to tight packing | Settles 10-20% over time |
| Air Sealing | Excellent air barrier when properly installed | Good coverage but less air sealing |
Dense-pack cellulose is blown into closed cavities at high pressure. It fills wall spaces tightly, creating a solid barrier. This method is great for air sealing.
Loose-fill application is different. It’s blown into open spaces like attic floors at lower pressure. The material settles over time to reach its final density.
Professional installation is key for both methods. The right density is important for performance. Skilled installers ensure the material is installed correctly.
The choice between methods depends on your cabin’s areas. Use dense-pack for walls and loose-fill for attics. Many cabins use both for the best results.
Mineral Wool Insulation for Cabins
Mineral wool insulation is great for cabins. It’s fire-safe, sound-dampening, and keeps moisture out. It’s made from natural stone or industrial waste, making it strong and safe for cabins.
Rock wool is dense, which means it works well in real life. It comes in batts, rolls, and loose-fill for different needs. Most of it is recycled, making it good for the planet too.
Two Main Types and Their Origins
Mineral wool includes rockwool and slag wool. Rockwool comes from volcanic rock melted and spun into fibers. It’s dense and keeps heat and fire out.
Slag wool is made from steel waste. It’s similar to rock wool but less dense. Both are great for cabins, with rockwool being the better choice.
The main difference between them is small. Both fit well in spaces and insulate well. Your choice depends on what’s available and the price.
Unmatched Protection Against Heat and Flames
Mineral wool insulation is top-notch for fire safety. It can handle over 2,000°F without melting or releasing harmful fumes. This is great for cabins with fireplaces or stoves.
It’s better than fiberglass, which melts at 1,200°F, or spray foam, which can catch fire. Rock wool stays strong and insulating even when exposed to flames. This slows down fire spread and gives you more time to escape.
For cabins in wildfire areas, this insulation is a big plus. It’s safe around heat sources and in attic spaces where fires can spread fast. It won’t add fuel to a fire, making it a safe choice.
Noise Reduction for Peaceful Retreats
Mineral wool’s density also makes it great for soundproofing. It absorbs sound, not reflects it, making cabins quieter. This is perfect for places where peace is key.
It’s great for walls between bedrooms for better sleep. It also works well in ceiling assemblies for lofts or second floors. Once installed, you’ll notice a big difference in noise.
For cabins near roads or neighbors, mineral wool in exterior walls helps block out noise. It’s better at blocking sound than most materials. This is a bonus to its thermal protection.
Moisture Management and Long-Term Performance
Unlike fiberglass, rock wool keeps its insulating power even when wet. Its fibers repel water but let vapor pass through. This stops moisture buildup that can cause mold or damage.
This is very useful in cabin foundations and crawl spaces where moisture levels change. It won’t sag or lose shape when wet. If it does get wet, it dries fast and works like new again.
Mineral wool insulation lasts a long time, even in damp places. It doesn’t settle or lose its R-value. Pests can’t nest in it, and it won’t grow mold or mildew.
How to Install It Correctly
Installing mineral wool is similar to fiberglass but with some key differences. It’s denser and heavier, which makes it easier to handle. It fits tightly between studs and joists without needing staples or supports.
To cut rockwool, use a sharp knife or a special blade. It compresses when cut but returns to its original thickness. This ensures a tight fit, even around obstacles like electrical boxes and pipes.
DIY installation is possible for those who know basic carpentry. Wear dust masks and gloves because the fibers can irritate skin and lungs. It’s easier to work with than fiberglass, thanks to its less aggressive spring-back.
For the best results, measure each space individually instead of cutting multiple pieces beforehand. The batts should fit snugly but not be compressed too much. Make sure to cover window and door frames well to prevent heat loss.
Natural and Eco-Friendly Insulation Alternatives
Want to make your cabin eco-friendly? Mother Nature has some great ideas. Natural insulation materials are both effective and kind to the planet. They keep your cabin cozy all year.
Today’s sustainable insulation is good for you and the earth. It’s free from harmful chemicals found in synthetic materials. Let’s look at natural options that are both green and work well.
Sheep’s Wool Insulation
Wool has kept us warm for ages. Now, it’s a top choice for cabin insulation. Sheep wool insulation is from renewable sources and needs little processing. It’s treated with borate for fire safety and pest control without harsh chemicals.
Natural Moisture Management
Wool is amazing at handling moisture. It can soak up to 33% of its weight in moisture vapor. Yet, it stays effective. Wool fibers draw in moisture and release it when needed.
This helps prevent moisture problems in walls. Wool is great in humid places because it breathes well. It also fights mold and mildew, protecting your cabin.
Performance and Availability
Sheep’s wool insulation has an R-value of R-3.5 to R-3.8 per inch. It’s similar to fiberglass batts. Wool comes in batts for 16 or 24 inch studs. It’s easy to install, even for DIY projects.
Wool insulation is less common in the U.S. than other options. But, you can find it at green building suppliers and online. It’s pricier, but many think it’s worth it for the environmental benefits.
Cotton Denim Insulation
Old jeans can become cabin insulation. Cotton insulation is made from recycled denim and cotton. It turns waste into effective insulation.
Recycled Material Benefits
Cotton denim insulation has up to 85% recycled content. It’s made with less energy than synthetic insulation. Choosing recycled cotton helps reduce waste and insulates your cabin.
This insulation is treated with borate for fire safety. It’s free from harmful chemicals like formaldehyde and fiberglass. This makes it safe for people with sensitivities and healthier for your cabin.

Working with cotton insulation is easy and safe. It doesn’t irritate skin, and you don’t need special gear. Installation is similar to traditional batt insulation.
Cotton batts fit standard stud spacing. They’re denser than fiberglass, so they stay in place. R-values are R-3.4 to R-3.7 per inch, making them suitable for most cabins.
Cost is about 15-20% more than fiberglass. But it’s cheaper than wool or cork. You can find it at major retailers and green building suppliers across the U.S. It’s popular for DIY projects because of its performance and eco-friendliness.
Cork Board Insulation
Cork is a unique choice for insulation. It comes from the bark of cork oak trees, which regenerates without harming the tree. Cork forests absorb carbon dioxide, making it very eco-friendly.
Unique Properties for Cabins
Cork board is fire-resistant without chemicals. It’s also moisture-resistant and won’t grow mold. Plus, it’s great at soundproofing, making your cabin quieter.
R-values for cork board are R-3.6 to R-4.0 per inch. It’s best for exterior walls, foundations, and under floors. Cork lasts long, keeping its performance for decades.
The big drawback is its high cost and limited availability in the U.S. Cork insulation is rare, but specialty suppliers can find it. Prices are high, but for those who value sustainability, cork is unmatched.
Hemp and Wood Fiber Options
Hemp and wood fiber insulation are new but promising. Hemp insulation grows fast with little water and pesticides. It’s processed into batts that resist mold, pests, and fire naturally.
Wood fiber insulation is made from wood chips and natural binders. It’s formed into boards that offer good thermal performance. Wood fiber also dampens sound and breathes well for walls.
Both hemp insulation and wood fiber are hard to find in the U.S. European makers lead the market, making imports expensive. But, as demand grows, more U.S. production is starting. Check with local green building suppliers for availability and prices.
| Material Type | R-Value Per Inch | Primary Benefits | Best Applications | Relative Cost |
|---|---|---|---|---|
| Sheep’s Wool | R-3.5 to R-3.8 | Moisture management, renewable, non-toxic | Walls, attics with standard framing | High (2-3x fiberglass) |
| Cotton Denim | R-3.4 to R-3.7 | Recycled content, easy handling, safe installation | Walls, floors, accessible DIY projects | Moderate (15-20% above fiberglass) |
| Cork Board | R-3.6 to R-4.0 | Fire resistant, soundproofing, moisture resistant | Exterior sheathing, foundations, under floors | Very High (3-4x rigid foam) |
| Hemp Fiber | R-3.5 to R-3.8 | Rapidly renewable, pest resistant, breathable | Walls, attics where available | High (limited U.S. availability) |
| Wood Fiber | R-3.5 to R-4.0 | Sound dampening, breathable, rigid structure | Exterior walls, roof assemblies | High (limited U.S. availability) |
Natural and eco-friendly insulation options are great for sustainable cabins. They might cost more, but they’re better for the planet and your health. Choose wisely, balancing needs, budget, and eco-friendliness.
Best Cabin Insulation Types for Your Climate
Choosing the right insulation is like picking the right shoes for your climate. What works in Minnesota won’t work in Georgia. Your cabin’s climate affects everything from the materials you choose to how you install them.
Understanding your climate means picking materials that match your weather. Temperature, humidity, and seasons all play a part. Let’s look at the best strategies for each major climate zone to help you make the right choice.
Cold and Snowy Climate Insulation Strategies
Northern cabins face harsh winters. Cold climate insulation must handle extreme temperatures and snow. Your main goal is to keep your cabin warm and prevent moisture damage.
The biggest challenge is keeping warm air inside. Cold outdoor temperatures create unique problems. You need special solutions to handle this.
Preventing Ice Dams
Ice dams form when heat escapes through your roof. This melts snow that then freezes at the eaves. This can lead to leaks and damage. Proper insulation and ventilation in your attic are key to preventing ice dams.
Your attic needs consistent temperature control to prevent uneven snow melting. Use at least R-49 insulation in attic floors. Make sure it’s covered without gaps. Add soffit and ridge vents for airflow.
Air sealing is also critical. Seal gaps around chimneys, lights, and plumbing with spray foam. This prevents warm air from escaping.

Closed-cell spray foam is the best option for extreme cold. It has high R-values and seals air leaks. It’s perfect for walls and roofs in harsh climates.
Mineral wool is another great choice for cold climates. It resists compression and keeps its performance in sub-zero temperatures. It also doesn’t absorb moisture, which prevents damage during freeze-thaw cycles.
Consider using multiple insulation types for maximum protection. Many use spray foam for air sealing and then add fiberglass batts for more R-value. This approach balances performance and cost.
Hot and Humid Climate Considerations
Southern cabins face different challenges than northern ones. Hot climate insulation must reflect heat and manage moisture. High humidity can destroy insulation.
Preventing heat gain is key in warm climates. Radiant barriers can reduce cooling costs by 5-10%. They work well in sunny areas.
Managing Moisture and Condensation
Humidity control is vital in hot climates. Moisture can degrade insulation and cause mold. Your strategy must block vapor and air infiltration.
Use vapor barriers on the exterior of wall insulation in hot climates. This is different from cold climates where barriers go inside. The goal is to keep humid air out.
Closed-cell spray foam is great for controlling humidity. It blocks moisture and has high R-values. It’s perfect for best insulation applications in sheds in humid areas.
Recommended Materials
Radiant barriers are a top choice for hot climates. Install them in attic spaces to reflect heat. Place them with an air gap facing the heat source.
Closed-cell spray foam offers great protection against heat and moisture. It has high R-values and seals air leaks. It’s ideal for walls and roofs in hot climates.
Rigid foam boards are good for exterior use in hot climates. Polyisocyanurate boards have high R-values and reflective facings. Install them as continuous exterior insulation to prevent thermal bridging.
Moderate Climate Balanced Approach
Cabins in transitional zones need versatile insulation. They face both heating and cooling seasons. You don’t need extreme measures like in harsh climates.
Focus on balanced R-values for year-round comfort. Wall insulation should be around R-15 to R-21. Attics should reach R-38 to R-49. These levels work well for moderate temperature swings.
Fiberglass batts are cost-effective for moderate climates. They fit well in standard wall cavities and provide good thermal resistance. Pair them with careful air sealing for maximum performance without spending too much.
Consider climate-specific insulation strategies that focus on proper installation. Even basic insulation works well if installed correctly. Spend your budget on thorough coverage, not on exotic materials.
| Climate Zone | Primary Challenge | Recommended Materials | Target R-Values | Special Considerations |
|---|---|---|---|---|
| Cold & Snowy | Heat retention and ice dams | Closed-cell spray foam, mineral wool, dense fiberglass | Walls: R-21 to R-28, Attic: R-49 to R-60 | Emphasize air sealing and attic ventilation |
| Hot & Humid | Heat reflection and moisture control | Radiant barriers, closed-cell foam, rigid foam boards | Walls: R-13 to R-19, Attic: R-30 to R-38 | Exterior vapor barriers and proper ventilation |
| Moderate | Year-round balance | Fiberglass batts, blown-in cellulose, open-cell foam | Walls: R-15 to R-21, Attic: R-38 to R-49 | Focus on installation quality and air sealing |
| Mixed Humid | Seasonal temperature and moisture variations | Hybrid systems, mineral wool, vapor-permeable barriers | Walls: R-19 to R-23, Attic: R-38 to R-49 | Smart vapor retarders and seasonal ventilation |
Your cabin’s microclimate might need special adjustments. Consider elevation, sun exposure, and winds. Local building codes often reflect your climate and provide minimum insulation requirements.
Choosing the right insulation affects your comfort and energy costs. Investing in the right materials for your region saves money and improves your cabin’s livability. Take time to evaluate your local conditions before making your final choice.
Insulating Specific Cabin Areas Effectively
Different cabin areas need special insulation. A one-size-fits-all approach won’t work. Each part of your cabin, like walls, floors, and ceilings, has its own needs.
Knowing what each area needs helps you choose the right materials and how to install them. When you insulate your log cabin right, it stays cozy all year.
Wall Insulation Methods and Materials
Walls face the most weather. The right wall insulation keeps your cabin warm and saves energy.
Most cabins use batts or spray foam. Fiberglass batts fit well in stud spaces if installed right. Spray foam seals every gap for better insulation.
For older cabins, blown-in cellulose fills gaps without damaging finishes. This boosts insulation without big changes.
Exterior vs. Interior Wall Insulation
Choosing between exterior and interior wall insulation depends on your cabin and goals. Exterior insulation wraps your cabin, stopping heat loss.
This method is top-notch but harder to install. It costs more because you need to replace siding. But, it stops heat loss better.
Interior insulation is easier to put in. It fits between studs and doesn’t mess up the outside. But, it might not be as effective and could lose heat through studs.

Log cabins need special insulation to meet modern energy standards. Injector foam insulation fills gaps well in hybrid homes.
For real log cabins, open-cell foam expands to seal gaps. This makes sure there are no cold spots where walls meet floors and ceilings.
Chinking and caulking keep your cabin looking rustic while keeping air out. Use flexible chinking that moves with logs as the weather changes.
Floor and Foundation Insulation
The ground pulls heat away in cold weather. Good floor insulation and foundation insulation keep your cabin warm.
Cabins over unheated areas lose a lot of heat through floors. Spray foam under sinks and around boxes insulates well.
Barricade paneling with foam and wafer board insulates floors. It’s great when there’s no basement to insulate from below.
Area rugs add warmth and keep heat in. They’re best in rooms you use most in winter.
Crawl Space Strategies
How you insulate your crawl space depends on if it’s heated or not. For unheated crawl spaces, insulate the floor above with batts or spray foam.
Heated crawl spaces need wall insulation instead. Rigid foam on foundation walls creates a thermal barrier. This brings the crawl space into your thermal envelope.
Moisture control is key in crawl spaces. Use a heavy-duty vapor barrier and seal it well. Ventilation or dehumidification stops moisture damage.
Slab and Basement Options
Slab foundations lose heat around the edges. Perimeter insulation with rigid foam boards stops this.
Under-slab insulation is even better. It stops heat loss into the ground. Use rigid foam across the slab before pouring concrete.
Basement walls need insulation too. You can insulate the interior or exterior. Exterior insulation protects the foundation and keeps it warm.
Roof, Attic, and Cathedral Ceiling Insulation
Heat rises, making roof and attic insulation very important. Without enough, you waste a lot of energy.
Attics with open space can have lots of insulation. Use blown-in cellulose or fiberglass batts. Aim for R-38 to R-60 for best results.
Barricade paneling is great for cabin roofs. It provides structure and insulation. The foam layer insulates well, and the wafer board supports roofing.
Cathedral ceiling insulation is tricky because there’s no attic. Insulate between rafters and keep ventilation channels open.
Spray foam is the best for cathedral ceilings. It insulates and seals air leaks. Closed-cell foam eliminates the need for separate ventilation.
Ventilation Requirements
Good ventilation stops moisture buildup. This hurts insulation and damages your cabin. Standard attics need balanced ventilation.
Keep a 1-inch air gap between insulation and roof sheathing. This lets air flow and prevents ice dams in winter.
Cathedral ceilings with spray foam might not need ventilation. The foam is applied directly to the roof sheathing. Make sure it meets local building codes.
| Cabin Area | Best Insulation Type | Typical R-Value | Special Considerations |
|---|---|---|---|
| Standard Walls | Fiberglass batts or spray foam | R-13 to R-21 | Ensure no gaps between studs |
| Log Cabin Walls | Injector or open-cell foam | R-10 to R-15 | Maintain rustic appearance |
| Floors Over Crawl Space | Spray foam or batts | R-19 to R-30 | Control moisture with vapor barrier |
| Attic Spaces | Blown-in cellulose or fiberglass | R-38 to R-60 | Requires proper ventilation |
| Cathedral Ceilings | Closed-cell spray foam | R-30 to R-38 | May use unvented design |
Insulating each area of your cabin the right way makes it cozy and energy-efficient. This approach keeps your cabin comfortable for years.
Vapor Barriers and Moisture Control
Your cabin’s biggest threat isn’t cold or heat—it’s moisture. The right vapor control strategy is key. Water vapor can cause mold, rot, and damage. Managing moisture keeps your cabin healthy and insulation working well.
Vapor barrier and vapor retarder terms are often mixed up. But the difference is important for your cabin’s health. Getting moisture control right from the start prevents costly repairs and protects your investment for decades.
The Real Difference Between Barriers and Retarders
A vapor barrier blocks almost all moisture. A vapor retarder slows it down. A vapor barrier has a permeance rating of 0.1 perms or less. A retarder has a rating between 0.1 and 1.0 perms, allowing some moisture to pass through.
Think of it like this: a vapor barrier is like a raincoat. It keeps you dry. A vapor retarder is like a windbreaker. It resists moisture but isn’t totally waterproof. Modern building codes often use the term vapor retarder instead of barrier because blocking all moisture can trap water inside walls.
Common vapor retarder materials include kraft paper on fiberglass batts, foil-kraft paper combinations, and polyethylene plastic sheeting. Some manufacturers attach these facings to insulation batts for both vapor retarder and air barrier functions. Rigid foam boards like polyisocyanurate also act as vapor retarders when installed with sealed seams.

Strategic Placement for Maximum Protection
The golden rule used to be simple: always install vapor barriers on the warm side of insulation. But modern science has refined this based on your specific wall assembly and climate. The location depends on where moisture is most likely to condense inside your walls.
In most cases, you’ll install a vapor barrier on the interior (warm) side of wall insulation in cold climates. This prevents warm, humid indoor air from reaching the cold outer layers where it would condense. Spray foam insulation changes this equation entirely because it creates its own vapor barrier when applied thick enough.
Some building codes don’t recognize sprayed foam insulation as a complete vapor barrier, which means your installation might require an additional vapor retarder layer. Check your local building codes before finalizing your insulation plan. For fiberglass batts, you’ll typically want faced batts with the paper or foil facing toward the heated interior space.
Floor and foundation areas need special attention for moisture control. Install vapor retarders between the ground and any insulation in crawl spaces to prevent ground moisture from migrating upward. When insulating basement walls from the interior, the vapor retarder should go between the insulation and the interior finish.
Matching Your Strategy to Your Climate
Where you live dramatically changes your moisture management approach. What works perfectly in Minnesota can cause serious cabin moisture problems in Florida. Understanding your climate zone helps you avoid the most common moisture mistakes.
Cold and very cold climates present the clearest scenario for humidity control. The warm, moist indoor air wants to escape to the cold, dry exterior. Installing a vapor retarder on the interior side prevents this moisture from reaching the cold sheathing where it would condense and freeze. This approach handles condensation prevention effectively in northern states and mountain regions.
Hot and humid climates flip the script entirely. Here, the moisture drive reverses during summer months when humid outdoor air tries to push into your air-conditioned cabin. Some building scientists recommend vapor retarders on the exterior side in these climates, though this remains controversial. The safest approach in hot-humid areas is using “smart” vapor retarders that adjust their permeability based on humidity levels.
Mixed climates where both heating and cooling seasons are significant create the trickiest scenarios. You might have moisture drive in both directions depending on the season. These areas benefit most from vapor-permeable materials that allow walls to dry out in either direction while controlling moisture movement.
| Climate Zone | Vapor Retarder Location | Recommended Approach | Key Consideration |
|---|---|---|---|
| Cold & Very Cold | Interior (warm side) | Standard polyethylene or faced batts | Prevent interior moisture from reaching cold surfaces |
| Hot & Humid | May need exterior placement or omit entirely | Smart vapor retarders or vapor-permeable materials | Allow inward drying during cooling season |
| Mixed Climate | Interior with moderate permeability | Smart vapor retarders that adapt to conditions | Enable bidirectional drying as needed |
| Hot & Dry | Often not required | Focus on air sealing instead | Low humidity reduces condensation risk |
Avoiding Costly Moisture Mistakes
Even experienced builders sometimes make vapor barrier mistakes that lead to trapped moisture and damaged insulation. Learning from these common errors saves you from expensive repairs and protects your cabin’s structural integrity.
The worst mistake is creating a moisture control sandwich by installing vapor retarders on both sides of your wall assembly. This traps any moisture that gets into the wall cavity with no way to dry out. You end up with a petri dish for mold growth between two impermeable layers.
Another frequent error involves using the wrong type of facing on insulation batts. Installing faced batts with the facing toward the exterior instead of the interior defeats the entire purpose. The kraft paper or foil facing should always face the heated space in cold climates.
Failing to seal seams and penetrations undermines your entire vapor retarder system. Every gap around electrical boxes, plumbing pipes, or unsealed joints creates a pathway for moisture to bypass your carefully installed vapor barrier. Use acoustical sealant or special vapor barrier tape to seal all seams and penetrations thoroughly.
Some builders forget that interior applications of foam board insulation must be covered with half-inch gypsum board or other building-code approved material for fire safety. This isn’t just about condensation prevention—it’s a critical safety requirement that protects occupants in case of fire.
Overlooking climate-specific requirements causes problems too. Using a standard approach designed for cold climates in a hot-humid area can trap moisture and create cabin moisture problems instead of preventing them. Always verify that your moisture management strategy matches your specific climate zone and wall assembly design.
Many people confuse air barriers with vapor barriers. While they often work together, they serve different purposes. Air barriers stop air movement (which carries lots of moisture), while vapor barriers control diffusion of water vapor through materials. Your cabin needs both for optimal humidity control, but they’re not interchangeable solutions.
DIY Installation vs. Hiring Professionals
Insulating your cabin is a big decision. You can do it yourself or hire professionals. This choice affects your budget and how well your insulation works. Some insulation is easy to do yourself, but others need special tools and skills.
Knowing what you can do yourself and when to hire experts can save you money. It also helps avoid mistakes.

Materials You Can Install Yourself
Some DIY insulation projects are easy. Fiberglass batts and rolls are good for beginners. They need just a utility knife and measuring tape.
These materials fit between wall studs and ceiling joists. You measure, cut, and place them. It’s simple enough for most people to do.
Rigid foam boards are also DIY-friendly. You can cut them with a handsaw or knife. They’re great for basement walls and crawl spaces.
Loose-fill insulation is another DIY option. It’s for small attic spaces. But, you need to rent equipment and follow the manufacturer’s instructions carefully.
When Professional Help Becomes Essential
Some insulation needs professional insulation installation. Spray foam is one example. It requires special equipment and knowledge.
Getting spray foam right is tricky. It needs the right temperature and mixing. Wrong, and it doesn’t work well or can even be harmful.
Dense-pack cellulose also needs pros. They use special blowers to get the right density. Too loose or too dense can cause problems.
Walls with blown-in insulation also need experts. They drill holes, fill cavities, and seal them up. The cellulose trade group says to hire pros for this job.
Cathedral ceilings and complex roofs need pros too. They involve working at heights and ensuring proper ventilation. Mistakes can lead to moisture issues and expensive fixes.
Safety Gear and Tools for DIY Work
If you’re doing DIY insulation, safety is key. A good respirator is essential to protect your lungs. Insulation fibers can irritate your lungs if you breathe them in.
Wear sealed safety goggles, not just glasses. Insulation fibers can hurt your eyes if they get in. Long sleeves, pants, and gloves protect your skin from irritation.
Here’s a list of what you’ll need:
- Personal protective equipment: N95 or better respirator, sealed safety goggles, disposable coveralls, work gloves, and closed-toe boots
- Cutting and measuring tools: Sharp utility knife with extra blades, straightedge, measuring tape, and carpenter’s square
- Installation tools: Staple gun for faced insulation, caulk gun for sealing gaps, and a stud finder for locating framing
- Lighting and access: Work lights, sturdy ladder rated for your weight, and possibly scaffolding for high areas
- Cleanup supplies: Heavy-duty trash bags, shop vacuum, and lint rollers for removing fibers from clothing
Always check local building and fire codes before starting. Many places require permits for insulation work. Inspections ensure you meet safety standards.
Understanding Professional Service Costs
When hiring insulation contractors, know the costs. Labor prices vary by insulation type, project complexity, and location.
Get written estimates from several contractors. This helps you compare and negotiate. Prices for the same R-value can vary a lot. This difference often shows the contractor’s experience and equipment quality.
| Insulation Type | Average Labor Cost per Sq Ft | Total Cost Range (Material + Labor) | Installation Complexity |
|---|---|---|---|
| Fiberglass Batts | $0.50 – $1.50 | $1.50 – $3.00 | Low to Moderate |
| Blown-In Cellulose | $1.00 – $2.00 | $2.00 – $3.75 | Moderate |
| Spray Foam (Open-Cell) | $1.50 – $2.50 | $3.00 – $5.00 | High |
| Spray Foam (Closed-Cell) | $2.00 – $3.50 | $5.00 – $8.00 | High |
Ask contractors about their experience with your chosen insulation. They should know how to apply it well.
Also, ask about air-sealing services and costs. Many contractors offer this as part of their service. It’s more expensive upfront but works better.
Watch out for low quotes, contractors who won’t give references, or those who rush you. Good insulation work takes time and planning. Reputable contractors give you time to decide.
Think about the long-term benefits, not just the upfront cost. Professional installation comes with warranties. DIY work means you’re responsible for fixing any mistakes, which can cost more.
Cost Comparison and Budget Planning
Understanding the costs of cabin insulation helps you make smart choices. While insulation prices vary, the cheapest option isn’t always the best. Good budget planning looks at both upfront costs and long-term savings.
This cost comparison shows what you’ll spend on materials and installation. We’ll also look at how your investment saves money on utility bills. You’ll see when you can get your money back through lower heating and cooling costs.
Material Costs per Square Foot
The cost of cabin insulation materials varies a lot. Fiberglass batt insulation is the cheapest, costing $0.40 to $0.80 per square foot. It’s a good choice for those on a tight budget.
Blown-in cellulose insulation costs $0.60 to $1.20 per square foot for materials. It’s a good value, perfect for attics and hard-to-reach areas.
Mineral wool insulation costs $1.00 to $2.00 per square foot. It’s more expensive than fiberglass but offers better fire resistance and soundproofing.

Rigid foam boards have different prices. Expanded polystyrene (EPS) boards cost $0.50 to $1.00 per square foot. Extruded polystyrene (XPS) costs $1.00 to $1.50 per square foot. Premium polyisocyanurate boards cost $1.50 to $2.50 per square foot because of their high R-values.
Spray foam is the most expensive option. Open-cell spray foam costs $1.00 to $1.50 per square foot. Closed-cell spray foam costs $2.50 to $4.00+ per square foot. Despite the high cost, it creates a tight air barrier that saves money on other weatherization costs.
Installation Labor Expenses
Labor costs add a lot to your budget and vary by insulation type and location. Installing fiberglass batts costs $0.50 to $1.50 per square foot. Many choose to do this themselves to save money.
Blown-in cellulose or fiberglass needs special equipment. Professional installation costs $1.00 to $2.00 per square foot. It’s not practical for DIY projects.
Spray foam installation is the most expensive at $1.50 to $3.00 per square foot. It needs professional application for proper expansion and curing. It’s not DIY-friendly but offers superior air sealing.
| Insulation Type | Material Cost/Sq Ft | Labor Cost/Sq Ft | Total Cost/Sq Ft |
|---|---|---|---|
| Fiberglass Batts | $0.40 – $0.80 | $0.50 – $1.50 | $0.90 – $2.30 |
| Blown-In Cellulose | $0.60 – $1.20 | $1.00 – $2.00 | $1.60 – $3.20 |
| Mineral Wool | $1.00 – $2.00 | $0.75 – $1.75 | $1.75 – $3.75 |
| Closed-Cell Spray Foam | $2.50 – $4.00 | $1.50 – $3.00 | $4.00 – $7.00 |
For a 1,000-square-foot cabin, insulation costs range from $900 for DIY fiberglass to $7,000+ for professional closed-cell spray foam. Knowing these costs helps you plan your budget and avoid surprises.
Long-Term Energy Savings Calculations
Insulation’s real value shows up in lower utility bills over time. A well-insulated cabin in a cold area can save $500 to $1,500 annually on heating. These savings add up over the years.
To calculate your savings, first figure out your current heating and cooling costs. Most cabins in northern areas spend $1,200 to $3,000 yearly on heating. Upgrading insulation from R-11 to R-20 or higher can cut these costs by 30% to 50%.
For example, if your cabin costs $2,000 annually to heat, improving insulation from R-11 to R-21 might save $700 per year. Over 10 years, that’s $7,000 in savings before energy prices go up, which they usually do by 3-5% each year.
Climate zone greatly affects your savings. Cabins in very cold areas (Minnesota, Maine, Alaska) see the biggest savings from premium insulation. Cabins in milder climates also save but may take longer to see a return.
Return on Investment by Insulation Type
Calculating insulation ROI helps find the best financial choice for you. Fiberglass batts usually pay off in 2 to 5 years when replacing no insulation. Their low cost and decent performance make them a smart choice for those watching their budget.
Blown-in cellulose pays off in 3 to 7 years. Its higher costs are balanced by better coverage in odd spaces and good thermal performance.
Spray foam insulation has interesting ROI dynamics. Despite its high initial cost, its superior air sealing and R-values often lead to a 5 to 10 year payback. Its air barrier properties can cut energy loss by 15-20% more than other insulation types.
Premium options like closed-cell spray foam are best for long-term cabin ownership. A 10-year payback period is less important when you’ll enjoy lower bills for 20, 30, or 40 years. Plus, quality insulation increases your cabin’s resale value, with buyers willing to pay more for energy-efficient homes.
The best ROI often comes from mixing insulation types. Use premium materials in key areas like cathedral ceilings and cost-effective options for standard walls. This maximizes performance per dollar spent.
Financing and Rebate Programs
Many programs can lower your costs for cabin insulation. The federal government offers energy efficiency tax credits covering up to 30% of insulation costs. These credits apply to materials with minimum R-values.
States like New York, California, and Washington offer insulation rebates through energy efficiency programs. Rebates range from $200 to $2,000 depending on the improvements. Check your state energy office website for current programs and eligibility.
Local utility companies also offer rebates for insulation upgrades that reduce energy use. Electric and gas utilities may give $0.10 to $0.50 per square foot rebates for insulation meeting specific R-values. Some utilities also provide free energy audits to find the most cost-effective improvements.
Low-interest financing programs make big insulation projects more affordable. PACE (Property Assessed Clean Energy) financing lets you repay improvement costs through property tax assessments over 10-20 years. Home equity loans or lines of credit are another option, with interest potentially tax-deductible for home improvements.
To get the most from programs, do your energy audit before starting. Document your current conditions and planned improvements. Apply for rebates before starting installation, as many programs require pre-approval. Combine multiple incentives for the best financial benefit.
Choosing the Perfect Insulation for Your Cabin Project
Choosing insulation depends on climate, budget, and how you use your cabin. For cold climates, use high-performance options like closed-cell spray foam or mineral wool. For weekend retreats in moderate climates, fiberglass batts or blown-in cellulose work well.
Match insulation to your needs. Climate-controlled spaces need closed-cell spray foam for moisture control and R-value. Storage areas without temperature demands can use more affordable options. Frame construction offers flexibility, while log cabins need special approaches.
The best insulation balances performance and cost. Spray foam is great for air sealing and thermal resistance. Fiberglass is affordable and reliable. Rigid foam boards are best in high-moisture environments.
Proper installation is key, not just the material. Even top insulation fails if installed wrong. Learn the right techniques or hire experts.
Don’t forget about air sealing, quality windows, ventilation, and heating systems. These cabin insulation tips help make your retreat comfortable for years.
FAQ
What R-value do I need for my cabin walls?
Can I install spray foam insulation myself to save money?
Which insulation type offers the best value for a cabin on a budget?
FAQ
What R-value do I need for my cabin walls?
The R-value needed depends on your climate zone. Most cabins should aim for R-13 to R-21 for walls. For colder regions like Minnesota or Maine, aim for R-21 or higher.
Cabins in moderate climates like the mid-Atlantic can get by with R-13 to R-15. Your attic needs much higher R-values—typically R-38 to R-60—because heat rises. Check local building codes for specific requirements in your area.
Can I install spray foam insulation myself to save money?
We strongly advise against DIY spray foam installation for your cabin. Spray foam requires specialized equipment and expertise. Improper application can lead to off-gassing and health hazards.
Small DIY spray foam kits are fine for tiny gaps and cracks. But they’re not suitable for insulating entire walls or attics. Hiring professionals ensures proper installation and maintains warranties.
Which insulation type offers the best value for a cabin on a budget?
Fiberglass batts typically offer the best value for budget-conscious cabin builders. Material costs run about
FAQ
What R-value do I need for my cabin walls?
The R-value needed depends on your climate zone. Most cabins should aim for R-13 to R-21 for walls. For colder regions like Minnesota or Maine, aim for R-21 or higher.
Cabins in moderate climates like the mid-Atlantic can get by with R-13 to R-15. Your attic needs much higher R-values—typically R-38 to R-60—because heat rises. Check local building codes for specific requirements in your area.
Can I install spray foam insulation myself to save money?
We strongly advise against DIY spray foam installation for your cabin. Spray foam requires specialized equipment and expertise. Improper application can lead to off-gassing and health hazards.
Small DIY spray foam kits are fine for tiny gaps and cracks. But they’re not suitable for insulating entire walls or attics. Hiring professionals ensures proper installation and maintains warranties.
Which insulation type offers the best value for a cabin on a budget?
Fiberglass batts typically offer the best value for budget-conscious cabin builders. Material costs run about $0.40-$0.80 per square foot. If you’re comfortable with DIY work, you can install them yourself.
Blown-in cellulose is another cost-effective option, running around $0.60-$1.20 per square foot installed. While these materials don’t have the highest R-value per inch like spray foam, they deliver solid performance at a fraction of the cost.
How do I insulate a log cabin without ruining its appearance?
Log cabins present unique insulation challenges. You can use foam backer rod and high-quality chinking to seal gaps while maintaining the traditional look. You can also add rigid foam boards or spray foam to the interior side of exterior walls.
Then cover them with tongue-and-groove paneling that complements your logs. Another approach is building insulated stud walls several inches inside your log walls. Fill them with fiberglass or mineral wool, and finish with wood paneling.
What’s the difference between faced and unfaced fiberglass insulation?
Faced fiberglass insulation comes with a paper or foil backing that serves as a built-in vapor retarder. Unfaced insulation is just the bare fiberglass material. Use faced insulation when you need a vapor barrier—typically on the warm side of your walls (interior in cold climates).
The facing should always face toward the living space. Unfaced insulation works well when you already have a vapor barrier in place. Never install faced insulation on both sides of a wall cavity, as this traps moisture and leads to mold and rot.
Is mineral wool insulation worth the extra cost compared to fiberglass?
Mineral wool (like Rockwool) costs about 25-50% more than fiberglass. But the extra investment delivers real benefits for cabin applications. Its superior fire resistance—withstanding temperatures over 2,000°F—makes it ideal near wood stoves, fireplaces, or anywhere fire safety matters.
Mineral wool also provides excellent soundproofing, won’t absorb water like fiberglass can, maintains its shape without sagging over time, and is easier to cut precisely for tight-fitting installation. For cabins with fire hazards or where you want peace and quiet, mineral wool is absolutely worth the premium.
Do I need a vapor barrier in my cabin walls?
Whether you need a vapor barrier depends on your climate zone and wall assembly. In cold climates, you typically need a vapor barrier on the interior (warm) side of insulation to prevent warm, moist indoor air from condensing inside wall cavities.
In hot, humid climates, the situation often reverses—exterior vapor barriers might be necessary. Some modern insulation materials like closed-cell spray foam act as their own vapor barriers and don’t need additional layers. Installing vapor barriers incorrectly (like on both sides of a wall) causes serious moisture problems.
What insulation works best in extremely cold climates?
For cabins in extremely cold climates like Alaska, northern Minnesota, or high-elevation mountain areas, closed-cell spray foam and dense mineral wool are your top performers. Closed-cell spray foam offers the highest R-value per inch (R-6 to R-7), creates an airtight seal that stops drafts cold, and resists moisture infiltration.
Mineral wool provides excellent thermal resistance while being non-combustible—important when you’re relying on wood stoves for heat. Aim for R-21 or higher in walls and R-49 to R-60 in attics. Pay special attention to preventing ice dams through proper attic insulation and ventilation, and don’t neglect floor insulation, which is critical when temperatures plunge below zero.
How much money can proper insulation save on heating and cooling costs?
Properly insulating your cabin can reduce heating and cooling costs by 30-50% annually. Exact savings depend on your climate, cabin size, current insulation levels, and energy costs in your area. A poorly insulated 1,000-square-foot cabin in a cold climate might cost $2,000-$3,000 annually to heat; adding quality insulation could drop that to $1,000-$1,500, saving you $1,000+ each year.
In moderate climates with lower energy costs, annual savings might be $300-$600, which adds up significantly over time. Most insulation upgrades pay for themselves within 5-10 years through energy savings, then continue saving money for decades. Beyond dollars and cents, proper insulation delivers consistent comfort—and you can’t put a price on stepping into a cozy cabin.
Can I use different insulation types in different parts of my cabin?
Absolutely—in fact, using different insulation types for different areas is often the smartest approach! Many cabin builders use spray foam in rim joists and crawl spaces where air sealing is critical, fiberglass batts in walls where cost matters, blown-in cellulose in attic floors for easy coverage of irregular spaces, and rigid foam boards on exterior foundation walls for moisture resistance.
This mixed approach lets you optimize performance and budget for each area’s specific needs. Just make sure your different insulation types work together properly—pay attention to vapor barrier placement, ensure continuous thermal boundaries without gaps, and maintain proper R-values throughout. There’s no rule saying you must use one insulation type everywhere, so take advantage of each material’s strengths where they make the most sense.
What’s the most eco-friendly insulation option for cabins?
Blown-in cellulose insulation tops the list for eco-friendliness—it’s made from up to 85% recycled newspaper, requires relatively little energy to manufacture, and performs excellently while keeping materials out of landfills. Sheep’s wool is another outstanding green option, being completely renewable, naturally moisture-regulating, and requiring minimal processing.
Cotton denim insulation (made from recycled jeans) contains no chemical irritants and repurposes textile waste. Cork board insulation comes from renewable cork oak bark that regenerates without harming trees. Even among these eco-friendly options, performance varies—cellulose and wool deliver R-values comparable to fiberglass, while cork excels at moisture resistance and soundproofing. The greenest insulation is the one you’ll actually use, so balance environmental values with practical considerations like availability, cost, and performance for your specific climate.
How do I prevent ice dams with proper attic insulation?
Ice dams form when heat escapes through your attic, melts snow on your roof, and the water refreezes at the cold eaves, creating damaging ice buildup. Preventing them requires a three-part strategy. First, install high R-value insulation (R-49 to R-60) on your attic floor to keep heat in your living space.
Second, ensure proper attic ventilation—you need air flowing from soffit vents to ridge vents to keep your roof deck cold and prevent uneven melting. Third, seal all air leaks between your living space and attic—gaps around recessed lights, plumbing penetrations, and attic hatches let warm air rise and cause problems. Many ice dam issues come from air leakage, not insufficient insulation, so air sealing is absolutely critical.
Should I remove old insulation before adding new insulation?
It depends on the condition and type of existing insulation. If your current insulation is dry, clean, and pest-free, you can often add new insulation right over it—this is common in attics where you’re increasing R-values. But you should remove old insulation if it’s damaged by water, contaminated by rodents or pests, moldy or mildewed, compressed and no longer performing, or if you’re changing insulation types in walls and need access to the cavities.
Wet or moldy insulation must go—it’s ineffective and potentially hazardous. When adding insulation over existing material, never place faced insulation over faced insulation, as this creates moisture problems. In wall renovations, removing old insulation often makes sense so you can inspect for hidden damage, upgrade wiring or plumbing, and install modern high-performance insulation throughout.
What safety equipment do I need for DIY insulation installation?
Safety gear is non-negotiable when working with insulation materials. At minimum, you need a proper respirator (not just a dust mask)—fiberglass and mineral wool release tiny particles that damage your lungs. Get safety glasses or goggles to protect your eyes from irritating fibers.
Wear long sleeves, long pants, and gloves—disposable coveralls work great and can be tossed after the job. A hat or hood keeps insulation out of your hair. Good work boots protect your feet, and you’ll need a sharp utility knife or insulation saw for cutting insulation.
When working in attics, bring proper lighting and watch your footing—step only on joists, never between them. If you’re working with rigid foam or cutting mineral wool, a dust mask rated for fine particles is essential. Keep the work area well-ventilated and take frequent breaks in fresh air.
How long does cabin insulation typically last?
Quality insulation lasts decades when properly installed and protected from moisture and pests. Fiberglass batts can last 80-100 years if they stay dry and undisturbed, though they may settle or compress slightly over time. Spray foam should last the lifetime of your cabin—50+ years—without degrading, losing R-value, or requiring replacement.
Cellulose insulation typically lasts 20-30 years before settling significantly affects performance, though properly installed dense-pack cellulose lasts much longer. Mineral wool is incredibly durable and can last 50+ years while resisting moisture, pests, and compression. The main threats to insulation longevity are water damage (which ruins any insulation type), pest infestations, and poor installation. Regular roof and plumbing maintenance prevents water damage, while proper pest control protects your investment. Bottom line: quality insulation properly installed in a well-maintained cabin should last as long as the structure itself.
FAQ
What R-value do I need for my cabin walls?
The R-value needed depends on your climate zone. Most cabins should aim for R-13 to R-21 for walls. For colder regions like Minnesota or Maine, aim for R-21 or higher.
Cabins in moderate climates like the mid-Atlantic can get by with R-13 to R-15. Your attic needs much higher R-values—typically R-38 to R-60—because heat rises. Check local building codes for specific requirements in your area.
Can I install spray foam insulation myself to save money?
We strongly advise against DIY spray foam installation for your cabin. Spray foam requires specialized equipment and expertise. Improper application can lead to off-gassing and health hazards.
Small DIY spray foam kits are fine for tiny gaps and cracks. But they’re not suitable for insulating entire walls or attics. Hiring professionals ensures proper installation and maintains warranties.
Which insulation type offers the best value for a cabin on a budget?
Fiberglass batts typically offer the best value for budget-conscious cabin builders. Material costs run about
FAQ
What R-value do I need for my cabin walls?
The R-value needed depends on your climate zone. Most cabins should aim for R-13 to R-21 for walls. For colder regions like Minnesota or Maine, aim for R-21 or higher.
Cabins in moderate climates like the mid-Atlantic can get by with R-13 to R-15. Your attic needs much higher R-values—typically R-38 to R-60—because heat rises. Check local building codes for specific requirements in your area.
Can I install spray foam insulation myself to save money?
We strongly advise against DIY spray foam installation for your cabin. Spray foam requires specialized equipment and expertise. Improper application can lead to off-gassing and health hazards.
Small DIY spray foam kits are fine for tiny gaps and cracks. But they’re not suitable for insulating entire walls or attics. Hiring professionals ensures proper installation and maintains warranties.
Which insulation type offers the best value for a cabin on a budget?
Fiberglass batts typically offer the best value for budget-conscious cabin builders. Material costs run about $0.40-$0.80 per square foot. If you’re comfortable with DIY work, you can install them yourself.
Blown-in cellulose is another cost-effective option, running around $0.60-$1.20 per square foot installed. While these materials don’t have the highest R-value per inch like spray foam, they deliver solid performance at a fraction of the cost.
How do I insulate a log cabin without ruining its appearance?
Log cabins present unique insulation challenges. You can use foam backer rod and high-quality chinking to seal gaps while maintaining the traditional look. You can also add rigid foam boards or spray foam to the interior side of exterior walls.
Then cover them with tongue-and-groove paneling that complements your logs. Another approach is building insulated stud walls several inches inside your log walls. Fill them with fiberglass or mineral wool, and finish with wood paneling.
What’s the difference between faced and unfaced fiberglass insulation?
Faced fiberglass insulation comes with a paper or foil backing that serves as a built-in vapor retarder. Unfaced insulation is just the bare fiberglass material. Use faced insulation when you need a vapor barrier—typically on the warm side of your walls (interior in cold climates).
The facing should always face toward the living space. Unfaced insulation works well when you already have a vapor barrier in place. Never install faced insulation on both sides of a wall cavity, as this traps moisture and leads to mold and rot.
Is mineral wool insulation worth the extra cost compared to fiberglass?
Mineral wool (like Rockwool) costs about 25-50% more than fiberglass. But the extra investment delivers real benefits for cabin applications. Its superior fire resistance—withstanding temperatures over 2,000°F—makes it ideal near wood stoves, fireplaces, or anywhere fire safety matters.
Mineral wool also provides excellent soundproofing, won’t absorb water like fiberglass can, maintains its shape without sagging over time, and is easier to cut precisely for tight-fitting installation. For cabins with fire hazards or where you want peace and quiet, mineral wool is absolutely worth the premium.
Do I need a vapor barrier in my cabin walls?
Whether you need a vapor barrier depends on your climate zone and wall assembly. In cold climates, you typically need a vapor barrier on the interior (warm) side of insulation to prevent warm, moist indoor air from condensing inside wall cavities.
In hot, humid climates, the situation often reverses—exterior vapor barriers might be necessary. Some modern insulation materials like closed-cell spray foam act as their own vapor barriers and don’t need additional layers. Installing vapor barriers incorrectly (like on both sides of a wall) causes serious moisture problems.
What insulation works best in extremely cold climates?
For cabins in extremely cold climates like Alaska, northern Minnesota, or high-elevation mountain areas, closed-cell spray foam and dense mineral wool are your top performers. Closed-cell spray foam offers the highest R-value per inch (R-6 to R-7), creates an airtight seal that stops drafts cold, and resists moisture infiltration.
Mineral wool provides excellent thermal resistance while being non-combustible—important when you’re relying on wood stoves for heat. Aim for R-21 or higher in walls and R-49 to R-60 in attics. Pay special attention to preventing ice dams through proper attic insulation and ventilation, and don’t neglect floor insulation, which is critical when temperatures plunge below zero.
How much money can proper insulation save on heating and cooling costs?
Properly insulating your cabin can reduce heating and cooling costs by 30-50% annually. Exact savings depend on your climate, cabin size, current insulation levels, and energy costs in your area. A poorly insulated 1,000-square-foot cabin in a cold climate might cost $2,000-$3,000 annually to heat; adding quality insulation could drop that to $1,000-$1,500, saving you $1,000+ each year.
In moderate climates with lower energy costs, annual savings might be $300-$600, which adds up significantly over time. Most insulation upgrades pay for themselves within 5-10 years through energy savings, then continue saving money for decades. Beyond dollars and cents, proper insulation delivers consistent comfort—and you can’t put a price on stepping into a cozy cabin.
Can I use different insulation types in different parts of my cabin?
Absolutely—in fact, using different insulation types for different areas is often the smartest approach! Many cabin builders use spray foam in rim joists and crawl spaces where air sealing is critical, fiberglass batts in walls where cost matters, blown-in cellulose in attic floors for easy coverage of irregular spaces, and rigid foam boards on exterior foundation walls for moisture resistance.
This mixed approach lets you optimize performance and budget for each area’s specific needs. Just make sure your different insulation types work together properly—pay attention to vapor barrier placement, ensure continuous thermal boundaries without gaps, and maintain proper R-values throughout. There’s no rule saying you must use one insulation type everywhere, so take advantage of each material’s strengths where they make the most sense.
What’s the most eco-friendly insulation option for cabins?
Blown-in cellulose insulation tops the list for eco-friendliness—it’s made from up to 85% recycled newspaper, requires relatively little energy to manufacture, and performs excellently while keeping materials out of landfills. Sheep’s wool is another outstanding green option, being completely renewable, naturally moisture-regulating, and requiring minimal processing.
Cotton denim insulation (made from recycled jeans) contains no chemical irritants and repurposes textile waste. Cork board insulation comes from renewable cork oak bark that regenerates without harming trees. Even among these eco-friendly options, performance varies—cellulose and wool deliver R-values comparable to fiberglass, while cork excels at moisture resistance and soundproofing. The greenest insulation is the one you’ll actually use, so balance environmental values with practical considerations like availability, cost, and performance for your specific climate.
How do I prevent ice dams with proper attic insulation?
Ice dams form when heat escapes through your attic, melts snow on your roof, and the water refreezes at the cold eaves, creating damaging ice buildup. Preventing them requires a three-part strategy. First, install high R-value insulation (R-49 to R-60) on your attic floor to keep heat in your living space.
Second, ensure proper attic ventilation—you need air flowing from soffit vents to ridge vents to keep your roof deck cold and prevent uneven melting. Third, seal all air leaks between your living space and attic—gaps around recessed lights, plumbing penetrations, and attic hatches let warm air rise and cause problems. Many ice dam issues come from air leakage, not insufficient insulation, so air sealing is absolutely critical.
Should I remove old insulation before adding new insulation?
It depends on the condition and type of existing insulation. If your current insulation is dry, clean, and pest-free, you can often add new insulation right over it—this is common in attics where you’re increasing R-values. But you should remove old insulation if it’s damaged by water, contaminated by rodents or pests, moldy or mildewed, compressed and no longer performing, or if you’re changing insulation types in walls and need access to the cavities.
Wet or moldy insulation must go—it’s ineffective and potentially hazardous. When adding insulation over existing material, never place faced insulation over faced insulation, as this creates moisture problems. In wall renovations, removing old insulation often makes sense so you can inspect for hidden damage, upgrade wiring or plumbing, and install modern high-performance insulation throughout.
What safety equipment do I need for DIY insulation installation?
Safety gear is non-negotiable when working with insulation materials. At minimum, you need a proper respirator (not just a dust mask)—fiberglass and mineral wool release tiny particles that damage your lungs. Get safety glasses or goggles to protect your eyes from irritating fibers.
Wear long sleeves, long pants, and gloves—disposable coveralls work great and can be tossed after the job. A hat or hood keeps insulation out of your hair. Good work boots protect your feet, and you’ll need a sharp utility knife or insulation saw for cutting insulation.
When working in attics, bring proper lighting and watch your footing—step only on joists, never between them. If you’re working with rigid foam or cutting mineral wool, a dust mask rated for fine particles is essential. Keep the work area well-ventilated and take frequent breaks in fresh air.
How long does cabin insulation typically last?
Quality insulation lasts decades when properly installed and protected from moisture and pests. Fiberglass batts can last 80-100 years if they stay dry and undisturbed, though they may settle or compress slightly over time. Spray foam should last the lifetime of your cabin—50+ years—without degrading, losing R-value, or requiring replacement.
Cellulose insulation typically lasts 20-30 years before settling significantly affects performance, though properly installed dense-pack cellulose lasts much longer. Mineral wool is incredibly durable and can last 50+ years while resisting moisture, pests, and compression. The main threats to insulation longevity are water damage (which ruins any insulation type), pest infestations, and poor installation. Regular roof and plumbing maintenance prevents water damage, while proper pest control protects your investment. Bottom line: quality insulation properly installed in a well-maintained cabin should last as long as the structure itself.
.40-
FAQ
What R-value do I need for my cabin walls?
The R-value needed depends on your climate zone. Most cabins should aim for R-13 to R-21 for walls. For colder regions like Minnesota or Maine, aim for R-21 or higher.
Cabins in moderate climates like the mid-Atlantic can get by with R-13 to R-15. Your attic needs much higher R-values—typically R-38 to R-60—because heat rises. Check local building codes for specific requirements in your area.
Can I install spray foam insulation myself to save money?
We strongly advise against DIY spray foam installation for your cabin. Spray foam requires specialized equipment and expertise. Improper application can lead to off-gassing and health hazards.
Small DIY spray foam kits are fine for tiny gaps and cracks. But they’re not suitable for insulating entire walls or attics. Hiring professionals ensures proper installation and maintains warranties.
Which insulation type offers the best value for a cabin on a budget?
Fiberglass batts typically offer the best value for budget-conscious cabin builders. Material costs run about $0.40-$0.80 per square foot. If you’re comfortable with DIY work, you can install them yourself.
Blown-in cellulose is another cost-effective option, running around $0.60-$1.20 per square foot installed. While these materials don’t have the highest R-value per inch like spray foam, they deliver solid performance at a fraction of the cost.
How do I insulate a log cabin without ruining its appearance?
Log cabins present unique insulation challenges. You can use foam backer rod and high-quality chinking to seal gaps while maintaining the traditional look. You can also add rigid foam boards or spray foam to the interior side of exterior walls.
Then cover them with tongue-and-groove paneling that complements your logs. Another approach is building insulated stud walls several inches inside your log walls. Fill them with fiberglass or mineral wool, and finish with wood paneling.
What’s the difference between faced and unfaced fiberglass insulation?
Faced fiberglass insulation comes with a paper or foil backing that serves as a built-in vapor retarder. Unfaced insulation is just the bare fiberglass material. Use faced insulation when you need a vapor barrier—typically on the warm side of your walls (interior in cold climates).
The facing should always face toward the living space. Unfaced insulation works well when you already have a vapor barrier in place. Never install faced insulation on both sides of a wall cavity, as this traps moisture and leads to mold and rot.
Is mineral wool insulation worth the extra cost compared to fiberglass?
Mineral wool (like Rockwool) costs about 25-50% more than fiberglass. But the extra investment delivers real benefits for cabin applications. Its superior fire resistance—withstanding temperatures over 2,000°F—makes it ideal near wood stoves, fireplaces, or anywhere fire safety matters.
Mineral wool also provides excellent soundproofing, won’t absorb water like fiberglass can, maintains its shape without sagging over time, and is easier to cut precisely for tight-fitting installation. For cabins with fire hazards or where you want peace and quiet, mineral wool is absolutely worth the premium.
Do I need a vapor barrier in my cabin walls?
Whether you need a vapor barrier depends on your climate zone and wall assembly. In cold climates, you typically need a vapor barrier on the interior (warm) side of insulation to prevent warm, moist indoor air from condensing inside wall cavities.
In hot, humid climates, the situation often reverses—exterior vapor barriers might be necessary. Some modern insulation materials like closed-cell spray foam act as their own vapor barriers and don’t need additional layers. Installing vapor barriers incorrectly (like on both sides of a wall) causes serious moisture problems.
What insulation works best in extremely cold climates?
For cabins in extremely cold climates like Alaska, northern Minnesota, or high-elevation mountain areas, closed-cell spray foam and dense mineral wool are your top performers. Closed-cell spray foam offers the highest R-value per inch (R-6 to R-7), creates an airtight seal that stops drafts cold, and resists moisture infiltration.
Mineral wool provides excellent thermal resistance while being non-combustible—important when you’re relying on wood stoves for heat. Aim for R-21 or higher in walls and R-49 to R-60 in attics. Pay special attention to preventing ice dams through proper attic insulation and ventilation, and don’t neglect floor insulation, which is critical when temperatures plunge below zero.
How much money can proper insulation save on heating and cooling costs?
Properly insulating your cabin can reduce heating and cooling costs by 30-50% annually. Exact savings depend on your climate, cabin size, current insulation levels, and energy costs in your area. A poorly insulated 1,000-square-foot cabin in a cold climate might cost $2,000-$3,000 annually to heat; adding quality insulation could drop that to $1,000-$1,500, saving you $1,000+ each year.
In moderate climates with lower energy costs, annual savings might be $300-$600, which adds up significantly over time. Most insulation upgrades pay for themselves within 5-10 years through energy savings, then continue saving money for decades. Beyond dollars and cents, proper insulation delivers consistent comfort—and you can’t put a price on stepping into a cozy cabin.
Can I use different insulation types in different parts of my cabin?
Absolutely—in fact, using different insulation types for different areas is often the smartest approach! Many cabin builders use spray foam in rim joists and crawl spaces where air sealing is critical, fiberglass batts in walls where cost matters, blown-in cellulose in attic floors for easy coverage of irregular spaces, and rigid foam boards on exterior foundation walls for moisture resistance.
This mixed approach lets you optimize performance and budget for each area’s specific needs. Just make sure your different insulation types work together properly—pay attention to vapor barrier placement, ensure continuous thermal boundaries without gaps, and maintain proper R-values throughout. There’s no rule saying you must use one insulation type everywhere, so take advantage of each material’s strengths where they make the most sense.
What’s the most eco-friendly insulation option for cabins?
Blown-in cellulose insulation tops the list for eco-friendliness—it’s made from up to 85% recycled newspaper, requires relatively little energy to manufacture, and performs excellently while keeping materials out of landfills. Sheep’s wool is another outstanding green option, being completely renewable, naturally moisture-regulating, and requiring minimal processing.
Cotton denim insulation (made from recycled jeans) contains no chemical irritants and repurposes textile waste. Cork board insulation comes from renewable cork oak bark that regenerates without harming trees. Even among these eco-friendly options, performance varies—cellulose and wool deliver R-values comparable to fiberglass, while cork excels at moisture resistance and soundproofing. The greenest insulation is the one you’ll actually use, so balance environmental values with practical considerations like availability, cost, and performance for your specific climate.
How do I prevent ice dams with proper attic insulation?
Ice dams form when heat escapes through your attic, melts snow on your roof, and the water refreezes at the cold eaves, creating damaging ice buildup. Preventing them requires a three-part strategy. First, install high R-value insulation (R-49 to R-60) on your attic floor to keep heat in your living space.
Second, ensure proper attic ventilation—you need air flowing from soffit vents to ridge vents to keep your roof deck cold and prevent uneven melting. Third, seal all air leaks between your living space and attic—gaps around recessed lights, plumbing penetrations, and attic hatches let warm air rise and cause problems. Many ice dam issues come from air leakage, not insufficient insulation, so air sealing is absolutely critical.
Should I remove old insulation before adding new insulation?
It depends on the condition and type of existing insulation. If your current insulation is dry, clean, and pest-free, you can often add new insulation right over it—this is common in attics where you’re increasing R-values. But you should remove old insulation if it’s damaged by water, contaminated by rodents or pests, moldy or mildewed, compressed and no longer performing, or if you’re changing insulation types in walls and need access to the cavities.
Wet or moldy insulation must go—it’s ineffective and potentially hazardous. When adding insulation over existing material, never place faced insulation over faced insulation, as this creates moisture problems. In wall renovations, removing old insulation often makes sense so you can inspect for hidden damage, upgrade wiring or plumbing, and install modern high-performance insulation throughout.
What safety equipment do I need for DIY insulation installation?
Safety gear is non-negotiable when working with insulation materials. At minimum, you need a proper respirator (not just a dust mask)—fiberglass and mineral wool release tiny particles that damage your lungs. Get safety glasses or goggles to protect your eyes from irritating fibers.
Wear long sleeves, long pants, and gloves—disposable coveralls work great and can be tossed after the job. A hat or hood keeps insulation out of your hair. Good work boots protect your feet, and you’ll need a sharp utility knife or insulation saw for cutting insulation.
When working in attics, bring proper lighting and watch your footing—step only on joists, never between them. If you’re working with rigid foam or cutting mineral wool, a dust mask rated for fine particles is essential. Keep the work area well-ventilated and take frequent breaks in fresh air.
How long does cabin insulation typically last?
Quality insulation lasts decades when properly installed and protected from moisture and pests. Fiberglass batts can last 80-100 years if they stay dry and undisturbed, though they may settle or compress slightly over time. Spray foam should last the lifetime of your cabin—50+ years—without degrading, losing R-value, or requiring replacement.
Cellulose insulation typically lasts 20-30 years before settling significantly affects performance, though properly installed dense-pack cellulose lasts much longer. Mineral wool is incredibly durable and can last 50+ years while resisting moisture, pests, and compression. The main threats to insulation longevity are water damage (which ruins any insulation type), pest infestations, and poor installation. Regular roof and plumbing maintenance prevents water damage, while proper pest control protects your investment. Bottom line: quality insulation properly installed in a well-maintained cabin should last as long as the structure itself.
.80 per square foot. If you’re comfortable with DIY work, you can install them yourself.
Blown-in cellulose is another cost-effective option, running around
FAQ
What R-value do I need for my cabin walls?
The R-value needed depends on your climate zone. Most cabins should aim for R-13 to R-21 for walls. For colder regions like Minnesota or Maine, aim for R-21 or higher.
Cabins in moderate climates like the mid-Atlantic can get by with R-13 to R-15. Your attic needs much higher R-values—typically R-38 to R-60—because heat rises. Check local building codes for specific requirements in your area.
Can I install spray foam insulation myself to save money?
We strongly advise against DIY spray foam installation for your cabin. Spray foam requires specialized equipment and expertise. Improper application can lead to off-gassing and health hazards.
Small DIY spray foam kits are fine for tiny gaps and cracks. But they’re not suitable for insulating entire walls or attics. Hiring professionals ensures proper installation and maintains warranties.
Which insulation type offers the best value for a cabin on a budget?
Fiberglass batts typically offer the best value for budget-conscious cabin builders. Material costs run about $0.40-$0.80 per square foot. If you’re comfortable with DIY work, you can install them yourself.
Blown-in cellulose is another cost-effective option, running around $0.60-$1.20 per square foot installed. While these materials don’t have the highest R-value per inch like spray foam, they deliver solid performance at a fraction of the cost.
How do I insulate a log cabin without ruining its appearance?
Log cabins present unique insulation challenges. You can use foam backer rod and high-quality chinking to seal gaps while maintaining the traditional look. You can also add rigid foam boards or spray foam to the interior side of exterior walls.
Then cover them with tongue-and-groove paneling that complements your logs. Another approach is building insulated stud walls several inches inside your log walls. Fill them with fiberglass or mineral wool, and finish with wood paneling.
What’s the difference between faced and unfaced fiberglass insulation?
Faced fiberglass insulation comes with a paper or foil backing that serves as a built-in vapor retarder. Unfaced insulation is just the bare fiberglass material. Use faced insulation when you need a vapor barrier—typically on the warm side of your walls (interior in cold climates).
The facing should always face toward the living space. Unfaced insulation works well when you already have a vapor barrier in place. Never install faced insulation on both sides of a wall cavity, as this traps moisture and leads to mold and rot.
Is mineral wool insulation worth the extra cost compared to fiberglass?
Mineral wool (like Rockwool) costs about 25-50% more than fiberglass. But the extra investment delivers real benefits for cabin applications. Its superior fire resistance—withstanding temperatures over 2,000°F—makes it ideal near wood stoves, fireplaces, or anywhere fire safety matters.
Mineral wool also provides excellent soundproofing, won’t absorb water like fiberglass can, maintains its shape without sagging over time, and is easier to cut precisely for tight-fitting installation. For cabins with fire hazards or where you want peace and quiet, mineral wool is absolutely worth the premium.
Do I need a vapor barrier in my cabin walls?
Whether you need a vapor barrier depends on your climate zone and wall assembly. In cold climates, you typically need a vapor barrier on the interior (warm) side of insulation to prevent warm, moist indoor air from condensing inside wall cavities.
In hot, humid climates, the situation often reverses—exterior vapor barriers might be necessary. Some modern insulation materials like closed-cell spray foam act as their own vapor barriers and don’t need additional layers. Installing vapor barriers incorrectly (like on both sides of a wall) causes serious moisture problems.
What insulation works best in extremely cold climates?
For cabins in extremely cold climates like Alaska, northern Minnesota, or high-elevation mountain areas, closed-cell spray foam and dense mineral wool are your top performers. Closed-cell spray foam offers the highest R-value per inch (R-6 to R-7), creates an airtight seal that stops drafts cold, and resists moisture infiltration.
Mineral wool provides excellent thermal resistance while being non-combustible—important when you’re relying on wood stoves for heat. Aim for R-21 or higher in walls and R-49 to R-60 in attics. Pay special attention to preventing ice dams through proper attic insulation and ventilation, and don’t neglect floor insulation, which is critical when temperatures plunge below zero.
How much money can proper insulation save on heating and cooling costs?
Properly insulating your cabin can reduce heating and cooling costs by 30-50% annually. Exact savings depend on your climate, cabin size, current insulation levels, and energy costs in your area. A poorly insulated 1,000-square-foot cabin in a cold climate might cost $2,000-$3,000 annually to heat; adding quality insulation could drop that to $1,000-$1,500, saving you $1,000+ each year.
In moderate climates with lower energy costs, annual savings might be $300-$600, which adds up significantly over time. Most insulation upgrades pay for themselves within 5-10 years through energy savings, then continue saving money for decades. Beyond dollars and cents, proper insulation delivers consistent comfort—and you can’t put a price on stepping into a cozy cabin.
Can I use different insulation types in different parts of my cabin?
Absolutely—in fact, using different insulation types for different areas is often the smartest approach! Many cabin builders use spray foam in rim joists and crawl spaces where air sealing is critical, fiberglass batts in walls where cost matters, blown-in cellulose in attic floors for easy coverage of irregular spaces, and rigid foam boards on exterior foundation walls for moisture resistance.
This mixed approach lets you optimize performance and budget for each area’s specific needs. Just make sure your different insulation types work together properly—pay attention to vapor barrier placement, ensure continuous thermal boundaries without gaps, and maintain proper R-values throughout. There’s no rule saying you must use one insulation type everywhere, so take advantage of each material’s strengths where they make the most sense.
What’s the most eco-friendly insulation option for cabins?
Blown-in cellulose insulation tops the list for eco-friendliness—it’s made from up to 85% recycled newspaper, requires relatively little energy to manufacture, and performs excellently while keeping materials out of landfills. Sheep’s wool is another outstanding green option, being completely renewable, naturally moisture-regulating, and requiring minimal processing.
Cotton denim insulation (made from recycled jeans) contains no chemical irritants and repurposes textile waste. Cork board insulation comes from renewable cork oak bark that regenerates without harming trees. Even among these eco-friendly options, performance varies—cellulose and wool deliver R-values comparable to fiberglass, while cork excels at moisture resistance and soundproofing. The greenest insulation is the one you’ll actually use, so balance environmental values with practical considerations like availability, cost, and performance for your specific climate.
How do I prevent ice dams with proper attic insulation?
Ice dams form when heat escapes through your attic, melts snow on your roof, and the water refreezes at the cold eaves, creating damaging ice buildup. Preventing them requires a three-part strategy. First, install high R-value insulation (R-49 to R-60) on your attic floor to keep heat in your living space.
Second, ensure proper attic ventilation—you need air flowing from soffit vents to ridge vents to keep your roof deck cold and prevent uneven melting. Third, seal all air leaks between your living space and attic—gaps around recessed lights, plumbing penetrations, and attic hatches let warm air rise and cause problems. Many ice dam issues come from air leakage, not insufficient insulation, so air sealing is absolutely critical.
Should I remove old insulation before adding new insulation?
It depends on the condition and type of existing insulation. If your current insulation is dry, clean, and pest-free, you can often add new insulation right over it—this is common in attics where you’re increasing R-values. But you should remove old insulation if it’s damaged by water, contaminated by rodents or pests, moldy or mildewed, compressed and no longer performing, or if you’re changing insulation types in walls and need access to the cavities.
Wet or moldy insulation must go—it’s ineffective and potentially hazardous. When adding insulation over existing material, never place faced insulation over faced insulation, as this creates moisture problems. In wall renovations, removing old insulation often makes sense so you can inspect for hidden damage, upgrade wiring or plumbing, and install modern high-performance insulation throughout.
What safety equipment do I need for DIY insulation installation?
Safety gear is non-negotiable when working with insulation materials. At minimum, you need a proper respirator (not just a dust mask)—fiberglass and mineral wool release tiny particles that damage your lungs. Get safety glasses or goggles to protect your eyes from irritating fibers.
Wear long sleeves, long pants, and gloves—disposable coveralls work great and can be tossed after the job. A hat or hood keeps insulation out of your hair. Good work boots protect your feet, and you’ll need a sharp utility knife or insulation saw for cutting insulation.
When working in attics, bring proper lighting and watch your footing—step only on joists, never between them. If you’re working with rigid foam or cutting mineral wool, a dust mask rated for fine particles is essential. Keep the work area well-ventilated and take frequent breaks in fresh air.
How long does cabin insulation typically last?
Quality insulation lasts decades when properly installed and protected from moisture and pests. Fiberglass batts can last 80-100 years if they stay dry and undisturbed, though they may settle or compress slightly over time. Spray foam should last the lifetime of your cabin—50+ years—without degrading, losing R-value, or requiring replacement.
Cellulose insulation typically lasts 20-30 years before settling significantly affects performance, though properly installed dense-pack cellulose lasts much longer. Mineral wool is incredibly durable and can last 50+ years while resisting moisture, pests, and compression. The main threats to insulation longevity are water damage (which ruins any insulation type), pest infestations, and poor installation. Regular roof and plumbing maintenance prevents water damage, while proper pest control protects your investment. Bottom line: quality insulation properly installed in a well-maintained cabin should last as long as the structure itself.
.60-
FAQ
What R-value do I need for my cabin walls?
The R-value needed depends on your climate zone. Most cabins should aim for R-13 to R-21 for walls. For colder regions like Minnesota or Maine, aim for R-21 or higher.
Cabins in moderate climates like the mid-Atlantic can get by with R-13 to R-15. Your attic needs much higher R-values—typically R-38 to R-60—because heat rises. Check local building codes for specific requirements in your area.
Can I install spray foam insulation myself to save money?
We strongly advise against DIY spray foam installation for your cabin. Spray foam requires specialized equipment and expertise. Improper application can lead to off-gassing and health hazards.
Small DIY spray foam kits are fine for tiny gaps and cracks. But they’re not suitable for insulating entire walls or attics. Hiring professionals ensures proper installation and maintains warranties.
Which insulation type offers the best value for a cabin on a budget?
Fiberglass batts typically offer the best value for budget-conscious cabin builders. Material costs run about $0.40-$0.80 per square foot. If you’re comfortable with DIY work, you can install them yourself.
Blown-in cellulose is another cost-effective option, running around $0.60-$1.20 per square foot installed. While these materials don’t have the highest R-value per inch like spray foam, they deliver solid performance at a fraction of the cost.
How do I insulate a log cabin without ruining its appearance?
Log cabins present unique insulation challenges. You can use foam backer rod and high-quality chinking to seal gaps while maintaining the traditional look. You can also add rigid foam boards or spray foam to the interior side of exterior walls.
Then cover them with tongue-and-groove paneling that complements your logs. Another approach is building insulated stud walls several inches inside your log walls. Fill them with fiberglass or mineral wool, and finish with wood paneling.
What’s the difference between faced and unfaced fiberglass insulation?
Faced fiberglass insulation comes with a paper or foil backing that serves as a built-in vapor retarder. Unfaced insulation is just the bare fiberglass material. Use faced insulation when you need a vapor barrier—typically on the warm side of your walls (interior in cold climates).
The facing should always face toward the living space. Unfaced insulation works well when you already have a vapor barrier in place. Never install faced insulation on both sides of a wall cavity, as this traps moisture and leads to mold and rot.
Is mineral wool insulation worth the extra cost compared to fiberglass?
Mineral wool (like Rockwool) costs about 25-50% more than fiberglass. But the extra investment delivers real benefits for cabin applications. Its superior fire resistance—withstanding temperatures over 2,000°F—makes it ideal near wood stoves, fireplaces, or anywhere fire safety matters.
Mineral wool also provides excellent soundproofing, won’t absorb water like fiberglass can, maintains its shape without sagging over time, and is easier to cut precisely for tight-fitting installation. For cabins with fire hazards or where you want peace and quiet, mineral wool is absolutely worth the premium.
Do I need a vapor barrier in my cabin walls?
Whether you need a vapor barrier depends on your climate zone and wall assembly. In cold climates, you typically need a vapor barrier on the interior (warm) side of insulation to prevent warm, moist indoor air from condensing inside wall cavities.
In hot, humid climates, the situation often reverses—exterior vapor barriers might be necessary. Some modern insulation materials like closed-cell spray foam act as their own vapor barriers and don’t need additional layers. Installing vapor barriers incorrectly (like on both sides of a wall) causes serious moisture problems.
What insulation works best in extremely cold climates?
For cabins in extremely cold climates like Alaska, northern Minnesota, or high-elevation mountain areas, closed-cell spray foam and dense mineral wool are your top performers. Closed-cell spray foam offers the highest R-value per inch (R-6 to R-7), creates an airtight seal that stops drafts cold, and resists moisture infiltration.
Mineral wool provides excellent thermal resistance while being non-combustible—important when you’re relying on wood stoves for heat. Aim for R-21 or higher in walls and R-49 to R-60 in attics. Pay special attention to preventing ice dams through proper attic insulation and ventilation, and don’t neglect floor insulation, which is critical when temperatures plunge below zero.
How much money can proper insulation save on heating and cooling costs?
Properly insulating your cabin can reduce heating and cooling costs by 30-50% annually. Exact savings depend on your climate, cabin size, current insulation levels, and energy costs in your area. A poorly insulated 1,000-square-foot cabin in a cold climate might cost $2,000-$3,000 annually to heat; adding quality insulation could drop that to $1,000-$1,500, saving you $1,000+ each year.
In moderate climates with lower energy costs, annual savings might be $300-$600, which adds up significantly over time. Most insulation upgrades pay for themselves within 5-10 years through energy savings, then continue saving money for decades. Beyond dollars and cents, proper insulation delivers consistent comfort—and you can’t put a price on stepping into a cozy cabin.
Can I use different insulation types in different parts of my cabin?
Absolutely—in fact, using different insulation types for different areas is often the smartest approach! Many cabin builders use spray foam in rim joists and crawl spaces where air sealing is critical, fiberglass batts in walls where cost matters, blown-in cellulose in attic floors for easy coverage of irregular spaces, and rigid foam boards on exterior foundation walls for moisture resistance.
This mixed approach lets you optimize performance and budget for each area’s specific needs. Just make sure your different insulation types work together properly—pay attention to vapor barrier placement, ensure continuous thermal boundaries without gaps, and maintain proper R-values throughout. There’s no rule saying you must use one insulation type everywhere, so take advantage of each material’s strengths where they make the most sense.
What’s the most eco-friendly insulation option for cabins?
Blown-in cellulose insulation tops the list for eco-friendliness—it’s made from up to 85% recycled newspaper, requires relatively little energy to manufacture, and performs excellently while keeping materials out of landfills. Sheep’s wool is another outstanding green option, being completely renewable, naturally moisture-regulating, and requiring minimal processing.
Cotton denim insulation (made from recycled jeans) contains no chemical irritants and repurposes textile waste. Cork board insulation comes from renewable cork oak bark that regenerates without harming trees. Even among these eco-friendly options, performance varies—cellulose and wool deliver R-values comparable to fiberglass, while cork excels at moisture resistance and soundproofing. The greenest insulation is the one you’ll actually use, so balance environmental values with practical considerations like availability, cost, and performance for your specific climate.
How do I prevent ice dams with proper attic insulation?
Ice dams form when heat escapes through your attic, melts snow on your roof, and the water refreezes at the cold eaves, creating damaging ice buildup. Preventing them requires a three-part strategy. First, install high R-value insulation (R-49 to R-60) on your attic floor to keep heat in your living space.
Second, ensure proper attic ventilation—you need air flowing from soffit vents to ridge vents to keep your roof deck cold and prevent uneven melting. Third, seal all air leaks between your living space and attic—gaps around recessed lights, plumbing penetrations, and attic hatches let warm air rise and cause problems. Many ice dam issues come from air leakage, not insufficient insulation, so air sealing is absolutely critical.
Should I remove old insulation before adding new insulation?
It depends on the condition and type of existing insulation. If your current insulation is dry, clean, and pest-free, you can often add new insulation right over it—this is common in attics where you’re increasing R-values. But you should remove old insulation if it’s damaged by water, contaminated by rodents or pests, moldy or mildewed, compressed and no longer performing, or if you’re changing insulation types in walls and need access to the cavities.
Wet or moldy insulation must go—it’s ineffective and potentially hazardous. When adding insulation over existing material, never place faced insulation over faced insulation, as this creates moisture problems. In wall renovations, removing old insulation often makes sense so you can inspect for hidden damage, upgrade wiring or plumbing, and install modern high-performance insulation throughout.
What safety equipment do I need for DIY insulation installation?
Safety gear is non-negotiable when working with insulation materials. At minimum, you need a proper respirator (not just a dust mask)—fiberglass and mineral wool release tiny particles that damage your lungs. Get safety glasses or goggles to protect your eyes from irritating fibers.
Wear long sleeves, long pants, and gloves—disposable coveralls work great and can be tossed after the job. A hat or hood keeps insulation out of your hair. Good work boots protect your feet, and you’ll need a sharp utility knife or insulation saw for cutting insulation.
When working in attics, bring proper lighting and watch your footing—step only on joists, never between them. If you’re working with rigid foam or cutting mineral wool, a dust mask rated for fine particles is essential. Keep the work area well-ventilated and take frequent breaks in fresh air.
How long does cabin insulation typically last?
Quality insulation lasts decades when properly installed and protected from moisture and pests. Fiberglass batts can last 80-100 years if they stay dry and undisturbed, though they may settle or compress slightly over time. Spray foam should last the lifetime of your cabin—50+ years—without degrading, losing R-value, or requiring replacement.
Cellulose insulation typically lasts 20-30 years before settling significantly affects performance, though properly installed dense-pack cellulose lasts much longer. Mineral wool is incredibly durable and can last 50+ years while resisting moisture, pests, and compression. The main threats to insulation longevity are water damage (which ruins any insulation type), pest infestations, and poor installation. Regular roof and plumbing maintenance prevents water damage, while proper pest control protects your investment. Bottom line: quality insulation properly installed in a well-maintained cabin should last as long as the structure itself.
.20 per square foot installed. While these materials don’t have the highest R-value per inch like spray foam, they deliver solid performance at a fraction of the cost.
How do I insulate a log cabin without ruining its appearance?
Log cabins present unique insulation challenges. You can use foam backer rod and high-quality chinking to seal gaps while maintaining the traditional look. You can also add rigid foam boards or spray foam to the interior side of exterior walls.
Then cover them with tongue-and-groove paneling that complements your logs. Another approach is building insulated stud walls several inches inside your log walls. Fill them with fiberglass or mineral wool, and finish with wood paneling.
What’s the difference between faced and unfaced fiberglass insulation?
Faced fiberglass insulation comes with a paper or foil backing that serves as a built-in vapor retarder. Unfaced insulation is just the bare fiberglass material. Use faced insulation when you need a vapor barrier—typically on the warm side of your walls (interior in cold climates).
The facing should always face toward the living space. Unfaced insulation works well when you already have a vapor barrier in place. Never install faced insulation on both sides of a wall cavity, as this traps moisture and leads to mold and rot.
Is mineral wool insulation worth the extra cost compared to fiberglass?
Mineral wool (like Rockwool) costs about 25-50% more than fiberglass. But the extra investment delivers real benefits for cabin applications. Its superior fire resistance—withstanding temperatures over 2,000°F—makes it ideal near wood stoves, fireplaces, or anywhere fire safety matters.
Mineral wool also provides excellent soundproofing, won’t absorb water like fiberglass can, maintains its shape without sagging over time, and is easier to cut precisely for tight-fitting installation. For cabins with fire hazards or where you want peace and quiet, mineral wool is absolutely worth the premium.
Do I need a vapor barrier in my cabin walls?
Whether you need a vapor barrier depends on your climate zone and wall assembly. In cold climates, you typically need a vapor barrier on the interior (warm) side of insulation to prevent warm, moist indoor air from condensing inside wall cavities.
In hot, humid climates, the situation often reverses—exterior vapor barriers might be necessary. Some modern insulation materials like closed-cell spray foam act as their own vapor barriers and don’t need additional layers. Installing vapor barriers incorrectly (like on both sides of a wall) causes serious moisture problems.
What insulation works best in extremely cold climates?
For cabins in extremely cold climates like Alaska, northern Minnesota, or high-elevation mountain areas, closed-cell spray foam and dense mineral wool are your top performers. Closed-cell spray foam offers the highest R-value per inch (R-6 to R-7), creates an airtight seal that stops drafts cold, and resists moisture infiltration.
Mineral wool provides excellent thermal resistance while being non-combustible—important when you’re relying on wood stoves for heat. Aim for R-21 or higher in walls and R-49 to R-60 in attics. Pay special attention to preventing ice dams through proper attic insulation and ventilation, and don’t neglect floor insulation, which is critical when temperatures plunge below zero.
How much money can proper insulation save on heating and cooling costs?
Properly insulating your cabin can reduce heating and cooling costs by 30-50% annually. Exact savings depend on your climate, cabin size, current insulation levels, and energy costs in your area. A poorly insulated 1,000-square-foot cabin in a cold climate might cost ,000-,000 annually to heat; adding quality insulation could drop that to
FAQ
What R-value do I need for my cabin walls?
The R-value needed depends on your climate zone. Most cabins should aim for R-13 to R-21 for walls. For colder regions like Minnesota or Maine, aim for R-21 or higher.
Cabins in moderate climates like the mid-Atlantic can get by with R-13 to R-15. Your attic needs much higher R-values—typically R-38 to R-60—because heat rises. Check local building codes for specific requirements in your area.
Can I install spray foam insulation myself to save money?
We strongly advise against DIY spray foam installation for your cabin. Spray foam requires specialized equipment and expertise. Improper application can lead to off-gassing and health hazards.
Small DIY spray foam kits are fine for tiny gaps and cracks. But they’re not suitable for insulating entire walls or attics. Hiring professionals ensures proper installation and maintains warranties.
Which insulation type offers the best value for a cabin on a budget?
Fiberglass batts typically offer the best value for budget-conscious cabin builders. Material costs run about $0.40-$0.80 per square foot. If you’re comfortable with DIY work, you can install them yourself.
Blown-in cellulose is another cost-effective option, running around $0.60-$1.20 per square foot installed. While these materials don’t have the highest R-value per inch like spray foam, they deliver solid performance at a fraction of the cost.
How do I insulate a log cabin without ruining its appearance?
Log cabins present unique insulation challenges. You can use foam backer rod and high-quality chinking to seal gaps while maintaining the traditional look. You can also add rigid foam boards or spray foam to the interior side of exterior walls.
Then cover them with tongue-and-groove paneling that complements your logs. Another approach is building insulated stud walls several inches inside your log walls. Fill them with fiberglass or mineral wool, and finish with wood paneling.
What’s the difference between faced and unfaced fiberglass insulation?
Faced fiberglass insulation comes with a paper or foil backing that serves as a built-in vapor retarder. Unfaced insulation is just the bare fiberglass material. Use faced insulation when you need a vapor barrier—typically on the warm side of your walls (interior in cold climates).
The facing should always face toward the living space. Unfaced insulation works well when you already have a vapor barrier in place. Never install faced insulation on both sides of a wall cavity, as this traps moisture and leads to mold and rot.
Is mineral wool insulation worth the extra cost compared to fiberglass?
Mineral wool (like Rockwool) costs about 25-50% more than fiberglass. But the extra investment delivers real benefits for cabin applications. Its superior fire resistance—withstanding temperatures over 2,000°F—makes it ideal near wood stoves, fireplaces, or anywhere fire safety matters.
Mineral wool also provides excellent soundproofing, won’t absorb water like fiberglass can, maintains its shape without sagging over time, and is easier to cut precisely for tight-fitting installation. For cabins with fire hazards or where you want peace and quiet, mineral wool is absolutely worth the premium.
Do I need a vapor barrier in my cabin walls?
Whether you need a vapor barrier depends on your climate zone and wall assembly. In cold climates, you typically need a vapor barrier on the interior (warm) side of insulation to prevent warm, moist indoor air from condensing inside wall cavities.
In hot, humid climates, the situation often reverses—exterior vapor barriers might be necessary. Some modern insulation materials like closed-cell spray foam act as their own vapor barriers and don’t need additional layers. Installing vapor barriers incorrectly (like on both sides of a wall) causes serious moisture problems.
What insulation works best in extremely cold climates?
For cabins in extremely cold climates like Alaska, northern Minnesota, or high-elevation mountain areas, closed-cell spray foam and dense mineral wool are your top performers. Closed-cell spray foam offers the highest R-value per inch (R-6 to R-7), creates an airtight seal that stops drafts cold, and resists moisture infiltration.
Mineral wool provides excellent thermal resistance while being non-combustible—important when you’re relying on wood stoves for heat. Aim for R-21 or higher in walls and R-49 to R-60 in attics. Pay special attention to preventing ice dams through proper attic insulation and ventilation, and don’t neglect floor insulation, which is critical when temperatures plunge below zero.
How much money can proper insulation save on heating and cooling costs?
Properly insulating your cabin can reduce heating and cooling costs by 30-50% annually. Exact savings depend on your climate, cabin size, current insulation levels, and energy costs in your area. A poorly insulated 1,000-square-foot cabin in a cold climate might cost $2,000-$3,000 annually to heat; adding quality insulation could drop that to $1,000-$1,500, saving you $1,000+ each year.
In moderate climates with lower energy costs, annual savings might be $300-$600, which adds up significantly over time. Most insulation upgrades pay for themselves within 5-10 years through energy savings, then continue saving money for decades. Beyond dollars and cents, proper insulation delivers consistent comfort—and you can’t put a price on stepping into a cozy cabin.
Can I use different insulation types in different parts of my cabin?
Absolutely—in fact, using different insulation types for different areas is often the smartest approach! Many cabin builders use spray foam in rim joists and crawl spaces where air sealing is critical, fiberglass batts in walls where cost matters, blown-in cellulose in attic floors for easy coverage of irregular spaces, and rigid foam boards on exterior foundation walls for moisture resistance.
This mixed approach lets you optimize performance and budget for each area’s specific needs. Just make sure your different insulation types work together properly—pay attention to vapor barrier placement, ensure continuous thermal boundaries without gaps, and maintain proper R-values throughout. There’s no rule saying you must use one insulation type everywhere, so take advantage of each material’s strengths where they make the most sense.
What’s the most eco-friendly insulation option for cabins?
Blown-in cellulose insulation tops the list for eco-friendliness—it’s made from up to 85% recycled newspaper, requires relatively little energy to manufacture, and performs excellently while keeping materials out of landfills. Sheep’s wool is another outstanding green option, being completely renewable, naturally moisture-regulating, and requiring minimal processing.
Cotton denim insulation (made from recycled jeans) contains no chemical irritants and repurposes textile waste. Cork board insulation comes from renewable cork oak bark that regenerates without harming trees. Even among these eco-friendly options, performance varies—cellulose and wool deliver R-values comparable to fiberglass, while cork excels at moisture resistance and soundproofing. The greenest insulation is the one you’ll actually use, so balance environmental values with practical considerations like availability, cost, and performance for your specific climate.
How do I prevent ice dams with proper attic insulation?
Ice dams form when heat escapes through your attic, melts snow on your roof, and the water refreezes at the cold eaves, creating damaging ice buildup. Preventing them requires a three-part strategy. First, install high R-value insulation (R-49 to R-60) on your attic floor to keep heat in your living space.
Second, ensure proper attic ventilation—you need air flowing from soffit vents to ridge vents to keep your roof deck cold and prevent uneven melting. Third, seal all air leaks between your living space and attic—gaps around recessed lights, plumbing penetrations, and attic hatches let warm air rise and cause problems. Many ice dam issues come from air leakage, not insufficient insulation, so air sealing is absolutely critical.
Should I remove old insulation before adding new insulation?
It depends on the condition and type of existing insulation. If your current insulation is dry, clean, and pest-free, you can often add new insulation right over it—this is common in attics where you’re increasing R-values. But you should remove old insulation if it’s damaged by water, contaminated by rodents or pests, moldy or mildewed, compressed and no longer performing, or if you’re changing insulation types in walls and need access to the cavities.
Wet or moldy insulation must go—it’s ineffective and potentially hazardous. When adding insulation over existing material, never place faced insulation over faced insulation, as this creates moisture problems. In wall renovations, removing old insulation often makes sense so you can inspect for hidden damage, upgrade wiring or plumbing, and install modern high-performance insulation throughout.
What safety equipment do I need for DIY insulation installation?
Safety gear is non-negotiable when working with insulation materials. At minimum, you need a proper respirator (not just a dust mask)—fiberglass and mineral wool release tiny particles that damage your lungs. Get safety glasses or goggles to protect your eyes from irritating fibers.
Wear long sleeves, long pants, and gloves—disposable coveralls work great and can be tossed after the job. A hat or hood keeps insulation out of your hair. Good work boots protect your feet, and you’ll need a sharp utility knife or insulation saw for cutting insulation.
When working in attics, bring proper lighting and watch your footing—step only on joists, never between them. If you’re working with rigid foam or cutting mineral wool, a dust mask rated for fine particles is essential. Keep the work area well-ventilated and take frequent breaks in fresh air.
How long does cabin insulation typically last?
Quality insulation lasts decades when properly installed and protected from moisture and pests. Fiberglass batts can last 80-100 years if they stay dry and undisturbed, though they may settle or compress slightly over time. Spray foam should last the lifetime of your cabin—50+ years—without degrading, losing R-value, or requiring replacement.
Cellulose insulation typically lasts 20-30 years before settling significantly affects performance, though properly installed dense-pack cellulose lasts much longer. Mineral wool is incredibly durable and can last 50+ years while resisting moisture, pests, and compression. The main threats to insulation longevity are water damage (which ruins any insulation type), pest infestations, and poor installation. Regular roof and plumbing maintenance prevents water damage, while proper pest control protects your investment. Bottom line: quality insulation properly installed in a well-maintained cabin should last as long as the structure itself.
,000-
FAQ
What R-value do I need for my cabin walls?
The R-value needed depends on your climate zone. Most cabins should aim for R-13 to R-21 for walls. For colder regions like Minnesota or Maine, aim for R-21 or higher.
Cabins in moderate climates like the mid-Atlantic can get by with R-13 to R-15. Your attic needs much higher R-values—typically R-38 to R-60—because heat rises. Check local building codes for specific requirements in your area.
Can I install spray foam insulation myself to save money?
We strongly advise against DIY spray foam installation for your cabin. Spray foam requires specialized equipment and expertise. Improper application can lead to off-gassing and health hazards.
Small DIY spray foam kits are fine for tiny gaps and cracks. But they’re not suitable for insulating entire walls or attics. Hiring professionals ensures proper installation and maintains warranties.
Which insulation type offers the best value for a cabin on a budget?
Fiberglass batts typically offer the best value for budget-conscious cabin builders. Material costs run about $0.40-$0.80 per square foot. If you’re comfortable with DIY work, you can install them yourself.
Blown-in cellulose is another cost-effective option, running around $0.60-$1.20 per square foot installed. While these materials don’t have the highest R-value per inch like spray foam, they deliver solid performance at a fraction of the cost.
How do I insulate a log cabin without ruining its appearance?
Log cabins present unique insulation challenges. You can use foam backer rod and high-quality chinking to seal gaps while maintaining the traditional look. You can also add rigid foam boards or spray foam to the interior side of exterior walls.
Then cover them with tongue-and-groove paneling that complements your logs. Another approach is building insulated stud walls several inches inside your log walls. Fill them with fiberglass or mineral wool, and finish with wood paneling.
What’s the difference between faced and unfaced fiberglass insulation?
Faced fiberglass insulation comes with a paper or foil backing that serves as a built-in vapor retarder. Unfaced insulation is just the bare fiberglass material. Use faced insulation when you need a vapor barrier—typically on the warm side of your walls (interior in cold climates).
The facing should always face toward the living space. Unfaced insulation works well when you already have a vapor barrier in place. Never install faced insulation on both sides of a wall cavity, as this traps moisture and leads to mold and rot.
Is mineral wool insulation worth the extra cost compared to fiberglass?
Mineral wool (like Rockwool) costs about 25-50% more than fiberglass. But the extra investment delivers real benefits for cabin applications. Its superior fire resistance—withstanding temperatures over 2,000°F—makes it ideal near wood stoves, fireplaces, or anywhere fire safety matters.
Mineral wool also provides excellent soundproofing, won’t absorb water like fiberglass can, maintains its shape without sagging over time, and is easier to cut precisely for tight-fitting installation. For cabins with fire hazards or where you want peace and quiet, mineral wool is absolutely worth the premium.
Do I need a vapor barrier in my cabin walls?
Whether you need a vapor barrier depends on your climate zone and wall assembly. In cold climates, you typically need a vapor barrier on the interior (warm) side of insulation to prevent warm, moist indoor air from condensing inside wall cavities.
In hot, humid climates, the situation often reverses—exterior vapor barriers might be necessary. Some modern insulation materials like closed-cell spray foam act as their own vapor barriers and don’t need additional layers. Installing vapor barriers incorrectly (like on both sides of a wall) causes serious moisture problems.
What insulation works best in extremely cold climates?
For cabins in extremely cold climates like Alaska, northern Minnesota, or high-elevation mountain areas, closed-cell spray foam and dense mineral wool are your top performers. Closed-cell spray foam offers the highest R-value per inch (R-6 to R-7), creates an airtight seal that stops drafts cold, and resists moisture infiltration.
Mineral wool provides excellent thermal resistance while being non-combustible—important when you’re relying on wood stoves for heat. Aim for R-21 or higher in walls and R-49 to R-60 in attics. Pay special attention to preventing ice dams through proper attic insulation and ventilation, and don’t neglect floor insulation, which is critical when temperatures plunge below zero.
How much money can proper insulation save on heating and cooling costs?
Properly insulating your cabin can reduce heating and cooling costs by 30-50% annually. Exact savings depend on your climate, cabin size, current insulation levels, and energy costs in your area. A poorly insulated 1,000-square-foot cabin in a cold climate might cost $2,000-$3,000 annually to heat; adding quality insulation could drop that to $1,000-$1,500, saving you $1,000+ each year.
In moderate climates with lower energy costs, annual savings might be $300-$600, which adds up significantly over time. Most insulation upgrades pay for themselves within 5-10 years through energy savings, then continue saving money for decades. Beyond dollars and cents, proper insulation delivers consistent comfort—and you can’t put a price on stepping into a cozy cabin.
Can I use different insulation types in different parts of my cabin?
Absolutely—in fact, using different insulation types for different areas is often the smartest approach! Many cabin builders use spray foam in rim joists and crawl spaces where air sealing is critical, fiberglass batts in walls where cost matters, blown-in cellulose in attic floors for easy coverage of irregular spaces, and rigid foam boards on exterior foundation walls for moisture resistance.
This mixed approach lets you optimize performance and budget for each area’s specific needs. Just make sure your different insulation types work together properly—pay attention to vapor barrier placement, ensure continuous thermal boundaries without gaps, and maintain proper R-values throughout. There’s no rule saying you must use one insulation type everywhere, so take advantage of each material’s strengths where they make the most sense.
What’s the most eco-friendly insulation option for cabins?
Blown-in cellulose insulation tops the list for eco-friendliness—it’s made from up to 85% recycled newspaper, requires relatively little energy to manufacture, and performs excellently while keeping materials out of landfills. Sheep’s wool is another outstanding green option, being completely renewable, naturally moisture-regulating, and requiring minimal processing.
Cotton denim insulation (made from recycled jeans) contains no chemical irritants and repurposes textile waste. Cork board insulation comes from renewable cork oak bark that regenerates without harming trees. Even among these eco-friendly options, performance varies—cellulose and wool deliver R-values comparable to fiberglass, while cork excels at moisture resistance and soundproofing. The greenest insulation is the one you’ll actually use, so balance environmental values with practical considerations like availability, cost, and performance for your specific climate.
How do I prevent ice dams with proper attic insulation?
Ice dams form when heat escapes through your attic, melts snow on your roof, and the water refreezes at the cold eaves, creating damaging ice buildup. Preventing them requires a three-part strategy. First, install high R-value insulation (R-49 to R-60) on your attic floor to keep heat in your living space.
Second, ensure proper attic ventilation—you need air flowing from soffit vents to ridge vents to keep your roof deck cold and prevent uneven melting. Third, seal all air leaks between your living space and attic—gaps around recessed lights, plumbing penetrations, and attic hatches let warm air rise and cause problems. Many ice dam issues come from air leakage, not insufficient insulation, so air sealing is absolutely critical.
Should I remove old insulation before adding new insulation?
It depends on the condition and type of existing insulation. If your current insulation is dry, clean, and pest-free, you can often add new insulation right over it—this is common in attics where you’re increasing R-values. But you should remove old insulation if it’s damaged by water, contaminated by rodents or pests, moldy or mildewed, compressed and no longer performing, or if you’re changing insulation types in walls and need access to the cavities.
Wet or moldy insulation must go—it’s ineffective and potentially hazardous. When adding insulation over existing material, never place faced insulation over faced insulation, as this creates moisture problems. In wall renovations, removing old insulation often makes sense so you can inspect for hidden damage, upgrade wiring or plumbing, and install modern high-performance insulation throughout.
What safety equipment do I need for DIY insulation installation?
Safety gear is non-negotiable when working with insulation materials. At minimum, you need a proper respirator (not just a dust mask)—fiberglass and mineral wool release tiny particles that damage your lungs. Get safety glasses or goggles to protect your eyes from irritating fibers.
Wear long sleeves, long pants, and gloves—disposable coveralls work great and can be tossed after the job. A hat or hood keeps insulation out of your hair. Good work boots protect your feet, and you’ll need a sharp utility knife or insulation saw for cutting insulation.
When working in attics, bring proper lighting and watch your footing—step only on joists, never between them. If you’re working with rigid foam or cutting mineral wool, a dust mask rated for fine particles is essential. Keep the work area well-ventilated and take frequent breaks in fresh air.
How long does cabin insulation typically last?
Quality insulation lasts decades when properly installed and protected from moisture and pests. Fiberglass batts can last 80-100 years if they stay dry and undisturbed, though they may settle or compress slightly over time. Spray foam should last the lifetime of your cabin—50+ years—without degrading, losing R-value, or requiring replacement.
Cellulose insulation typically lasts 20-30 years before settling significantly affects performance, though properly installed dense-pack cellulose lasts much longer. Mineral wool is incredibly durable and can last 50+ years while resisting moisture, pests, and compression. The main threats to insulation longevity are water damage (which ruins any insulation type), pest infestations, and poor installation. Regular roof and plumbing maintenance prevents water damage, while proper pest control protects your investment. Bottom line: quality insulation properly installed in a well-maintained cabin should last as long as the structure itself.
,500, saving you
FAQ
What R-value do I need for my cabin walls?
The R-value needed depends on your climate zone. Most cabins should aim for R-13 to R-21 for walls. For colder regions like Minnesota or Maine, aim for R-21 or higher.
Cabins in moderate climates like the mid-Atlantic can get by with R-13 to R-15. Your attic needs much higher R-values—typically R-38 to R-60—because heat rises. Check local building codes for specific requirements in your area.
Can I install spray foam insulation myself to save money?
We strongly advise against DIY spray foam installation for your cabin. Spray foam requires specialized equipment and expertise. Improper application can lead to off-gassing and health hazards.
Small DIY spray foam kits are fine for tiny gaps and cracks. But they’re not suitable for insulating entire walls or attics. Hiring professionals ensures proper installation and maintains warranties.
Which insulation type offers the best value for a cabin on a budget?
Fiberglass batts typically offer the best value for budget-conscious cabin builders. Material costs run about $0.40-$0.80 per square foot. If you’re comfortable with DIY work, you can install them yourself.
Blown-in cellulose is another cost-effective option, running around $0.60-$1.20 per square foot installed. While these materials don’t have the highest R-value per inch like spray foam, they deliver solid performance at a fraction of the cost.
How do I insulate a log cabin without ruining its appearance?
Log cabins present unique insulation challenges. You can use foam backer rod and high-quality chinking to seal gaps while maintaining the traditional look. You can also add rigid foam boards or spray foam to the interior side of exterior walls.
Then cover them with tongue-and-groove paneling that complements your logs. Another approach is building insulated stud walls several inches inside your log walls. Fill them with fiberglass or mineral wool, and finish with wood paneling.
What’s the difference between faced and unfaced fiberglass insulation?
Faced fiberglass insulation comes with a paper or foil backing that serves as a built-in vapor retarder. Unfaced insulation is just the bare fiberglass material. Use faced insulation when you need a vapor barrier—typically on the warm side of your walls (interior in cold climates).
The facing should always face toward the living space. Unfaced insulation works well when you already have a vapor barrier in place. Never install faced insulation on both sides of a wall cavity, as this traps moisture and leads to mold and rot.
Is mineral wool insulation worth the extra cost compared to fiberglass?
Mineral wool (like Rockwool) costs about 25-50% more than fiberglass. But the extra investment delivers real benefits for cabin applications. Its superior fire resistance—withstanding temperatures over 2,000°F—makes it ideal near wood stoves, fireplaces, or anywhere fire safety matters.
Mineral wool also provides excellent soundproofing, won’t absorb water like fiberglass can, maintains its shape without sagging over time, and is easier to cut precisely for tight-fitting installation. For cabins with fire hazards or where you want peace and quiet, mineral wool is absolutely worth the premium.
Do I need a vapor barrier in my cabin walls?
Whether you need a vapor barrier depends on your climate zone and wall assembly. In cold climates, you typically need a vapor barrier on the interior (warm) side of insulation to prevent warm, moist indoor air from condensing inside wall cavities.
In hot, humid climates, the situation often reverses—exterior vapor barriers might be necessary. Some modern insulation materials like closed-cell spray foam act as their own vapor barriers and don’t need additional layers. Installing vapor barriers incorrectly (like on both sides of a wall) causes serious moisture problems.
What insulation works best in extremely cold climates?
For cabins in extremely cold climates like Alaska, northern Minnesota, or high-elevation mountain areas, closed-cell spray foam and dense mineral wool are your top performers. Closed-cell spray foam offers the highest R-value per inch (R-6 to R-7), creates an airtight seal that stops drafts cold, and resists moisture infiltration.
Mineral wool provides excellent thermal resistance while being non-combustible—important when you’re relying on wood stoves for heat. Aim for R-21 or higher in walls and R-49 to R-60 in attics. Pay special attention to preventing ice dams through proper attic insulation and ventilation, and don’t neglect floor insulation, which is critical when temperatures plunge below zero.
How much money can proper insulation save on heating and cooling costs?
Properly insulating your cabin can reduce heating and cooling costs by 30-50% annually. Exact savings depend on your climate, cabin size, current insulation levels, and energy costs in your area. A poorly insulated 1,000-square-foot cabin in a cold climate might cost $2,000-$3,000 annually to heat; adding quality insulation could drop that to $1,000-$1,500, saving you $1,000+ each year.
In moderate climates with lower energy costs, annual savings might be $300-$600, which adds up significantly over time. Most insulation upgrades pay for themselves within 5-10 years through energy savings, then continue saving money for decades. Beyond dollars and cents, proper insulation delivers consistent comfort—and you can’t put a price on stepping into a cozy cabin.
Can I use different insulation types in different parts of my cabin?
Absolutely—in fact, using different insulation types for different areas is often the smartest approach! Many cabin builders use spray foam in rim joists and crawl spaces where air sealing is critical, fiberglass batts in walls where cost matters, blown-in cellulose in attic floors for easy coverage of irregular spaces, and rigid foam boards on exterior foundation walls for moisture resistance.
This mixed approach lets you optimize performance and budget for each area’s specific needs. Just make sure your different insulation types work together properly—pay attention to vapor barrier placement, ensure continuous thermal boundaries without gaps, and maintain proper R-values throughout. There’s no rule saying you must use one insulation type everywhere, so take advantage of each material’s strengths where they make the most sense.
What’s the most eco-friendly insulation option for cabins?
Blown-in cellulose insulation tops the list for eco-friendliness—it’s made from up to 85% recycled newspaper, requires relatively little energy to manufacture, and performs excellently while keeping materials out of landfills. Sheep’s wool is another outstanding green option, being completely renewable, naturally moisture-regulating, and requiring minimal processing.
Cotton denim insulation (made from recycled jeans) contains no chemical irritants and repurposes textile waste. Cork board insulation comes from renewable cork oak bark that regenerates without harming trees. Even among these eco-friendly options, performance varies—cellulose and wool deliver R-values comparable to fiberglass, while cork excels at moisture resistance and soundproofing. The greenest insulation is the one you’ll actually use, so balance environmental values with practical considerations like availability, cost, and performance for your specific climate.
How do I prevent ice dams with proper attic insulation?
Ice dams form when heat escapes through your attic, melts snow on your roof, and the water refreezes at the cold eaves, creating damaging ice buildup. Preventing them requires a three-part strategy. First, install high R-value insulation (R-49 to R-60) on your attic floor to keep heat in your living space.
Second, ensure proper attic ventilation—you need air flowing from soffit vents to ridge vents to keep your roof deck cold and prevent uneven melting. Third, seal all air leaks between your living space and attic—gaps around recessed lights, plumbing penetrations, and attic hatches let warm air rise and cause problems. Many ice dam issues come from air leakage, not insufficient insulation, so air sealing is absolutely critical.
Should I remove old insulation before adding new insulation?
It depends on the condition and type of existing insulation. If your current insulation is dry, clean, and pest-free, you can often add new insulation right over it—this is common in attics where you’re increasing R-values. But you should remove old insulation if it’s damaged by water, contaminated by rodents or pests, moldy or mildewed, compressed and no longer performing, or if you’re changing insulation types in walls and need access to the cavities.
Wet or moldy insulation must go—it’s ineffective and potentially hazardous. When adding insulation over existing material, never place faced insulation over faced insulation, as this creates moisture problems. In wall renovations, removing old insulation often makes sense so you can inspect for hidden damage, upgrade wiring or plumbing, and install modern high-performance insulation throughout.
What safety equipment do I need for DIY insulation installation?
Safety gear is non-negotiable when working with insulation materials. At minimum, you need a proper respirator (not just a dust mask)—fiberglass and mineral wool release tiny particles that damage your lungs. Get safety glasses or goggles to protect your eyes from irritating fibers.
Wear long sleeves, long pants, and gloves—disposable coveralls work great and can be tossed after the job. A hat or hood keeps insulation out of your hair. Good work boots protect your feet, and you’ll need a sharp utility knife or insulation saw for cutting insulation.
When working in attics, bring proper lighting and watch your footing—step only on joists, never between them. If you’re working with rigid foam or cutting mineral wool, a dust mask rated for fine particles is essential. Keep the work area well-ventilated and take frequent breaks in fresh air.
How long does cabin insulation typically last?
Quality insulation lasts decades when properly installed and protected from moisture and pests. Fiberglass batts can last 80-100 years if they stay dry and undisturbed, though they may settle or compress slightly over time. Spray foam should last the lifetime of your cabin—50+ years—without degrading, losing R-value, or requiring replacement.
Cellulose insulation typically lasts 20-30 years before settling significantly affects performance, though properly installed dense-pack cellulose lasts much longer. Mineral wool is incredibly durable and can last 50+ years while resisting moisture, pests, and compression. The main threats to insulation longevity are water damage (which ruins any insulation type), pest infestations, and poor installation. Regular roof and plumbing maintenance prevents water damage, while proper pest control protects your investment. Bottom line: quality insulation properly installed in a well-maintained cabin should last as long as the structure itself.
,000+ each year.
In moderate climates with lower energy costs, annual savings might be 0-0, which adds up significantly over time. Most insulation upgrades pay for themselves within 5-10 years through energy savings, then continue saving money for decades. Beyond dollars and cents, proper insulation delivers consistent comfort—and you can’t put a price on stepping into a cozy cabin.
Can I use different insulation types in different parts of my cabin?
Absolutely—in fact, using different insulation types for different areas is often the smartest approach! Many cabin builders use spray foam in rim joists and crawl spaces where air sealing is critical, fiberglass batts in walls where cost matters, blown-in cellulose in attic floors for easy coverage of irregular spaces, and rigid foam boards on exterior foundation walls for moisture resistance.
This mixed approach lets you optimize performance and budget for each area’s specific needs. Just make sure your different insulation types work together properly—pay attention to vapor barrier placement, ensure continuous thermal boundaries without gaps, and maintain proper R-values throughout. There’s no rule saying you must use one insulation type everywhere, so take advantage of each material’s strengths where they make the most sense.
What’s the most eco-friendly insulation option for cabins?
Blown-in cellulose insulation tops the list for eco-friendliness—it’s made from up to 85% recycled newspaper, requires relatively little energy to manufacture, and performs excellently while keeping materials out of landfills. Sheep’s wool is another outstanding green option, being completely renewable, naturally moisture-regulating, and requiring minimal processing.
Cotton denim insulation (made from recycled jeans) contains no chemical irritants and repurposes textile waste. Cork board insulation comes from renewable cork oak bark that regenerates without harming trees. Even among these eco-friendly options, performance varies—cellulose and wool deliver R-values comparable to fiberglass, while cork excels at moisture resistance and soundproofing. The greenest insulation is the one you’ll actually use, so balance environmental values with practical considerations like availability, cost, and performance for your specific climate.
How do I prevent ice dams with proper attic insulation?
Ice dams form when heat escapes through your attic, melts snow on your roof, and the water refreezes at the cold eaves, creating damaging ice buildup. Preventing them requires a three-part strategy. First, install high R-value insulation (R-49 to R-60) on your attic floor to keep heat in your living space.
Second, ensure proper attic ventilation—you need air flowing from soffit vents to ridge vents to keep your roof deck cold and prevent uneven melting. Third, seal all air leaks between your living space and attic—gaps around recessed lights, plumbing penetrations, and attic hatches let warm air rise and cause problems. Many ice dam issues come from air leakage, not insufficient insulation, so air sealing is absolutely critical.
Should I remove old insulation before adding new insulation?
It depends on the condition and type of existing insulation. If your current insulation is dry, clean, and pest-free, you can often add new insulation right over it—this is common in attics where you’re increasing R-values. But you should remove old insulation if it’s damaged by water, contaminated by rodents or pests, moldy or mildewed, compressed and no longer performing, or if you’re changing insulation types in walls and need access to the cavities.
Wet or moldy insulation must go—it’s ineffective and potentially hazardous. When adding insulation over existing material, never place faced insulation over faced insulation, as this creates moisture problems. In wall renovations, removing old insulation often makes sense so you can inspect for hidden damage, upgrade wiring or plumbing, and install modern high-performance insulation throughout.
What safety equipment do I need for DIY insulation installation?
Safety gear is non-negotiable when working with insulation materials. At minimum, you need a proper respirator (not just a dust mask)—fiberglass and mineral wool release tiny particles that damage your lungs. Get safety glasses or goggles to protect your eyes from irritating fibers.
Wear long sleeves, long pants, and gloves—disposable coveralls work great and can be tossed after the job. A hat or hood keeps insulation out of your hair. Good work boots protect your feet, and you’ll need a sharp utility knife or insulation saw for cutting insulation.
When working in attics, bring proper lighting and watch your footing—step only on joists, never between them. If you’re working with rigid foam or cutting mineral wool, a dust mask rated for fine particles is essential. Keep the work area well-ventilated and take frequent breaks in fresh air.
How long does cabin insulation typically last?
Quality insulation lasts decades when properly installed and protected from moisture and pests. Fiberglass batts can last 80-100 years if they stay dry and undisturbed, though they may settle or compress slightly over time. Spray foam should last the lifetime of your cabin—50+ years—without degrading, losing R-value, or requiring replacement.
Cellulose insulation typically lasts 20-30 years before settling significantly affects performance, though properly installed dense-pack cellulose lasts much longer. Mineral wool is incredibly durable and can last 50+ years while resisting moisture, pests, and compression. The main threats to insulation longevity are water damage (which ruins any insulation type), pest infestations, and poor installation. Regular roof and plumbing maintenance prevents water damage, while proper pest control protects your investment. Bottom line: quality insulation properly installed in a well-maintained cabin should last as long as the structure itself.


