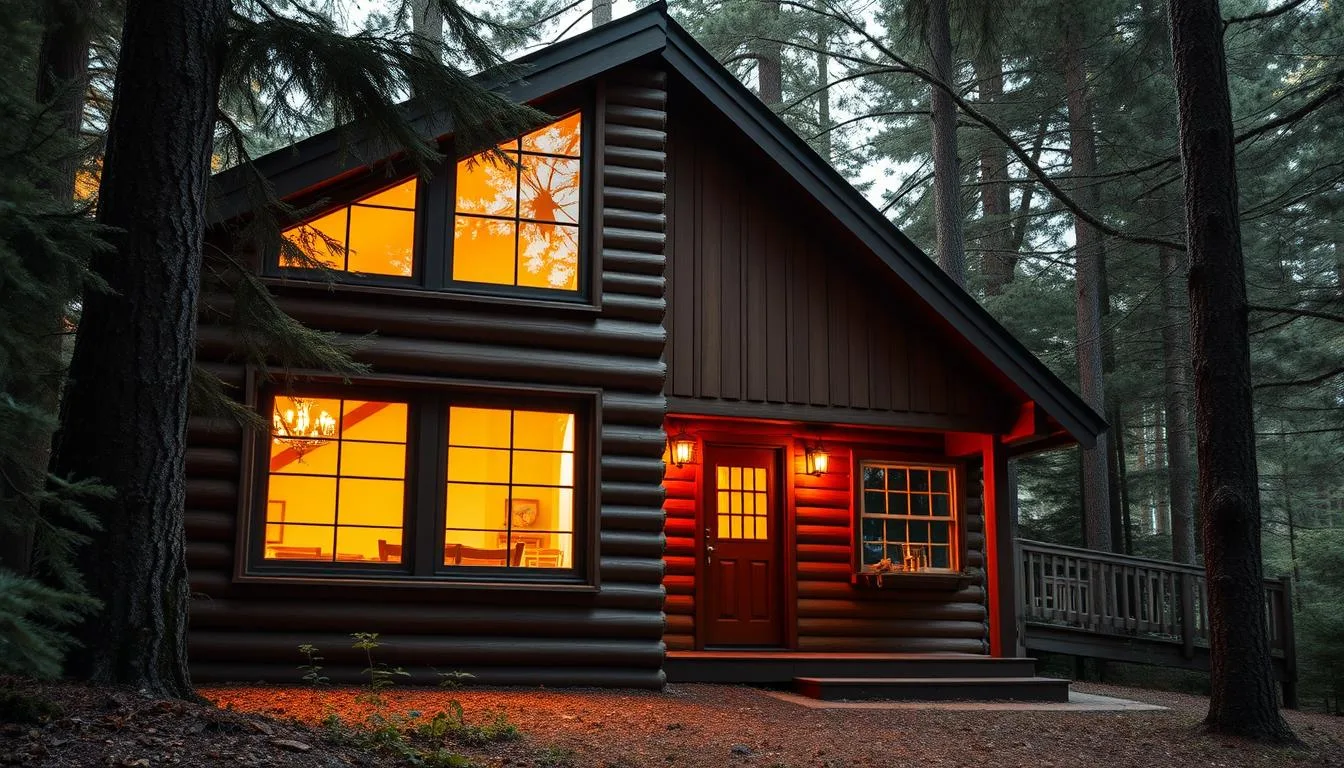
Your cabin needs more than a nice view. The right windows bring in light, air, and save money. Whether you’re starting from scratch or updating, your choice affects comfort and bills.
Off-grid cabins have special needs. With less power, keeping warm or cool is key. Energy efficient cabin windows help control temperature, saving on heating and cooling.
Choosing the right windows for cabins is important. They must handle extreme weather and remote locations. This guide covers thermal performance, frame materials, and installation for cabin living.
Why Energy Efficiency Matters for Cabin Windows
Cabin owners face unique challenges. Energy-efficient windows are essential for comfort all year. Unlike suburban homes, cabins often have no reliable utility connections. This makes heating and cooling costs high.
Windows play a key role in managing these costs. Whether in mountains or woods, they help keep your cabin comfortable.
Cabins face extreme temperature swings. In winter, they can get very cold. In summer, they can get very hot. This is because of inefficient windows.
Standard windows don’t keep the weather out well. In winter, heat escapes, making you use more propane or firewood.
Off-grid cabin owners face big challenges. They use solar panels, wind turbines, or generators. Every inefficiency counts.
Quality windows act as a thermal barrier. They keep warmth in and cold out. This means your heating and cooling systems work less, saving energy.
The benefits go beyond saving money. Here are some advantages:
- Reduced fuel consumption – Less propane and firewood needed
- Lower environmental impact – Less carbon footprint
- Extended HVAC lifespan – Less strain means fewer repairs
- Increased property value – Upgrades attract buyers and raise resale prices
Condensation is a problem for cabin owners, too. Moisture on cold windows can cause mold and rot. Energy-efficient windows with cabin insulation reduce this problem.
Many cabins are quiet retreats. Energy-efficient windows block outside noise. You’ll hear birds instead of traffic.
Natural light is important in remote areas. Modern windows let in light while blocking UV rays. Your furniture and floors stay protected from sun damage.
Vacation cabins face extreme temperatures when empty. Quality windows keep the interior stable. This prevents damage to plumbing and protects your investment.
Understanding Window Energy Ratings and Certifications
Looking for energy-efficient cabin windows can seem like a puzzle. But, it’s like reading food labels. Once you get what each rating means, picking windows is easy.
The National Fenestration Rating Council sets standards for window energy performance. Every good window has an NFRC label. It shows key performance numbers. These NFRC ratings help you compare windows fairly.
Energy Star windows are the best, meeting strict standards. Not all windows get this label. The standards change based on where you live, making sure windows work well in your climate.
 energy efficiency label for a window. The label prominently displays the U-factor and SHGC (Solar Heat Gain Coefficient) metrics, rendered in clear, legible text and icons. The label is placed against a clean, neutral background, with soft, directional lighting highlighting the details. The image conveys a sense of technical precision and informative clarity, suitable for an article on energy-efficient windows for cabins.")
Heat Transfer Measurement
The window U-factor shows how well a window keeps heat in. It ranges from 0.20 to 1.20, with lower numbers being better. Think of it as your window’s strength against cold.
For cold cabins, choose windows with the lowest U-factor. A U-factor of 0.25 keeps more heat in than 0.50. This saves on heating costs in winter.
Standard single-pane windows have U-factors around 1.0, feeling drafty. Double-pane windows are 0.30 to 0.50, and triple-pane can be 0.15 to 0.20.
The window U-factor is key in cold climates. Every tenth of a point saved means more energy savings over time.
Solar Heat Gain Coefficient Basics
SHGC ratings show how much solar heat a window lets in. It ranges from 0 to 1, with lower numbers blocking more heat. Your ideal rating depends on your climate.
In hot climates, choose windows with low SHGC ratings, around 0.25 to 0.30. These block unwanted heat, saving on air conditioning costs. They act like sunglasses for your cabin.
Cold-climate cabins need higher SHGC ratings, 0.40 to 0.60. These windows capture solar heat in winter, reducing heating needs. The sun helps heat your cabin.
Consider window orientation when choosing SHGC ratings. South-facing windows in northern cabins should have higher ratings for more solar gain. East and west windows might need lower ratings to control heat.
Energy Star Certification for Different Climate Zones
The U.S. is divided into four climate zones for Energy Star windows. Each zone has specific requirements for optimal performance. Your cabin’s location determines which certification is most important.
The Northern zone includes cold states like Minnesota and Maine. Windows here need great insulation, U-factors of 0.27 or lower. SHGC ratings can be higher to capture solar heat in long winters.
The North-Central zone has moderate winters, like Pennsylvania and Kansas. This area needs balanced performance, U-factors around 0.30, and moderate solar heat control. Windows must handle seasonal temperature changes well.
Southern and Sun-Belt zones focus on blocking heat. These Energy Star windows have low SHGC ratings to reduce cooling costs. U-factor requirements are slightly relaxed compared to northern regions.
Visible Transmittance and Air Leakage Ratings
Visible transmittance shows how much natural light a window lets in. It ranges from 0 to 1, with higher numbers letting in more light. Most energy-efficient windows have ratings between 0.40 and 0.70.
You want to balance energy performance with natural light, for cabins with scenic views. A window with great insulation but low visible transmittance makes your cabin dark. This defeats the purpose of the views.
Air leakage ratings show how well windows prevent drafts. Lower numbers mean tighter seals. Quality windows should have air leakage ratings of 0.30 or less.
Drafty windows waste energy, no matter their other ratings. Even windows with great window U-factor performance lose efficiency if they leak air. Check this rating carefully before choosing.
| Rating Type | What It Measures | Ideal Range (Cold Climate) | Ideal Range (Hot Climate) |
|---|---|---|---|
| U-Factor | Heat transfer through window | 0.20 – 0.30 (lower is better) | 0.30 – 0.40 (lower is better) |
| SHGC | Solar heat gain allowance | 0.40 – 0.60 (higher captures warmth) | 0.25 – 0.30 (lower blocks heat) |
| Visible Transmittance | Natural light penetration | 0.50 – 0.70 (higher is brighter) | 0.40 – 0.60 (balance light and heat) |
| Air Leakage | Draft prevention ability | ≤0.30 (lower prevents drafts) | ≤0.30 (lower prevents drafts) |
Understanding these NFRC ratings helps you make smart choices for your cabin windows. Focus on the ratings that matter most for your climate zone. The right balance makes your cabin comfortable and energy-efficient all year.
Types of Energy-Efficient Window Frames for Cabins
The type of frame you choose affects your cabin’s energy use and upkeep. Cabins face harsh weather and big temperature changes. They also get less maintenance access. So, durability is key.
When picking cabin windows, knowing about frame materials is important. It helps balance looks, function, and value. Check out this guide to make a smart choice.
Each frame type has its own benefits. They depend on your climate, budget, and style. Let’s look at the top picks for energy-saving cabin windows.
Vinyl Windows for Low Maintenance
Vinyl windows are popular for their affordable, low maintenance quality. They’re made of PVC and resist moisture. You don’t need to paint or stain them, and they keep your cabin warm.
Vinyl windows are as good as more expensive ones at saving energy. Their design traps air, keeping your cabin cozy. They’re great for saving energy without much upkeep.
But, vinyl isn’t perfect. It can get brittle in cold weather and might crack. The color might fade, but good brands use UV-resistant finishes.
Fiberglass Windows for Extreme Weather
Fiberglass windows are best for harsh weather. They’re made from glass fibers and resin. They don’t warp or crack like other materials.
Fiberglass is stronger than vinyl and more fire-resistant than wood. You can paint it any color. It lasts a long time, even in wet and cold conditions.
Fiberglass windows cost more than vinyl. But, they’re worth it for their durability and low upkeep. Brands like Marvin and Pella make great fiberglass windows for tough climates.
Wood-Clad Windows for Traditional Cabins
Wood clad windows offer warmth and beauty without constant upkeep. They have real wood inside and aluminum or vinyl outside. This protects the wood from the weather.
They’re perfect for those who love traditional looks but don’t want to paint often. The wood can be stained or painted to match your cabin. The outside cladding keeps the wood safe from the elements.
Quality wood-clad windows are energy-efficient. They have natural insulation and weather seals to keep air out. They cost more than vinyl but less than all-wood or fiberglass.
| Frame Material | Best Climate | Maintenance Level | Relative Cost |
|---|---|---|---|
| Vinyl | Moderate climates | Very Low | $$ |
| Fiberglass | Extreme weather | Very Low | $$$$ |
| Wood-Clad | All climates | Low to Moderate | $$$ |
| Composite | High moisture areas | Low | $$$ |
Composite Frame Options
Composite frames mix wood fibers with polymer resins. They look like wood but resist moisture better. This makes them great for humid or wet areas.
They can be molded into many shapes and finished with paint or stain. They’re better at keeping warm than vinyl or aluminum. They need less care than solid wood.
Composite windows are a good middle choice. They’re pricier than vinyl but cheaper than fiberglass or wood. You can find them from local makers and big brands, at various prices.
When picking window frames, think about your cabin’s location first. Different places need different protection. Consider how often you’ll visit, your budget, and the look you want.
Double-Pane vs. Triple-Pane Windows
Choosing the right windows for your cabin is about balancing cost and comfort. Double pane and triple pane windows have insulating gas between the glass layers. This makes them better than single-pane windows. The main difference is how many layers you get.
Double-pane windows have two layers of glass with a gas-filled space in between. Triple-pane windows add a third layer of glass and another gas-filled space. This makes five total layers of insulation. It keeps warm air in and hot air out.
Deciding between double and triple pane depends on your climate, budget, and how you use your cabin. Let’s look at when each is best.
Affordable Performance for Moderate Conditions
Double pane windows are great for many cabins without being too expensive. They work well in temperate areas with mild winters. Quality double-pane units with Low-E coatings are enough for most needs.
These windows are perfect for vacation cabins used seasonally. If you visit mostly in spring, summer, and fall, double-pane is good. It saves money for other upgrades.
Double-pane is also good for those on a budget. Modern double-pane options with argon gas are very affordable. They outperform old windows and keep costs down.
Superior Insulation for Harsh Winter Conditions
Triple pane windows are best in very cold areas. They have up to 50% better insulation than double-pane. This makes a big difference in comfort during cold weather.
Triple-pane windows also stop condensation. The inner glass stays warm, preventing moisture. This keeps your views clear and protects your windows from damage.
Triple pane also reduces outside noise. The extra glass and gas dampen sounds considerably. This is great for cabins near roads or neighbors.
People living in their cabins all year in cold areas often find triple pane worth the extra cost. They improve comfort daily. Triple pane can even let you use smaller, more efficient HVAC systems.
Calculating Your Investment Return
Triple pane windows cost 25-30% more than double pane. For a cabin with 15 windows, double-pane costs about $9,000. Triple-pane costs $11,700-$11,900. This extra cost needs careful thought.
The payback period depends on your climate and how you use your cabin. In cold states, you might see savings in 8-12 years. In warmer states, it might never pay off.
Think about these things when deciding:
- Climate severity: Triple pane is better in very cold areas
- Energy costs: Higher rates mean faster payback
- Usage frequency: Living there all year makes triple pane worth it
- Comfort value: Benefits like less condensation and noise don’t show on bills
- Resale considerations: Better windows might increase your property’s value
The table below shows how different features affect your comfort and savings:
| Feature | Double-Pane Windows | Triple-Pane Windows |
|---|---|---|
| Typical U-Factor | 0.25 – 0.30 | 0.15 – 0.20 |
| Annual Heating Savings | Baseline | 15-25% additional savings |
| Condensation Resistance | Good (50-60 rating) | Excellent (65-75 rating) |
| Noise Reduction | Moderate (30-35 dB) | Superior (38-45 dB) |
Choosing between double and triple pane depends on your needs. Triple pane is a good choice for cold climates and long-term use. Double pane is better for occasional use in milder weather and is more affordable.
Gas Fills and Low-E Coatings Explained
Today’s best windows have invisible technologies that keep heating and cooling costs down. These innovations turn ordinary window insulation into a sophisticated barrier against temperature extremes. Understanding how gas fills and Low-E coatings work together will help you see why modern windows are better than older ones.
Gas fills and coatings tackle heat loss in different ways. Argon gas windows reduce heat transfer between panes. Low-E glass reflects radiant heat back into your cabin. Together, they create a defense system that keeps your cabin comfortable all year.
These features are invisible to the naked eye. You get energy-saving benefits without losing your view or natural light. Let’s explore how each technology works and which options are best for your cabin.
Noble Gas Insulation Comparison
The space between window panes isn’t empty in quality windows. Manufacturers fill it with special gases that insulate better than regular air. These gases are denser, slowing down heat transfer.
Argon gas is the most popular choice for multi-pane windows. It’s less expensive than other options but offers great thermal performance. Argon is about six times denser than air, improving temperature control and lowering energy bills.
Krypton gas takes insulation performance even higher. It’s denser than argon, making it ideal for narrower gaps or premium triple-pane installations. Krypton gas is perfect for maximum efficiency.
Krypton is more expensive than argon. It’s used in high-end window lines. For most cabin owners, argon offers great value without the high cost. Both gases are safe, non-toxic, colorless, and odorless, improving comfort without being noticed.
 coating technology. In the foreground, the intricate layers of the window pane are depicted, with the Low-E coating visible as a thin, reflective film. The middle ground features a schematic diagram highlighting the function of the Low-E coating, reflecting infrared radiation to improve insulation. In the background, a cabin or residential setting is depicted, emphasizing the application of this energy-efficient window technology. The scene is lit with a soft, natural lighting, creating a warm and inviting atmosphere. The angle and composition highlight the technical details of the Low-E coating while contextualizing its real-world usage.")
| Feature | Argon Gas | Krypton Gas |
|---|---|---|
| Density vs. Air | 6x denser | 12x denser |
| Best Application | Standard gaps (1/2 inch) | Narrow gaps (1/4 inch) |
| Cost Level | Moderate premium | High premium |
| Performance Gain | 30-40% better than air | 40-50% better than air |
Understanding Low-E Technology
Low-E glass has a thin metallic coating that’s almost invisible. This coating reflects heat while letting natural light through. It’s incredibly thin but greatly improves window performance.
In winter, Low-E coating reflects indoor heat back into your cabin. This keeps rooms warmer without raising the thermostat. In summer, it blocks outdoor heat from entering.
Different Low-E coatings suit different climates. Low-solar-gain coatings are for hot climates, blocking more solar radiation. High-solar-gain versions are better in cold regions, capturing free solar heat.
The coating’s placement also affects performance. Surface 2 works well for cold climates, while surface 3 suits moderate climates. Your window professional can suggest the best configuration for your cabin.
Advanced Multi-Layer Systems
Premium windows now have multiple Low-E coating layers. These systems fine-tune thermal performance by addressing solar heat gain and radiant heat loss. Triple-pane windows with two Low-E coatings offer the ultimate insulation.
Each coating layer targets specific wavelengths of light and heat. The outer coating blocks summer heat, while the inner coating prevents winter warmth from escaping. This dual-action approach ensures year-round comfort.
The combination of gas fills and multiple coatings creates a synergistic effect. Gas fills handle conductive and convective heat transfer, while Low-E layers manage radiant heat transfer. Together, they form a complete thermal barrier that far exceeds single-pane or basic double-pane windows. For cabin owners serious about energy efficiency, this integrated approach delivers the best long-term value and comfort.
Step 1: Assess Your Cabin’s Climate Zone and Orientation
Before buying windows, check your cabin’s location and climate. The right climate zone windows vary by location. Knowing your environment helps avoid mistakes and saves energy.
The U.S. has four climate zones for energy savings. Each zone has its own rules because of different temperatures and sunlight. Your cabin location affects which windows are best.
Walk around your property with a compass or phone. Note which rooms face which directions. Watch how sunlight moves across your cabin. This helps with every window choice you make.
Northern Climate Requirements
Cabins in northern states face harsh winters. Northern climate windows must keep heat in and let in free solar energy. They aim to keep warm without losing efficiency.
Look for windows with U-factors of 0.27 or lower in these areas. This means they keep heat in well during cold nights. Triple-pane windows are often a good choice here because they save energy over time.
In northern cabins, you want moderate to high SHGC values (0.40-0.55). This lets winter sunlight warm your cabin. South-facing windows help reduce furnace use by letting in natural heat.
Consider these features for northern climate windows:
- Triple-pane glass with argon or krypton gas fills
- Multiple Low-E coating layers to reflect interior heat back inside
- Insulated frames (fiberglass or vinyl outperform aluminum)
- Quality weatherstripping that remains flexible in extreme cold
- Durable hardware designed for freeze-thaw cycles
Southern and Sun-Belt Considerations
Cabins in hot climates face different challenges. The main goal is to block solar heat gain to save on air conditioning. Windows must block intense sunlight.
In these areas, choose windows with low SHGC values (0.25 or lower). This stops unwanted solar heat from entering. Lower SHGC means less heat gets through during hot summers.
U-factor is less important in southern climates because temperature differences are smaller. But, don’t ignore insulation. Modern homes keep 20-30 degree differences between inside and outside.
Southern cabin owners should focus on:
- Specialized Low-E coatings designed to reflect heat outward
- Tinted or reflective glass options for west-facing exposures
- Frame materials that resist UV degradation (vinyl and fiberglass excel)
- Impact-resistant glass in hurricane-prone coastal areas
- Condensation-resistant features for humid climates
Mountain and High-Altitude Factors
Cabins above 5,000 feet face unique challenges. High-altitude locations have intense UV radiation, extreme temperatures, and winds. Your windows must handle these conditions.
UV radiation increases with elevation. This degrades window materials faster. Choose UV-resistant materials like fiberglass frames.
Temperature swings stress window components. Mountain cabins can see 70-degree swings between day and night. Frames and seals must handle this without leaks.
High-altitude cabin windows should include:
- Fiberglass or composite frames with superior dimensional stability
- Advanced Low-E coatings that block UV while allowing visible light
- Reinforced glass suitable for high wind loads
- Impact-resistant options in areas with severe hail or flying debris
- Multi-point locking systems for structural integrity
Window Orientation and Sun Exposure
The direction of each window affects its energy use. Window orientation impacts sunlight, heat gain, and natural light. Smart placement boosts window benefits.
South-facing windows get the most sunlight all year. In cold climates, they help warm your cabin. In hot climates, they need shading or low SHGC glass.
North-facing windows get little sunlight. They provide steady, indirect light without heat gain worries. Prioritize insulation over solar control for these windows.
East-facing windows get gentle morning sunlight. This doesn’t usually cause cooling problems. Standard energy-efficient specs work well here.
West-facing windows face intense summer sun. This creates cooling challenges. Use low SHGC ratings, shading, reflective glass, or smaller windows for these exposures.
Sketch your cabin’s layout and take photos. This helps choose the right windows for each spot. Don’t buy the same windows for every room.
Step 2: Measure Your Existing Windows Accurately
Measuring your cabin’s windows might seem easy, but small mistakes can cause big problems. A quarter-inch mistake can lead to headaches and lower energy efficiency. It’s very important to measure your windows accurately before you buy anything.
Most cabin owners spend between $250 and $650 per window, depending on size and type. This investment needs careful preparation. Measuring correctly now saves you from costly returns and delays later.
Essential Measuring Tools
You don’t need a lot of fancy tools for accurate window sizing. A few basic items will do the job right. Having these tools ready makes the process smoother.
Here’s what you’ll need for proper window measurement:
- Quality steel tape measure (at least 25 feet long for reliability)
- Pencil and notepad or smartphone for recording measurements
- Carpenter’s level to check if your openings are square
- Helper for larger windows or hard-to-reach locations
- Flashlight for inspecting darker corners and frame conditions
Avoid using cloth measuring tapes because they stretch over time and give inaccurate readings. A metal tape measure stays reliable year after year. Always double-check your measurements before writing them down.

How to Measure Width, Height, and Depth
Professional installers follow a specific technique when they measure windows for replacement. They measure each opening three times in different spots. This approach accounts for frames that aren’t perfectly square, which is common in older cabins.
Start with the width measurement: Measure across the window opening at the top, middle, and bottom. Write down all three numbers. Always use the smallest measurement when ordering your windows.
Frames settle and shift over time, which is common in log cabins. The narrowest point ensures your new window will fit without forcing it. Forcing a window into a tight space can crack the frame or break the glass.
Next, tackle the height: Measure from the sill to the head jamb on the left side, center, and right side. Again, record all three window dimensions and use the smallest one. This protects you from ordering windows that are too tall.
Don’t forget the depth: Measure from the inside edge of the frame to the outside edge. This tells you how thick your wall is and helps determine if you need extension jambs. Extension jambs make your window sit properly in deeper walls.
Window sizes are always listed as width first, then height. A window marked “3050” means 3 feet wide by 5 feet tall. Understanding this notation prevents ordering mistakes that waste time and money.
Recording Rough Opening Dimensions
The type of replacement window installation you’re planning changes how you measure. Replacement windows fit into existing frames, while new construction windows need rough opening measurements. Knowing the difference is key for accurate sizing.
For replacement windows: Measure the existing frame opening exactly as described above. Your new windows will slide into these existing frames. This approach works great when your current frames are in good condition.
For new construction windows: Measure the rough opening in the wall studs. These openings should be 1/2 to 1 inch larger than the actual window unit. The extra space allows for shimming and adjustment during installation.
Create a simple chart to keep your measurements organized and prevent confusion:
| Window Location | Width (inches) | Height (inches) | Depth (inches) |
|---|---|---|---|
| Living Room South | 36, 35.75, 36 (use 35.75) | 60, 60.25, 60 (use 60) | 5.5 |
| Bedroom East | 30, 30, 29.75 (use 29.75) | 48, 48.25, 48 (use 48) | 5.5 |
| Kitchen North | 42, 42, 41.75 (use 41.75) | 36, 36.25, 36 (use 36) | 5.5 |
Log cabin owners need to pay special attention to wall settlement. Newly constructed log walls can settle several inches during the first few years. Installing rigid windows in settling walls causes serious structural problems.
For log cabins less than three years old: Use special sliding bracket systems that accommodate vertical movement. These brackets let the logs settle while keeping your windows secure and weathertight. Skipping this step can crack your expensive new windows.
If you feel uncertain about taking accurate measurements, consider consulting a professional. Many window suppliers offer free measuring services when you purchase through them. A small mistake at this stage can cost hundreds of dollars in returns and reorders.
Keep your measurement records safe and bring them when you shop for windows. Sales representatives can verify your numbers and recommend the best products for your specific rough opening dimensions. Having detailed records also helps if you decide to replace additional windows later.
Step 3: Calculate Your Budget and Energy Savings
Investing in quality energy-efficient windows is a big step. They save you money on bills and make your home more comfortable. Knowing the cost upfront and the savings later helps you choose wisely.
The cost of new windows includes more than just the windows. You also pay for labor, materials, and any repairs needed. Planning ahead helps avoid unexpected costs.
Price Ranges for Different Window Types
A new window costs $250 to $650 installed. Labor adds $150 to $250. Installing one window takes two to three hours.
Window style affects the price. Sliding and single-hung windows are cheaper. But, bay and casement windows cost more because of their complex design.
Choosing the right frame material is key. Vinyl windows are the cheapest at $250-400 installed. But, fiberglass and wood-clad options last longer and keep your cabin warmer.
What kind of glass you choose also matters. Triple-pane windows cost 25-30% more than double-pane. But, they work better in very cold or hot places. Adding special features like Low-E coatings and krypton gas fills raises the price even more.
| Window Type | Frame Material | Glass Package | Price Range (Installed) |
|---|---|---|---|
| Single-Hung | Vinyl | Double-Pane, Low-E | $250-$400 |
| Casement | Vinyl/Fiberglass | Double-Pane, Low-E | $400-$650 |
| Picture Window | Wood-Clad | Triple-Pane, Low-E | $600-$900 |
| Bay Window | Wood-Clad | Double-Pane, Low-E | $800-$1,200 |
Replacing windows in an old house costs more than in a new one. If you need to fix siding or trim, you’ll pay extra. Installing windows in a log cabin can also cost more because of the special skills needed.
Calculating Your Annual Utility Bill Reductions
Energy-efficient windows save you money over time. Knowing how much you’ll save helps you decide if it’s worth it. Upgrading to Energy Star certified windows can save $125 to $465 a year, depending on where you live and how much you heat or cool your home.
Several things affect how much you’ll save. Local energy prices are a big factor. Cabins in areas with high energy costs save more money faster. The weather also plays a role, as very cold or hot temperatures offer more savings opportunities.
How often you use your cabin also matters. If you live there all year, you’ll save more than if it’s just a vacation home. Your heating and cooling systems also impact savings, with older systems showing bigger improvements.
It usually takes 8 to 15 years to break even on new windows. But, windows last 20-30 years or more with the right care. So, you’ll enjoy lower bills for many years after the initial investment.
To figure out your savings, follow these steps:
- Look at your heating and cooling bills from the last year to find your baseline
- Find out how much energy loss comes from your windows (usually 25-30% in older cabins)
- Calculate how much you could save with new windows
- Multiply your annual heating/cooling costs by the savings percentage
Many window makers have online tools to help estimate your savings. These tools give you a personalized estimate based on your location and current windows.
Federal Incentives and Local Utility Programs
There are tax credits and rebates that can lower your costs. The federal Energy Efficient Home Improvement Credit can give you up to $600 a year for qualifying windows. This credit is for windows that meet Energy Star standards for your area.
The IRS has rules for what products qualify and what documents you need. Keep your certification statement and installation receipts for your taxes. The credit covers both the cost of the windows and the labor to install them.
States and local areas also offer rebates for energy-efficient upgrades. Utility companies often have cash-back programs for these upgrades. These incentives can range from $25 to $100 per window, depending on the program and how well the windows perform.
Here are some places to find these programs:
- Your electric or gas utility company’s energy efficiency department
- State energy office websites for local incentive databases
- ENERGY STAR’s rebate finder tool at energystar.gov
- County or municipal building departments for local programs
Some programs need you to apply before starting your project. Apply early to avoid missing deadlines or running out of funds. Combining federal tax credits with local rebates can cut your total cost by 15-25%.
Incentive programs change often. What’s available this year might not be next year. Planning your project carefully can help you get the most financial benefits. Investing in energy-efficient windows pays off through immediate comfort and long-term savings.
Best Energy Efficient Windows: Top Brands and Models
The window market has many great options from big and small makers. They offer top energy efficiency for cabins. While big brands are well-known, smaller makers also offer great products at better prices.
Choosing the right window depends on your needs, climate, and budget. These brands are known for quality frames, durable hardware, and good energy performance.
Andersen 400 Series Woodwright Double-Hung
The Andersen 400 Series Woodwright is a top pick for cabin owners. It combines traditional looks with modern energy efficiency. The wood inside adds warmth, while the exterior cladding protects against weather.
The wood inside gives a classic look that fits log cabins well. The exterior comes in many colors and needs little upkeep. It stands up to extreme temperatures.
Key Specifications
This series is known for its energy efficiency. The Low-E4 glass technology keeps your cabin warm in winter and cool in summer.
- U-Factor ratings as low as 0.27, keeping cold out in winter
- Multiple SHGC options for different sun exposures
- SmartSun technology blocks up to 95% of UV rays
- Argon gas fill for better thermal performance
- Available in many sizes for any opening

This window line is great for certain cabins. Traditional log cabins look best with its wood interior.
It saves a lot of energy in cold climates. Cabin owners who want wood and quality choose these windows.
Pella 250 Series Vinyl Windows
The Pella 250 Series is a great value for cabin owners. It uses vinyl that’s durable and low maintenance. It’s a good choice for those who want quality without spending too much.
Energy Performance
This series is good for most cabins. U-factor ratings around 0.30 help keep your cabin warm in winter and cool in summer.
The Low-E glass options help control heat in summer. You can choose the right balance of light and heat for your cabin.
Durability Features
Vinyl frames are practical for cabins. They never need painting or staining, saving time and money.
The corners are fusion-welded for a tight seal. Vinyl stays stable in all temperatures without warping or fading.
These windows are great for vacation cabins. They’re affordable and maintain well. They’re perfect for cabins where upkeep is important.
Marvin Elevate Collection
The Marvin Elevate Collection is a top choice for cabins. It combines fiberglass exteriors with wood interiors. It’s durable and stylish.
Design Options
This collection offers many customization options. Fiberglass exteriors come in many colors that last.
Wood interiors match your cabin’s design. You can choose from many species and finishes. There are also various hardware styles and glass options.
It’s ideal for unique cabin designs. You can choose from standard sizes to custom shapes.
Climate Suitability
Fiberglass is stable in extreme temperatures. It keeps seals tight through seasonal changes.
It’s perfect for harsh mountain environments. Coastal cabins benefit from its moisture resistance.
The warranty shows the manufacturer’s confidence. Upscale cabins and those in extreme climates find it worth the cost.
JELD-WEN Siteline EX Wood Clad
The JELD-WEN Siteline EX offers versatility at a mid-range price. It’s made of wood-clad construction and comes in many sizes and shapes.
Customization Options
This line is great for cabins that need unique windows. It offers countless size variations without the high cost of custom windows.
It comes in many shapes and configurations. You can choose from single units to complex assemblies.
It’s perfect for cabins with unique features. It’s also great for replacement projects with unusual openings. Its mid-range price makes customization affordable.
Milgard Ultra Series Fiberglass
The Milgard Ultra Series is the best for extreme weather. It uses advanced fiberglass for harsh conditions.
Weather Resistance
The fiberglass is incredibly strong. It’s warranted for coastal areas where other materials fail.
It’s certified for high-wind zones. It stays stable in extreme temperatures. It’s also great for wildfire-prone areas.
It’s ideal for areas with harsh weather. The premium price reflects its durability. It’s worth it for challenging environments.
| Brand & Series | Frame Material | Best U-Factor | Ideal Climate | Price Range |
|---|---|---|---|---|
| Andersen 400 Woodwright | Wood/Clad | 0.27 | Cold Climates | Premium |
| Pella 250 Series | Vinyl | 0.30 | All Climates | Budget-Friendly |
| Marvin Elevate | Fiberglass/Wood | 0.28 | Extreme Conditions | Premium |
| JELD-WEN Siteline EX | Wood/Clad | 0.29 | Moderate Climates | Mid-Range |
| Milgard Ultra | Fiberglass | 0.27 | Harsh Environments | Premium |
Each brand has its own strengths for cabins. Choose based on energy needs, style, climate, and budget. Find the perfect match for your cabin.
Step 4: Select the Right Window Style for Each Location
Different areas of your cabin need specific windows for better energy use and comfort. Choosing the right cabin window types is key. This ensures each room works well and saves energy.
Every room in your cabin has its own needs. A single window style won’t do for all. By picking the right window for each spot, you get better air flow, views, and warmth.
Casement Windows for Maximum Energy Efficiency
Casement windows are the most energy-saving. They open with a crank and seal tightly when closed. This makes them better than most other windows.
They block air leaks well. Unlike sliding windows, casements seal tightly. This keeps your cabin warm or cool.
These windows offer clear views without a middle rail. They let in lots of light and air. When open, they catch breezes and bring them inside.
Put energy-efficient windows like casements in key rooms. They work great in places needing good sealing and air flow.
But, casements need space to open. Don’t put them near decks or walkways. They can be a hazard. Also, be careful not to block pathways.

Double-Hung Windows for Traditional Appeal
Double hung windows add classic style to your cabin. They have two sashes that slide up and down. You can open them in different ways for better air flow.
They’re good for bedrooms and living areas. You can open the bottom sash or both for more air. This makes them very useful.
Modern double hungs tilt in for easy cleaning. This is great for second-story windows. They look good and work well, keeping your cabin cozy.
Double hungs fit in any room. They keep your cabin looking traditional while saving energy. They’re perfect for small spaces.
Picture Windows for Scenic Views
Picture windows are the most energy-efficient. They have no moving parts, so they don’t leak. They’re just sealed glass panels.
They’re very good at keeping air out. This makes them very efficient. They’re better than most other windows.
Use them for amazing views. They’re great for living rooms and dining areas. They let in lots of light and show off your view.
Pair them with other windows for the best of both worlds. This way, you get great views and air flow. The fixed window saves energy, while the others let in air.
Awning and Sliding Window Applications
Awning windows open from the top and let in air even when it rains. They direct rain away while letting in air. This is great for bathrooms and kitchens.
They’re good for places where you need to control moisture. You can leave them open in light rain. They also work well with other windows for more air flow.
Sliding windows move side to side. They’re good for tight spaces. They’re often used above kitchen sinks and where other windows won’t fit.
They’re good for wide spaces but not as energy-efficient. They slide past weatherstripping, not sealing as tightly as other windows.
| Window Style | Best Applications | Energy Efficiency | Key Advantages |
|---|---|---|---|
| Casement | Living rooms, bedrooms, dining areas | Excellent (compression seal) | Maximum ventilation, tight seal, unobstructed views |
| Double-Hung | Any room, specially traditional cabins | Very good (modern versions) | Top or bottom ventilation, easy cleaning, classic style |
| Picture | Living areas, scenic view locations | Outstanding (no moving parts) | Maximum efficiency, uninterrupted views, abundant light |
| Awning | Bathrooms, kitchens, upper installations | Good (weather-resistant ventilation) | Rain ventilation, moisture control, privacy options |
| Sliding | Kitchens, tight spaces, wide openings | Moderate (track-based operation) | Space-saving design, horizontal operation, easy use |
Choosing the right window styles for each area makes your cabin cozy and energy-smart. Mix different designs for the best results. This way, you save energy and make your cabin more comfortable.
Installation Best Practices for Maximum Efficiency
How you install windows is key to their energy use. Even the best windows won’t work well if installed wrong. Bad installation leads to leaks, water damage, and wasted energy.
Installing windows in a cabin is tough. It’s hard to fix mistakes in remote places. That’s why knowing how to install windows right is important for cabin owners.

DIY Installation vs. Professional Services
Installing windows is hard, with a difficulty level of 7-8 out of 10. If you know carpentry, you can do it yourself. Each window takes 2 to 3 hours to install.
Doing it yourself saves money, about $150 to $250 per window. You’ll also feel proud of your work. But, you need the right tools, like a circular saw and shims.
Professional installers have big advantages. They know how to do it right and cover mistakes. If you mess up, you’re on your own.
Replacing windows is harder than putting in new ones. You might need to change trim, which is complex. Log cabins need special skills for installation.
For expensive or complex windows, hire pros. If you’re good at carpentry and it’s a vacation cabin, DIY might work. But, mistakes can cause big problems.
| Installation Method | Cost Per Window | Time Required | Warranty Coverage | Best For |
|---|---|---|---|---|
| DIY Installation | Materials only ($0 labor) | 2-3 hours per window | Product only (no labor) | Experienced DIYers, vacation cabins, budget projects |
| Professional Installation | $150-$250 labor per window | 1-2 hours per window | Product and installation | Premium windows, primary residences, complex installations |
| Manufacturer Installers | $200-$300 labor per window | 1-2 hours per window | Complete coverage from one source | Log cabins, warranty protection priority, peace of mind |
Proper Sealing and Insulation Techniques
Start with a level and square frame. Use shims around the frame and check with a level. An uneven frame causes air leaks and poor operation.
Low-expansion foam fills gaps. Avoid over-filling to prevent frame bowing. Apply foam in thin layers for best results.
Use weather-resistant barrier tape around the opening. This tape helps keep moisture out. The Energy Department’s guide says sealing can cut energy loss by up to 30%.
Choose the right caulk for your location. Exterior caulk withstands temperature changes. Interior caulk is easier to use and clean up.
Flashing Installation for Weather Protection
Flashing keeps your cabin dry. It’s like shingles that direct water away. Each piece overlaps the one below.
Install sill flashing first. This catches water and directs it outward. It should slope slightly.
Side flashing goes next. These vertical pieces overlap the sill flashing. They should extend 6 inches above and below the window.
Head flashing goes last. It sheds water away from the window. Proper flashing is key in remote cabins to avoid water damage.
Testing for Air Leaks After Installation
Test your installation to catch problems early. Look for gaps around the frame. Small gaps can leak a lot of air.
A smoke pencil test shows air movement. Hold a smoke pencil near the edges on a windy day. Smoke that moves in or out indicates leaks.
Blower door tests are the most accurate. They pressurize your cabin to find leaks. This is best for big renovations.
Check if windows open and close smoothly. If they don’t, the frame might be wrong. Proper installation ensures smooth operation and tight seals.
Remember, a premium window installed poorly is worse than a mid-grade one installed right. Do it well, or hire pros. Your cabin’s comfort and energy efficiency depend on it.
Weatherproofing Features for Cabin Durability
Your cabin’s windows must face extreme weather every year. This includes heavy snow, intense UV rays, wind-driven rain, and flying debris. Unlike suburban homes, cabins are often in mountain areas, lakefronts, or forests with harsh conditions.
Windows are constantly attacked by wind, water, ice, and dirt. Over time, this causes fading, cracking, and warping. Choosing durable windows with advanced features saves you money and trouble later.

Storm Protection and Impact Resistance
Impact resistant windows are key in areas with severe weather. They use laminated glass technology, like car windshields. A tough polymer interlayer holds the glass together if it breaks.
This design stops hail, flying branches, or storm debris from getting in. Even if the glass cracks, it stays in place. This keeps weather outside. If you live in a hurricane zone or have severe thunderstorms, these windows are a must.
ASTM testing shows these windows can handle specific impact forces. Many insurance companies give discounts for homes with impact-rated windows. Check with your insurer for savings.
Preventing Moisture Problems
Condensation is a big problem in cabins, worse with wood stoves or propane heaters. Warm, humid air meeting cold windows causes water to form. This can damage frames, grow mold, and freeze windows.
The Condensation Resistance Factor (CRF) rates windows from 1 to 100. Higher numbers mean better performance. Quality windows score above 50, and premium ones over 60. Upgrading to higher-rated windows can greatly reduce condensation.
Good condensation resistance comes from several features:
- Insulated frames that stay warmer on the inside
- Warm edge spacers between glass panes that reduce heat transfer
- Quality seals that prevent air from getting in
- Proper ventilation to manage indoor humidity
Log cabin walls absorb and release humidity, making them prone to condensation. Add a wood stove, and you have a perfect storm for moisture. Your windows must handle these conditions without failing.
Long-Term Frame Protection
Intense sunlight breaks down window frames over time. Vinyl becomes brittle and cracks. Wood fades and dries out. UV rays also damage the seals between glass panes.
South-facing and west-facing windows get the most sun damage. They need frames that resist UV damage well. Different materials offer varying levels of protection:
- Fiberglass naturally resists UV damage better than vinyl or wood, making it ideal for sun-exposed locations
- UV-stabilized vinyl includes special additives that block UV penetration
- Capstock vinyl features a protective outer layer with extra UV inhibitors for maximum durability
- Wood-clad frames combine wood’s beauty with aluminum or vinyl exterior protection
Fiberglass is a top choice for cabins. It’s very tough and offers better fire resistance than vinyl or wood. If your cabin is in a wildfire-prone area, fiberglass frames offer extra safety.
Don’t forget another UV benefit: Low-E coatings block over 95% of UV radiation. This protects your cabin’s furniture, wood floors, and textiles from fading. You’ll keep your cabin’s look while also extending your window frames’ life.
Quality window weatherproofing features work together for reliable cabin windows for decades. When comparing options, look at the whole package of protective features. Choose what fits your location and climate challenges best.
Enhancing Window Performance with Treatments and Accessories
Your cabin windows work harder with the right treatments and accessories. Quality windows are a good start, but the right additions can make them 25-60% more efficient. These extras add insulation, control heat, and seal gaps.
Think of these enhancements as team players for your windows. They help a lot during extreme weather. Plus, many of these solutions are cheaper than replacing windows and save a lot of energy.
Honeycomb Shades That Trap Air
Insulated shades with cellular construction are smart for improving window performance. They trap air in cells, creating a barrier. Quality cellular shades can improve your window’s R-value by 40-60%. This means more comfort and energy savings.
Double-cell designs are better than single-cell because they have two air pockets. They’re great for bedrooms or large windows where you want insulation at night and views by day.

For hard-to-reach cabin windows, cordless and motorized options are perfect. Mount them so they seal tightly at the top and bottom. This stops air from going behind the shade.
Heavy Fabric Options for Temperature Control
Thermal curtains offer old-fashioned charm with modern energy benefits. They have insulated linings or multiple layers to block heat. Properly installed thermal curtains can reduce heat loss by 25% or more. They’re great in bedrooms for better sleep.
Look for curtains with:
- Multiple fabric layers or foam backing for maximum insulation
- Floor-length designs that prevent air circulation underneath
- Extensions beyond the window frame on both sides to seal edges
- Light-blocking fabrics that also provide privacy
Many cabin owners use thermal curtains with lighter shades or blinds. This way, you can open the curtains for natural light and keep the lighter layer closed for privacy.
Adding an Extra Weather Barrier
Storm windows add an extra air space and weather barrier outside your primary windows. They’re cost-effective for older single-pane windows. Quality exterior storm windows can improve old windows’ performance to nearly match modern double-pane units at a fraction of the replacement cost.
These layers trap air between the storm panel and your existing window. This air space provides insulation like double-pane windows. Storm windows also protect your primary windows from weather damage, potentially extending their lifespan by decades.
Installation is easy for handy cabin owners. Many modern storm windows have easy-mount systems that don’t require extensive carpentry skills.
Additional Performance Boosters
Several other window accessories are worth considering for your cabin. Window film reduces solar heat gain in hot climates. It adds privacy without blocking views completely. Some films also protect against UV rays that can fade furniture.
Window quilts are removable insulated panels for extreme cold nights. Hang them over windows when it’s very cold, then remove them for natural light. They’re traditional solutions that work well in mountain cabins.
Don’t overlook weatherstripping kits for older windows with air leaks. Fresh weatherstripping stops drafts and saves energy. Quality screens allow fresh air while keeping insects out. They’re essential for enjoying your cabin.
These accessories work best when used together. A layered approach with cellular shades and thermal curtains provides flexibility and performance across all seasons.
Maintenance Schedule for Long-Term Energy Efficiency
Regular window care keeps your cabin comfy and efficient. Even durable materials like vinyl and fiberglass need some attention. A simple cabin window care routine takes just a few hours twice a year. It can extend your windows’ life by decades.
Think of window maintenance as an insurance policy for your investment. You’ve spent good money on quality energy-efficient windows. A little preventive care protects that investment and keeps your heating and cooling costs low.
The good news? Most window maintenance tasks are straightforward and don’t require special skills. You can handle nearly everything yourself with basic tools and supplies you probably already have at your cabin.
Twice-Yearly Inspection Checklist
Spring and fall are ideal times to give your windows a thorough once-over. These seasonal transitions let you catch problems before extreme weather arrives. Set aside a morning or afternoon to walk through your cabin with a notepad and camera.
Start by examining the weatherstripping around each window. Look for cracks, gaps, or areas where the material has compressed and lost its seal. Run your hand along the edges with the window closed to feel for drafts.
Check the caulking around exterior window frames next. You’re looking for spots where the caulk has shrunk, cracked, or pulled away from the frame or siding. These gaps let air and moisture infiltrate, reducing energy efficiency.

- Glass condition: Inspect for cracks, chips, or cloudiness between panes that signals gas fill loss
- Window operation: Open and close each window to ensure smooth movement without binding
- Water damage signs: Look for stains, soft spots, or rot on sills and surrounding walls
- Weep holes: Verify these small drainage openings at the bottom of frames are clear
- Locks and latches: Test that all hardware engages properly and holds secure
- Frame integrity: Check for warping, separation, or deterioration in the frame material
Take photos of anything that concerns you. These visual records help you track whether issues are worsening and provide documentation for warranty claims if needed.
Proper Cleaning Techniques
Clean windows do more than look nice—they maximize visible light transmission and help you spot developing problems early. The right window cleaning approach depends on your window materials and coatings.
For the glass itself, use a simple solution of mild dish soap and water. Avoid ammonia-based cleaners like Windex on Low-E coated glass, as these can damage the special coating over time. A few drops of soap in a bucket of water works perfectly.
Clean on cloudy days when possible. Direct sunlight causes cleaning solutions to dry too quickly, leaving streaks. Use a squeegee or microfiber cloth to avoid lint and achieve a streak-free finish.
Frame cleaning varies by material:
| Frame Material | Cleaning Method | Frequency | Products to Avoid |
|---|---|---|---|
| Vinyl | Soap and water with soft cloth | Twice yearly | Abrasive cleaners, solvents |
| Fiberglass | Mild detergent solution | Twice yearly | Harsh chemicals, steel wool |
| Wood-clad | Gentle wood cleaner | Three times yearly | Excessive water, abrasives |
| Unclad wood | Wood-safe cleaner, immediate drying | Four times yearly | Soaking, harsh scrubbing |
Don’t forget the tracks and channels where windows slide. These areas collect dirt, dead insects, and debris that prevent proper closure. A vacuum with a brush attachment followed by a damp cloth does the job quickly.
For hard-to-reach windows or if you only visit your cabin seasonally, consider hiring professional window cleaning services. They have the equipment and expertise to safely clean second-story or specialty windows.
Keeping Seals and Weatherstripping Fresh
Weatherstripping and seals are your windows’ first line of defense against air leakage. These components wear gradually through normal use and exposure to temperature extremes. Quality weatherstripping maintenance keeps your windows performing like new.
Most weatherstripping lasts 5 to 10 years before requiring replacement. Learn what type your windows use—common varieties include foam tape, V-strip, felt, and tubular rubber. Keep replacement materials on hand so you can address problems immediately.
Exterior caulking needs attention when you notice shrinkage or cracks during your seasonal inspection. Remove old, failing caulk completely before applying new material. Use paintable acrylic latex caulk for most cabin window applications—it flexes with temperature changes and adheres well to various materials.
Apply a continuous bead of caulk without gaps. Tool it smooth with a wet finger or caulking tool to create a concave profile that sheds water effectively. Allow proper curing time before exposing the caulk to rain or temperature extremes.
Interior seals deserve attention too. If windows feel drafty even after exterior weatherstripping maintenance, check the interior compression seals. These rubber or foam gaskets may have deteriorated and need replacement.
Hardware Care and Adjustments
Window hardware works hard, even on operable windows you use frequently. Locks, hinges, and cranks need occasional lubrication and adjustment to function smoothly. This simple cabin window care takes minutes but prevents bigger problems.
Once a year, apply silicone spray lubricant to moving parts. Silicone works better than oil-based products because it doesn’t attract dirt and dust. Spray hinges, lock mechanisms, and crank operators lightly—a little goes a long way.
Wipe away any excess lubricant to prevent drips and staining. Work the window through its full range of motion several times to distribute the lubricant evenly.
Check all screws in hardware for tightness. Temperature cycling causes metal and wood to expand and contract, which can loosen fasteners over time. Tighten any loose screws, but don’t overtighten and strip the holes.
If windows don’t close properly or feel misaligned, adjust the hinges before the problem worsens. Most modern windows have adjustment screws that let you fine-tune the fit. Consult your window manufacturer’s documentation for specific adjustment procedures.
Replace worn or damaged hardware promptly. A broken lock compromises security, while a failed crank operator makes the window unusable. Most manufacturers sell replacement parts, and many home centers stock common hardware components.
By following this straightforward maintenance schedule, your energy-efficient windows will deliver peak performance for 20 years or more. The small time investment pays off in lower energy bills, better comfort, and windows that look and work like new decades after installation.
Making the Right Window Choice for Your Cabin
You now have all the info to pick the best energy efficient windows for your cabin. Cabin windows do more than just look good. They let in natural light, cool breezes, save energy, and make your space feel welcoming.
The right choice depends on your situation. The climate where you live is important. If you live there all year, you need different windows than if it’s just a weekend spot. Your budget also matters. High-end triple-pane windows are best for cold winters, while double-pane works for milder climates.
Get quotes from several window companies. Look at warranties for both the product and the installation. Make sure your windows meet Energy Star standards for your area. Also, check for tax credits and rebates to help with the cost.
This guide has covered energy ratings, materials, glass types, and how to install them. Your investment in energy efficient windows will save you money on bills every month. With proper care, these windows can last 20 to 30 years.
Take your time choosing windows. If you’re on a tight budget, focus on the rooms you use most. Choose windows that are durable and perform well, even if they’re not the prettiest. The windows you pick will make your cabin comfortable, efficient, and beautiful for years to come.