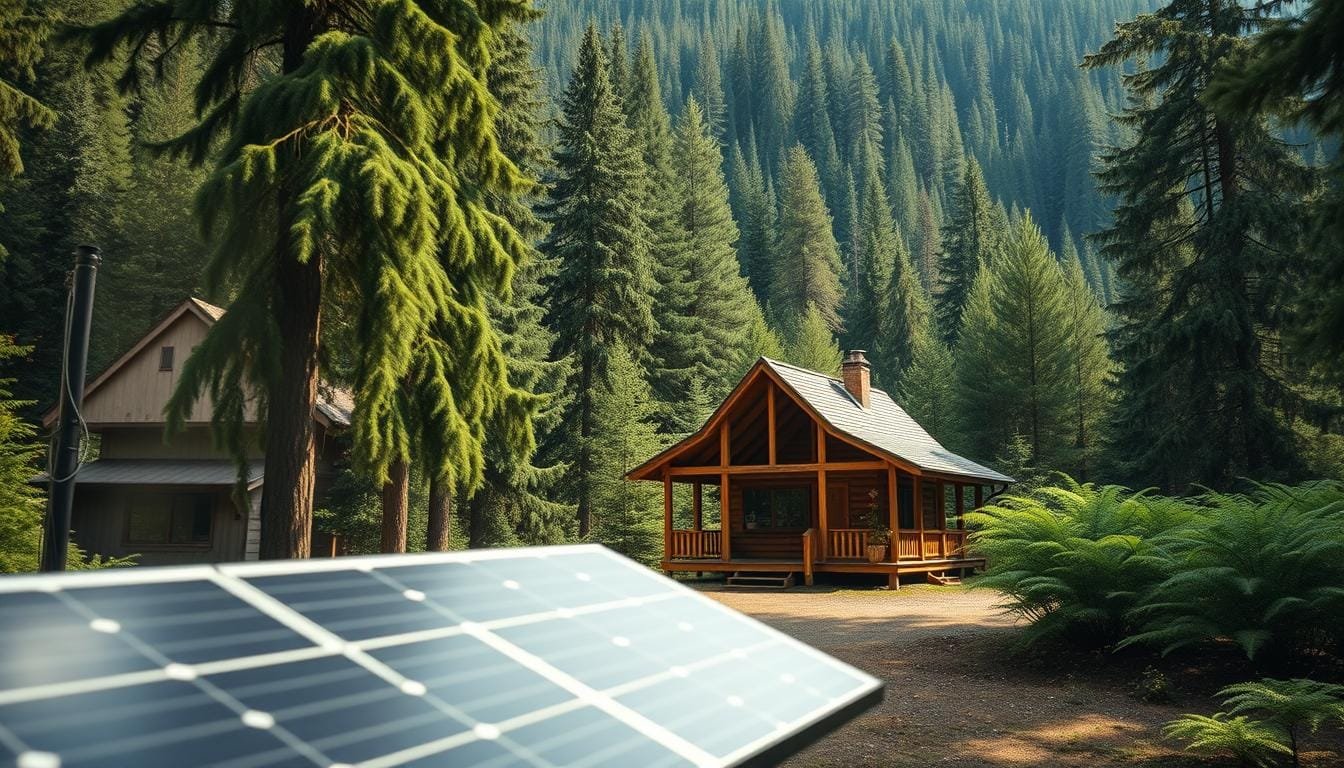
Thinking about energy independence for your remote getaway? Switching to renewable energy means freedom from utility companies and high electric bills. An off-grid solar system powers your retreat sustainably and cuts down on environmental harm.
Getting the sizing right is key. The average American home uses about 886 kilowatt-hours monthly. But, your mountain retreat likely uses much less. Most places need 15-22 photovoltaic modules to cover electricity costs fully. Yet, cabin solar panels need special calculations based on your unique situation.
Your setup must be customized for location, weather, and visit frequency. This guide helps you figure out daily energy use, pick the right parts, and plan for future growth. Whether it’s for a weekend getaway or a year-round home, good planning avoids headaches and ensures electricity when you need it.
Let’s dive into what you need to know about matching power needs with the right photovoltaic solution.
1. Understanding Your Cabin’s Energy Needs
The first step in setting up a cabin solar system is knowing how much energy you need. Without a clear idea of your cabin energy needs, you might end up with too much or too little equipment. This mistake can cost you a lot of money or leave you without power when you need it.
Many things affect how big your solar system should be. These include how much electricity you use, where your cabin is, and how big it is. The average American home uses 10,791 kWh of electricity each year. But cabins use energy differently.
Working with experts can help you make sure your system meets your needs. But knowing the basics yourself gives you more control over your project.
Why Accurate Energy Assessment Matters for Off-Grid Success
Getting your energy needs wrong can lead to big problems. Undersizing your system means you’ll have power outages and dead batteries. You might have to turn off lights to run the fridge or skip showers because the pump uses too much power.
Oversizing your system is also a waste of money. You could spend thousands on equipment you won’t use. The goal is to find the right size that meets your needs without wasting money.
An accurate energy assessment helps you make smart choices. You might find that using a propane fridge or LED lights reduces your needs. These choices only come from knowing how much power you really use.
Full-Time vs. Seasonal Cabin Usage Patterns
How often you use your cabin affects your solar system design. A summer vacation cabin used on weekends might need just 2-3 kWh per day. This is a small load that requires a small system.
Living in your cabin all year changes things. You’ll need 10-20 kWh daily or more, depending on your heating and water systems. You’ll need to power everything a regular home needs.
Seasonal changes also affect your kWh consumption. Winter might mean more power for heaters and lights. Summer brings challenges with fans and air conditioning.
Consider these typical usage scenarios:
- Weekend retreat: 1-4 kWh daily, minimal appliances, basic comfort
- Extended summer residence: 5-10 kWh daily, most conveniences, limited heavy loads
- Year-round off-grid home: 10-25 kWh daily, full household operation, all seasons
- Luxury cabin: 25+ kWh daily, no compromises, high-end appliances
Essential vs. Luxury Power Loads
Knowing the difference between essential and luxury loads helps you plan your power budget. Essential loads are things you can’t live without. These include refrigeration, water pumping, some lighting, and medical equipment.
Essential loads might use 3-8 kWh per day. A fridge uses 1-2 kWh daily. LED lighting for a small cabin adds another 0.5-1 kWh. These are your basic needs.
Luxury loads are things that make life more comfortable but aren’t essential. Think hot tubs, electric space heaters, large TVs, or charging stations for electric vehicles. One luxury item can double or triple your daily energy needs.
The smart way is to design your system for essentials first. Then add capacity for luxuries as you can afford it. You might start with a 3 kW system for basics and add more later for luxuries.
Many cabin owners use a mix of energy sources. They use propane or wood for heating and cooking, and solar for electronics and lighting. This approach saves money and keeps you comfortable.
Your energy assessment is your guide for every decision. Get this right, and the rest of your project will go smoothly. You’ll end up with a system that fits your lifestyle perfectly.
2. Creating Your Complete Power Consumption Inventory
Building your power inventory is like packing for a trip. You need to list every item you’ll use. Knowing your cabin’s power use is key to sizing your solar system right.
This detailed process takes time but avoids costly mistakes. Walk through your cabin, listing each device that uses power. Your goal is a complete list of your electrical needs.
Room-by-Room Appliance and Device Listing
Start by carrying a clipboard through your cabin. Begin in the kitchen, then move to bedrooms, bathrooms, and living areas. This method ensures nothing is missed.
In the kitchen, list your fridge, microwave, coffee maker, and toaster. Don’t forget under-cabinet lights or that electric can opener.
Your living areas have entertainment and comfort devices. Include your TV, streaming devices, sound systems, lamps, ceiling fans, and space heaters. Don’t forget the electric blower for your wood stove.

Bedrooms have lighter loads but are important. List alarm clocks, phone chargers, reading lights, and heated blankets. Bathrooms have exhaust fans, hair dryers, electric razors, and heated towel racks.
Your utility room or storage areas often hide big power draws. Look for:
- Water pumps for well systems that cycle throughout the day
- Septic aerators that run continuously in some systems
- Water heaters (electric models are major consumers)
- Washing machines and dryers if you have them
- Power tools and battery chargers in workshops
Finding Wattage Ratings and Specifications
After listing every device, find each item’s wattage rating. This info is vital for calculating watt-hours later. Most appliances have this info on a label or nameplate.
Look for a number followed by “W” for watts or “A” for amps on the back, bottom, or side of appliances. If you find amps, multiply by your voltage (usually 120V in the US) to get watts.
For example, if your fridge label shows 5 amps, calculate: 5 amps × 120 volts = 600 watts. This is the max power draw for that appliance.
If labels are worn or missing, search online for the model number. Look up specs on the manufacturer’s website. Online databases also have typical wattage ranges for common devices.
For devices without clear ratings, use these typical ranges:
- LED light bulbs: 8-15 watts each
- Laptop computers: 50-100 watts
- Phone chargers: 5-10 watts
- WiFi routers: 10-20 watts
- Ceiling fans: 30-75 watts
Consider buying a kill-a-watt meter or similar device. These cost $20-30 and give exact readings for any device with a standard plug.
Don’t Forget These Often-Overlooked Devices
Forgetting certain devices can lead to an undersized system. These devices can add up to a lot of power use over time.
Well pumps are often forgotten but are a big load. They might only run a few minutes per hour but draw a lot of power—500-1500 watts. Missing this device throws off your entire calculation.
Security systems and motion-activated lights run all day, even if you don’t think about them. A typical security panel with a few sensors uses 20-50 watts all day. That’s 480-1200 watt-hours per day.
WiFi routers and modems never stop working. They draw 10-20 watts all day, adding 240-480 watt-hours daily to your use. Internet equipment is key for many cabin owners but easy to overlook.
Phantom loads are hidden energy drains that many miss. These are devices that use power even when turned “off” or in standby mode. Common culprits include:
- Coffee makers with clocks or timers
- Televisions in standby mode
- Cable boxes and streaming devices
- Microwave ovens with digital displays
- Chargers plugged in without devices attached
Seasonal equipment is another blind spot in power planning. Block heaters for vehicles, dehumidifiers for damp months, or extra fans for summer all affect your energy needs. Document these items and note which seasons they operate.
Garage door openers and electric gate operators also use power. They draw little power in standby but spike during use.
Don’t forget battery charging stations for power tools, recreational equipment, or backup devices. Tool battery chargers, e-bike chargers, and portable battery banks all need regular charging from your solar system.
Medical devices need special care because they can’t be compromised. CPAP machines, oxygen concentrators, or refrigerated medications need reliable power. Include their use and mark them as critical loads in your inventory.
With a detailed inventory and accurate wattage ratings, you’ll know your total daily energy use. This list is your guide throughout the solar sizing process.
3. Calculating Your Daily Energy Usage Step-by-Step
Turning a list of devices into exact energy needs is easy. It takes four simple steps. These steps help you figure out how big your solar system should be. Don’t worry about the math—it’s just basic multiplication that anyone can do.
The watt-hours calculation method shows how much energy your cabin needs each day. This number is key when picking out solar panels and batteries. Most people find this step easy once they do their first example.
Step 1: Record the Wattage for Each Device
Start by writing down the wattage of each appliance and device. You can find this on the label or in the manual. Make a chart with two columns: device name and wattage.
Here’s what a typical cabin inventory looks like:
- LED light bulbs: 9W each (8 bulbs total)
- Refrigerator: 150W (energy-efficient model)
- Laptop computer: 65W
- Phone chargers: 5W each (2 chargers)
- Water pump: 400W
- Coffee maker: 900W
- Television: 80W
- Ceiling fan: 75W
If a device lists amperage, multiply it by voltage (usually 120V in the US) to get watts. For example, 2 amps at 120V is 240 watts.
Step 2: Estimate Realistic Daily Hours of Operation
This step is about being honest with yourself. Think about how long each device actually runs in a day. Overestimating can make your system too expensive, while underestimating can leave you short on power.
Consider these realistic usage patterns for the devices above:
- LED lights: 4 hours per day (not all lights on simultaneously)
- Refrigerator: 8 hours actual runtime (cycles on/off throughout 24 hours)
- Laptop: 3 hours
- Phone chargers: 2 hours total
- Water pump: 30 minutes (0.5 hours)
- Coffee maker: 15 minutes (0.25 hours)
- Television: 3 hours
- Ceiling fan: 6 hours
Remember, refrigerators and freezers don’t run all day. Modern models usually run about 8-10 hours a day. Track your usage for a few days to get accurate numbers.
Step 3: Calculate Watt-Hours for Each Item
Now, multiply the wattage by daily hours for each device. This gives you the watt-hours calculation for actual energy use. The formula is simple: Watts × Hours = Watt-Hours.
Here’s how the math works for our cabin example:
| Device | Wattage | Daily Hours | Watt-Hours |
|---|---|---|---|
| LED lights (8 bulbs) | 72W | 4 hours | 288 Wh |
| Refrigerator | 150W | 8 hours | 1,200 Wh |
| Laptop computer | 65W | 3 hours | 195 Wh |
| Phone chargers (2) | 10W | 2 hours | 20 Wh |
| Water pump | 400W | 0.5 hours | 200 Wh |
Keep going with this process for every device on your list. A solar panel calculator can do these calculations for you. But knowing how to do it manually helps you adjust as needed.
Step 4: Total Your Daily Energy Consumption
Add up all the watt-hours from Step 3 to find your total daily energy use. To make it easier to compare, convert the total to kilowatt-hours (kWh) by dividing by 1,000.
Our example cabin calculation totals:
- LED lighting: 288 Wh
- Refrigerator: 1,200 Wh
- Laptop: 195 Wh
- Phone chargers: 20 Wh
- Water pump: 200 Wh
- Coffee maker: 225 Wh
- Television: 240 Wh
- Ceiling fan: 450 Wh
- Other devices: 682 Wh
Total daily usage: 3,500 watt-hours or 3.5 kWh per day
This number is your baseline power need. It helps you size your solar array, battery bank, and other system parts. Remember, system losses and inefficiencies mean you’ll need to generate more power than this baseline. We’ll cover those adjustments next.
Most small to medium cabins use 2-8 kWh per day, depending on appliances and lifestyle. A weekend retreat might use 2-3 kWh daily, while a full-time home with modern amenities could use 8-12 kWh. Your calculated number is a personalized starting point for any solar panel calculator to suggest specific equipment.
4. Understanding the Four Main Solar System Components
Your solar power system is like a team. Each part has a special job. Knowing what each does helps size your cabin’s system right.
A good off-grid system has four key parts. Solar panels make electricity, battery banks store it, charge controllers protect batteries, and inverters make power for your stuff. Knowing these parts helps you choose the right ones for your cabin.
Learn more about the main components of a solar power system. This will help you understand how each part fits together.
Solar Panels Convert Sunlight to Electricity
Solar panels are the heart of your off-grid system. They turn sunlight into DC electricity. Photons from the sun make electrons move, creating an electrical current.
Modern solar panels come in different sizes. They range from 100 watts to 400 watts per panel. Their efficiency is usually between 15% and 22%.

Many things affect how much electricity your panels make. Temperature, shading, dust, and sun angle all play a part. Knowing these helps size your system right.
Battery Banks Store Energy for Nighttime Use
Battery banks are your cabin’s energy storage. They keep extra electricity from your panels for when it’s dark or cloudy. Without enough storage, your lights won’t work at night.
Choosing the right battery size is key. Most plan for 2-3 days of power without sunlight. A bigger bank means more freedom from the weather.
There are two main battery types:
- Lithium batteries: Cost more upfront but last longer and are lighter
- Lead-acid batteries: Cheaper but don’t last as long and are heavier
- Battery capacity: Measured in amp-hours (Ah) or watt-hours (Wh), shows how much energy it holds
- System voltage: Can be 12V, 24V, or 48V, depending on your needs
Modern kits offer integrated batteries. They range from 2000Wh to 15kWh. These units are easy to install and save space.
Charge Controllers Regulate Charging Safely
Charge controllers manage the flow of energy from panels to batteries. They prevent overcharging, which can harm batteries. This is key for keeping your system running long.
These controllers do more than just stop overcharging. They also prevent reverse current flow at night and optimize charging. They’re the smart part of your system.
There are two main types:
- PWM (Pulse Width Modulation): A budget option for smaller systems
- MPPT (Maximum Power Point Tracking): A better choice for bigger systems, gets more power from panels
Your controller must handle the maximum current from your panels. The wrong size can waste energy. The right size makes sure every bit of sunlight is used.
Inverters Convert DC Power to Usable AC Power
Inverters change DC electricity from batteries to AC power for your appliances. Without them, you can only use special DC devices. This limits what you can use.
The quality of your inverter matters. Pure sine wave inverters make electricity just like the grid. They’re safe for sensitive electronics. Modified sine wave inverters are cheaper but can damage some devices.
Choosing the right inverter size is important. It depends on two things:
- Continuous power rating: How much power it can give for a long time
- Surge power rating: The extra power needed when starting motors and compressors
- System voltage matching: Must match your battery bank’s voltage
Some people use all-in-one power stations. These are great for small cabins because they’re simple and portable.
Knowing how these components work together is key. Each part affects the others. You can’t just pick parts randomly and expect your system to work well.
5. Accounting for System Losses and Inefficiencies
Most cabin owners are surprised to learn that 15-25% of their solar energy vanishes before reaching their appliances. This isn’t a flaw in your equipment—it’s physics. Every component in your solar energy storage system creates resistance and converts a small amount of electricity into heat instead of useful power.
Understanding these losses prevents the most common sizing mistake: building a system that looks perfect on paper but leaves you without enough electricity in real life. When you account for inefficiencies from the start, your cabin stays powered reliably.
Think of it like filling a bucket with holes. Your solar panels pour energy in at the top, but some leaks out through every component before reaching your devices at the bottom.
Battery Round-Trip Efficiency Losses
Your battery bank doesn’t store and release electricity with perfect efficiency. Round-trip efficiency measures how much energy you get back compared to what you put in during solar energy storage cycles.
Lithium batteries perform exceptionally well with 90-95% round-trip efficiency. If you store 1000 watt-hours, you’ll retrieve about 900-950 watt-hours when you need them.
Lead-acid batteries operate at 80-85% efficiency under ideal conditions. The same 1000 watt-hours stored only returns 800-850 watt-hours to your cabin’s electrical system.
Temperature affects battery efficiency dramatically. Cold batteries charge slower and provide less capacity, while excessive heat degrades their lifespan and performance.
Inverter Conversion Losses
Your inverter transforms DC power from panels and batteries into AC power your appliances use. This conversion process creates heat and consumes energy, reducing your overall solar panel efficiency.
Quality pure sine wave inverters typically lose 5-10% during conversion when operating at optimal load levels. Budget modified sine wave models may waste 10-15% or more.
Inverter efficiency varies with load size. Running a 3000-watt inverter at only 300 watts wastes more energy proportionally than running it at 1500-2000 watts.
Modern inverters include standby power consumption that drains batteries even when nothing is running. This phantom load typically ranges from 10-50 watts depending on the model.
Wire Resistance and Connection Losses
Electricity flowing through wires encounters resistance that converts some energy into heat. Longer wire runs and smaller gauge wires increase these losses significantly.
A 50-foot run of undersized wire between your panels and charge controller might lose 3-5% of your generated power. Proper wire sizing based on amperage and distance minimizes this waste.
Every connection point creates additional resistance. Loose terminal screws, corroded battery terminals, or oxidized connectors add up quickly across your entire system.
Higher system voltages reduce wire losses for the same power level. A 24-volt system loses less energy over distance compared to a 12-volt system carrying the same wattage.
Applying the System Efficiency Factor
Professional installers use a system efficiency factor between 0.75 and 0.85 to account for all combined losses. This single multiplier ensures your solar energy storage system generates enough power despite inefficiencies.
Here’s how to apply it in practice. Let’s say your daily consumption calculation showed you need 5000 watt-hours (5 kWh) per day.
| Efficiency Scenario | Efficiency Factor | Required Generation | Extra Capacity Needed |
|---|---|---|---|
| Optimal System | 0.85 (85%) | 5,882 watt-hours | 882 watt-hours |
| Average System | 0.80 (80%) | 6,250 watt-hours | 1,250 watt-hours |
| Basic System | 0.75 (75%) | 6,667 watt-hours | 1,667 watt-hours |
To calculate your required generation, divide your daily needs by your system efficiency factor. Using 5000 watt-hours and a 0.80 factor: 5000 ÷ 0.80 = 6,250 watt-hours needed from your panels.
Systems with premium components—high-quality lithium batteries, efficient MPPT charge controllers, and properly sized conductors—can use the 0.85 factor. Budget systems with lead-acid batteries and longer wire runs should use 0.75 to ensure adequate power.
This approach prevents undersizing that leaves you frustrated and in the dark. Your solar panel efficiency calculations must include these real-world losses from the beginning.
Temperature, age, and maintenance affect your actual efficiency over time. Starting with conservative estimates builds a reliable system that performs well even as components age.
6. Determining the Best Solar System Size for Cabin Applications
Now it’s time to pick the right solar array sizing for your cabin. You’ve figured out how much power you need. Now, find a system that can handle it.
This part talks about three main types of cabin solar systems. Each fits different needs and budgets. By the end, you’ll know which one is right for you.
Matching System Capacity to Your Calculated Needs
Your daily energy use is key to picking the best solar system size for cabin. Use the total watt-hours you calculated earlier. This is your base need.
For example, if your cabin needs 3,500 watt-hours daily, you need a system that can make at least that much. Most cabins need between 1,200 and 8,000 watt-hours a day, depending on how you use it.
The system’s watt rating shows its max power output in perfect conditions. A 2,000-watt system can make about 10,000 watt-hours daily. This is why knowing your location’s sun hours is important.

Adding a 20-25% Safety Margin
Don’t size your system exactly to your needs. Add a 20-25% safety margin to cover unexpected things. This helps avoid power shortages.
Real-world weather and dust on panels can lower output. The extra capacity helps with these drops.
Power spikes from using many appliances at once also need this extra. It keeps your battery from getting too low.
To add a safety margin, multiply your daily needs by 1.25. For 4,000 watt-hours daily, aim for a 5,000 watt-hour system. This gives you extra power and makes your equipment last longer.
Small Cabin Systems: 400-1000 Watts
Small systems are great for weekend homes or simple cabins. They use 1-3 panels and power the basics. They’re perfect for simple shelters.
These systems can handle:
- LED lighting in a small space (3-5 fixtures)
- Phone and tablet charging stations
- Small 12-volt refrigerator or cooler
- Laptop or small electronics
- Water pump for basic plumbing needs
- Radio or small entertainment device
A 600-watt system with two 300-watt panels is a common choice. It works well with a 100-200 amp-hour battery bank. This setup is reliable and affordable, costing between $1,500 and $3,000 installed.
Medium Cabin Systems: 1000-3000 Watts
For cabins used more often, medium systems of 1000-3000 watts are best. They support more appliances and are practical. You’ll need 3-8 panels for this size.
Medium systems can power:
- Full-size refrigerator running all the time
- Multiple room lighting in the cabin
- Television and entertainment system
- Microwave for cooking
- Coffee maker and small kitchen appliances
- Well pump and pressure system
- Ceiling fans or portable air conditioning
- Power tools for maintenance and projects
A 2,000-watt array is a good choice for many. It covers everyday needs without needing huge batteries or taking up too much space. Batteries usually range from 400-800 amp-hours, giving 1-2 days of power.
Medium systems cost $4,000-$8,000, depending on quality and complexity. They’re the most popular for families using their cabin a lot.
Large Cabin Systems: 3000+ Watts
For cabins used all year, large systems over 3,000 watts are needed. They can match traditional homes in power. You’ll need 8-15+ panels for this.
Large systems support:
- Complete kitchen appliances (oven, dishwasher, disposal)
- Electric water heater or on-demand system
- Washer and dryer for laundry
- Central HVAC or multiple mini-split units
- Deep well pump with pressure tank
- Workshop tools and equipment
- Multiple refrigeration units
- Home office equipment and computers
- Electric vehicle charging capability
A 5,000-watt system is a common start for off-grid living. Serious homesteaders might choose 8,000-10,000 watts for no compromises. These systems need big batteries (1,000+ amp-hours) and top-notch inverters.
Large systems start at $12,000 and can go over $25,000. The cost includes more than just parts. It also covers structure, permits, and wiring.
| System Size | Daily Generation | Typical Appliances | Best For |
|---|---|---|---|
| 400-1000W Small | 2,000-5,000 Wh | Lights, phone charging, small fridge, laptop | Weekend cabins, hunting camps |
| 1000-3000W Medium | 5,000-15,000 Wh | Full refrigerator, TV, microwave, well pump | Seasonal vacation homes |
| 3000W+ Large | 15,000-50,000 Wh | Complete kitchen, HVAC, washer/dryer, workshop | Year-round residences |
Choosing your system depends on how often you use it, your lifestyle, and your budget. Start small if unsure. Most systems can grow as your needs change or your budget increases.
7. Calculating Required Solar Panel Capacity
Figuring out how many solar panels you need starts with knowing your power needs. You must understand how much sunlight your area gets. Then, you turn your daily energy use into the right number and type of panels. Getting this right means your cabin will have power all year.
The math is simple, but you need the right data and expectations. You’ll learn about peak sun hours, use sizing formulas, and pick panel wattages that fit your budget and space.
Finding Your Location’s Peak Sun Hours
Peak sun hours are when sunlight is strong enough to make 1000 watts per square meter. This isn’t the same as daylight hours. For example, your cabin might get 14 daylight hours in summer, but only 5 are peak sun hours.
Knowing this difference is key for sizing your system right. A sunny day with haze might have 10 hours of light but only 3.5 peak sun hours of energy.
The National Renewable Energy Laboratory has free tools like the PVWatts solar panel calculator to find your area’s peak sun hours. Just enter your zip code to see monthly and yearly averages. These numbers vary from 3-4 hours in the Pacific Northwest to 5-7 hours in the Southwest.
Where you live greatly affects solar energy production. California gets about 5.5 peak sun hours daily, while Massachusetts gets 4. Colorado, with its high altitude, often sees 5.5-6 hours, even in cold weather.
Using the Solar Panel Sizing Formula
With your peak sun hours known, you can figure out how many panels you need. The basic formula is your daily energy use divided by sunlight hours. This tells you how much power your panels must make.
Here’s how to do it step by step. First, know your daily energy use in watt-hours (from Section 4). Then, divide that by your location’s peak sun hours. This gives you the minimum panel capacity in watts.
For example, if your cabin uses 5,000 watt-hours daily and your area gets 5 peak sun hours, you need 1,000 watts of panels (5,000 ÷ 5 = 1,000). This assumes perfect conditions, so you’ll add a safety margin later.
The formula also includes production ratios that vary by location. In the U.S., production ratios usually range from 1.1 to 1.7. California has a ratio of about 1.5, meaning panels produce 50% more than their rated capacity over a year. Massachusetts has a lower ratio of about 1.2 due to less consistent sunshine.
To include production ratio, use this formula: Number of panels = annual electricity use ÷ production ratio ÷ panel wattage. This accounts for seasonal changes and real-world efficiency losses.
Choosing Between 100W, 200W, 300W, and 400W Panels
Solar panels come in different wattages, affecting cost and installation complexity. Each wattage fits different cabin needs and budgets. In 2025, 97% of solar panels are 400+ watts.
Modern 450-watt panels are now the top choice for new setups. They maximize energy while needing fewer units and less labor for installation.
Let’s compare your options based on key factors:
| Panel Wattage | Best Use Case | Cost Per Watt | Panels for 3 kWh Daily | Installation Space |
|---|---|---|---|---|
| 100W | Portable systems, small cabins, RV additions | $1.50-$2.00 | 8-10 panels | 80-100 sq ft |
| 200W | Budget systems, gradual expansion plans | $1.20-$1.50 | 5-6 panels | 50-60 sq ft |
| 300W | Mid-size cabins, balanced installations | $0.90-$1.20 | 3-4 panels | 35-45 sq ft |
| 400W+ | Maximum efficiency, modern systems, limited roof space | $0.75-$1.00 | 2-3 panels | 25-35 sq ft |
100W panels are flexible and portable but need many units for enough power. They’re good for testing solar before a bigger system. But, installing 10 small panels can cost more than 3 big ones.
200W panels are a good middle ground. They’re easy to handle for DIY setups and let you grow your system without breaking the bank.
300W panels have been great for cabins in recent years. They offer substantial power and are easy to install with two people. Many brands offer 300W panels with 25-year warranties.
400W+ panels are the latest tech and offer the best long-term value. They cost more upfront but save money overall with fewer racks, less wiring, and simpler setups. A typical 450W panel is about 6.5 feet by 3.5 feet.
Determining Total Number of Panels Needed
Now, combine your panel capacity calculation with your chosen wattage to find how many panels you need. This turns abstract numbers into a list of real equipment.
Divide your required system capacity by your chosen panel wattage. Round up to the nearest whole number because you can’t install part of a panel. Always add at least one extra panel for a safety margin.
Let’s look at examples of how location and panel choice affect your panel count. A cabin in Arizona with 6 peak sun hours needing 3,000 watt-hours daily requires 500 watts of panels (3,000 ÷ 6 = 500). With 400W panels, you need 2, but install 3 for safety.
The same cabin in Washington State with 3.5 peak sun hours needs 857 watts of capacity (3,000 ÷ 3.5 = 857). With 400W panels, you need 3, but install 4 for cloudy periods.
A bigger cabin in Colorado using 5,000 watt-hours daily in 5.5 peak sun hours needs 909 watts of panel capacity (5,000 ÷ 5.5 = 909). Modern 450W panels require just 3, but 4 panels are safer for winter or unexpected needs.
Season is key in these calculations. Always size your system for winter peak sun hours instead of summer averages. Winter values are 30-50% lower than annual averages in most U.S. locations. This ensures power all year, not just summer.
Your final panel count should also consider roof or ground space. Measure your space before choosing panels. A cabin with limited southern exposure might need higher-wattage panels to fit the needed capacity in available space.
Remember, panels in series must have the same specs. If you plan to expand, buy all panels from the same manufacturer and model line. Mismatched voltage and current can reduce system efficiency by 15-25%.
8. Sizing Your Battery Bank for Reliable Power Storage
Getting your battery bank right is key for reliable power at your remote cabin. Your batteries store energy from solar panels during the day. Then, they release it when you need it most.
Choosing the right battery size depends on your energy needs, climate, and battery type. It might seem hard, but breaking it down helps.
Converting Daily Usage to Required Amp-Hours
The first step is to convert your daily energy use into amp-hours. This is because batteries are rated in amp-hours, not watt-hours.
To do this, use the formula: Amp-Hours = Watt-Hours ÷ System Voltage. For example, if your cabin uses 5,000 watt-hours a day and you have a 12-volt system, you need 417 Ah of battery capacity.
For a 24-volt system using the same amount of energy, you need 208 Ah. Higher voltage systems need fewer amp-hours, which means fewer batteries and less weight.

Planning for Days of Autonomy in Your Climate
Days of autonomy is how long your batteries can power your cabin without solar. This depends on your local weather.
In cloudy areas like the Pacific Northwest, you might need 3-5 days of autonomy. Sunny places like Arizona or New Mexico usually need 1-2 days.
To find your total battery capacity, multiply your daily amp-hour need by your desired days of autonomy. For example, 417 Ah per day × 3 days = 1,251 Ah total capacity. This ensures enough energy for several cloudy days.
Understanding Depth of Discharge Limits
Depth of discharge (DoD) is how much you can safely use from your battery. Different batteries have different DoD limits.
Lead-acid batteries should only be used to about 50% of their capacity. So, for 400 Ah of usable energy, you need an 800 Ah lead-acid battery. Using them too much shortens their life.
Lithium batteries can safely use 80-100% of their capacity. A 400 Ah lithium battery truly provides 400 Ah of power. This makes a big difference in sizing and cost.
Lithium vs. Lead-Acid Sizing Differences
Choosing between lithium and lead-acid batteries affects your battery bank size. Lithium batteries cost more but need smaller banks because they can use more of their capacity.
Let’s compare two scenarios for a cabin needing 400 Ah of usable capacity per day with 3 days of autonomy (1,200 Ah usable):
| Battery Type | Usable DoD | Required Total Capacity | Typical Lifespan | Approximate Cost |
|---|---|---|---|---|
| Lead-Acid (AGM/Gel) | 50% | 2,400 Ah | 3-5 years | $2,400-$3,600 |
| Lithium (LiFePO4) | 80-100% | 1,200-1,500 Ah | 10-15 years | $4,800-$6,000 |
| Weight Difference | – | Lead: ~850 lbs vs Lithium: ~350 lbs | – | – |
Lithium batteries charge faster, work better in cold, and need little maintenance. They can be more cost-effective over time, even with a higher initial cost.
Battle Born 100Ah Lithium Batteries
Battle Born’s 100Ah 12V lithium batteries are top for off-grid cabins. Each battery gives 1,280 watt-hours of energy and weighs 31 pounds.
These batteries can be wired in series for higher voltage or in parallel for more amp-hours. For a 1,200 Ah 12V lithium bank, you need twelve 100Ah Battle Born batteries in parallel. At 24V, you need six batteries in series-parallel.
Battle Born batteries have built-in management systems for safety. They come with a 10-year warranty and can handle 3,000-5,000 charge cycles at 100% DoD.
Renogy 200Ah Gel Batteries
For lead-acid, Renogy’s 200Ah 12V gel batteries are a premium option. Gel batteries have better deep-cycle performance than other lead-acid types.
Remember, you’ll only use about 50% of a lead-acid battery’s capacity. A 200Ah Renogy gel battery gives about 100 Ah of usable power. For a 2,400 Ah total capacity bank, you need twelve 200Ah batteries.
These batteries weigh about 130 pounds each and need good ventilation when charging. They cost less than lithium upfront but need replacement every 3-5 years. Gel batteries are a good choice for seasonal use with lighter cycling.
Whichever battery you choose, proper sizing ensures reliable power storage for your cabin. Take time to calculate your needs accurately, considering climate and DoD limits specific to your battery type.
9. Selecting the Right Charge Controller for Your System
A small but mighty device sits between your solar panels and batteries. It’s called the charge controller. It makes sure your system works well by controlling electricity flow. This prevents overcharging and helps get more energy from the sun.
Your charge controller is very important. It keeps your expensive batteries safe from damage. It watches the battery’s state and adjusts the charging as needed. Without it, your batteries could get damaged quickly.
There are two main types of controllers: MPPT and PWM. Each has its own benefits, depending on your budget and system design. Knowing the difference helps you choose wisely.
Maximum Power Point Tracking for Superior Performance
MPPT charge controllers are the top choice for off-grid cabins. They find the best way for your solar panels to work. This means they get more power, even when conditions change.
MPPT controllers are very efficient. They can get 20-30% more energy than other controllers. This extra power can keep your lights on longer in the evening.
In cold mornings, MPPT controllers shine. Panels make more voltage but less current. The controller turns that extra voltage into more current, filling your batteries faster.
MPPT controllers are key when your panel voltage is higher than your battery’s. If you have 24-volt panels and a 12-volt battery, only MPPT can use that extra voltage. PWM controllers would waste it.

Pulse Width Modulation Controllers Work for Smaller Budgets
PWM controllers are simpler and cheaper. They work by quickly switching the connection between panels and batteries. This reduces panel voltage to match battery voltage. They’ve been around for a long time and are reliable.
PWM controllers are good for small cabins where money is tight. They work well when panel and battery voltages are close. For example, 12-volt panels with a 12-volt battery work fine with PWM.
The downside of PWM controllers is lost power. They can’t use power that’s more than what your battery needs. That power turns into heat. For those with small power needs and a tight budget, this might be okay.
Choose PWM for systems under 400 watts if cost is a big factor. But for more power, MPPT’s extra efficiency is worth the extra cost. It pays off in a few years.
Determining the Amperage Your Controller Must Handle
To find out how much amperage your controller needs, use a simple formula. Divide your total solar panel wattage by your system voltage. Then multiply by 1.25 for a safety margin. This extra capacity helps your controller last longer and work better.
For example, a 1,200-watt system with a 12-volt battery needs a controller for at least 125 amps. First, divide 1,200W by 12V to get 100A. Then, 100A × 1.25 = 125A. Always choose the next size up.
For sizing your charge controller correctly, system voltage matters a lot. The same 1,200-watt array needs only 62.5 amps on a 24-volt system. Higher voltage systems need smaller, less expensive controllers.
Never choose a controller that’s too small to save money. An overloaded controller will shut down, leaving you without power. It can also get damaged, needing a new one.
Proven Controller Brands for Cabin Installations
The Victron SmartSolar series is known for its reliability in off-grid systems. These MPPT charge controllers have Bluetooth for monitoring on your phone. You can see how much power you’re getting in real-time.
Victron’s controllers are built to last. They handle extreme temperatures, moisture, and electrical surges better than most. The SmartSolar 100/30 model is great for small to medium cabins, handling up to 440 watts on 12-volt systems or 880 watts on 24-volt systems.
The Renogy Rover series offers good value for those on a budget. They bring MPPT technology to more people. The Rover 40 amp model is a good choice for many cabins.
Renogy controllers have LCD displays for real-time data. You can see if your panels are working right and if your batteries are charging. Their easy-to-use interface makes fixing problems easier.
| System Size | Recommended Controller | Maximum Solar Input | Best Application |
|---|---|---|---|
| Small (400-800W) | Renogy Rover 40A | 520W at 12V | Weekend cabins, basic lighting |
| Medium (800-2000W) | Victron SmartSolar 100/50 | 700W at 12V / 1400W at 24V | Full-time residence, multiple appliances |
| Large (2000W+) | Victron SmartSolar 150/70 | 1000W at 12V / 2000W at 24V | High-demand systems, power tools |
| Budget Small | Renogy PWM 30A | 400W at 12V | Minimal power needs, tight budget |
Choosing between these components should think about your current needs and future growth. Starting with a good MPPT charge controller means you get every watt from your panels. This leads to longer battery life and reliable power for your cabin.
The controller is a small part of the system’s cost but greatly affects its performance. Investing in quality here pays off over 20 years. It’s a smart choice for your solar setup.
10. Choosing an Appropriately Sized Inverter
After your solar panels charge your batteries, you need an inverter. This device changes DC power into AC electricity for your appliances. The inverter is key to your power system, turning stored energy into the power your devices need.
Choosing the right inverter is vital for your system’s performance. A bad choice can damage your electronics, waste energy, or fail when you need it most. Let’s look at what you need to know to make the right choice.
Pure Sine Wave Inverters for Sensitive Electronics
Not all inverters make the same quality of power. This difference is more important than many people think. A pure sine wave inverter makes AC power just like the grid, smooth and continuous.
Modified sine wave inverters are cheaper but make lower-quality power. This can harm modern devices.
Here’s what happens with modified sine wave power on sensitive equipment:
- Laptops and computers may charge poorly or get damaged over time
- Variable-speed power tools run inefficiently and overheat
- Audio equipment produces annoying buzzing and humming sounds
- CPAP machines and medical devices may malfunction or void warranties
- Modern appliances with digital controls can behave erratically
- Battery chargers for cordless tools often fail to work properly
For today’s cabins, a pure sine wave inverter is essential. The price difference has narrowed, and the reliability is worth it. Your sensitive electronics will run safely and efficiently without the risk of early failure.
Sizing for Continuous vs. Surge Power Demands
Understanding continuous and surge power is key for solar inverter sizing. Your inverter must handle both steady loads and brief spikes during startup.
Continuous power rating shows what the inverter can do forever. It must be more than your biggest load at once.
Surge power rating (or peak power) shows how much power for a few seconds during startup. Devices like refrigerators and power tools need 2-3 times their running wattage when starting.
Here’s how to figure out your inverter size:
- List all appliances you might run at once and add their wattages
- Find devices with motors or compressors in your list
- Multiply motor-driven device wattages by 3 to estimate surge needs
- Choose an inverter with a continuous rating above your total load
- Make sure the surge rating meets your highest startup demand
For example, if your fridge needs 600W to start and you might also run 500W of lights, you need an inverter rated for at least 700W continuous with 1100W+ surge. Most manufacturers clearly show both ratings.
System Voltage Selection: 12V, 24V, or 48V
Your system voltage affects wire size, efficiency, and component choice. Higher voltages mean smaller wires and less loss.
12V systems are good for small cabins with loads under 1000W. They’re simple and can power 12V devices directly. But, they need thick, expensive cables for long distances.
24V systems fit medium cabins with 1000-3000W needs. They use smaller wires and reduce voltage drop. Most quality inverters and charge controllers work with 24V.
48V systems are best for large cabins needing 3000W or more. They use less current, saving costs and improving efficiency. Starting with 48V gives you more room to grow.
At 12V, a 1200W load draws 100 amps, needing big cables. At 24V, it’s 50 amps. At 48V, it’s 25 amps, much easier to manage.
Recommended Models: Victron MultiPlus and Aims Power
After understanding the technical needs, look for reliable products. Two brands stand out for different budgets and system sizes.
Victron MultiPlus series is top-tier for pure sine wave inverters. These inverter-chargers also charge batteries and work with grid power or generators.
Victron’s main benefits include:
- Exceptional build quality with 5-year warranties
- PowerAssist feature adds battery power when AC is limited
- Remote monitoring via smartphone apps and web interfaces
- Seamless switching between power sources without interruption
- Models available from 500W to 15,000W across all voltages
For those on a budget, Aims Power inverters offer good mid-range performance. Their pure sine wave models provide clean power at a lower cost than premium brands.
Popular configurations by cabin size:
| Cabin Size | Recommended Model | Continuous Power | System Voltage |
|---|---|---|---|
| Small Weekend Cabin | Aims 1000W Pure Sine | 1000W | 12V |
| Medium Cabin | Victron MultiPlus 24/3000 | 3000W | 24V |
| Large Full-Time Cabin | Victron MultiPlus 48/5000 | 5000W | 48V |
| Budget Medium System | Aims 2000W Pure Sine | 2000W | 24V |
When comparing models, look at efficiency at partial loads. Most cabins don’t run full capacity all the time. An inverter that stays efficient at 20-30% load saves a lot of energy over time. Victron units usually do well in this area, while Aims is okay for less demanding needs.
Consider buying a bit more capacity than you think you need. An inverter running at 60-70% of its rating will last longer and be more efficient. The extra cost is worth it for peace of mind and system longevity.
11. Location and Climate Factors That Impact System Sizing
Your cabin’s zip code is key to sizing your solar array right. A 2,000-watt system works great in Arizona but falls short in Washington State by 30-40%. Knowing your local climate helps avoid costly mistakes.
Two cabins with the same energy needs might need different solar setups based on location. Solar production varies from 1.1 in cloudy areas to 1.7 in sunny ones. This means you need to adjust your plans based on real solar conditions, not just theory.
Solar Radiation Variations Across US Regions
The Southwest gets the most sun, with Arizona, Nevada, and New Mexico getting 5.5 to 7 peak sun hours daily. This area’s clear skies and low humidity make it perfect for solar power. A cabin in Phoenix gets almost ideal conditions.
The Pacific Northwest faces a different challenge. Washington and Oregon get only 3 to 4.5 peak sun hours daily due to clouds and moisture. This doesn’t mean solar won’t work, but you’ll need more panels. California is in the middle, with coastal areas getting less sun than inland areas.

The Northeast and Midwest get 4 to 5 peak sun hours daily. Places like Massachusetts, New York, and Pennsylvania have enough sun for solar systems. But, winter production drops to 60% of summer output, affecting battery needs.
Understanding these regional differences helps set realistic expectations. The table below compares solar production across major U.S. regions to show how location impacts system requirements:
| Region | Average Peak Sun Hours | Production Ratio | System Size Multiplier |
|---|---|---|---|
| Southwest (AZ, NV, NM) | 5.5-7.0 hours | 1.5-1.7 | 1.0x (baseline) |
| Southeast (FL, GA, TX) | 4.5-6.0 hours | 1.3-1.5 | 1.1-1.2x |
| Midwest/Northeast (NY, PA, OH) | 4.0-5.0 hours | 1.2-1.4 | 1.3-1.4x |
| Pacific Northwest (WA, OR) | 3.0-4.5 hours | 1.1-1.3 | 1.5-1.8x |
High Altitude Benefits and Northern Latitude Challenges
Mountain cabins get a boost from high altitude. The thinner atmosphere means less solar radiation is lost before reaching panels. At 8,000 feet, there’s 25% less atmosphere to block sunlight.
Cooler temperatures at high elevations also improve solar panel efficiency. Panels actually work better in cold weather. A Colorado mountain cabin might outperform a Florida beach house in spring and fall.
Northern latitudes face a big challenge, mainly in winter. Cabins in Minnesota, Montana, or Alaska see very low sun angles in December and January. The sun barely rises, and daylight hours are short. This means you need to oversize your system compared to southern locations.
The combination of latitude and season causes big production swings. A cabin at 45 degrees north might see summer production triple its winter output. You should size your system for winter conditions for year-round use, then enjoy the extra in summer.
Temperature Effects on Component Performance
Temperature affects every part of your solar system, but not always as you’d think. Solar panels lose about 0.5% efficiency for every degree Celsius above 25°C (77°F). A panel rated at 300 watts might only deliver 270 watts on a hot 95°F day.
This is why solar panel efficiency often peaks in cool, sunny spring days, not hot summer afternoons. Minnesota cabins can have great production in April and October when it’s cool but sunny. The cool air and bright sun make for ideal conditions.
Battery performance also changes with temperature. Lithium batteries work well from 14°F to 113°F. Lead-acid batteries lose up to 50% capacity in freezing temperatures. This makes lithium better for unheated cabins.
Extreme heat also speeds up battery wear, regardless of type. Keeping batteries in a controlled environment helps them last longer. An insulated battery box with ventilation helps manage temperature swings.
Conducting a Shading Analysis Before Installation
Even a little shade can hurt your system’s performance. Shaded panels act like a clog, reducing current flow. A single shaded panel can cut total output by 30-50%, much more than its share.
Trees are the main shading problem for cabin solar setups. A tree that shades in summer might block important winter sunlight. Deciduous trees lose leaves in winter but can cast shadows that reduce production.
To analyze shading, watch your site at different times and seasons. Stand at the planned panel spot and look up at the sky. Note any obstacles that might cast shadows as the sun moves and seasons change.
More detailed analysis uses tools like the Solar Pathfinder or smartphone apps. These show when and where shadows will fall all year. Aim for a spot with full sun from 9 AM to 3 PM daily, as these hours produce most of your energy.
Trimming trees on the southern side of your cabin might help. Removing lower branches can clear enough space without harming the tree. Ground-mounted systems offer more flexibility, letting you place panels away from shade.
Remember, the sun’s path changes a lot with the seasons. Your panels might get full sun in July but heavy shade in January. Always size and position your array for winter sun angles for year-round power.
12. Adjusting for Winter vs. Summer Energy Production
The difference between summer and winter solar production is huge for off-grid cabins. Seasonal changes affect how much electricity your panels make. Knowing these changes is key for setting up your solar panels right.
Planning for the worst case is smart. This way, you have power all year, not just in sunny months. Having more capacity means you’re powered up in December, not stuck with a noisy generator.
Why You Should Size for Winter Months
Design your system for your lowest production month. This way, it works well all year. Sizing for summer or averages can leave you without power when you need it most.
A real-world example from Montana shows this. A 3000-watt solar array might make 30 kWh daily in July. But in January, it makes only 8 kWh, a 73% drop.
Just do the math. Figure out your daily energy needs. Then, see how many panels you need for your worst month. This is usually December or January in the US.

Shorter Days and Lower Sun Angles
Winter reduces energy production in two ways: shorter days and sun angles. In summer, the sun is high and days are long. Winter days are short, and the sun is low, hitting panels less.
The sun angle effect is big. Panels get less energy when sunlight hits them at an angle. A panel might get 300 watts in June but only 100 watts in December, even in full sun.
Daylight hours also matter. Places at 45 degrees latitude get 15.5 hours of daylight in June but only 8.5 hours in December. You’re working with nearly half the available solar collection time, and each hour is less productive due to the sun angles.
Northern cabins face even more extreme seasonal variation. Alaska, northern Minnesota, and similar locations can see 70-80% reductions in winter versus summer output. If you’re building a system in these regions, winter solar production calculations become even more critical to your planning process.
Snow Accumulation and Panel Maintenance
Snow adds complexity to winter cabin solar systems. Even a thin layer of snow can block 90% of your solar production. A heavy snowfall that completely covers your panels eliminates generation until you clear them or the snow melts.
The impact varies by your cabin’s location and typical weather patterns. A Colorado mountain cabin might see snow cover panels for 3-5 days after a major storm. A Minnesota cabin could face weeks of persistent snow cover without intervention. These periods of zero production must factor into your battery bank sizing and days of autonomy calculations.
Panel maintenance becomes a regular winter chore for serious off-grid cabin owners. Accessible panel locations allow you to brush or rake snow off after storms. Some cabin owners install panels on ground mounts for easier winter access, accepting the trade-offs of less optimal roof mounting.
Steeper mounting angles help snow slide off naturally, reducing manual clearing needs. Panels installed at 60-degree angles tend to shed snow much better than those at 30 degrees. The darker panel surfaces also absorb heat, which can speed melting on sunny days even when temperatures remain below freezing.
Optimal Panel Tilt Angle for Year-Round Production
Your panel tilt angle affects seasonal energy production. Choosing the right angle is key for solar panel configuration. The standard recommendation is setting tilt equal to your latitude, balancing summer and winter collection. But cabins used mainly in one season benefit from adjusted angles.
Winter-focused cabins should use steeper angles—typically your latitude plus 15 degrees. This captures the low winter sun better, boosting production when you need it most. A cabin at 40 degrees latitude would use a 55-degree tilt, improving December and January output.
Summer cabins can do the opposite, using shallower angles (latitude minus 15 degrees) to maximize peak season production. Year-round cabins should stick closer to the latitude-equals-tilt rule. Ground-mounted systems offer the ultimate flexibility—some cabin owners install adjustable mounts and change the angle twice yearly to optimize for each season.
The table below shows recommended tilt angles for different latitudes and usage patterns, helping you optimize your installation:
| Latitude Range | Year-Round Use | Winter Priority | Summer Priority | Production Impact |
|---|---|---|---|---|
| 25-35° (Southern US) | 30° tilt | 45° tilt | 15° tilt | ±8% seasonal gain |
| 35-45° (Mid-US) | 40° tilt | 55° tilt | 25° tilt | ±12% seasonal gain |
| 45-55° (Northern US) | 50° tilt | 65° tilt | 35° tilt | ±15% seasonal gain |
| 55°+ (Alaska) | 60° tilt | 75° tilt | 45° tilt | ±18% seasonal gain |
Fixed-tilt systems require a compromise, but that compromise should favor your critical usage season. Most cabin owners find that slightly oversizing their array compensates for any tilt angle inefficiencies, providing adequate power across all seasons without requiring adjustable mounting hardware.
Temperature also plays a role worth mentioning. Solar panels actually perform better in cold weather, with improved efficiency compared to hot summer days. A panel rated for 300 watts at standard test conditions might produce 315 watts on a cold, sunny winter day. This small efficiency boost helps offset some of the losses from shorter days and lower sun angles, though it doesn’t come close to equalizing summer versus winter production.
13. Building in Expandability and Future-Proofing
Your cabin’s energy needs will grow over time. Building flexibility into your solar installation makes future upgrades easy and affordable. Planning for solar system expansion from the start protects your investment and streamlines the upgrade process.
This forward-thinking approach to energy independence means you won’t need to replace expensive components or redesign your entire system when you’re ready to add capacity.
The beauty of modular solar systems is their inherent scalability. You can start with what you need today and expand tomorrow without wasting money or components.
Many cabin owners discover their actual power consumption differs from initial estimates after living with solar for a season or two. Building expandability into your system design accounts for this learning curve while keeping initial costs manageable.
Starting with a Smaller System and Scaling Up
Starting with a modest solar array and adding panels over time is a practical strategy for budget-conscious cabin owners. You might initially install enough capacity to run essential loads like lighting, refrigeration, and water pumps, then expand later when you want to power air conditioning, workshop tools, or entertainment systems.
This phased approach offers several advantages beyond spreading out costs. You gain real-world experience with solar system operation before making larger investments.
You’ll learn which appliances consume more power than expected and which energy-saving habits make the biggest difference. This hands-on knowledge helps you size future expansions more accurately than any theoretical calculation.
Starting small also reduces the risk of oversizing. Some cabin owners install massive systems based on “worst-case” estimates, only to find they rarely use half their capacity. A grow-as-you-go strategy matches system size to actual needs, not guesswork.

Choosing Oversized Controllers and Inverters
The single most cost-effective future-proofing decision involves selecting charge controllers and inverters with higher capacity ratings than your initial system requires. The price difference between a 30-amp and 60-amp charge controller typically runs just $150-300, but replacing an undersized controller later costs both the new unit price and installation labor.
Consider this practical example: your initial 1,200-watt solar array needs only a 30-amp MPPT controller. But buying a 60-amp model from the start lets you double your panel capacity later without touching your charge controller.
The same logic applies to inverters. A 3,000-watt pure sine wave inverter costs only $200-400 more than a 2,000-watt model but provides significantly more expansion headroom. If you later want to run power tools, a larger microwave, or additional appliances simultaneously, that extra capacity proves invaluable.
When selecting oversized components, focus on reputable brands with proven reliability. A Victron SmartSolar 100/50 charge controller handles up to 50 amps and 700 watts per battery bank (12V), while their 100/100 model doubles that capacity for minimal additional cost. Similar to their inverter line, which offers models from 1,600 to 5,000 watts within similar physical footprints.
| Component Type | Initial System Needs | Recommended Oversized Option | Additional Cost | Future Expansion Capacity |
|---|---|---|---|---|
| Charge Controller | 30A MPPT for 1,200W array | 60A MPPT controller | $200-350 | Up to 2,400W panel array |
| Inverter | 2,000W for basic loads | 3,000W pure sine wave | $250-400 | 50% more simultaneous loads |
| Battery Enclosure | Space for 400Ah bank | Cabinet sized for 800Ah | $100-200 | Double battery capacity |
| DC Breaker Panel | 4-circuit capacity | 8-circuit panel with blanks | $75-150 | Additional expansion circuits |
Don’t overlook supporting infrastructure either. Installing oversized conduit and wiring during initial construction accommodates future cable runs without tearing into walls or roofing. Adding an extra conduit from your array location to the equipment room costs minimal money during installation but saves major headaches later.
Maintaining Voltage Compatibility for Additions
Maintaining consistent voltage throughout your solar installation and any future additions is critical. If you begin with a 12-volt battery bank, any expansion batteries must also operate at 12 volts, or you’ll need to completely reconfigure your entire power system.
Mixing voltages creates dangerous situations and equipment damage. You cannot simply add 24-volt batteries to a 12-volt bank, and attempting to do so will damage charge controllers, inverters, and the batteries themselves.
When planning your initial system voltage, consider your long-term power goals. 12-volt systems work well for small cabins with total loads under 2,000 watts, while 24-volt configurations suit medium cabins up to 4,000 watts. Large installations exceeding 5,000 watts benefit from 48-volt architecture, which reduces current flow and allows smaller, less expensive wire gauges.
Document your system specifications thoroughly. Create a simple diagram showing panel wiring configurations, battery bank layout, and equipment model numbers. Store this documentation both at your cabin and electronically in cloud storage.
When you’re ready to expand two years later, you’ll know exactly which components you have and how they’re configured. This information proves invaluable whether you’re doing the expansion yourself or hiring a contractor.
Design your battery bank layout with physical space for additional batteries from day one. If you’re starting with four lithium batteries but have room for eight in your battery enclosure, future expansion becomes a simple plug-and-play operation. Measure your available space and choose an enclosure or rack system that accommodates your ultimate capacity goal, even if you’re only filling half of it initially.
Wire your solar panel array with future expansion in mind as well. If you’re installing four panels initially but have roof space for eight, run conduit and mounting rails for the full eight-panel configuration. You can add the additional panels later by simply bolting them down and connecting the pre-wired circuits.
This approach to future-proofing strikes the perfect balance between meeting current energy needs affordably while preserving options for growth. Your cabin usage patterns will evolve, your family’s power expectations may increase, and new efficient appliances will tempt you over the years. Building expandability into your initial design ensures your solar investment grows with you, not limiting your options down the road.
14. Installation Planning and Configuration Options
Planning your installation is key to turning your cabin into a power-generating machine. You’ve figured out your energy needs and picked your gear. Now, it’s time to decide where and how to set it up. Your choices will affect how well your system works and how easy it is to keep it running.
Your roof’s size and slope will decide how many panels you can put up. Make sure panels aren’t shaded by trees or buildings to get the most sunlight.
Roof-Mounted Arrays: Pros and Cons
Roof-mounted systems are a common choice for cabins. They use your roof space and keep panels out of the way. This setup also keeps them safe from animals and vandals.
Roof systems have big pluses. They use unused roof space and are easy to access for daily activities. They’re also more secure because they’re harder to get to.
But roof systems have downsides too. Your roof must be strong enough to hold the panels and mounting gear. Older cabins might need extra support. Cleaning and maintenance can be tough, and the roof’s slope affects panel angle.
Roof penetrations for mounting can lead to leaks. You’ll need to seal these points well to avoid water damage.
Ground-Mounted Systems with Adjustable Tilt
Ground-mounted systems offer more flexibility than roof systems. You can adjust panel angles for better sun exposure. This is great for areas with tricky roof angles or lots of shade.
Adjusting panel angles seasonally is a big plus. In winter, tilt panels steeply to catch low sun and shed snow. In summer, tilt them less for more sun. This can increase energy production by 15-25%.
Maintenance is easier with ground systems. You can clean panels without ladders and check connections without climbing. No roof holes mean no leaks.

Ground systems cost more for footings or screws, adding $500-1,500. They take up yard space and can get buried in snow. You might need fencing to protect them from animals or damage.
Series vs. Parallel Panel Wiring Configurations
Choosing how to wire your panels is key for system performance and safety. You can wire panels in series, parallel, or a mix of both. Each method affects voltage and current differently.
Series wiring adds voltage while keeping current the same. For example, three 100-watt panels wired in series produce 54 volts at 5.5 amps. This is good for long wire runs and MPPT controllers.
Parallel wiring keeps voltage the same but adds current. The same three panels in parallel produce 18 volts at 16.5 amps. This is simpler and safer for beginners.
Series-parallel wiring balances voltage and current for the best performance. Many DIY systems use this mix to match charge controller specs and keep wire sizes manageable.
Working with experts or using DIY guides ensures your system meets your energy needs. Installing a power kit can simplify wiring.
| Wiring Method | Voltage Effect | Current Effect | Best Application |
|---|---|---|---|
| Series Configuration | Multiplies voltage (panels add together) | Stays constant (same as one panel) | Long wire runs, MPPT controllers, 24V/48V systems |
| Parallel Configuration | Stays constant (same as one panel) | Multiplies current (panels add together) | 12V systems, PWM controllers, partial shading conditions |
| Series-Parallel Combination | Increases moderately (strings in series) | Increases moderately (strings in parallel) | Large arrays, matching controller specs, balanced performance |
| Independent Circuits | Each string operates separately | Each string operates separately | Multiple controllers, different panel types, complex shading |
Required Safety Disconnects and Breakers
Safety disconnects are a must for your system. They let you safely shut down parts of your system for maintenance. They also protect against overcurrent and electrical fires.
Your system needs multiple disconnect points at strategic locations. Install a DC disconnect between your solar array and charge controller. This lets you isolate panels during maintenance or emergencies. Make sure this disconnect is rated for your panels’ maximum voltage and current.
A second DC disconnect goes between your charge controller and battery bank. This lets you service the controller or batteries without live solar input. Battery disconnects should include overcurrent protection sized for your battery bank’s maximum charge/discharge rates.
The inverter needs its own AC disconnect on the output side. This is between the inverter and your cabin’s electrical panel or load center. This disconnect allows you to isolate the inverter while maintaining battery power to DC loads.
Proper breaker sizing protects wire and components from overheating. Calculate breaker ratings based on the maximum current each circuit can carry. Fuse or breaker ratings should never exceed the current-carrying capacity of the smallest wire in that circuit.
DIY Installation vs. Hiring Licensed Professionals
Choosing between DIY and professional installation depends on your skills, local laws, and system complexity. DIY can save $3,000-8,000 in labor costs. It’s good for budget-conscious owners with basic electrical and construction skills.
DIY tasks include mounting panels, assembling racking systems, running conduit, and making low-voltage battery connections. Many owners successfully do these tasks with proper research and attention to instructions. Online resources and manufacturer support make learning these skills easier than ever.
Professional installation is needed for specific scenarios. Complex roof installations on steep pitches or tall structures pose safety risks. Any connection to existing electrical panels typically requires licensed electrician involvement to meet code requirements and pass inspections.
Larger systems above 3,000 watts introduce complexity that benefits from professional experience. Proper solar panel configuration, optimal wiring layouts, and troubleshooting require knowledge that takes years to develop. Professionals also carry liability insurance protecting you from installation errors.
Consider a hybrid approach for many cabin installations. Do the mechanical work yourself—mounting panels, building battery enclosures, and installing conduit—then hire an electrician for the final electrical connections and inspection. This strategy captures labor savings while ensuring code compliance and safety for critical electrical work.
Local permitting requirements often dictate your options. Some jurisdictions require licensed contractor involvement for any grid-tied systems or installations above certain wattages. Off-grid cabin systems in remote areas typically face fewer restrictions, but always verify local rules before starting work.
15. Budget Planning and Cost Breakdown by System Size
Let’s look at what you’ll spend on your cabin solar system. Knowing the costs upfront helps avoid surprises. Solar power is a big investment, but understanding costs helps match your budget to your needs. Prices have dropped a lot in the last decade, making off-grid power more affordable.
Your solar installation cost depends on system size, component quality, and installation choice. Most cabin owners spend $3,000 to $15,000 for a complete setup. Smaller weekend retreats cost less, while full-time off-grid homes cost more.
Component Costs for Small Systems (Under $3000)
Small solar systems are great for weekend cabins or seasonal retreats. They include 2-4 solar panels making 400 to 1000 watts. You can power basic lighting, phone charging, a small fridge, and maybe a laptop or TV.
Here’s what you’ll spend on each part. Solar panels cost $400 to $800. A basic MPPT charge controller is $200 to $400. Battery storage is your biggest expense, costing $600 to $1,200.
Your inverter will cost $300 to $600 for 1000-1500 watts. Don’t forget extra costs like mounting hardware, wire, and disconnects. These add $200 to $400. Many DIY fans save money by doing it themselves, avoiding $500 to $1,000 in labor costs.
Mid-Range System Investment ($3000-$8000)
Mid-range systems support serious seasonal use or modest year-round living. They have 5-10 panels making 1500 to 3000 watts. This power supports full-size appliances, power tools, and entertainment systems.
Professional-grade charge controllers cost $400 to $800. They offer advanced features like Bluetooth monitoring. Your battery bank grows to 400-800 amp-hours, costing $1,500 to $3,500.
Inverters in this range deliver 2000 to 3000 watts continuously and cost $800 to $1,500. You get pure sine wave output with multiple AC outlets. Solar panels cost $1,200 to $2,400 for the complete array.
Installation materials and hardware cost $400 to $800 for mid-range systems. Professional installation adds $1,500 to $3,000. But many cabin owners choose DIY at this level. The quality components at this price point deliver reliable performance for 15-20 years.
Premium Large Systems ($8000-$15000+)
Premium systems provide full-featured off-grid living. They include 10-20+ panels making 3000 to 6000+ watts. You can power air conditioning, electric cooking appliances, well pumps, and workshop equipment without compromise.
Large systems often need multiple charge controllers costing $800 to $1,600 total. Lithium battery banks of 600+ amp-hours cost $4,000 to $8,000. High-capacity inverters or inverter-chargers rated 3000 to 5000 watts cost $2,000 to $4,000.
The solar array itself represents $2,500 to $5,000 of your investment. Premium panels with 20-22% efficiency maximize power production. Professional installation becomes more common at this level, adding $3,000 to $6,000 to your project cost.
Federal Solar Tax Credit and State Incentives
The federal solar tax credit makes solar installations more affordable. It currently provides a 30% credit on total system costs. A $10,000 system costs just $7,000 after applying the credit when you file your federal taxes.
But, there’s a critical urgency for cabin owners planning installations. Recent legislation ended the solar tax credit for systems installed after December 31, 2025. This creates a firm deadline if you want to capture this substantial savings. Systems must be operational and commissioned before the end of 2025 to qualify.
State incentives vary dramatically depending on where your cabin is located. Some states offer additional rebates that stack with federal credits. This can cover 40-50% of total costs. Property tax exemptions prevent your solar system from increasing assessed values. Sales tax exemptions eliminate the typical 5-8% you’d pay on equipment purchases.
Check your state’s Database of State Incentives for Renewables and Efficiency to discover available programs. Some rural electric cooperatives offer special rebates for off-grid systems. These programs change frequently, so research current offerings before finalizing your budget.
Long-Term Savings vs. Upfront Investment
The financial benefits of cabin solar extend far beyond the initial installation. Most systems pay for themselves within 8 to 15 years through eliminated electric bills or generator fuel costs. After payback, you enjoy free power for another 10 to 15+ years, as solar panels typically last 25-30 years.
Consider the alternative costs you’re avoiding. Running a generator costs $3 to $8 per day in fuel, plus regular maintenance and eventual replacement. That’s $1,000 to $3,000 annually for seasonal use. Grid extension to remote properties often costs $15,000 to $50,000+ just for the initial connection, plus ongoing monthly bills.
The lifetime savings analysis reveals impressive returns. A $10,000 solar system saves $20,000 to $50,000+ over its operational life compared to generator power or grid extension. Higher fuel prices and electricity rates increase these savings. Your property value also increases, as buyers pay premiums for off-grid capable cabins.
Maintenance costs remain minimal throughout system life. Budget $100 to $300 annually for cleaning panels, checking connections, and monitoring performance. Battery replacement represents your only major expense, occurring every 5-10 years for lead-acid or 10-15 years for lithium options. Even with these costs, solar delivers exceptional long-term value.
| System Size | Power Output | Total Investment | Typical Applications | Payback Period |
|---|---|---|---|---|
| Small System | 400-1000W | $2,000-$3,000 | Weekend cabin, basic lighting and devices | 5-8 years |
| Mid-Range System | 1500-3000W | $3,000-$8,000 | Seasonal use, full appliances | 8-12 years |
| Premium System | 3000-6000W+ | $8,000-$15,000+ | Year-round living, all modern conveniences | 10-15 years |
The decision to invest in cabin solar balances upfront costs against long-term benefits. Starting with a properly sized system prevents expensive upgrades later. Taking advantage of the federal tax credit before it expires maximizes your savings. Most cabin owners find that solar delivers both energy independence and financial returns that far exceed traditional power options.
16. Taking the Next Steps Toward Your Cabin Solar Installation
You now have all the info you need for your renewable energy cabin. The next step is to turn these numbers into a real system that powers your space.
First, organize your papers. Make a folder with your energy use, solar needs, battery specs, charge controller info, and inverter size. This list will help you shop and guide you during installation.
If you’re doing it yourself, check local rules before buying parts. Some places need permits and checks for off-grid homes. Plan on 2-4 weekends for a small setup, or more for bigger projects.
For pros, get quotes from several. Ask them to explain their plans and part choices. Be wary of those who don’t ask about your use or suggest too big systems.
Pro jobs usually take 1-3 days for the work, plus extra for permits. Going solar is good for your wallet and the planet. With careful planning and a good solar partner, your install will be safe and efficient.
Starting your journey to energy freedom is exciting. You know how to size your system right. Now, you can make your off-grid dream a reality.


