Building your dream retreat doesn’t have to break the bank. With smart planning and the right approach, you can create a sturdy structure that fits your budget and lasts for decades.
Take Andrew Szeto’s inspiring example. He built a beautiful 10×10-foot A-frame retreat in Quebec for just $10,632 CAD (about $8,012 USD). That works out to roughly $106 per square foot. The project took 35 to 40 full workdays, with help from friends and mentor Richard Scott.
This guide explores practical construction approaches that balance initial investment with long-term durability. You’ll discover which timber techniques work best for DIY builders versus professional teams. We’ll show you where strategic spending pays off and where you can safely cut corners.
Whether you’re planning a weekend getaway or a full-time off-grid home, choosing the right building strategy can save thousands. This isn’t about building cheap—it’s about building smart with proven affordable cabin framing techniques that deliver real results.
Understanding the Basics of Cabin Framing Economics
Smart cabin builders know framing costs are more than just materials. Framing usually takes up 15-20% of your total budget. This part of the budget is important because it affects the whole project.
Two main things affect framing costs: materials and labor. Material prices change with lumber grades, wood types, and market trends. Labor costs depend on project complexity and whether you do it yourself or hire pros.
Here’s what really matters when evaluating budget-friendly cabin construction options:
- Upfront material costs: The price tag at the lumber yard
- Labor requirements: Time and skill needed for installation
- Energy efficiency: How well the framing supports insulation
- Maintenance needs: Long-term upkeep and repair costs
- Structural longevity: How many decades your frame will last
Location is a big factor. What’s best in the Pacific Northwest might not work in the Southwest. Local lumber, building codes, and climate affect the best choice.
The secret to saving money? Look beyond the initial cost. Modern timber frames with SIPs might cost more upfront. But, they can cut heating and cooling costs by up to 60%. Cheaper framing might cost more over time.
Smart planning means looking at the big picture. Compare upfront costs to long-term benefits. Think about insulation, maintenance, and durability. The best choice balances cost and quality, found by understanding these basics first.
Why Smart Framing Choices Matter for Your Budget
Choosing economical cabin structural options can save you money during construction. The framing decisions you make early on can help you stay within budget. These choices affect every part of your cabin project.
Smart framing choices save you money in several ways. They decide how much material you need and how much gets wasted. Your framing method also affects labor costs, which can greatly impact your budget.
These decisions also impact energy efficiency for years. The right framing can lower heating and cooling costs over time. It also determines the maintenance your cabin will need for its life.
https://www.youtube.com/watch?v=4cUw2AILyjs
Andrew Szeto built a 10×10′ cabin for about $106 per square foot. He found that building slightly larger would have reduced his per-square-foot costs. This made his cabin more livable.
Adding 5-10 feet in both directions was more cost-effective. This shows how fixed costs work in construction.
Fixed costs like foundation and roofing spread out over your total square footage. Building bigger means these costs are spread thinner. This principle works for any size cabin.
| Framing Decision Factor | Budget Impact | Long-Term Consideration | Builder Flexibility |
|---|---|---|---|
| Material Selection | Determines 30-40% of framing costs | Affects structural integrity for 50+ years | Wide range from reclaimed to premium lumber |
| Framing Method | Controls labor hours and skill needs | Influences energy efficiency and maintenance | Options from DIY-friendly to professional-only |
| Cabin Size | Fixed costs spread across square footage | Determines livability and resale value | Larger often costs less per square foot |
| Design Complexity | Simple designs reduce waste by 15-25% | Fewer joints mean less maintenance | Standard dimensions maximize material use |
Choosing your framing method affects many practical things. Different methods need different skills and tools. This can limit or expand your DIY options.
Code compliance also varies by framing method. Some budget-conscious structural approaches are easy to permit. Others need more engineering, adding time and money.
The right framing approach considers several key factors:
- Your personal skill level and construction experience
- Budget constraints and available financing
- Access to helpers or professional contractors
- Project timeline and seasonal considerations
- Long-term cabin use plans and resale intentions
Spending time to evaluate these factors before choosing a framing method is wise. This planning prevents costly changes and ensures your approach fits your goals.
The framing decisions you make today will impact your cabin’s performance and satisfaction for years. Choosing economical options doesn’t mean sacrificing quality. It means making smart decisions that save money at every step.
Traditional Stick Framing: The Affordable Standard
Stick framing is a great way to build a cabin without spending too much money. It uses 2x4s or 2x6s to make walls, floors, and roofs. This method is popular in North America because it’s reliable and doesn’t need special tools.
Stick framing is well-known, making it easy to find help if you need it. You can find the materials at any lumber yard, and they’re priced well because they’re in high demand.
Stick framing is also good because you can make changes easily. If you want to add a window or change a wall, it’s not hard to do. This makes building your cabin more flexible and less expensive.
Advantages of Stick-Built Construction
Stick framing has many benefits that make it a great choice for building cabins on a budget. Knowing these benefits helps you see why it’s so popular for building homes.
- Material availability: You can always find dimensional lumber at lumber yards, so you don’t have to wait long.
- Minimal tool requirements: You only need basic tools like a circular saw and a hammer to start framing.
- Manageable learning curve: You can learn how to frame a cabin by watching tutorials and practicing, even if you’re new to building.
- Design versatility: Stick framing works for many different cabin designs, from simple to complex.
- Cost transparency: You can easily figure out how much materials will cost, helping you plan your budget.
- Widespread contractor knowledge: It’s easy to find skilled workers who know how to frame a cabin, which helps keep costs down.
Stick framing is a great choice for beginners because it’s affordable and doesn’t require special tools or training. Making mistakes is also easier to fix compared to more complex methods.
Cost-Saving Tips for Stick Framing
Planning carefully can make stick framing even more budget-friendly. Making smart choices about materials, spacing, and waste can save you 20-30% on framing costs.
Start by designing your cabin to fit standard lumber lengths. Most lumber comes in 8, 10, 12, and 16-foot sections. This way, you’ll cut down on waste and save money.
Another way to save is by planning walls in 2-foot increments. This fits perfectly with 4×8 sheathing panels, saving time and materials.
Optimizing Stud Placement
Changing stud spacing can also save you money. Instead of the usual 16-inch spacing, you can use 24-inch spacing for single-story structures or upper floors.
Using 24-inch spacing cuts lumber needs by about 25% without losing strength. This means fewer studs to buy, less cutting, and faster wall assembly. Always check with your local building inspector before using wider spacing, as codes can vary.
For load-bearing walls or areas with heavy roof loads, talk to your local building inspector. They can tell you if 24-inch spacing meets code for your cabin design and location.
Minimizing Cuts and Waste
Waste can add up quickly, but careful planning can prevent unnecessary expenses. Make detailed cut lists before buying materials to avoid overbuying.
Here are some tips to reduce waste:
- Measure twice, cut once to avoid mistakes and save materials.
- Use scraps for blocking, fire stops, and other small parts instead of cutting new lumber.
- Order lumber in lengths that fit your needs, not just 8-foot boards.
- Align window and door openings with stud spacing to reduce extra framing.
- Stack and protect lumber properly to prevent warping and save damaged pieces.
Using digital design tools and framing calculators can help you plan your cabin before buying materials. Spending time on planning can save you hundreds of dollars and speed up construction. This upfront effort makes stick framing a cost-effective choice for building cabins.
Post-and-Beam Framing for Budget-Conscious Builders
For those on a budget, post-and-beam framing is a great choice. It creates big, open spaces without costing too much. This method uses big posts and beams to hold up the roof and floors. Unlike regular framing, it makes the structure itself a beautiful part of the design.
This method is a good middle ground between simple and complex framing. You’ll use big posts, 6×6 inches or bigger, spaced 8 to 16 feet apart. This means fewer pieces to handle and lower labor costs, even with the bigger components.
One big plus is that you don’t need walls to hold up the roof. This makes your floor plan more flexible. You can change your interior layout later without worrying about damaging the structure.
Material Requirements and Costs
Knowing what materials you need helps you plan your budget better. Post-and-beam framing might need more board feet than stick framing, but it’s spread over fewer, bigger pieces. A small cabin might need 12 to 20 big posts and beams, compared to hundreds of studs in regular framing.
Buying materials directly from local sawmills can save a lot of money. Small mills often cut custom sizes at lower prices than big-box stores. For example, a 6×6 post that costs $85 at a big store might be just $45 from a mill. These savings add up fast.

The way you connect the pieces affects both cost and complexity. Traditional mortise-and-tenon joints look great but take more skill and time. Simpler options like metal brackets or screws are faster and cheaper but less authentic.
| Material Component | Stick Framing Cost | Post-and-Beam Cost | Savings |
|---|---|---|---|
| Vertical supports (400 sq ft cabin) | $850 (2×6 studs) | $720 (6×6 posts from mill) | 15% savings |
| Horizontal members | $650 (plates, headers) | $980 (6×10 beams) | -50% more expensive |
| Connection hardware | $200 (nails, plates) | $350 (brackets, bolts) | -75% more expensive |
| Total material cost | $1,700 | $2,050 | -20% more expensive |
Choosing the right lumber grade is another way to save money. Use high-grade lumber for key beams but save on less critical posts. This can cut costs by 20-30% compared to using top-grade lumber everywhere.
Labor Considerations for Post-and-Beam
Labor costs and time are different with post-and-beam framing. You’ll have fewer pieces to handle but each one needs careful planning and precise work. You’ll make fewer connections, around 50-80 major joints, compared to hundreds in stick framing.
This means less repetitive work but more focus on each connection. The work is varied and less tiring. Labor hours might be similar or a bit more than stick framing, but it feels more like traditional craftsmanship.
DIY Feasibility
Building a post-and-beam cabin yourself is doable with some skills and help. The main challenge is safely handling heavy materials. A 12-foot 6×6 timber weighs about 120 pounds, and an 8×10 beam can be over 250 pounds.
You’ll need 3 to 4 helpers during the raising process. They don’t need special skills, just muscle and direction. Many DIY builders organize weekend work parties where friends help out for meals and future favors.
The joinery skills needed depend on your chosen method. Simple bolted connections require basic carpentry and drilling. Traditional mortise-and-tenon joints need more practice but are achievable with patience and practice on scrap wood.
Equipment Needs
Post-and-beam framing needs specific tools and equipment, some of which you might want to rent. A heavy-duty circular saw or chainsaw is needed for cutting timber. A chainsaw mill attachment lets you make custom beams from logs if you have access to standing timber. Budget $150-300 for saw rentals over your project’s duration.
Lifting equipment is your most important rental choice. A small excavator with forks costs $250-400 per day but makes raising the structure safer and more precise. A farm tractor with a front loader can also do the job if you have access to one. Some builders use gin poles and block-and-tackle systems, trading equipment costs for more labor and time.
Drilling equipment must handle large holes in thick timbers. A 1/2-inch or larger drill with spade bits or auger bits is needed for bolt holes. Temporary bracing materials like 2x4s, stakes, and adjustable braces hold posts plumb during assembly. These items cost $200-400 but are useful for future projects.
Measuring and layout tools need to be precise over long spans. A quality laser level ($50-150 rental) ensures posts are perfectly vertical. Long measuring tapes and string lines keep spacing accurate. Spending time on careful layout prevents costly mistakes during the actual timber raising.
Advanced Framing Techniques That Reduce Material Waste
Building a cabin on a budget means every board counts. Advanced framing methods help use fewer boards more effectively. These techniques, known as optimum value engineering, can cut lumber costs by 15-25% without losing strength. They eliminate unnecessary framing members that add expense but don’t improve structure.
Traditional framing often includes unnecessary materials. By using advanced framing in your project, you’ll only use what’s needed. This leads to a lighter materials list and a heavier wallet.
Spacing Studs at 24 Inches On-Center
Switching to 24-inch on-center spacing cuts the number of studs by about one-third. This reduces material costs and labor time. Building codes allow this wider spacing for most single-story cabins and many two-story ones, with proper sheathing.
This method works best for single-story structures and some two-story ones. Two-story cabins might need engineering approval, but the savings are worth it.
Wider spacing requires stronger sheathing materials, like 7/16-inch OSB instead of 3/8-inch. The cost difference is small compared to saving one-third of wall studs. Builders report saving $500 to $1,200 on small cabin projects.
Two-Stud Corners and Single Top Plates
Traditional corners are overkill and create thermal weak spots. Two-stud corners offer the same strength with less lumber and better insulation. This switch eliminates thermal bridging, where extra wood conducts heat away.
Building two-stud corners is simple. You build one full stud assembly on one wall, then attach a single stud on the other with drywall clips. This uses 30-40% less lumber at each corner.
Single top plates are another smart reduction. When roof trusses or rafters align with wall studs, the second top plate is unnecessary. This removes an entire layer of lumber from your materials list.
Mark your truss or rafter locations to match stud positions during design. This maintains structural integrity because loads transfer directly downward through aligned members.
Optimized Header Sizing
Many builders install oversized headers “just to be safe.” This wastes money and lumber. Properly sized headers based on actual load calculations can save hundreds of dollars while keeping structures compliant.
The difference between a double 2×12 header and a double 2×6 header might seem small. But across eight windows and three doors, it’s substantial. Oversized headers also require more jack and cripple studs, adding to waste.
Calculating Proper Header Spans
Header sizing depends on span width, load from above, and lumber species. A 3-foot window opening in a single-story wall with a simple roof usually needs only a double 2×6 header. Standard span tables provide these calculations without needing an engineer for straightforward applications.
Most building departments have header span tables specific to your region. These charts consider snow loads, roof pitch, and local factors. Match your opening width to the chart to know the exact header size needed.
Interior non-bearing walls often need no headers at all. Just a flat 2×4 laid across the opening is enough. Identifying bearing versus non-bearing walls during design prevents unnecessary header installation in your cabin.
Eliminating Unnecessary Jack Studs
Jack studs support headers, but not every header needs them on both sides. Single jack studs work for openings under 4 feet wide in many cases. Wider openings and heavier loads require double jack studs, but smaller windows and interior doors rarely do.
Use engineering when available, span tables when possible, and double jack studs when uncertain. This ensures safety while eliminating studs where they’re not needed. On a cabin with ten openings, removing ten unnecessary jack studs saves ten 8-foot or 10-foot boards.
These advanced techniques require more careful planning than traditional methods. But the 15-25% reduction in lumber costs makes the extra design time worth it. Your cabin will be strong, well-insulated, and more affordable to frame.
Cost Effective Framing Methods for Cabin: A Comparative Look
When you’re ready to start building, comparing framing methods side-by-side is key. Each method has its own cost, labor needs, and performance benefits. Knowing these differences helps you avoid overspending and build a cabin that lasts.
The right choice depends on your budget, skills, local climate, and design. Some methods are better in certain situations. By looking at each method’s key features, you can find the best fit for your project.
Platform Framing vs Balloon Framing
Platform framing and balloon framing are two traditional methods. Platform framing builds one level at a time, with each floor as a working platform. Balloon framing has continuous studs from foundation to roof.
Platform framing is safer and more common today. It uses standard lumber sizes and creates natural fire blocks at each floor. This improves safety.
Balloon framing is good for certain designs. It can improve insulation in two-story cabins and offers a unique look. But, it’s less popular due to practical challenges and code issues.
Platform framing is cheaper than balloon framing. It uses shorter lumber, which costs less and is easier to transport. You can load it in a pickup truck without special equipment.
Balloon framing needs longer studs, which are more expensive and harder to transport. It also requires more labor to handle safely.
Platform framing is faster and safer. It lets builders work on solid platforms, reducing labor costs. Balloon framing needs more complex scaffolding and longer working times at heights.
Structural Performance
Both methods are reliable when done right. Platform framing is stable due to its floor-level connections. It resists lateral forces well.
Platform framing also has a safety advantage. Fire can’t spread easily through wall cavities because of the floor barriers. This often meets building codes without extra fire-stopping materials.
Balloon framing is good in high-wind areas. It has continuous load paths from roof to foundation. But, it needs extra fire blocking, adding costs.
Hybrid Approaches for Maximum Savings
Using different framing methods in one project can save money. You don’t have to stick to one method. Mixing methods lets you use each method’s strengths while avoiding its weaknesses.
Use post-and-beam for main areas for dramatic spaces and exposed timber. Then, switch to stick framing for smaller areas. This saves money in secondary spaces while adding visual appeal where it matters.
Another hybrid approach is combining platform framing with SIPs for walls or the roof. This simplifies framing and improves insulation. It saves on roof framing while boosting energy efficiency.
Planning transitions between methods is key. Make sure connections are engineered right. Talk to your building inspector early to ensure your hybrid meets local codes.
Regional Considerations for Method Selection
Your location affects which methods are best. Climate, local codes, material availability, and construction practices all play a role. What works in one area might not work in another.
High wind areas need special framing. Hurricane-prone regions benefit from uninterrupted load paths. Platform framing works well here with proper anchoring. Post-and-beam is also good for wind resistance.
Heavy snow regions require strong roof framing. The roof is more critical than walls in these areas. Consider engineered trusses or heavy timber for roofs. Platform framing for walls with engineered roofs is often the best choice.
Seismic zones require specific framing. Platform framing is excellent here because it ties the structure together horizontally. Use proper anchor bolts and shear wall construction.
Humid climates need framing that promotes air circulation. Avoid designs that trap moisture. Platform framing’s natural breaks help prevent moisture buildup. Use pressure-treated bottom plates and proper flashing details.
| Framing Method | Material Cost per Sq Ft | Labor Difficulty | Best Application | Key Advantage |
|---|---|---|---|---|
| Platform Framing | $3-5 | Low to Medium | General purpose cabins, DIY projects | Safety, speed, standard materials |
| Balloon Framing | $5-7 | Medium to High | Two-story traditional designs | Continuous insulation cavities |
| Post-and-Beam | $8-12 | High | Open floor plans, featured spaces | Aesthetic appeal, fewer load-bearing walls |
| Pole Barn | $2-4 | Low to Medium | Simple cabins, workshops | Lowest cost, minimal foundation |
| Advanced Stick Framing | $2.50-4 | Medium | Energy-efficient small cabins | Material efficiency, insulation space |
Material availability in your area affects costs. Local timber can make post-and-beam affordable in some areas. But, platform framing materials are often cheaper in areas with limited local timber. Always check local suppliers before choosing a method.
Local building codes and inspector preferences are important. Some areas are familiar with certain methods and have streamlined approval processes. A quick talk with your building department can help you choose methods that will pass inspection easily.
Consider the local labor market too. Choose a method that local builders know well. Trying an unfamiliar method can increase costs due to the learning curve. The most cost-effective method is often the one your local builders are familiar with.
Pole Barn Framing: The Budget Champion
Looking for low-cost cabin building methods that are strong? Pole barn framing is your best bet. It uses big vertical posts in the ground or on concrete footings. These posts support both walls and roofs.
This method has changed affordable building in rural areas. It’s simple and skips many traditional steps.
Pole barn framing is different from traditional framing. It combines multiple functions into one. This means less material and time spent building.
Why Pole Barn Methods Save Money
Pole barn framing saves money in many ways. It uses one system for everything, cutting down on materials and labor. This can save thousands on a cabin project.
When comparing steel vs post frame buildings, post frame is often cheaper. It works well for cabins from 400 to 2,000 square feet.
Traditional cabins need separate foundations, floors, walls, and roofs. Pole barns do it all with one system. This is where you save money.
Reduced Foundation Costs
Foundation costs are huge in traditional building. A small cabin’s foundation can cost $8,000 to $15,000. Pole barns change this.
Pole barns use individual posts instead of a big foundation. These posts go below the frost line, saving on concrete. Foundation costs drop to $2,000 to $4,000.
Building a pole barn is easy enough for DIYers. You dig holes, set posts in concrete or gravel, and you’re done.
Speed is key when building a cabin. Pole barn framing is one of the fastest methods. A small team can frame a cabin in three to five days.
The process is simple. Posts go up first, then girts connect them, and roof trusses span between. This means fewer complicated parts.
Working with pole barns means less material waste. You need fewer pieces, which means less cutting and assembly time.
Basic tools are all you need for pole barn construction. You’ll need carpentry tools and a post hole digger. No need for expensive rentals.
Durability and Longevity Factors
Some worry that inexpensive log cabin construction like pole barns won’t last. But modern materials and proper installation make them durable. They can last 40 to 60 years or more with little maintenance.
Using the right pressure-treated posts is key. Look for UC-4B rated posts for ground contact. They resist rot, insects, and moisture.
Proper installation is as important as the right materials. Set posts below the frost line to prevent heaving. Adequate drainage is also essential.
Moisture barriers add extra protection. They prevent moisture from wicking into the wood. This simple step extends post life.
Modern pole barn cabins can look any way you want. The framework is hidden behind your choice of finishes. Options range from rustic to modern.
Inside, you can insulate and finish like any other cabin. Spray foam insulation is great for energy efficiency. Drywall, wood paneling, or other finishes work normally.
| Construction Aspect | Traditional Framing | Pole Barn Framing | Cost Savings |
|---|---|---|---|
| Foundation System | $8,000-$15,000 | $2,000-$4,000 | $6,000-$11,000 |
| Framing Labor (600 sq ft) | 8-12 days | 3-5 days | 40-60% time reduction |
| Material Waste | 15-20% typical | 8-12% typical | 30-40% less waste |
| Expected Lifespan | 50-75 years | 40-60+ years | Comparable durability |
| DIY Difficulty Level | Intermediate-Advanced | Beginner-Intermediate | More accessible |
Pole barn framing saves 30% to 50% compared to traditional building. For a 600-square-foot cabin, this means saving $10,000 to $20,000. You can use this money for better finishes or stay within budget.
Check local building codes before starting a pole barn project. Most areas approve it when done right. You might need engineering drawings, costing $500 to $1,500.
Pole barns are weather-resistant. They handle wind and snow well. They’ve even survived hurricanes and tornadoes.
Maintenance is minimal. Just check post bases and moisture barriers yearly. Exterior finishes need regular care, but the structure itself needs little.
Structural Insulated Panels for Efficient Small Cabins
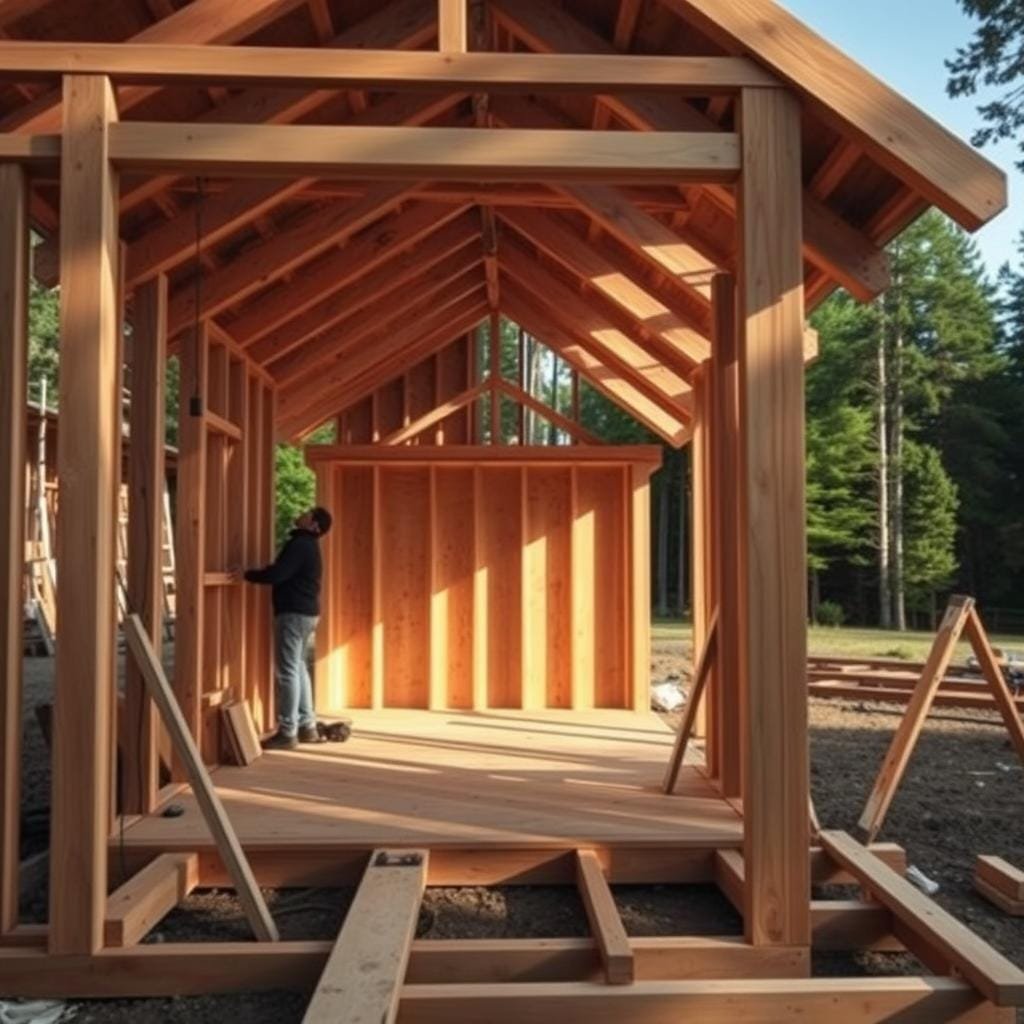
When planning a budget-friendly cabin, structural insulated panels (SIPs) offer big advantages. They combine structure and insulation into one unit, making installation faster than traditional framing. Knowing how SIPs work helps you make smart choices for your cabin project.
SIPs have rigid foam insulation between oriented strand board sheets. This creates walls and roofs that are ready to install. They eliminate the need for many construction steps, making the process simpler.
, nestled in a serene, lightly forested landscape. In the foreground, the cabin's exterior features clean, minimalist lines and muted, natural tones that blend seamlessly with the surrounding environment. The middle ground showcases the efficient SIP construction, with the panels' layered composition visible, emphasizing their insulative properties. In the background, a soft, golden-hour light filters through the trees, casting a warm, inviting glow over the scene. The overall composition conveys a sense of tranquility, practicality, and sustainability, reflecting the cost-effective yet durable nature of the cabin's design.")
Many builders are surprised by the cost of SIPs at first. But, the integrated design saves on materials and simplifies the build process. This makes SIPs a smart choice for efficient small cabin framing.
Upfront Investment Versus Lifetime Returns
SIPs cost 10-15% more than stick framing at first. But, looking at long-term savings shows SIPs are a better deal. They offer benefits that go beyond initial costs.
With SIPs, you don’t need to buy separate insulation or pay for extra sealing work. This saves money and reduces the cost difference between SIPs and traditional framing.
Energy bills show the real value of SIPs. They can reduce heating and cooling costs by up to 60% compared to stick-built homes. Most owners see their investment pay off in 5-8 years through lower bills.
After that, the savings keep adding up for decades. A cabin that costs $200 a year to heat with stick framing might only cost $80 with SIPs. This $120 difference adds up to thousands over the cabin’s life.
Faster Construction Timelines
Building with SIPs is faster, which saves money. Traditional framing takes many steps, but SIPs do it all at once. This makes building faster and more efficient.
This speed helps both pros and DIY builders. It means less time waiting for the weather to improve. Projects are more predictable and take less time.
Dramatic Labor Time Savings
Installing SIPs can save 40-50% of labor hours compared to stick framing. A small cabin that takes two weeks to frame can be weather-tight in just 2-3 days. This saves money on labor costs.
DIY builders get even more benefits from faster construction. They can finish projects in weeks, not months. This saves fuel and time.
The installation process is simpler with SIPs. They come pre-cut with detailed plans. This reduces errors and waste on site.
Immediate Weather Protection
Traditional framing leaves your cabin open to weather damage during construction. Rain, snow, and humidity can get in, causing mold and damage. SIPs create a weather-tight envelope within days of starting.
This protection keeps your cabin safe while you finish the build. It also means no drafts or cold spots, making your cabin more comfortable.
Superior air sealing also improves indoor air quality. Fewer gaps mean less chance of outdoor allergens getting in. This makes your cabin healthier and more comfortable.
With SIPs, your cabin stays at a consistent temperature. This makes every room comfortable, without cold spots near walls. This is key for small cabins where space is limited.
| Construction Factor | Structural Insulated Panels | Conventional Stick Framing | Advantage |
|---|---|---|---|
| Initial Material Cost | 10-15% higher | Baseline cost | Stick framing |
| Installation Timeline | 2-3 days weather-tight | 2 weeks to frame | SIPs by 70-85% |
| Energy Cost Reduction | Up to 60% savings | Code minimum efficiency | SIPs significant |
| Labor Hours Required | 40-50% fewer hours | Standard framing time | SIPs major savings |
| Payback Period | 5-8 years typical | Not applicable | SIPs long-term value |
Small cabins benefit a lot from SIPs. The simple building process is great for remote sites. Factory precision ensures quality, no matter the site or builder’s skill.
Timber Frame Construction on a Budget
Timber frame construction is a mix of old-world craftsmanship and modern building methods. It’s affordable for those who want to save money. The exposed beams create stunning spaces that regular framing can’t match.
Many think timber framing is too expensive. But with smart planning, it’s possible for any cabin project. Finding the right materials and learning key skills can help keep costs down.
Local sourcing and DIY approaches dramatically reduce costs. This way, you can get professional-looking results without spending a lot. Knowing where to find good deals and what techniques work best is key.
Finding Affordable Timber Sources
Material costs can vary a lot depending on where you buy. Retail yards charge more, but there are better options. Buying in bulk can save you thousands on a cabin project.
Local Sawmills and Suppliers
Small sawmills offer timber at lower prices than big stores. You might pay $3-4 per board foot compared to $8-10 elsewhere. They can also cut timber to your exact needs, saving waste and money.
These sawmills often use local wood species. This supports the local economy and reduces environmental impact. Call several mills to compare prices and species before buying.
Buying directly from loggers can save even more. If you can transport logs and mill them yourself, prices can drop to $1-2 per board foot. This is great for using sustainable cabin building materials from local forests.
Keep in mind that direct purchases need proper drying time. But many beams can be installed green and dry in place. This flexibility helps with planning your construction timeline and material strategy.
DIY Timber Framing Basics
Learning DIY cabin timber framing is easier than you think. The traditional mortise-and-tenon joinery takes patience and practice. But many builders have learned these skills through determination and good resources.
Andrew Szeto found a mentor, Richard Scott from Ottawa City Woodshop, to guide him. Having an experienced mentor can greatly shorten your learning time and avoid costly mistakes. Many communities have woodworking clubs or experienced builders willing to help newcomers.
Start with simple connections and gradually improve your skills. Invest in quality tools instead of cheap ones. For a basic cabin, you don’t need complex joints. Simple designs work well.
Modern hybrid approaches combine traditional joinery with metal brackets. This saves time and keeps the structure strong. It’s a practical way to get the look of exposed beams without needing advanced woodworking skills. Many builders use this method to save time and money.
Selecting Lumber Grades That Balance Cost and Strength
Learning about lumber grades can help you save hundreds of dollars on framing without losing strength. Many builders just pick what the staff suggests, missing a chance to save. The trick is to choose the right grade for each part of your cabin.
The grading system looks at both strength and looks, giving you different prices for the same size. Knowing what these grades mean lets you make smart choices. This is a key way to save money while keeping your cabin strong.
By picking the right lumber, you can spend more on what matters and less on what doesn’t. This can cut your lumber costs by 15-25% compared to using top grades everywhere.
Understanding Lumber Grading Systems
The grading system sorts wood by things like knots and grain patterns. These grades tell you how strong and how good the wood looks. Learning to read these labels helps you avoid overpaying for what you don’t need.
Grading follows strict rules set by groups like the American Lumber Standard Committee. Every piece of graded lumber has a stamp with its details. This stamp is your proof of what you’re buying.
Number 1, Number 2, and Number 3 Grades
Number 1 grade is the highest quality, with few knots and defects. It has tight grain and is very strong. But, it costs 20-30% more than Number 2 for the same size.
Number 2 grade is perfect for most framing in homes. Building codes often require “Number 2 or better” for structural work. It has bigger knots than Number 1, but is strong enough for most framing.
Number 3 grade has even bigger knots and more defects. It’s not strong enough for most load-bearing parts. You won’t find Number 3 in the structural lumber section, but it’s okay for temporary bracing.

Structural grades focus on strength and load-bearing capacity. These include Select Structural, Number 1, Number 2, and Number 3. Engineers use these when figuring out how much weight a piece can hold.
Appearance grades focus on looks, not strength. Categories like Clear, Select, and Common matter when the wood is seen in the cabin. You’ll pay more for appearance, sometimes double the cost of structural grades.
The main difference is that structural grades ensure safety, while appearance grades ensure beauty. For hidden framing, structural grades are enough without the extra cost.
Where to Splurge and Where to Save
Smart material selection means knowing where to spend more and where to save. This approach helps your budget and quality. The difference can be $800-1,200 for a small cabin.
Spend on Number 1 or Select grades for parts you can see. This includes porch posts, visible rafters, and handrails. These parts need both strength and looks.
Save money with Number 2 grade for parts you can’t see. This includes wall studs, floor joists, and hidden headers. Nobody will see these, so looks don’t matter.
| Application | Recommended Grade | Reason |
|---|---|---|
| Exposed beams and rafters | Number 1 or Select | Visible element requiring attractive appearance and structural strength |
| Wall studs and hidden joists | Number 2 | Structural requirements met with significant cost savings for concealed work |
| Porch posts and railings | Select or Clear | High visibility and safety requirements demand premium quality |
| Blocking and backing | Number 2 or economy | Non-critical applications where appearance and minor defects don’t matter |
Use economy studs or utility grade for parts that don’t need to be strong. This includes blocking, nailers for trim, and temporary bracing. This can save $200-400 on a small cabin without hurting quality.
For deck framing and outdoor use, choose pressure-treated lumber for ground contact. The treatment level is more important than the grade for these parts. Number 2 pressure-treated lumber is durable and affordable.
Buying in bulk can get you better prices. Ordering all your studs at once can get you contractor pricing or discounts. Some yards offer 10-15% off for big orders.
This smart grading approach is a top way to save money. You’re not sacrificing strength—you’re just not paying for looks where they’re hidden. The savings add up fast across many framing members in your cabin.
Engineered Wood Products for Cost Efficiency
At first glance, factory-made wood products might seem pricey. But they often save money in important ways. Many builders think these materials will break the bank. Yet, when they tally up the costs, they’re surprised by the savings.
Engineered wood products, like laminated veneer lumber (LVL) and I-joists, offer big advantages. They help you save money on your cabin’s structure. Knowing when and where to use them is key to stretching your budget.
The secret is in using them smartly, not replacing all traditional lumber. By mixing engineered products with regular lumber, you get the best value. This balanced method works wonders for building cabins.
Performance Advantages of LVL and I-Joists
LVL and I-joists outperform regular lumber in many ways. They solve common framing problems and cut costs. Their benefits are clear when you look at specific uses.
LVL beams can handle much heavier loads than solid wood. They can replace multiple pieces of regular lumber in key spots. This saves on both material and labor costs.
I-joists make floors flat and stable, unlike traditional joists. They come straight from the factory and stay that way. You won’t face issues like warping or twisting that solid lumber often has.
Longer Spans with Less Material
Engineered products are great because they can span longer distances. A 2×12 dimensional lumber joist can only go about 16 feet safely. But an engineered I-joist can go up to 24 feet or more.
This means you don’t need mid-span beams and support posts. You can have open floor plans without columns ruining your space. Fewer supports save on materials and labor.
For example, a 24-foot wide cabin needs fewer supports with I-joists. You can skip the beam, posts, and footings. This cuts down on materials and installation time.
Using engineered wood saves time and money. Your project will be faster and cheaper to build.
Consistency and Reliability
Engineered wood products always perform the same. They don’t vary in strength or quality like natural lumber. Each piece meets exact specs without surprises.
Dimensional lumber has its own set of problems. Boards warp, twist, and check as they dry. Engineered products avoid these issues, saving time and effort.
Your floors will stay flat and your walls straight for years. This means less maintenance and repair costs down the line. Engineered wood is reliable and consistent.
The manufacturing process ensures precise dimensions and strength. You can trust the load ratings and span tables completely. This makes design easier and ensures your cabin meets building codes.
| Product Type | Maximum Practical Span | Cost Per Linear Foot | Best Applications |
|---|---|---|---|
| Dimensional 2×10 Joist | 14-16 feet | $8-12 | Short spans, standard spacing |
| Engineered I-Joist | 24-28 feet | $12-18 | Long spans, open floor plans |
| Dimensional 2×12 Beam | 10-12 feet | $15-22 (doubled) | Headers, short beams |
| LVL Beam | 20-30 feet | $18-28 | Long beams, heavy loads, critical headers |
When Engineered Wood Makes Financial Sense
Using engineered products wisely can save you money. Not every part of your cabin needs them. Knowing where they’re best used helps you make smart choices.
Engineered products are great for efficient small cabin framing when you need to span long distances. If regular lumber would need doubling or tripling, engineered products are often cheaper. The labor savings from handling lighter pieces adds to the benefit.
Floor systems are a perfect place for I-joists in most cabins. The savings in labor from using lighter, straighter members often outweigh the material cost. Your floors will install faster and last longer.
Consider these scenarios where engineered wood clearly saves money:
- Ridge beams and main support beams: LVL replaces built-up dimensional lumber with single, easier-to-install members
- Long-span floor joists: I-joists eliminate mid-span supports and associated foundation costs
- Wide door and window headers: LVL provides exact sizing without over-building
- Cathedral ceiling rafters: Engineered rafters span longer distances without sagging
Stick with dimensional lumber for short spans and standard uses. Wall studs, shorter floor joists, and typical roof rafters don’t benefit from engineered products. In these cases, regular lumber is cheaper.
A balanced approach combines both materials strategically. Use engineered products where their benefits justify the cost. Choose dimensional lumber where it’s cheaper. This hybrid strategy offers economical cabin structural options.
Don’t just look at material prices. Consider labor, support structures, and long-term performance. Engineered products often come out on top in a full cost analysis, even if they seem pricier at first.
Local prices can affect your decision. Some areas have competitive prices for engineered wood due to local manufacturing. Always compare prices from different suppliers to understand your local market.
The right mix of materials depends on your cabin’s design and local costs. Evaluate each part based on span and structural needs. This careful approach maximizes your budget while ensuring excellent performance.
Sustainable Materials That Lower Construction Costs
Building an affordable cabin often means choosing sustainable materials. These choices are good for your wallet and the planet. Eco-friendly building not only helps the environment but also saves money and adds character to your cabin.
There are many sources for sustainable materials, each with its own cost benefits. You can use salvaged lumber from old buildings or trees milled on your property. These options save money and create unique spaces. The key is knowing where to find them and how to evaluate their quality and value.
Reclaimed and Salvaged Lumber Options
Old barn beams are great for framing and cost less than new timber. These timbers come from old-growth forests and are stronger than modern lumber. They also add a unique history to your cabin walls.
Salvage yards and demolition contractors have plenty of lumber for framing. You can find 2x4s, 2x6s, and more from buildings being torn down. Some yards give away lumber if you’re willing to clean and pull nails.

Online marketplaces help find reclaimed materials in your area. Look for flooring, siding, and trim that add character while saving money. Always check for damage or chemicals that could harm your cabin.
Local Timber Harvesting Considerations
Building on wooded land or using nearby timber can save a lot of money. Trees on your property can become framing lumber at a fraction of the cost. This is great for remote builds where transporting materials is expensive.
Harvesting local timber is cost-effective. A $1,000 tree can become $5,000-8,000 worth of lumber after processing. You choose the trees and cuts that fit your cabin design perfectly.
Portable Sawmill Rentals
Renting a portable sawmill costs $200-400 per day. It can process enough logs in a weekend to frame a small cabin. These mills bring professional milling to your site, but you need someone experienced to operate it safely.
In rural areas, custom sawyers bring their mills to your property for a fee. This option saves money and eliminates the need to learn how to use a sawmill. Expect to pay $0.50-0.75 per board foot, much less than lumber yards.
Proper Drying and Treatment
Air-drying lumber is free but takes time. Stack boards with spacers and cover the top while leaving sides open for airflow. Allow one year of drying per inch of thickness for the best results.
Kiln drying speeds up the process for a fee if you’re short on time. Some builders use green (undried) lumber for frames, where stability is less important. The wood will shrink and check as it dries, but it remains structurally sound.
Alternative Framing Materials
Bamboo is strong in warm climates where it grows easily. It takes 3-5 years to reach harvest size and has impressive strength. While not used for primary framing in cold climates, bamboo is great for interior elements.
Straw bales make excellent infill between posts in timber frame designs. They provide great insulation at a low cost. The thick walls (18-24 inches) naturally stabilize interior temperatures.
Urban-harvested logs from tree removal services are another sustainable option. City arborists remove large trees that become valuable lumber. Contact local tree services to arrange for logs that would be thrown away. These logs often have interesting grain patterns and unique character.
Each sustainable approach needs careful planning and quality assessment. The money saved on materials can fund other cabin features or reduce your overall investment. Building with reclaimed and local materials also creates conversation pieces—every beam and board has its own story.
Planning Your Cabin Design to Minimize Framing Costs
Before you start building, planning your design can save 20-40% on framing costs. The choices you make early on have a big impact on your budget. Good planning helps avoid waste, cuts down on labor, and makes every dollar count.
Many builders focus on how to build, but forget about design choices that affect costs. A well-thought-out cabin design can save money from start to finish. The aim is to build a strong structure without unnecessary complexity that raises your budget.
Simple Roof Lines and Floor Plans
Your roof design is a big cost factor in cabin building. Choosing simple roof and floor layouts can save a lot without losing strength or beauty. Simple doesn’t mean dull—it means smart spending.
A basic gable roof framing costs $8-12 per square foot. But complex designs can cost $20-30 per square foot. That’s a big difference for the same area.
Every change in your roofline means more cutting, waste, and work. Valleys need special flashing and careful waterproofing. Dormers have their own mini-roofs with extra framing. These features look good but are expensive.
Stick with simple gable or shed roofs. They use standard angles, need fewer cuts, and waste less material. Your wallet will be happy, and the structure will be strong.
Rectangular vs Irregular Footprints
A simple 20×24-foot rectangle is cheaper to frame than an L-shaped or T-shaped floor plan. Rectangular designs have fewer corners, easier foundation work, and simpler roofs. Each corner adds material costs and construction time.
Andrew Szeto built a simple 10×10-foot A-frame cabin to keep costs down. He realized that a 15×20-foot design would improve the cabin without raising costs too much. The lesson is: rectangular footprints between 200-400 square feet are the most cost-effective for small cabins.
Irregular shapes make building harder than just framing. They make electrical, plumbing, and interior work harder. Unless you must, choose a rectangle every time.
Standard Dimension Planning
Designing with standard material sizes saves waste and cuts down on cutting time. Lumber and sheathing come in standard sizes that should guide your cabin measurements. Using these sizes saves money and effort.
Eight-foot wall heights fit standard studs well and save waste. Floor joist spans of 12, 16, or 24 feet match common lumber lengths. Standard 4×8 sheathing panels cover walls well when dimensions are multiples of four feet. Simple framing systems need fewer custom cuts and less scrap material.
Consider these dimension guidelines for maximum efficiency:
- Wall lengths in 2-foot increments (12′, 16′, 20′, 24′)
- Wall heights of 8 feet for single-story cabins
- Roof overhangs of 12, 16, or 24 inches
- Window and door openings that align with stud spacing
- Floor systems using joists at 16 or 24 inches on-center
These measurements aren’t random—they reflect how materials are made and sold. Fighting these standards means buying more material and spending more time cutting.
Reducing Complex Joints and Cuts
Every angled cut, compound miter, and custom connection slows down building and increases error risk. Complex joinery looks impressive but adds hours to your build time. For cost-effective building, choose simple connections that work well.
Design with perpendicular joints and standard angles—mostly 90 degrees with occasional 45-degree cuts for roof rafters. Repetitive elements allow batch cutting where you measure once and cut multiple identical pieces. This method reduces mistakes and speeds up assembly compared to custom-fitting each connection.
Simple cabin framing systems use straightforward connections: butt joints, lap joints, and standard nailing patterns. These joints work well when done right and don’t need special skills or tools. Save the complex carpentry for visible interior details where craftsmanship matters, not for framing hidden behind walls.
Avoid designs needing extensive notching, complex angles, or custom brackets. Each specialized connection point adds cost through increased labor time and expensive mistakes. The strongest framing systems often use the simplest joinery methods repeated throughout the structure.
DIY Framing vs Hiring Professionals: Making the Right Choice
Choosing who will do the framing work in your cabin is tough. You might decide to do it yourself, hire pros, or find a mix. Each choice affects your budget and how long it takes to finish.
DIY saves money but takes your time and skill. Hiring pros is faster but costs more. Most builders mix both to save money and time.
Skills Required for Different Framing Methods
Not all framing needs the same skills. Some are easy for beginners, while others need years of experience. Knowing this helps you decide if DIY is right for you.
Basic stick framing is doable for DIYers with some carpentry skills. It’s a traditional method that’s not too hard to learn. Mistakes can usually be fixed without big problems.
Post-and-beam framing needs more skill in layout and joinery. It has fewer connections than stick framing, making it simpler once you learn it. It requires careful planning and measuring.

DIY timber framing is the most challenging. It needs special knowledge of traditional joints. Builders often spend months learning before starting their first project.
Andrew Szeto’s cabin build shows what’s possible with the right help. His $10,632 project took 35-40 days. He had woodworking experience and mentorship, making it easier.
Pole barn construction is DIY-friendly for those who like structure. It has simple foundations and easy assembly. First-time builders can do it with careful planning.
Tools and Equipment Investment
Choosing tools is a big part of DIY framing. Some tools are affordable and useful for other projects. Others are expensive. Making smart choices can save a lot of money.
Essential Tools for Cabin Framing
Every framing project needs basic tools. You’ll need a good saw for cutting lumber and a framing nail gun for fast assembly. Traditional hammer work is also an option for those who prefer it.
Accurate measuring and leveling tools are essential. You’ll need levels of different lengths to ensure walls are straight. A speed square and framing square help with precise angles. Measuring tapes, a chalk line, and sturdy sawhorses or work tables are also necessary.
Safety equipment is just as important. You’ll need eye protection, hearing protection, gloves, and steel-toed boots to stay safe.
Rental vs Purchase Decisions
Knowing when to buy and when to rent is smart. It depends on how often you’ll use each tool.
Purchase is best for tools you’ll use a lot. A circular saw, basic hand tools, measuring equipment, and levels are worth it. They’ll be useful for future projects too.
Renting is better for expensive tools you won’t use often. Framing nailers, laser levels, scaffolding, and power augers for post holes cost a lot to buy but rent for less. If rental costs are half of buying, it’s better to rent.
| Equipment Type | Purchase Cost | Daily Rental | Best Choice |
|---|---|---|---|
| Framing Nailer | $300-$500 | $35-$50 | Rent (unless doing multiple projects) |
| Circular Saw | $80-$200 | $15-$25 | Purchase (frequent use) |
| Scaffolding Set | $400-$800 | $50-$75 | Rent (limited timeframe) |
| Laser Level | $150-$400 | $25-$40 | Rent (occasional use) |
Hybrid Approaches to Save Money
The smartest builders mix DIY and hiring pros. This way, they save money where they can and get expert help where needed.
They might do simple walls and floor framing themselves but hire pros for the roof. Roof framing needs precise calculations and experience with tricky angles. Pros can do it faster and better.
Another strategy is to hire a pro for layout and supervision at the start. This ensures you start right and avoid costly mistakes. Then, you can do the assembly work yourself.
Some builders hire pros for structural engineering and critical connections but do the rest themselves. This way, they save on labor costs while ensuring the cabin is structurally sound. The pro handles the complex parts, and the builder does the simpler sections.
Finding the right framing method for your cabin means knowing your limits. Can you dedicate the time? Do you have reliable helpers? Is your timeline flexible? Answering these questions helps you choose the best approach for your project.
Remember, hiring pros isn’t a failure. It’s often the best choice. The money saved by avoiding mistakes, preventing injuries, and ensuring the cabin is safe is usually more than the cost of hiring experts. Your goal is a safe, durable cabin, not necessarily doing everything yourself.
Common Framing Mistakes That Waste Money
Small framing errors can lead to big financial losses. They turn a budget-friendly cabin project into a costly lesson. Builders often find out too late that certain mistakes can add hundreds or thousands of dollars to their costs. Knowing these pitfalls before starting can save your wallet and keep your project on schedule.
The good news is that most costly framing errors are preventable. Learning from others’ mistakes can help you avoid similar expensive errors.
Over-Engineering and Material Overuse
First-time builders often think bigger is better when choosing framing materials. This leads to unnecessary spending without improving the structure’s performance. Using 2×6 studs where 2x4s are required wastes money on every wall.
Over-engineering shows up in several ways. Builders install massive headers over every door and window, even if they’re not needed. They also double or triple joists unnecessarily.
Some builders space framing members at 12 inches on center, when 16 or 24 inches is enough. This “better safe than sorry” approach can increase material costs by 15-25% without any benefit.
Building codes already include safety factors. Following them provides all the strength and durability your cabin needs. Trust the engineering in these standards instead of guessing.
Poor Planning and Measurement Errors
Rushing into construction without planning leads to frustrating waste. Poor measurements and hasty cuts cause problems that spread throughout your project. These mistakes are preventable with proper planning.
Creating detailed cut lists before starting saves time and money. This step helps you visualize your framing process and catch errors before they become costly.
The Cost of Incorrect Cuts
A single miscut board can add up quickly. A ruined 12-foot 2×6 costs $8 to $12 to replace. It also delays your project while you make another trip to the lumber yard.
Measurement mistakes are worse when cutting many identical pieces. One error can ruin dozens of boards before you notice. Remember, measure twice, cut once.
Andrew Szeto learned about preparation during his cabin build. Rushing with sealants in cold weather caused frustration and extra trips to the store. Checking temperature requirements would have saved time and money.
Ordering Too Much or Too Little
Ordering too much or too little material damages your budget. Excess lumber ties up capital that could be used elsewhere. Stores often have 30-day return windows, and returning large framing lumber is impractical.
Under-ordering causes its own problems. Running short on materials halts construction and forces emergency purchases. You lose momentum and may pay high prices for rush deliveries.
To avoid waste, create accurate material lists based on your plans. Add a 5-10% waste factor for most framing applications. This accounts for natural waste and minor mistakes without overdoing it.
Ignoring Building Codes
Ignoring building codes is one of the costliest mistakes builders make. Codes ensure safety and structural integrity. Violations can lead to expensive teardowns and rebuilds that destroy your budget and timeline.
Andrew Szeto’s experience shows the importance of proper site preparation. Without it, freeze-thaw cycles caused foundation movement, leading to ongoing problems.
Code violations also affect insurability and resale value. Failed inspections mean lost fees and delayed occupancy. Some violations require removing non-compliant work, wasting materials and labor.
Always check local building codes before framing. Requirements vary by location, and what works in one area might not meet standards in another. Your local building department can provide guidance specific to your region and project type.
Another lesson from Szeto’s build was about material selection. His polycarbonate roofing failed within a season, representing a complete waste of money. Choosing durable, code-compliant materials from the start prevents these costly mistakes.
Understanding requirements before building protects your investment. The effort of researching codes and proper techniques saves a lot of money compared to fixing violations after the fact.
Building Your Dream Cabin Within Budget
Starting your journey to affordable cabin ownership is all about smart planning and the right approach. This guide shows that quality doesn’t mean you have to spend a lot. Real builders are getting amazing results with just a little money.
Andrew Szeto showed us what’s possible with the right strategy and determination. His complete cabin build cost just $12. He built a fully functional 240-square-foot retreat. His smart choices, like an $8,000 exterior and $4,750 interior, prove you can build a great cabin without breaking the bank.
Success comes from choosing the right framing methods for your project. Simple designs cut down on waste and complexity. Having friends and mentors helps a lot. Learning as you go is okay, as long as you stay focused and humble.
Building your own retreat is more than just saving money. There’s no price on the joy of sitting on a porch you built. Your dream cabin is within reach. These proven techniques will guide you. Start by setting clear goals, learn everything you can, and take each step with confidence. Your dream cabin is closer than you think.


