Imagine you’re in your cozy cabin, surrounded by pine-scented air and rustic charm. But, clutter is taking over your space. A wall-mounted wooden rack is the perfect solution. It helps organize your cabin, making the most of every inch.
I tried this project in my 300-square-foot cabin, and it changed everything. It freed up floor space and added beauty to my walls. You don’t need to be a pro carpenter to make it. With basic tools and creativity, you can create a custom wall-mounted rack that looks great and works well.
Are you ready to make your cabin more organized? Let’s explore DIY wall-mounted racks. They can turn your cluttered space into an organized one quickly. Your future self will be grateful for this smart upgrade!
Tools and Materials Needed
Building a wall-mounted wooden rack for your cabin needs careful planning. We’ll look at the woodworking tools, lumber, and hardware you’ll need for this project.
Essential Tools for Building
To make a strong and useful rack, you’ll need certain tools. A compound miter saw set to 28 degrees is key for accurate cuts. You’ll also need a table or circular saw, pocket hole jig, tape measure, long level, nail gun, and drill. Remember, a 32mm drill bit is needed for pilot holes.
Choosing the Right Wood
Choosing the right wood is important for your rack’s strength. Oak, like white oak, is great because it resists rot and looks good. Maple is also a good choice for its grain patterns and durability indoors and outdoors. Plywood is a budget-friendly option for tool racks. Use timber that’s 38mm x 63mm for standard stud work.
Additional Supplies
Your project needs various hardware supplies. You’ll need wood screws, wall brackets, and hooks and clips for hanging tools. Big hooks are good for shovels and rakes, and small ones for hand tools. Use French cleats at the top and bottom for stable wall mounting.
| Material | Quantity | Use |
|---|---|---|
| 2×4″ boards | Variable | Shelf supports |
| 1/2″ plywood | As needed | Shelf surfaces |
| Wood screws | Multiple | Assembly |
| Wall brackets | 2-4 | Mounting |
Measuring and Planning Your Space
Space planning is key for a good storage solution in your cabin. First, figure out what you need to store. Count your items and think about what you might need later. This helps decide how big and what your rack should look like.
Wall Space Measurement
Getting the right wall measurements is essential for a great rack. Use a tape measure to find out how much space you have. Mark where the studs are for strong mounting. A self-leveling laser can help make sure your lines are straight and your rack is level.
Rack Design
Think about how far apart your shelves should be and how much they can hold. Consider the size of what you’ll store. For a small space (3’x5′), aim for at least 15 square feet. Bigger areas let you get creative.
Remember, your rack should take up about 11-12% of your floor space. This keeps things balanced.
Pro tip: Many hardware stores cut wood for you. This can make your project easier and save time. Just give them your measurements based on your space planning and rack design.
Step-by-Step Guide to Building the Rack
Are you ready to try DIY woodworking? Let’s build a wall-mounted wooden rack together. This guide will help you with cutting, assembly, and finishing. It’s great for adding storage to your cabin.
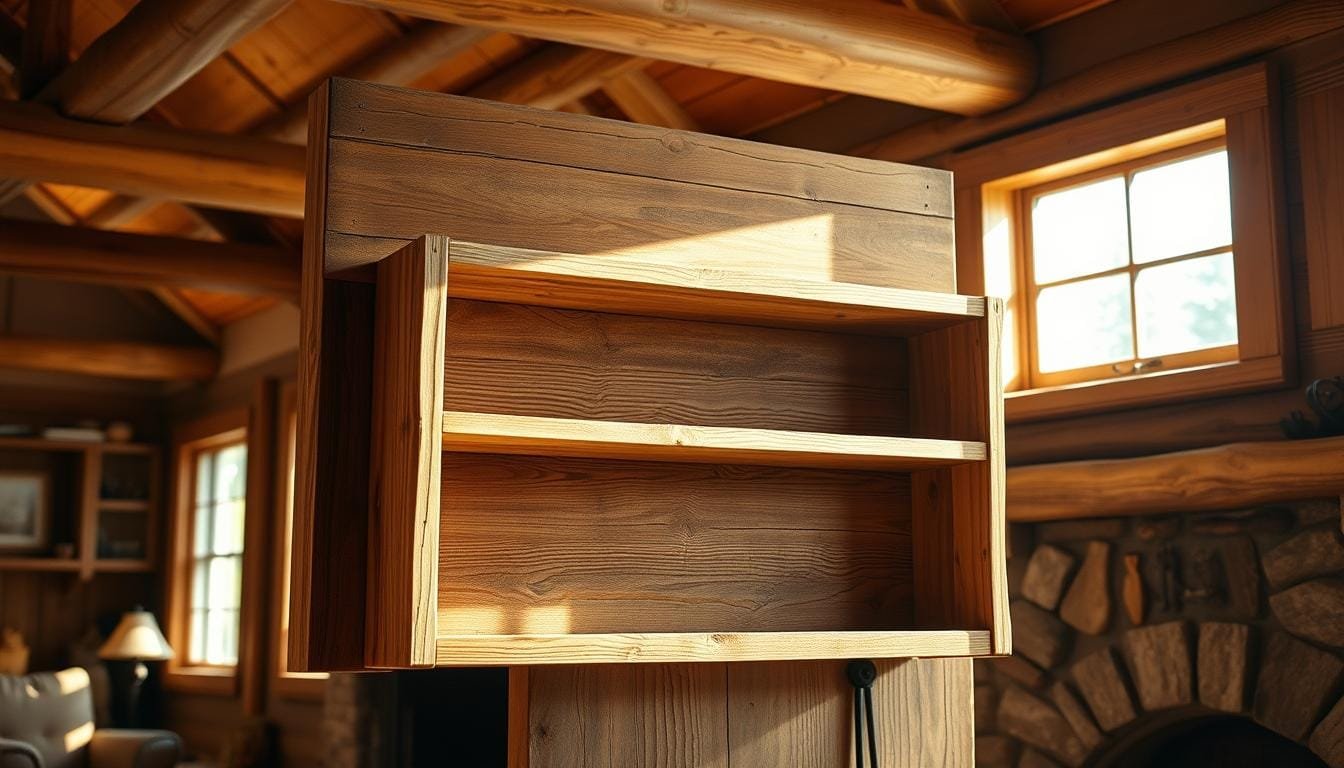
Cutting the Wood to Size
Begin by cutting your wood. You’ll need two vertical pieces and two horizontal shelves. Make sure the uprights are 32 inches apart to fit wall studs. Use a circular saw for straight cuts and a miter saw for angled ones. Always double-check your measurements before cutting!
Assembly of Rack Components
Next, it’s time to put the rack together. Use lap joints and dadoes to join the pieces. Make sure the shelves are offset in opposite directions for extra strength. Dry-fit all parts before gluing to check for alignment. Add a screw to the lower shelf for extra stability.

Sanding and Finishing Touches
After assembly, sand all surfaces for a smooth finish. Use a random orbital sander for best results. Chamfer the ends of the uprights and shelves for a polished look. Apply several coats of your chosen finish, letting each coat dry before adding more. This will protect your rack and make it look great.
This project is rated 3 out of 5 for skill level and takes about 8 days to finish. With patience and care, you’ll create a sturdy and attractive storage solution for your cabin.
Mounting Your Rack Safely
Proper wall mounting techniques are key for a secure rack installation. Let’s look at the main steps to keep your wooden rack stable. This ensures it can hold a lot of weight.
Choosing Wall Brackets
Choosing the right wall brackets is vital for a strong rack. Think about the weight of what you’ll store. Pick brackets that can handle at least 100 pounds per pair for heavy items.

Leveling Your Rack
A level rack looks good and holds weight evenly. Use a spirit level to mark where to drill. For long racks, have someone hold one end while you adjust the other.
Anchoring for Stability
Secure your rack to wall studs for the best stability. Use a stud finder to find studs, then drill pilot holes for screws. Don’t use wall anchors, as they might not support a loaded rack well.
| Mounting Type | Load Capacity | Installation Time |
|---|---|---|
| Stud-mounted Brackets | 100+ lbs | 1 hour |
| Cleats (2×2) | 50-75 lbs | 30 minutes |
| Utility Hooks | 25-50 lbs | 15 minutes |
Remember, a well-mounted rack can change your cabin storage. By following these tips, you’ll make a safe, useful space. It can hold everything from coats to heavy tools.
Organizing Items on Your Rack
Now that your wall-mounted wooden rack is set up, it’s time to focus on storage. A well-arranged rack can make your cabin more organized and use space better by up to 30%. Let’s look at some smart ways to use your new DIY project.
Smart Storage Solutions
Begin by organizing items you use often. Put heavier things on lower shelves for safety and easy reach. This can cut down the time you spend looking for things by 25%.
For smaller items, use labeled containers. A label maker can be a big help in keeping things organized. It lets you find what you need without digging through boxes.
Make the most of vertical space by adding hooks or pegs to your rack’s sides. This can add up to 20% more storage than just shelves. Store seasonal decorations or less-used items in clear bins on top shelves. This keeps things neat and protects items from dust and moisture.
Keeping your space organized is important for long-term success. Check your storage needs often and change your rack setup as needed. By using these tips, you’ll have a cabin that’s tidy, functional, and welcoming.


