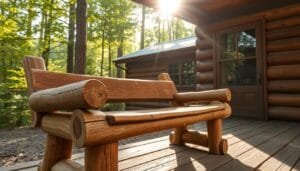
Imagine standing at your cozy cabin’s entrance, looking at the rustic wooden door you made. The sunlight highlights the oak or pine’s rich grains. It shows off your skill and makes you feel welcome.
Building a DIY cabin door might seem hard, but it’s doable with the right help. You can use oak, pine, or hickory to make your door. This way, your cabin gets a personal touch and becomes more functional.
Did you know some wooden doors last over 35 years? With the right materials and techniques, your door could last for generations. It will be a lasting welcome for your family and friends.
This guide will show you how to make a beautiful, lasting rustic wooden door. You’ll learn from picking the wood to adding the final details. Your door will show off your style and skill.
So, get ready to start a woodworking project that will make your cabin even more special. You’ll improve your DIY skills and bring your dream door to life!
Choosing Wood for Your Rustic Door
Choosing the right wood is essential for a rustic cabin door. It must look good and last long. We’ll look at the best wood types and how they handle the weather.
Suitable Wood Types
Various woods are great for cabin doors. Oak is tough and doesn’t warp easily. Pine is cheaper and easy to work with. Poplar is light and takes paint well. Hickory is very hard, perfect for busy places.
| Wood Type | Characteristics | Best Use |
|---|---|---|
| Oak | Durable, resistant to warping | Interior doors |
| Pine | Cost-effective, easy to shape | DIY projects |
| Poplar | Lightweight, accepts paint well | Custom carvings |
| Hickory | Extremely hard, shock-resistant | High-traffic areas |
Weather Resistance Considerations
For outdoor doors, pick weather-resistant wood. Cedar is great because it keeps bugs away and resists moisture. Mahogany also works well in damp places, shrinking and swelling less than other woods.
Remember, the right treatment and finish can make any wood weather-proof. Keeping your door in good shape means it will stay beautiful for many years.
Essential Tools
Building a rustic wooden door needs the right tools. We’ll look at hand tools and power tools you’ll need for this project.
Hand Tools
Hand tools are key for making your door. You’ll need a hammer, chisels, and a handsaw. A measuring tape and carpenter’s square help with precise cuts.
A level is also important to keep things straight. These tools let you work on the details and achieve a rustic look.
Helpful Power Tools
Power tools make the job faster and easier. A circular saw cuts boards quickly. An electric drill is great for fastening and making holes.
A power sander smooths out rough edges fast. For thick wood, like a 30 cm diameter chestnut tree, a chainsaw might be needed.
Always remember safety when using tools. Wear protective gear and follow the rules. With these tools, you’re set to build your rustic wooden door.
| Hand Tools | Power Tools |
|---|---|
| Hammer | Circular Saw |
| Chisels | Electric Drill |
| Handsaw | Power Sander |
| Measuring Tape | Chainsaw |
| Carpenter’s Square | Planer |
Taking Measurements
Getting the right door measurements is key for a perfect fit in your cabin. We’ll look at how to measure your door frame and figure out the best size for your custom door.
Measuring Door Frame
First, measure your door frame’s width at the top, middle, and bottom. Then, measure the height on both sides and the center. Use the smallest measurements as your guide for custom door sizing.
Calculating Door Dimensions
Remember, doors should be a bit smaller than the frame. Aim for 1/8″ to 3/16″ smaller than the smallest frame dimension. This ensures smooth opening and closing without sticking.
For instance, if your frame is 80 1/4″ tall and 36 1/8″ wide, your door should be about 80″ tall and 35 7/8″ wide. Standard doors are 80″ tall and 1 3/8″ thick, but your cabin door might need different dimensions.
- Measure frame width at top, middle, and bottom
- Measure frame height on both sides and center
- Subtract 1/8″ to 3/16″ from smallest measurements
- Consider standard sizing for hardware compatibility
By accurately measuring and calculating, your rustic wooden door will fit your cabin’s entryway perfectly. This focus on detail enhances both the look and function of your custom door.
Designing Your Rustic Door
Creating a rustic door for your cabin is a fun project. It lets you mix function with personal style. Let’s look at some popular rustic door designs and custom features that can make your cabin more charming.
Rustic Door Styles
Several cabin door styles are known for their rugged look and usefulness:
- “X” style: Features diagonal boards forming an X shape
- “Z” style: Incorporates horizontal and diagonal boards in a Z pattern
- “K” style: Combines elements of both X and Z styles
- 3-panel design: Offers a simpler look with three vertical sections

Personal Touches
Make your rustic door stand out with custom features:
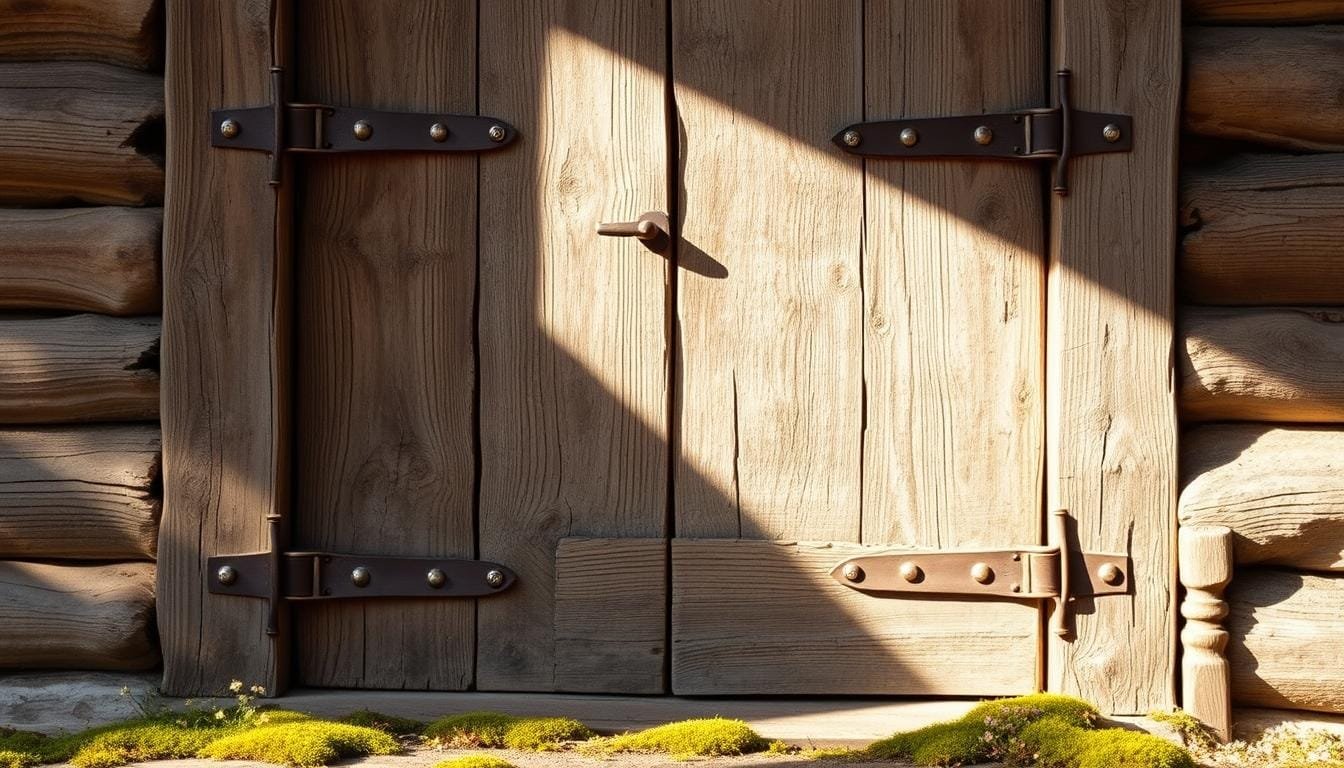
- Handcrafted door handles made from repurposed materials
- Decorative iron hinges for an authentic rustic look
- Carved wood patterns or initials for a personal touch
- Stained glass inserts for added color and character
The charm of DIY rustic doors comes from their customization. A standard 3′ x 7′ door costs about $625 for pine or $1,200 for white oak. But, making your own can save money and let you create something unique. With creativity and hard work, you can make a door that matches your cabin’s look perfectly.
Preparing the Wood
Preparing the wood is key to making a sturdy and attractive rustic wooden door for your cabin. This step makes sure your door lasts long and looks good for years. We’ll cover the important steps of wood preparation, like sanding and treating the wood.
Sanding for Finish
Proper sanding is vital for a smooth surface. Begin with coarse-grit sandpaper to remove rough spots. Move to finer grits for a shiny finish. Use an orbital sander for big areas and hand-sand corners.
Always sand with the wood grain to avoid scratches.
Wood Treatment for Longevity
Protecting the wood is critical to keep it safe from moisture, insects, and UV damage. Start with a wood preservative to fight rot and pests. Then, apply a water-repellent sealer to stop moisture.
For UV protection, use a stain or finish with built-in UV. Make sure to apply these treatments evenly and let them dry fully between coats.
By spending time on wood preparation, sanding, and treatment, your rustic cabin door will stay beautiful and strong. Patience in this stage leads to a door that’s both durable and looks great.
Assembling the Door Frame
Building the door frame is a key part of making a door. It’s easy enough for beginners to do, with a skill level of 1 out of 5. Let’s look at how to build the frame and how to fasten it together.
Frame Construction Steps
First, cut your stiles and rails to the right size. For a 30-inch door opening, make stiles 83 inches long and rails 38 inches. Use 1×6 pine boards for the back, cutting them half an inch shorter than the opening height. Put these pieces together to form your frame.

Fastening Methods
Using wood joinery techniques is important for a strong door. Drill pocket holes in the rails – two at each end of the upper and middle rails, and three for the bottom rail. Use 1 1/4-inch deck screws to secure the joints, going through filler strips into each 1×6 board.
For extra strength, tack down the face frame with 1 1/4-inch brads every 8 inches. Don’t forget to sand your frame. Start with 80-grit sandpaper and move to 220-grit for a smooth finish. Apply wood treatment for protection, then add three coats of wipe-on polyurethane, sanding between each coat. Your rustic door frame will be ready for the next step.
Adding Door Panels
Installing door panels is key to making your rustic wooden door. They add character and are essential for the door’s strength and use. Let’s look at the different panels and how to attach them right.
Panel Types
There are several types of rustic door panels to choose from:
- Solid wood: Authentic and durable, perfect for a traditional rustic look
- Plywood: Cost-effective and resistant to warping
- MDF (Medium-Density Fiberboard): Smooth surface, ideal for painting
The right choice depends on what you like and your budget. Solid wood panels give a unique rustic look.
Securing Panels
Using the right methods to put panels together keeps your door strong and looking good for a long time. Begin by cutting grooves in the rails and stiles for your panels. This lets the wood move naturally, avoiding warping or cracking.
When placing panels, leave a small gap (about 1/8 inch) around the edges. This gap lets the wood expand. Use wood glue on the edges of the panels to keep them in place while allowing for movement.
| Panel Type | Thickness | Typical Width |
|---|---|---|
| Solid Wood | 3/4 inch | 6-8 inches |
| Plywood | 1/2 inch | Full width |
| MDF | 1/2 inch | Full width |
The secret to great door panel installation is in being precise and letting the wood move naturally. With these tips, you’ll make a beautiful and lasting feature for your cabin.
Applying Finishes and Sealants
The final step in making your rustic wooden door is applying the right finishes. This step not only makes the door look better but also keeps it safe from damage. We’ll look at some top finishing products and expert tips for staining your door.
Recommended Finishing Products
There are many options for door sealants:
- Polyurethane: Ideal for high-traffic areas, offers great moisture protection.
- Polycrylic: Perfect for lighter woods, resists yellowing and has fewer odors.
- Spar Urethane: Great for doors in harsh conditions, protects against water, UV rays, and temperature changes.
- Hemp oil: A non-toxic option that highlights wood grain patterns.
Professional Finish Tips
To get a professional finish, remember these tips:
- Clean and sand the wood well before applying any finish.
- Apply thin layers of sealant to avoid bubbling and peeling.
- Let each coat dry fully to prevent streaks.
- Make sure the area is well-ventilated when using products with high VOC levels.
- For a weathered look, use clear wax instead of polyurethane.
| Finish Type | Best For | Reapplication |
|---|---|---|
| Thompson’s Water Seal | Long-lasting protection | Every 2-3 years |
| Ready Seal | Combined stain and sealer | Every 2 years |
| Sikkens Cetol SRD | Protection against moisture, sun, mildew | Every 2 years |
The right finish can make your door last longer. Sealed wood can handle spills and daily wear better than unsealed wood. By following these tips, you’ll make a beautiful and long-lasting wooden door for your cabin.
Installing Your Wooden Door
Now that you’ve made your rustic wooden door, it’s time to hang it in your cabin. This step needs careful planning and the right tools. Let’s look at some important door installation tips to make sure your door fits perfectly.
Necessary Installation Hardware
Before you start, gather all the needed hardware. You’ll need hinges, a doorknob, and a latch. For a rustic look, wrought iron hardware is a good choice. Standard doorknob holes are 2-1/8 inches in diameter. Place hinges 10 inches from the bottom, 7 inches from the top, and in the center of the door.
Ensuring Proper Alignment
Proper alignment is key when installing your wooden door. Use a level to check if the door frame is square. If it’s not, you might need to adjust it before hanging the door. When placing the door, leave a 1/8-inch gap at the top and sides, and a 3/8-inch gap at the bottom for clearance.
Here are some key steps for hanging a wooden door:
- Attach the hinges to the door first
- Hold the door in place and mark hinge locations on the frame
- Chisel out recesses for the hinges on the frame
- Screw the hinges into place
- Test the door’s swing and make adjustments as needed
By following these door installation tips and taking your time, you’ll ensure your rustic wooden door becomes a beautiful, functional part of your cabin. Remember, patience and precision are key to successful door hardware installation.
Maintaining Your Wooden Door
Your rustic wooden door can last a lifetime with the right care. Keeping it in good shape is key to its beauty and function. Here are some important tips and techniques to keep your cabin’s entrance looking great for years.
Regular Maintenance
Check your door every year to spot problems early. Clean it twice a year with mild soap and water to keep the finish looking good. Every 3-5 years, reapply a protective coat, if your door is exposed to harsh weather.
Also, check the weatherstripping often. Replacing it can make your door more energy-efficient by up to 15%.
Repairing Common Issues
Fix problems quickly to avoid expensive fixes. Warping and damage often come from too much moisture. Make sure all edges are sealed well.
In busy areas, use strong varnishes or wood oils. These protect well and are easy to care for, making them great for rustic doors.
By following these tips, your wooden door will remain a beautiful part of your cabin. Remember, ignoring maintenance can lead to costly repairs, up to 30% of the door’s price. With the right care, your door will last for decades.