Did you know that wood needs less than 18% moisture to work well with epoxy? This fact shows how key wood prep is when using epoxy wood hardener to prevent rot. Wood experts know epoxy can really revive damaged wood.
Epoxy wood hardener is a big deal in keeping wood safe. It’s not just a quick fix; it’s a lasting way to keep wooden things strong. Epoxy goes deep into the wood, making it tough and rot-proof, which can make your wood last longer.
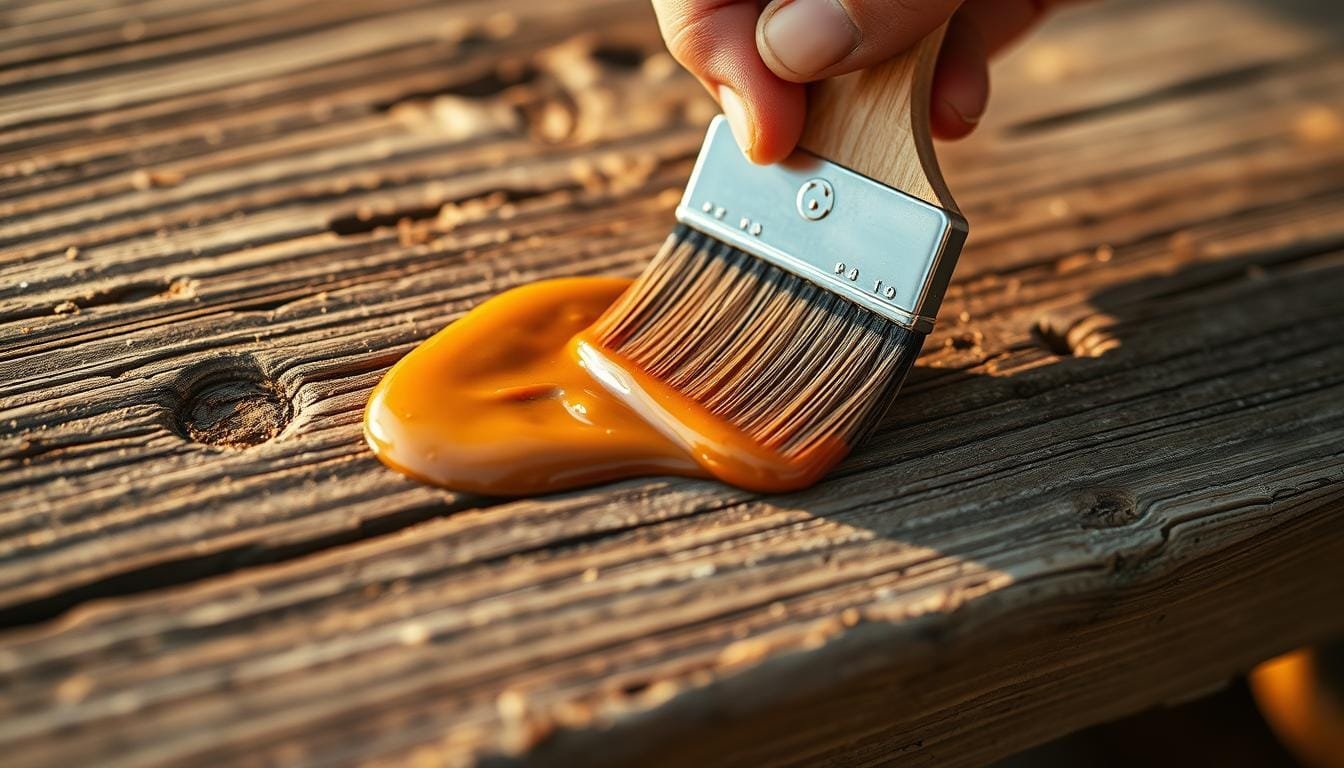
Epoxy is very flexible. It works for small deck repairs or big wooden boat restorations. It’s simple to use, dries fast, and is very durable. The epoxy starts to harden in 30-45 minutes after mixing, giving you time to work and ensuring it cures quickly.
As we look into epoxy wood hardeners, you’ll learn how to fix wood problems. We’ll cover spotting rot early and how to apply epoxy right. This guide will give you the tools to fight wood decay. Let’s see how this amazing product can keep your wooden items safe for years.
Understanding Epoxy Wood Hardener
Epoxy wood hardener is a powerful tool against wood rot. It combines epoxy resin’s strength with a wood stabilizer’s ability to penetrate. This makes it a top choice for fixing rot and preserving wood.
What Is Epoxy Wood Hardener?
Epoxy wood hardener is a special resin that goes into soft, damaged wood. It turns weak spots into solid surfaces, making wood strong again. This product stops rot and strengthens the wood’s structure.
Benefits and Uses
The benefits of using epoxy wood hardener are many:
- Stops rot in its tracks
- Strengthens weakened wood fibers
- Prevents future moisture damage
- Works on various wood types
- Ideal for both interior and exterior applications
Epoxy wood hardener is great for many tasks. It’s perfect for fixing window sills, door frames, and fascia boards. For small spots, a thick epoxy works well. But for bigger areas, moldable epoxy putty is better.
The curing process is key for the best results. At 72°F (22°C), it takes 6-8 hours to solidify in thin films. Every 18°F increase above 72°F halves the cure time. This wood stabilizer is durable and lasts longer than traditional fixes, making it a top choice for rot repair.
Identifying Wood Rot
Spotting wood rot early is key to avoiding big damage to your home. Wood rot shows different signs based on the type and how far it’s gone. Knowing these signs helps you catch problems early and fix them fast.
Recognizing Wood Rot Signs
Wood rot comes in two types: wet rot and dry rot. Wet rot happens in very damp wood. Look for:
- Darker wood appearance
- Soft, spongy texture
- Cracking or crumbling
- Small patches of fungus
Dry rot needs less moisture but can cause more damage. Watch for:
- Fine white threads (early stage)
- Cotton wool-like growth
- Mushroom-like fruiting bodies
- Wood splitting into cubes
Checking for Wood Damage
Do regular checks to find rot early. Look closely at places that get wet often, like windows, cellars, and roofs. Here’s how:
- Visual inspection for discoloration or fungal growth
- Tactile examination for softness or sponginess
- Smell test for musty odors indicating dampness
- Probe suspect areas with a screwdriver to check for softness
Early Rot Detection
Finding rot early saves money and time. Here’s what to do:
- Annual inspections of trim and structural wood
- Regular cleaning of gutters to prevent overflow
- Immediate repair of cracks in caulk or sealant
- Proper ventilation in damp-prone areas
- Use of moisture meters to check wood moisture content
| Rot Type | Moisture Requirement | Common Locations | Key Indicators |
|---|---|---|---|
| Wet Rot | High | Windows, Cellars, Roofs | Dark, Soft, Crumbly Wood |
| Dry Rot | Moderate | Flooring, Structural Timbers | White Threads, Fruiting Bodies |
By knowing these signs and doing regular checks, you can catch wood rot early. This helps prevent big damage to your home.
Preparing the Wood Surface
Getting your wood ready for epoxy treatment is key to preventing rot. Surface preparation involves several important tasks. These tasks ensure the epoxy bonds well and protects effectively.
Cleaning the Area
Begin with thorough wood cleaning. Remove dirt, debris, and loose paint. Use a wire brush or sandpaper to scrub the surface.
This step is vital for the epoxy to adhere properly. A clean surface allows for better penetration of the hardener.
Removing Damaged Wood
Inspect the wood carefully. Remove any unstable or soft wood that’s crumbly or loose. If less than 50% of the wood is rotted, you can proceed with repairs.
For more extensive damage, consider replacement. Use a chisel or scraper to clear out the decayed areas. Leave only solid wood behind.
Ensuring Ventilation
Proper ventilation is essential during surface preparation and epoxy application. Work in a well-ventilated area to avoid inhaling dust or fumes. Open windows or use fans to improve air circulation.
Good ventilation also helps the wood dry faster. This is critical before applying epoxy.
Before applying the hardener, ensure the wood’s moisture content is below 19%. Use a moisture meter to check. If needed, allow the wood to dry completely. This step is critical for the epoxy to bond effectively and prevent future rot issues.
Applying Epoxy Wood Hardener
Proper epoxy application is key for fixing wood rot. It involves mixing techniques and the right tools for the best results.
Mixing Epoxy Solution
Begin by mixing your epoxy. Most wood hardeners need a 1:1 ratio, making it simple to mix. The epoxy starts to set in 30-45 minutes, so work fast. Weather can change how long it takes to work – it’s cooler on cool days and faster when it’s hot.
Application Techniques
Apply multiple coats of wood hardener with a disposable brush. For deeper penetration, drill small holes. Use CPES (Clear Penetrating Epoxy Sealer) for the best results. It hardens rotted wood and makes it tough and resistant to damage.
Recommended Tools
You’ll need disposable brushes, mixing containers, and protective gear. For filling voids, consider a Rotten Wood Repair Kit. Some prefer Minwax Wood Hardener or Abatron Liquid Wood for their effectiveness. Bondo All Purpose Putty is a budget-friendly option at $14.99 per quart.
The wood’s moisture should be under 18% for epoxy repairs. Apply two to three coats in one day for small areas, letting it dry between coats. For bigger areas, drying can take days or weeks.
Curing and Drying
Epoxy curing is key in fixing wood rot. Knowing what affects drying time and cure factors is important. Let’s look at the curing process and what to expect.
Factors Affecting Cure Time
Several elements impact epoxy curing:
- Temperature: Warmer conditions speed up curing
- Humidity: High moisture levels slow down the process
- Epoxy thickness: Thicker layers take longer to cure
- Epoxy formulation: Some types cure faster than others
Ensuring Complete Cure
To achieve a full cure:
- Follow manufacturer’s instructions closely
- Maintain consistent temperature during curing
- Avoid touching or disturbing the epoxy while it cures
- Use a moisture meter to check surrounding wood moisture content
Curing Expectations
Epoxy drying time varies. Some products dry in 2-3 hours, while others need up to three days for a full cure. Always check the epoxy’s surface for tackiness before proceeding with further work. Remember, rushing the curing process can compromise the repair’s effectiveness and longevity.
| Epoxy Type | Initial Set | Full Cure |
|---|---|---|
| Fast-Setting | 2-3 hours | 24 hours |
| Standard | 6-8 hours | 48-72 hours |
| Slow-Setting | 12-24 hours | 3-7 days |
Safety Precautions
When working with epoxy wood hardener, safety is key. Taking the right steps keeps you safe and helps your project succeed.
Personal Protective Equipment (PPE)
Choosing the right PPE is vital. Always wear nitrile gloves to avoid skin contact. Safety goggles protect your eyes from spills. For extra safety, wear long sleeves and a respirator or mask when sanding.
Ventilation Practices
Good air flow is essential when using epoxy. Work in a room with open doors and windows. Fans help move air, reducing fume exposure and ensuring proper curing.
Contact Avoidance
Stay away from epoxy. If it gets on your skin, wash it off right away. Remove any contaminated clothes. Remember, epoxy is harmful to marine life, so dispose of it carefully. Once cured, it’s safe for household trash after 24 hours.
| Safety Measure | Importance | Recommended Action |
|---|---|---|
| Gloves | Essential | Wear nitrile gloves |
| Eye Protection | Critical | Use safety goggles |
| Ventilation | Vital | Open windows, use fans |
| Clothing | Important | Wear long sleeves |
| Respiratory Protection | Necessary for sanding | Use respirator or mask |

By following these safety tips, you’ll keep yourself safe and work in a secure environment. Always prioritize safety for the best results.
Tips for Best Results
To get the best results with epoxy wood hardener, pay close attention to detail and follow the right steps. Knowing how environment and technique affect your work will help your wood restoration project succeed.
Temperature and Humidity Considerations
Temperature and humidity greatly affect epoxy’s performance. For the best results, apply it in a room with temperatures between 60°F and 80°F. High humidity can slow down curing, and too much heat can cause it to harden too fast. Make sure the area is well-ventilated for the best conditions.
Layering Treatments for Severe Damage
For severe wood rot, applying multiple layers of treatment is key. Apply layers no thicker than 1/2 inch at a time. This method ensures proper curing and prevents overheating. For really damaged areas, use a wood hardener first to strengthen the wood fibers before applying epoxy.
Post-Application Monitoring
After applying epoxy, keep a close eye on the treated area. Look for tackiness or uneven curing, which could mean the epoxy wasn’t mixed or applied right. Regular checks help spot problems early. Remember, it can take up to 72 hours for full curing, depending on the environment. Being patient during this time ensures lasting results.
| Epoxy Type | Viscosity (cP) | Optimal Application |
|---|---|---|
| Mixed 105/205 | 975 | General purpose |
| Mixed 105/206 | 725 | Warm temperatures |
| Mixed 105/207 | 775 | Clear coating |
Common Mistakes to Avoid
When using epoxy wood hardener, it’s key to avoid application errors for the best results. Let’s look at some common mistakes and how to dodge them.
Dirty Surfaces
Working with dirty surfaces is a big no-no. Always clean and sand the wood well before applying epoxy. This ensures it sticks properly and avoids bubbles.
Make sure to remove all dust and debris. This creates a smooth surface for the epoxy to bond with.
Improper Mixing
Mixing mistakes can cause serious problems. Epoxy resin and hardener need to be mixed exactly 1:1 for the best results. Stir for 4-7 minutes to get it right.
Avoid overmixing to prevent air bubbles. Also, remember that mixing large amounts can make the resin heat up fast, shortening the work time.

Ignoring Cure Times
Rushing the curing process can mess up your project. Epoxy usually takes 48 hours to cure. But, temperature and humidity can change this.
Don’t sand or add more coats until it’s fully cured. Waiting at least a week before sanding is best for the best results.
| Mistake | Consequence | Prevention |
|---|---|---|
| Dirty surfaces | Poor adhesion, bubbles | Clean and sand thoroughly |
| Incorrect mixing ratio | Improper curing | Follow 1:1 ratio precisely |
| Rushing cure time | Weak finish, incomplete cure | Allow full 48-hour cure time |
By steering clear of these common mistakes, you’ll greatly boost your chances of a successful wood restoration project with epoxy hardener.
Troubleshooting Issues
Even with careful application, epoxy troubleshooting is sometimes necessary. Let’s explore common problems and solutions to ensure your wood restoration project succeeds.
Tackiness and Adhesion
If your epoxy surface remains tacky, it might not have cured properly. This often happens when the wood’s moisture content is too high – ideally, it should be below 20%. To fix adhesion problems, sand the tacky area lightly and reapply a thin layer of epoxy. Make sure the room temperature is between 60-80°F for optimal curing.
Uneven Cures
Uneven cures can result from improper mixing or application. If you notice patches that haven’t hardened, remove the uncured epoxy and clean the area. Then, mix a fresh batch, ensuring a 1:1 ratio of resin to hardener. Apply it evenly using a brush or roller for consistent results.
Reapplication
Sometimes, reapplication techniques are needed to achieve the desired outcome. If the first coat didn’t penetrate deeply enough, apply a second coat within 24 hours. For severe rot, you might need to use a system like CPES (Clear Penetrating Epoxy Sealer) followed by a filler epoxy. With over 20 years of experience in wood rot repair, many professionals recommend this two-step approach for lasting results.