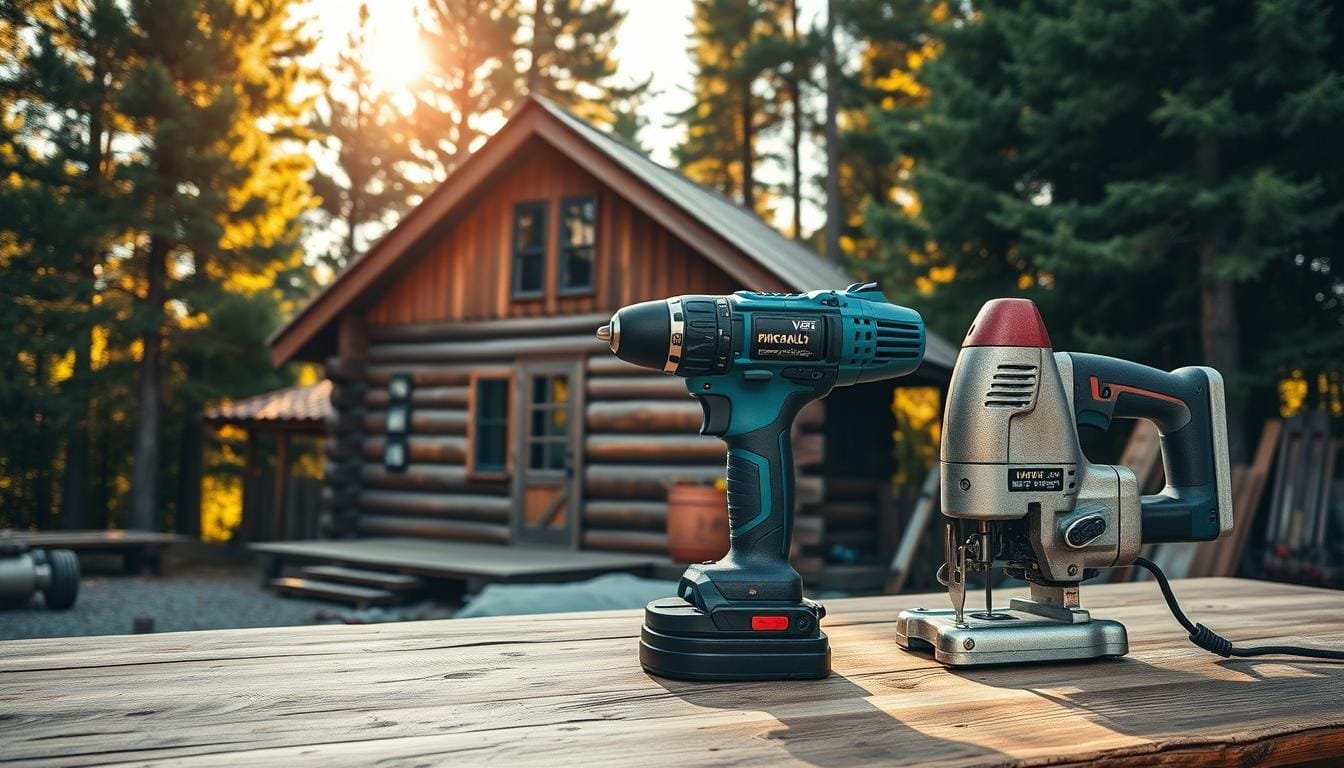
Living in a cabin or visiting one often teaches you a key lesson: you need tools. Whether you’re building a wilderness retreat or fixing up a rustic log home, the right tools make things easier. You’ll find yourself using certain tools over and over.
It’s not about having lots of tools. It’s about having fewer tools but better ones. A good cordless drill and driver set becomes your go-to, helping with bunk beds, shelving, hooks, and more.
This guide helps you pick the best drill for cabin construction that fits your needs. We’ll look at battery tech, torque, and key features for working with heavy timbers. You’ll learn which power tools for rustic cabin projects are worth it, beyond the marketing.
By the end, you’ll know which drilling and driving tools to buy. We’ll talk about powering tools in remote areas and what features are worth the extra cost when you’re far from the nearest store.
Why Your Drill Choice Matters in Cabin Construction
Choosing the right drill is more than just about power. It’s about finding a tool that fits the unique challenges of building a remote cabin. The best drill for cabin construction must handle tasks that go beyond typical home projects. You’ll need to drill pilot holes in hardwood logs and drive hundreds of screws through heavy timbers.
Before picking the most powerful drill, think about what you really need. Smaller 12-volt cordless drills are lighter than 18-volt ones. They’re great for light to medium drilling and driving tasks, making long work sessions easier.
Cabin building is tough, and your tools must be up to the task. You can’t just run to the hardware store when something breaks. Remote locations mean you have limited access to tools, power, and repair services.
Your drill must handle extreme conditions that would stop ordinary tools. Outdoor construction exposes equipment to dust, moisture, temperature swings, and physical impacts. A drill that works well in a controlled environment might not make it in harsh weather or when it gets clogged with sawdust.
The physical demands of cabin construction are high. You’ll spend hours drilling, driving, and moving around. A heavy drill can cause wrist strain and shoulder fatigue, making work harder over time.
During your cabin project, you’ll need different drilling abilities for different tasks. Framing work needs consistent torque for long screws. Foundation work requires hammer drilling. Securing big beams with lag bolts needs high torque that budget drills can’t handle.
| Construction Task | Drill Requirement | Why It Matters | Wrong Tool Consequence |
|---|---|---|---|
| Drilling hardwood logs | High torque, variable speed | Dense wood requires sustained power without burning out motor | Stalled motor, stripped bits, project delays |
| Driving structural screws | Impact driver or high-torque drill | Large fasteners need rotational force plus impact action | Stripped screw heads, wrist fatigue, incomplete seating |
| Foundation concrete work | Hammer drill function | Masonry requires percussion plus rotation | Damaged bits, inability to complete anchoring tasks |
| Extended remote sessions | Long battery runtime, backup batteries | No electrical outlets available for recharging | Work stoppages, wasted travel time, timeline delays |
An underpowered drill can cause a lot of frustration. You’ll struggle with tasks that should take minutes. Bits will get hot and dull fast. Motors will strain and might even burn out from too much use.
On the other hand, a drill that’s too big and powerful is a waste. You’ll carry extra weight all day for features you never use. The professional drill for homestead projects balances power, weight, and versatility to meet your specific needs.
Your drill choice affects your project’s timeline and quality. The right tool makes tasks efficient, keeping your project moving. It also reduces fatigue, so you can work longer and more precisely.
While budget is important, spending too little on a drill can cost more in the long run. A cheap drill that fails can lead to emergency purchases. Lost work time while waiting for new tools can also delay your project, which is a big problem when the weather is against you.
Understanding these factors helps you choose a professional drill for homestead projects that really meets your needs. The next sections will cover specific features, power options, and tool types to help you decide. You’ll learn which specs are most important and which marketing claims to ignore.
Understanding the Difference Between Drills and Drivers
Drills and impact drivers seem similar, but they serve different purposes. Knowing their differences makes your cabin building easier. These tools are designed for different jobs, saving time and effort.
Both tools can rotate bits, but they’re not interchangeable. Using an impact driver for drilling or a drill for driving screws is not efficient. Each tool has its own strengths for specific tasks.
The Core Mechanics of Traditional Drills
A traditional drill spins bits smoothly, thanks to its motor. You control the speed with the trigger, usually up to 2,000 RPM. The adjustable clutch system prevents screws from being overdriven.
Drills can handle various bit sizes, making them great for different materials. When working with wood, a cordless drill ensures clean holes.
Drills are best for tasks needing steady speed and control. They’re perfect for pilot holes, wiring, and delicate hardware installation. The variable speed trigger helps with different materials and bit sizes.
Impact Mechanism Technology Explained
Impact drivers use a unique mechanism. They combine rotation with rapid impacts. This creates a pulsing, high-torque action for driving fasteners with less effort.
The impact mechanism kicks in when resistance is met. It delivers quick, rotational force bursts. This design offers more torque than drills of similar size.

An impact driver is ideal for driving long screws in wood. Its pulsing action prevents bit camming out. You’ll hear a distinctive sound when it engages under load.
The hex chuck on impact drivers accepts only 1/4-inch hex shank bits. This limits versatility but allows for lightning-fast bit changes. Swapping bits is quick and easy, making it perfect for frequent changes.
| Feature | Standard Drill | Impact Driver |
|---|---|---|
| Primary Function | Drilling holes with precision | Driving screws and fasteners |
| Rotation Type | Smooth, continuous spin | Rotational impacts (hammer action) |
| Torque Output | 300-600 inch-pounds typical | 1,200-2,000+ inch-pounds |
| Chuck System | 3-jaw adjustable (various sizes) | 1/4-inch hex quick-release |
| Best Applications | Pilot holes, boring, hardware installation | Long screws, lag bolts, repetitive fastening |
Selecting the Right Tool for Each Task
Choosing the right tool becomes second nature with knowledge. Use a drill for precision and control. This includes drilling pilot holes and creating clean holes for dowels and hardware.
For tasks that involve a lot of fastening, use an impact driver. It’s great for framing, installing subflooring, and assembling timber frames. Its high torque and reduced fatigue make it essential for structural assembly work.
For foundation work with concrete piers or stone, you need a hammer drill or rotary hammer. But for wooden construction, having both a drill and impact driver is key.
Many builders drill pilot holes with a cordless drill and then use an impact driver for fastening. This method prevents splitting and takes advantage of the impact driver’s torque. The few seconds spent switching tools are worth it for cleaner results and less strain.
Consider the bit changes you’ll make throughout the day. Using dedicated tools for drilling and driving saves time and effort. Your drill and impact driver can stay equipped with the right bits, improving workflow efficiency.
Corded vs Cordless: Power Options for Remote Building Sites
Building a remote cabin is a unique challenge. You need to keep your tools running without electricity. Your choice of power source affects your work and project timeline. Understanding the strengths and weaknesses of cordless and corded tools is key to success.
Choosing between battery-powered and plug-in drills is more than just convenience. It affects your ability to work efficiently in remote areas. Modern technology has made both options better, making this decision more complex.
The Case for Cordless Freedom
A cordless drill for log cabin construction offers unmatched mobility. You can move freely without dealing with extension cords. This is invaluable for exterior work, like installing rafters high up or building outbuildings far from your main structure.
Modern lithium-ion batteries have changed cordless performance. The power gap between corded and cordless tools has almost disappeared for most cabin tasks. The DeWalt 20V Max and Makita 18V platforms deliver torque similar to corded models, without being tied to a power source.
Battery voltage is critical in remote building. While 12-volt drivers are good for lighter tasks, 18-volt to 20-volt systems are needed for heavy-duty work. These systems are not only more powerful but also more durable for wilderness construction.
The main challenge with cordless tools in off-grid locations is recharging batteries. You need a reliable power source, like a generator, solar panel, or vehicle inverter. Planning your battery rotation before heading to the site prevents downtime when batteries die.
When Corded Power Makes Sense
An electric drill for off-grid building offers unlimited runtime and consistent power. For tasks like drilling through massive logs or driving screws, corded tools are perfect. The power never fades, even after hours of use.
Corded drills are often cheaper than cordless ones. For those on a tight budget, a quality corded drill with a generator offers professional-level performance without the cost of batteries and charging systems. This is ideal if you’re already using a generator for other tools.
The downside of corded drills is being tied to your power source. You’ll need heavy-duty extension cords, and working on roofs or distant structures is harder. When choosing a drill, think about your work’s stationary versus mobile tasks. Our drill buying guide can help you decide.
Weather affects corded tools differently than cordless ones. Extension cords can stiffen in cold and create tripping hazards in snow. But, corded tools don’t lose power like cordless ones do in cold weather.
Generator Requirements for Off-Grid Building
Most cabin builders using corded tools need a generator between 2,000 and 4,000 watts. A typical corded drill uses 6 to 10 amps at 120 volts, needing about 720-1,200 watts. Your generator must handle the starting surge, which can double the running wattage.
Generator sizing gets complex when running multiple tools. For a drill, circular saw, and battery chargers, calculate total amperage and add 20% buffer. A 3,500-watt generator usually handles most scenarios well.
Fuel consumption affects your building schedule in remote areas. A mid-size generator at 50% load burns a gallon every 8-10 hours. For long building sessions, fuel storage and transportation are big logistical challenges.
| Power Option | Best For | Runtime | Initial Cost | Mobility |
|---|---|---|---|---|
| Cordless 18-20V | General cabin framing, roofing, mobile work | 2-4 hours per battery | $150-350 (with 2 batteries) | Excellent |
| Cordless 12V | Light assembly, finish work, tight spaces | 1-3 hours per battery | $80-180 (with 2 batteries) | Excellent |
| Corded Drill | Stationary work, repetitive tasks, budget builds | Unlimited with power | $60-150 | Limited by cord |
| Generator (3500W) | Supporting multiple corded tools | 8-10 hours per gallon | $400-700 | Requires setup |
The hybrid approach is best for most cabin builders. Use quality cordless tools for flexibility and mobility, but have a corded backup for long sessions. Add a reliable generator to your site equipment, and you’ll have power for every scenario.
This strategy provides redundancy when batteries die or generators need refueling. It lets you match the tool to the task—using cordless for mobile work and switching to corded for stationary tasks.
Battery Technology for Wilderness Construction
Building a cabin in the wilderness means your battery-powered drill for remote building needs the right battery. The right battery system keeps your project moving without constant charging. Knowing about voltage, capacity, and smart battery management is key to avoiding downtime.
Battery technology has improved a lot in recent years. Modern lithium-ion batteries are more powerful, last longer, and are lighter than older types. This is important when you’re far from power outlets and need your tools to work well all day.
Voltage Requirements for Heavy-Duty Tasks
The right battery voltage is important for your drill to handle tough cabin construction tasks. Lower voltage systems are okay for light projects, but for serious timber work, you need more power. The voltage you choose affects how well your drill can drill and fasten.
The 18V and 20V battery platforms are basically the same, with different names. An 18V Milwaukee battery and a 20V DeWalt battery have similar power. This means they can handle similar tasks well.
For cordless drill for log cabin construction, the 18V-20V class is the best. These batteries have enough power to drive 6-inch lag bolts through solid timber. They are also light and last all day for building.
Lighter 12V systems are good for finish carpentry and light drilling. But for boring through logs or driving many fasteners, you’ll need more power. The 18V-20V class gives you the power you need without being too heavy.
Flexvolt and High-Capacity Options
Advanced battery systems offer more flexibility for tough projects. Flexvolt technology automatically adjusts voltage based on the tool you’re using. This means you can use one battery for different tools, making your work easier.
This flexibility lets you build a tool system around one battery. You don’t need different batteries for different tools. High-capacity batteries in the 9.0Ah to 12.0Ah range give you more time working without needing to recharge, but they are heavier.
Amp-Hour Ratings and Runtime
Voltage shows how powerful a battery is, but amp-hour (Ah) ratings tell you how long it lasts. A higher Ah rating means longer runtime before you need to recharge. This helps you choose the right battery for your work.
A small 2.0Ah battery might last for 50-75 holes in dimensional lumber. This is good for small repairs or projects. But for a day of cabin construction, you’ll need more batteries, causing delays.
Medium-capacity 4.0Ah to 5.0Ah batteries are a great choice for most builders. They give you several hours of continuous drilling and driving without being too heavy. For long work sessions, 6.0Ah to 8.0Ah batteries keep you going without needing to swap batteries.
How long your battery lasts also depends on your tasks. Drilling through oak logs drains batteries faster than driving screws into pine. For heavy tasks, you need higher capacity batteries to keep working all day.
Managing Multiple Batteries in Remote Locations
Smart battery management is key when building far from power. The right strategy keeps your tools running and reduces downtime. A well-planned battery system prevents dead tools at critical moments.
For serious cabin construction, you need three batteries per tool. One battery powers your drill, another charges while you work, and a third is backup. This rotation ensures you always have power when you need it.
For long wilderness projects, consider using four or five batteries. This gives you enough power for a full day, even during intense work. You can charge all batteries in the evening for the next day, avoiding mid-day charging delays.
Keep your batteries in good condition by managing temperature. Lithium-ion batteries lose power in cold weather—sometimes up to 40% in freezing temperatures. Store batteries in an insulated box or inside your cabin at night in cold weather. Extreme heat also damages batteries, so avoid direct sunlight or hot vehicles.
If you’re really off-grid, solar battery chargers are a great solution for keeping your tools powered. A good power inverter connected to your vehicle is another option when generator power isn’t practical. Multi-port charging stations charge three or four batteries at once during breaks.
| Battery Platform | Nominal Voltage | Capacity Range | Average Runtime | Best For |
|---|---|---|---|---|
| Milwaukee M18 | 18V | 1.5Ah – 12.0Ah | 2-6 hours | Heavy-duty professional construction |
| DeWalt 20V Max | 18V nominal | 2.0Ah – 10.0Ah | 2-5 hours | Versatile general construction tasks |
| Makita LXT 18V | 18V | 2.0Ah – 6.0Ah | 2-4 hours | Balanced power and weight efficiency |
| Bosch 18V | 18V | 2.0Ah – 8.0Ah | 2-4 hours | Precision work with reliable runtime |
Keeping your batteries in good shape is important for their performance. Store batteries at partial charge (40-60%) during long breaks. Avoid letting batteries drain completely—lithium-ion cells last longer when recharged before they’re fully empty. Clean battery contacts regularly to keep electrical connections strong.
Investing in quality batteries is worth it for your cabin build. Cheap batteries often fail early or don’t perform well. Stick with well-known brands or reputable third-party options. Your battery-powered drill for remote building needs reliable power that won’t let you down.
Torque Requirements for Timber Frame and Log Work
Knowing about torque ratings is key when working with big timbers and heavy hardware. A high-torque drill for wilderness construction is essential for tough tasks. It’s much stronger than tools for hanging pictures or putting together furniture.
Torque is the twisting power that helps your drill bit go through thick wood or turn big fasteners. Without enough torque, even the sharpest bits and strongest screws won’t work. Your drill will struggle, get too hot, or stop working when it can’t handle the job.
Making Sense of Torque Numbers
Drill torque is measured in inch-pounds, showing how much twisting force it has. For cabin building, you need a drill with 400 to over 1,200 inch-pounds of torque. These numbers show if your drill can do the job.
Think of torque like weight classes for tools. Lower torque drills (300-500 inch-pounds) are good for standard drilling and light fastening. Medium torque drills (500-800 inch-pounds) handle most framing tasks, like driving 3-inch deck screws.
A heavy duty drill for timber frame construction needs to be in the high-torque category of 800+ inch-pounds. This power is needed for driving 6-inch structural screws, boring large holes, and installing lag bolts.

Powering Through Heavy Fasteners and Dense Timber
Lag bolts and large screws need a lot of power to go through wood. A 5/8-inch lag bolt through two 6×6 posts requires a lot of twisting force. If your drill doesn’t have enough torque, it will strain, sound like it’s working hard, and move slowly.
Dense hardwoods and green timber are even harder to work with. Fresh-cut logs are wet and hard to drill through. Air-dried oak, hickory, or maple are even harder. Standard drills might handle some of these tasks, but they will get hot and wear out fast.
Professional builders use drills with torque ratings of 1,000 inch-pounds or higher for timber work. This extra power helps avoid tool strain and keeps work pace steady. You’ll work faster and with less effort when your drill has extra power.
| Torque Range | Best Applications | Typical Fastener Size | Timber Work Capability |
|---|---|---|---|
| 300-500 inch-pounds | Light drilling, basic fastening | Up to 2.5-inch screws | Softwood trim and finishing only |
| 500-800 inch-pounds | General framing, standard construction | 2.5 to 4-inch screws | Dimensional lumber framing |
| 800-1,200+ inch-pounds | Timber frame, log construction, structural work | 4 to 8-inch screws, lag bolts | Heavy timbers, dense hardwood, green logs |
Why Brushless Technology Matters for Sustained Performance
Brushless motors are a big step up in cordless drill technology. They use electronic circuits to power the motor, unlike traditional brushed motors. This difference leads to real benefits for cabin construction.
A brushless motor gives more torque per battery charge because it loses less energy as heat and friction. You’ll get 25-50% longer battery life, which is key when working off-grid. Fewer battery swaps mean less downtime.
Brushless motors also stay cooler under heavy load. During long fastening sessions, they keep delivering power without overheating. Traditional motors slow down and get hot, forcing you to stop and wait for them to cool down.
The smart electronics in brushless systems adjust power based on resistance. They use less power when drilling through easy material and more when hitting a knot or dense grain. This smart power management saves battery life and motor longevity, making your tool reliable for years.
For remote wilderness construction, brushless motors last much longer. They don’t have carbon brushes to wear down, so they last three to five times longer than brushed motors. This makes them a smart investment for demanding timber work.
Brushless drills cost more than brushed models, but they’re worth it. They offer better torque, longer runtime, and longer tool life. When choosing a high-torque drill for wilderness construction, make sure it’s brushless.
Best Drill for Cabin Construction: Complete Selection Guide
Choosing a durable drill for mountain cabin work means looking beyond flashy marketing claims. You need to focus on practical capabilities. The best drill for cabin construction has specific features for working with timber, remote locations, and oversized fasteners. This guide will help you know what to look for in your primary drilling tool.
Not every feature advertised is important. Some features impact your daily productivity, while others just increase the price without adding value to your cabin project.
Essential Features to Prioritize
Certain drill features are key when building in wilderness settings. These features should be your top priority because they affect every task you’ll do throughout your project.
Chuck Capacity and Grip Strength
The chuck is the adjustable clamp at the front of your drill that holds bits in place. Chuck capacity determines the maximum bit shank diameter your tool can accommodate.
Standard light-duty drills have ⅜-inch chucks, which are fine for basic projects. But, a ½-inch chuck is essential for cabin construction. It lets you use larger bits for boring oversized holes in timber framing.
Grip strength is as important as capacity. A quality keyless chuck should hold bits firmly without slippage, even when drilling through dense hardwood logs. Cheaper drills often have weak chuck mechanisms that let bits slip or wobble during demanding tasks.

Built-in LED lights might seem like a minor convenience feature, but they’re invaluable during cabin construction. You’ll often work in shadowed areas under eaves, inside partially enclosed structures before electrical installation, or during early morning and late evening sessions.
Quality LED work lights illuminate your exact drilling point instead of providing general area lighting. Look for drills with lights positioned near the chuck that activate automatically when you pull the trigger.
Performance Specifications That Matter
Raw specifications tell you what your tool can actually accomplish under real working conditions. Understanding these numbers helps you match drill capabilities to your specific cabin construction needs.
RPM and Speed Settings
RPM (rotations per minute) indicates how fast the drill bit spins. The best drill for cabin construction typically offers two-speed ranges that you can switch between:
- Low gear: 0-500 RPM for high-torque drilling and driving large fasteners through dense timber
- High gear: 0-1,800 to 2,000 RPM for fast drilling in softer materials and smaller diameter holes
- Variable speed trigger: Allows precise speed control within each gear range for different materials and tasks
Variable speed control lets you start slowly for precise bit placement, then ramp up speed once the hole is established. This prevents bits from wandering across wood surfaces and gives you better control when drilling at awkward angles.
Maximum Drilling Capacity
Manufacturers specify the largest hole diameter their drill can bore through different materials. These maximum drilling capacity ratings provide realistic expectations for your tool’s capabilities.
| Material Type | Minimum Capacity | Ideal Capacity | Common Applications |
|---|---|---|---|
| Wood | 1.5 inches | 2+ inches | Timber boring, cable runs |
| Metal | 0.5 inches | 0.75 inches | Hardware installation, metal brackets |
| Masonry | 0.5 inches | 1 inch | Concrete piers, stone foundations |
For cabin construction, prioritize wood drilling capacity. A minimum wood drilling capacity of 2 inches ensures you can handle typical timber framing requirements without constantly maxing out your tool’s capabilities.
Durability Factors for Outdoor Construction
Cabin building exposes your tools to harsh conditions that would never occur in a controlled workshop environment. Your durable drill for mountain cabin projects must withstand dust, moisture, temperature swings, and physical abuse that comes with outdoor construction.
Rubberized overmold grips serve dual purposes beyond comfort. They improve control during extended use and protect the tool body from impact damage when you inevitably drop it on rocks, logs, or concrete piers.
Internal components determine long-term reliability. Look for these durability indicators:
- Metal chuck housing: Plastic housings crack under impact; metal survives drops and rough handling
- All-metal gearbox: Metal gears outlast plastic components by years when drilling through hardwood
- Sealed motor housing: Protects internal electronics from sawdust and moisture intrusion
- Reinforced battery connection: Heavy-duty latches prevent battery detachment during demanding tasks
Cold weather performance deserves consideration for mountain cabin projects. Temperature extremes affect both tool materials and battery performance, so choose models specific to your climate range.
The best drill for cabin construction balances all these factors without compromise. By understanding which features directly impact your work quality and which represent unnecessary extras, you can select a tool that performs reliably throughout your entire building project and beyond.
Hammer Drills for Foundation and Structural Work
Building a cabin is more than just working with wood. You also need tools for masonry work. Standard drills are great for most wood tasks, but hammer drills are needed for concrete and stone.
A hammer drill has a special feature. It drills and hammers at the same time. This lets you drill into hard materials like concrete and stone.
Recognizing When Hammer Function Becomes Essential
Not every task in cabin building needs a hammer drill. You’ll mostly work with wood. But, there are times when you really need a hammer drill.
Installing anchor bolts into concrete piers is one such task. These anchors hold your timber sill plates to the foundation. Without a hammer drill, you can’t make the holes needed for these anchors.
Drilling through stone foundation walls is another situation where hammer drills are key. Whether it’s for electrical, plumbing, or ventilation, standard drills will fail.
Setting concrete anchors for deck ledger boards and porch posts also requires hammer drilling. These anchors need to be drilled into solid concrete to hold heavy loads.

Many drills today have a hammer mode along with standard functions. This makes them versatile for cabin builders who need to drill into masonry sometimes.
Tackling Concrete Piers and Stone Foundation Projects
Concrete piers are common in cabin foundations, often due to frost heave or uneven terrain. They need anchor points to connect the wooden structure above.
A drill with hammer function works well for drilling a few dozen holes. It has enough power to drill through concrete. You can then install anchor bolts and beam hardware.
Stone foundations are different. Natural stone can be hard to drill through. Some stones are easier than others. Be patient and let the tool do the work.
For drilling into concrete or stone, use carbide-tipped bits. They can handle the hammering and stay sharp. Steel bits will dull quickly.
Understanding When Rotary Hammers Become Necessary
While combination drill-drivers are good, they have limits. For a lot of masonry work, a dedicated rotary hammer is better.
Rotary hammers are made for concrete and masonry. They have more power, which means faster drilling and bigger holes.
Rotary hammers use SDS chucks for better hammering. This design protects the tool and lets it drill all day without overheating.
For a full concrete foundation or a cabin with a lot of stone, a rotary hammer is a must. It’s also good for demolition tasks.
| Tool Type | Impact Energy | Best Applications | Ideal Project Scope |
|---|---|---|---|
| Combination Drill-Driver with Hammer Mode | Low to Moderate (0.5-1.5 ft-lbs) | Installing anchor bolts, occasional masonry drilling, utility penetrations | Cabins with minimal masonry work, fewer than 20 concrete holes |
| Standard Rotary Hammer | Moderate to High (1.5-4 ft-lbs) | Concrete foundation drilling, extensive anchor installation, stone foundation work | Full concrete foundations, significant stonework, 20-100+ holes |
| Heavy-Duty Rotary Hammer | High to Very High (4-8+ ft-lbs) | Large diameter boring, concrete demolition, commercial-grade masonry | Major foundation modifications, commercial projects, extreme masonry demands |
Choosing between a combination tool and a rotary hammer depends on your project. For most cabins, a combination drill-driver is enough. It’s versatile and works well for occasional masonry tasks.
But, if you’re building a cabin with a poured concrete foundation or a lot of stone, get a rotary hammer. It’s worth the investment for the time and effort it saves.
If you only need a rotary hammer for the foundation, consider renting one. This way, you have the right tool for concrete work without a long-term investment. After the foundation is done, your combination drill-driver will handle the rest.
Impact Drivers for Wooden Structures and Framing
Impact drivers look like regular drills but they have special abilities for cabin building. They are made for driving screws through heavy materials. This is key for cabin building, where you’ll use screws a lot more than drill holes. Knowing why you need an impact driver is vital for working well.
The secret of an impact driver for wooden structures is its hammer-and-anvil mechanism. It doesn’t keep rotating like drills do. Instead, it hits fast many times a second. This makes it push harder with less effort from you.
Building a cabin in the wilderness is easier with impact drivers. They make a big difference in how fast and comfortable you work. They can make up to 3,000+ inch-pounds of torque, way more than drills.
Superior Performance for Fastening Applications
Impact drivers beat standard drills for fastening in many ways. They push force to the fastener, not your hand and wrist. This lets you just guide the tool.
They also stop cam-out, which damages screws and wood. A high-torque drill for wilderness construction benefits a lot from impact technology with tough materials.
Impact drivers are also smaller than drills. This makes them great for tight spaces in cabin building. They’re perfect for installing decking, wall panels, or working in small areas.

Powering Through Dense Timber and Heavy Logs
Driving screws through solid wood is a big challenge in cabin building. Standard drills often struggle with 4-inch to 6-inch screws in hard woods.
Impact drivers make this easy. Their hammering action breaks through wood that drills can’t. You’ll see the difference when securing timber framing or attaching log walls.
These tools keep their speed even when working hard. Unlike drills, which slow down, impact drivers just hit faster. This means you work faster and get less frustrated.
For lag bolts or big fasteners, impact drivers with hex-shank adapters are perfect. They can do tasks that used to need wrenches or socket sets. This makes them essential for high-torque drill for wilderness construction jobs.
Minimizing Physical Strain During Extended Work
Cabin building means driving lots of screws. Using a drill for this is hard on your wrist, forearm, and shoulder. It can lead to injuries.
Impact drivers greatly reduce this strain by letting the tool handle the twisting. You just hold it steady. This is great for overhead work.
Modern impact drivers are also light. They weigh less than 3 pounds with battery, unlike drills. This makes a big difference after hours of use.
Quick-Change Hex Chuck Benefits
The quarter-inch hex chuck on impact drivers allows tool-free bit changes in seconds. Just pull the collar, swap bits, and release. No need for a chuck key.
This speed is important. In cabin building, you often switch bits for different screws. With an impact driver, each change is quick. This saves time.
The hex connection also holds bits better than round-shank chucks. This means no slipping under heavy loads. It’s key for structural screws and lag bolts.
There are many hex-shank accessories now. You can find drill bits, countersinks, and more. This means your impact driver for wooden structures can do more tasks than ever.
| Feature | Impact Driver | Standard Drill | Advantage for Cabin Building |
|---|---|---|---|
| Torque Output | 1,500-3,000+ in-lbs | 400-800 in-lbs | Drives long screws through dense timber without stalling |
| Wrist Strain | Minimal (force absorbed internally) | High (constant twisting) | Reduces fatigue during extended fastening sessions |
| Bit Changes | Tool-free hex chuck (2-3 seconds) | Keyless chuck (15-20 seconds) | Faster workflow when alternating between fastener sizes |
| Cam-Out Prevention | Excellent (impact action) | Moderate (constant pressure) | Protects screw heads and surrounding wood from damage |
| Compact Length | 5-6 inches (head to back) | 7-9 inches (head to back) | Works in tight spaces between framing members |
Impact drivers are the best choice for fastening in cabin building. They offer high torque, less fatigue, quick bit changes, and are compact. While you’ll need a drill for some tasks, impact drivers will be your go-to. They provide the power and efficiency needed for cabin building without wearing you out.
Drill and Driver Combo Kits for Versatile Cabin Building
Buying a combo kit is a smart move for cabin building. These kits come with a drill-driver and an impact driver, two batteries, a charger, and a case. They are perfect for beginners or those upgrading their tools.
Combo kits are great for cabin work. The drill is for boring holes, and the impact driver for fastening. This saves time and effort.
Matching Systems Work Better Together
Tools from the same brand work better together. They share batteries and controls, making work faster and less error-prone.
Brands like DeWalt offer complete combo kits. These kits include tools like saws and drivers. They all use the same power system.
But, remember, tools need different powers. Sawing lumber needs more power than screwing softwood. Choose a kit that fits your needs.
Batteries That Work Everywhere
Battery interchangeability is key for remote building. Any battery fits any tool in your system. This is vital for battery-powered drills in remote areas.
Quality kits come with at least two batteries. This means you always have power, even when charging. It keeps you working without breaks.
For off-grid cabins, this is even more important. Charge batteries when you can, then work on stored power. A cordless drill for log cabin work means no battery worries.
Look for kits with 4.0Ah or higher batteries. Smaller batteries won’t last all day. Better kits have 5.0Ah or 6.0Ah batteries for more power.
Real Money Savings on Complete Packages
Combo kits save money. Buying tools separately costs 20% to 40% more. Manufacturers offer discounts to encourage buying in bulk.
Here’s a comparison for a professional-grade combo kit:
| Item | Individual Price | Combo Kit Price |
|---|---|---|
| Brushless Drill-Driver | $179 | $299 total |
| Brushless Impact Driver | $169 | |
| Two 5.0Ah Batteries | $179 ($89.50 each) | |
| Dual Port Charger | $79 | |
| Carrying Case | $35 | |
| Total Savings | $641 – $299 = $342 saved (53%) |
Savings on tools mean more for other needs. You can buy specialty tools for your cabin.
When choosing a combo kit, look for these features:
- Brushless motors for efficiency and long life
- 18V-20V voltage class minimum for heavy work
- All-metal gearbox construction for durability
- LED work lights for better visibility
- Belt clips and side handles for easy carrying
For lighter work, consider compact kits. But for serious cabin building, go for full-size kits. They handle big fasteners and hardwoods better.
The right combo kit gives you essential tools, extra batteries, and saves money. For remote cabin builders, combo kits are a smart start for a professional tool collection.
Speed Settings and Clutch Control for Precision Work
Speed and torque control are key for professional drill for homestead projects. They ensure quality results. Adjusting speed and clutch settings is vital for perfect fastening.
These features are essential for cabin construction. You might drill oak beams in the morning and trim pine walls in the afternoon. Without control, tasks become challenging.
Mastering Variable Speed Triggers and Electronic Controls
Variable-speed triggers let you control drill speed. Light pressure is slow, and full pressure is fast. This is important for precise work.
For cabin building, this control is critical. It helps with starting holes and driving screws. You can adjust speed for different materials without changing tools.
Most quality drills have two or three mechanical speed ranges. This adds versatility:
- Low gear (0-500 RPM): High torque for driving screws and drilling large holes
- High gear (0-1,800+ RPM): Lower torque but faster speeds for drilling small to medium holes
- Electronic feedback systems: Monitor load and adjust power delivery to maintain consistent speed under varying resistance
Electronic speed controls keep performance steady. They adjust power when encountering knots or dense grain. This prevents stalling and ensures smoother results.
Selecting Appropriate Clutch Settings for Different Materials
Adjustable clutch settings are vital for durable drill for mountain cabin construction. The clutch stops the drive system at a preset torque level. This prevents over-driving screws and stripping screw heads.
Quality drills offer 15-25 clutch settings plus a drill mode. Knowing how to use these settings improves your fastening precision.
| Clutch Range | Best Applications | Material Types |
|---|---|---|
| Settings 1-5 | Small screws, delicate trim work | Soft woods like pine, cedar, spruce |
| Settings 6-15 | Standard construction fastening | Dimensional lumber, plywood |
| Settings 16-25 | Large screws, lag bolts | Dense hardwoods like oak, hickory |
| Drill Mode | Drilling holes (no clutch) | All materials when drilling |
Start with a lower clutch setting than you think you need. You can always increase it if the clutch disengages too early. Starting too high risks damaging your materials or fasteners before you realize the setting needs adjustment.
Preventing Overdriving in Soft Woods
Overdriving screws in soft woods creates unsightly divots and weakens connections. This is a problem in cabin construction where exposed timbers are part of the aesthetic appeal.
Lower clutch settings (1-5) work well for driving small screws in soft materials. The clutch stops the driver before the screw head crushes the wood fibers or sinks below the surface. This prevents both cosmetic damage and structural weakening.
When installing trim, cabinets, or decorative elements on soft wood surfaces, use clutch settings at the lower end of the range. Test your setting on scrap material first. The screw head should sit just flush with the surface without creating a depression.
Adjusting for Hardwoods and Dense Timbers
Dense hardwoods require a different approach. Using clutch settings that are too low results in screws that don’t seat fully, leaving heads protruding above the surface.
Higher clutch settings (16-25) or drill mode ensure fasteners seat completely in oak, hickory, or other dense timbers. You may need to drill pilot holes first to prevent splitting, even near board ends.
When working with large lag bolts in heavy timber framing, bypass the clutch entirely by selecting drill mode. These applications require full torque without interruption. The fastener and material can handle the force, and proper seating is critical for structural integrity.
Variable-speed drive combined with a light touch makes delicate tasks like countersinking possible. You maintain complete control over how the fastener seats, adjusting your trigger pressure as the screw head approaches the surface.
Weather Resistance and Durability for Mountain Cabin Projects
Building a cabin in the mountains is tough on your tools. Rain, snow, dust, and temperature changes test them like never before. Choosing a durable drill for mountain cabin work means picking tools that can handle the weather.
Remote sites expose your tools to harsh conditions. Morning dew and afternoon storms are common. Sawdust and humidity mix to clog your tools.
Investing in weather-resistant tools pays off. They keep working even in tough conditions. Professional-grade drills and drivers are made to handle outdoor challenges.
Keeping Your Equipment Safe from Water and Wood Particles
Moisture is a big threat to power tools for rustic cabin work. No drill is fully waterproof, but good ones have moisture-resistant features. Sealed switches keep water out of electrical parts.
Tools with protected battery contacts and rubber gaskets keep moisture away. This stops corrosion and keeps batteries working well. Good tools also have ventilation systems to keep dust out and moisture in.
Sawdust can damage your tools more than just dirt. It’s like abrasive powder that wears down gears and bearings. It can even cause electrical shorts.
Professional tools have sealed gearboxes and air intakes to keep contaminants out. Regular cleaning helps remove dust before it causes problems.
How Cold Temperatures Affect Your Drilling Equipment
Cold weather is tough on battery tools. Lithium-ion batteries lose power when it’s cold. At 20°F, you might get half the battery life you’d expect.
Keep spare batteries warm to maintain their power. Store them in a heated vehicle or inside the cabin. Use a warm battery in your durable drill for mountain cabin work when a cold one runs out.
Cold weather also makes tools harder to use. Grease and lubricants get thick, slowing down parts. Let tools warm up before using them fully. Start with light work to warm them up naturally.
Tool housings also face challenges in cold. Cheap plastic gets brittle and cracks easily. Quality tools use strong polymers that stay flexible in cold weather. Metal frames inside prevent the housing from breaking.
Construction Features That Withstand Job Site Abuse
Professional power tools for rustic cabin projects have rugged designs. Impact-resistant polymer housings with metal frames can handle drops and bumps. These designs are strong but light.
Rubber overmolds on quality drills are great for grip and shock absorption. They protect the tool and user from drops and vibrations. This makes tools last longer on the job site.
Chuck construction shows the difference in tool quality. Metal chucks last longer than plastic ones and prevent damage from drops. Metal belt clips and hooks also last longer than plastic ones. These small details make tools more durable.
| Durability Feature | Professional Grade | Consumer Grade | Performance Impact |
|---|---|---|---|
| Housing Material | Reinforced polymer with metal frame | Standard plastic shell | 3x better drop resistance |
| Moisture Protection | Sealed switches and gaskets | Basic weather resistance | Extended life in humid conditions |
| Gearbox Design | Fully sealed with protective vents | Basic dust shields | Reduced maintenance and longer lifespan |
| Chuck Construction | All-metal housing and jaws | Plastic body with metal jaws | Prevents catastrophic failure from drops |
Proper tool storage helps your tools last longer. Use a heavy-duty toolbox to keep tools organized and dry. Keep tools off the ground to avoid moisture.
For tools you carry, a good soft bag protects them during transport. Keep tools organized and dry when not in use. Simple storage habits can make a big difference.
Knowing about durability helps you choose and care for your tools. Spending a bit more on weather-resistant tools saves you money in the long run. They keep working even when cheaper tools fail.
Top Power Tool Brands for Professional Homestead Projects
Choosing the right power tool brand is key when building a cabin. These brands have developed cordless tools that offer top-notch power and reliability. They grow with your building needs.
For homestead projects, you need tools that can handle tough tasks. These brands offer tools built for demanding timber work and harsh weather. They are perfect for cabin construction.
Buying tools from one brand can save you money. Their batteries work with many tools, so you don’t need to buy new batteries for each one. This approach saves money on big projects.
Milwaukee M18 Fuel System
Milwaukee is known for its powerful tools. Their M18 Fuel line has a brushless motor for great performance. It has over 200 compatible tools, making it a top choice.
Their batteries have advanced electronics for better performance. Milwaukee’s Redlink Plus system prevents overheating and damage. This helps your tools last longer on tough projects.
Milwaukee 2804-20 M18 Fuel Hammer Drill
This hammer drill has 1,200 inch-pounds of torque for heavy drilling. It has a brushless motor that runs cooler and lasts longer. It’s great for both concrete and timber.
The all-metal chuck holds bits well, even under heavy loads. Milwaukee offers a five-year warranty on this drill. It’s lightweight but powerful.
Milwaukee 2853-20 M18 Fuel Impact Driver
This impact driver has 2,000 inch-pounds of torque for tough fasteners. It’s compact for tight spaces and has four-mode drive control. This lets you adjust speed and power for different materials.
The hex chuck accepts standard driver bits and changes quickly. Milwaukee designed this for professionals who drive many fasteners daily. It reduces wrist fatigue.
DeWalt 20V Max Platform
DeWalt’s 20V Max system is popular in North America. It offers great performance and value. It has over 200 tools and works well with older batteries.
DeWalt tools are tough and last a long time. They work well in harsh conditions. The brand has a wide service network, making parts and repairs easy to find.
DeWalt DCD999B 20V Max Hammer Drill
This drill has 820 unit watts out of power. It has three speeds for different tasks. It’s great for high-torque and fast drilling.
The drill has an electronic clutch with 11 precision settings. It prevents over-driving screws. It also has an LED light for working in dark spaces.
DeWalt DCF887B 20V Max Impact Driver
This impact driver has up to 1,825 inch-pounds of torque. It has three speed settings for different fastening tasks. It prevents damage to fasteners.
The driver is lightweight and easy to use overhead. It accepts standard hex bits and has one-handed bit loading. DeWalt designed it to reduce fatigue.
Makita LXT 18V Series
Woodworkers and finish carpenters like Makita for its smooth operation. The LXT 18V platform has over 275 tools. Makita batteries are known for their long life and consistent power.
Makita pioneered lithium-ion battery technology. Their star protection computer controls prevent damage. This drill maintains power even when the battery is low.
Makita XPH12Z 18V Hammer Driver-Drill
This compact tool combines hammer drill and driver functions. It has 620 inch-pounds of torque and dual speed ranges. It automatically adjusts speed and torque during use.
A built-in LED light illuminates the work area. The tool is durable and resistant to dust and water. Makita’s extreme protection technology keeps it safe during outdoor construction.
The hammer drill function is great for concrete and masonry. You can switch between modes easily. The rubberized handle reduces vibration and improves comfort.
Bosch Professional 18V Line
Bosch brings European engineering to their tools. Their 18V system has electronic cell protection for battery life. Bosch tools are known for their durability and user satisfaction.
The Flexiclick system lets you attach different chuck types to the same drill. This versatility saves you from needing multiple drills. It’s perfect for remote building sites.
Bosch offers fewer tools than some brands but covers essential cabin building tasks. Their tools are built to last with metal gear housings and motor protection. Bosch focuses on quality over quantity.
| Brand Platform | Hammer Drill Torque | Impact Driver Torque | Total Tool Ecosystem | Best Feature |
|---|---|---|---|---|
| Milwaukee M18 Fuel | 1,200 in-lbs | 2,000 in-lbs | 200+ tools | Maximum power output |
| DeWalt 20V Max | 820 UWO | 1,825 in-lbs | 200+ tools | Widespread availability |
| Makita LXT 18V | 620 in-lbs | 1,550 in-lbs | 275+ tools | Largest tool selection |
| Bosch Professional 18V | 663 in-lbs | 1,650 in-lbs | 100+ tools | European engineering quality |
Each platform offers reliable performance for cabin construction. Your choice depends on what matters most to you. All brands have great warranties and support for professionals.
Start with a combo kit that includes a hammer drill and impact driver. These kits are a good value. You get matching batteries and a charger for both tools.
Investing in quality tools pays off in the long run. These platforms support your building projects for years. Choose the brand that fits your style and goals.
Essential Drill Bits and Accessories for Log Cabin Construction
Choosing the right drill is just the start. You also need the right bits and accessories for each task. For timber frame and log construction, you need specialized tools. The right accessories can make your project go smoothly.
Quality drill bits are key for heavy timber work. They cut clean holes, last longer, and make drilling easier. Investing in good bits saves time and money.
Spade Bits for Large Diameter Holes
Spade bits are essential power tools for rustic cabin builders. They quickly bore large holes in wooden timbers. Their flat design works well in softwoods and is great for frequent drilling.
Use spade bits for holes for wiring, pipes, and bolts. They come in sizes from ¾-inch to 1½-inches. Having a full set is important to avoid delays.
Spade bits make rougher holes than other types. For precise work, consider Forstner bits. But for structural drilling, spade bits are fast and cost-effective.
Auger Bits for Deep Timber Drilling
Auger bits are best for deep drilling in thick timbers and logs. Their screw tip pulls the bit into the wood, making drilling easier. This is key for drilling many deep holes.
Auger bits clear wood chips well, preventing overheating. They’re great for holes deeper than 6 inches. Their deep flutes help keep the hole clean.
Long auger bits are essential for cabin construction. They drill through thick logs in one pass. Use them for rods and deep utility passages.
Driver Bit Sets for Various Fasteners
Driver bit sets with different fasteners are vital for cabin projects. Cabin construction uses many screw types. The right bit for each fastener prevents damage.
Quality driver bit sets have bits for common fasteners. Magnetic bit holders are handy for preventing fasteners from falling. This saves a lot of time.
Impact-rated driver bits are tough and last long. They’re perfect for impact drivers. These bits are essential for reliable fastening.
Keep your driver bits organized. Quick access to the right bit is important. Consider having duplicate sets of common sizes.
Hole Saws for Plumbing and Electrical Runs
Hole saws are used for plumbing and electrical work. They cut large circular holes in walls, floors, and ceilings. A good set has sizes from 1¼-inches to 4-inches.
Bi-metal hole saws are durable and resist breakage. They’re worth the investment for cutting through tough wood.
Use a pilot bit with hole saws to keep the cut centered. Start slow and increase speed as needed. Clear sawdust to prevent overheating.
Store hole saws properly to keep them sharp. Damage can occur if they rattle together. Proper storage protects your investment.
| Bit Type | Best Applications | Diameter Range | Key Advantage |
|---|---|---|---|
| Spade Bits | Wiring holes, bolt passages, quick rough drilling | ¾-inch to 1½-inches | Fast material removal in softwoods |
| Auger Bits | Deep holes, hardwoods, threaded rod passages | ¼-inch to 1½-inches, 12-18 inch lengths | Self-feeding action and superior chip clearance |
| Driver Bits | All fastening tasks throughout construction | Multiple fastener types and sizes | Prevents stripped fasteners and material damage |
| Hole Saws | Plumbing, electrical boxes, vent penetrations | 1¼-inches to 4-inches | Clean, precise circular cuts for finished work |
Maintaining Your Drills and Drivers in Rustic Building Environments
Tools used in rustic building need care to stay in good shape. Cabin construction is tough, with sawdust, moisture, and temperature changes. A good maintenance routine keeps your battery-powered drill for remote building working well.
Just a few minutes of daily maintenance can prevent expensive repairs. Construction sites are harsh, with debris, weather, and heavy use. Without care, your tools wear out faster.
Cleaning and Storage Best Practices
Clean your tools every day during construction. Sawdust can make them overheat and wear out quickly. Use compressed air or a soft brush to clean air vents, chuck areas, and battery contacts.
Be careful around motor vents. Blocked vents make the motor work harder and get hotter. A quick air blast can add years to your tool’s life.
Wipe tool housings with a damp cloth to remove sticky residue. Timber work leaves residue that harms switches and controls. Dry everything well after wiping to avoid moisture damage.
Never submerge cordless tools in water or spray them with a hose. Water harms electronics and motors. If your tool gets wet, remove the battery and let it dry for 24 hours before using it again.
Store tools in cases or a closed toolbox when not in use. This protects them from dust, moisture, and damage. For an electric drill for off-grid building, this is even more important.
A heavy-duty rolling toolbox is great for on-site storage. For tools moving between indoors and outdoors, a soft carrying bag protects them while being portable. The goal is to keep them away from the elements.
Battery Care for Maximum Longevity
Lithium-ion battery care is key to your tools’ longevity. These batteries are a big investment, and proper care doubles their life. Knowing how to charge and store them is essential.
Proper Charging Cycles
Always use the charger your battery came with. Third-party chargers might not have the right management to prevent damage. Saving a few dollars isn’t worth risking a $100 battery.
Don’t let batteries drain completely before charging. Lithium-ion batteries do better with partial discharge cycles. This is different from older battery types.
Charge batteries after each use, not when they’re dead. This keeps cell health good and ensures full power for the next day. Most modern batteries handle many partial charge cycles.
Don’t leave batteries on the charger too long after they’re fully charged. Most chargers prevent overcharging, but older ones might not. Remove batteries when the charger shows they’re fully charged.
Storage Temperature Guidelines
Extreme temperatures harm lithium-ion batteries. Store them indoors in a controlled climate. Avoid freezing sheds or hot vehicles for long periods.
For storage over a month, charge batteries to about 50% capacity. This reduces stress on the cells. The 50% charge is the best for storage.
Before storing tools for winter or long breaks, charge batteries fully, then remove them. Store batteries separately in a stable temperature, between 50-77°F (10-25°C). This prevents slow discharge damage and cold-weather capacity loss.
In cold weather, keep spare batteries in an insulated bag or coat pocket. Cold batteries have less power until they warm up. Switching warm batteries with working ones keeps performance consistent.
Regular Inspection and Lubrication
Regular inspections catch small problems before they become big ones. Check tools weekly during active construction and monthly when it’s slower. This helps find wear and issues early.
Look for damage on power cords every time you use them. Check for cuts, exposed wires, or damaged plugs. Replace damaged cords right away—electrical safety is too important to risk. Cord damage happens slowly, so catching it early prevents dangers.
Check chucks for wobble or excessive play, which means bearing wear. A little movement is okay, but noticeable wobble means the chuck needs fixing. Loose chucks affect drilling accuracy and can damage bits.
Test trigger action for smooth operation without sticking or hesitation. Triggers collect dust and debris that affects their response. Sticky triggers might just need cleaning, but they can also show internal switch problems needing professional help.
Examine battery contacts on both tools and batteries for corrosion or damage. Clean contacts with a soft cloth or specialized cleaner if you see buildup. Good electrical connection ensures proper charging and maximum power delivery.
Most modern drills have sealed parts needing little lubrication. But if your drill needs lubrication, follow the manufacturer’s advice precisely. Using the wrong lubricants can cause more harm by attracting dust or breaking down seals.
Check manufacturer guidelines for any specific maintenance needs. Some professional-grade tools need annual service at authorized centers. This professional check catches issues you might miss and keeps warranties valid.
| Maintenance Task | Frequency | Time Required | Critical For |
|---|---|---|---|
| Remove sawdust and debris | Daily after use | 2-3 minutes | Motor cooling and longevity |
| Wipe down housing and controls | Daily after use | 1-2 minutes | Switch operation and grip cleanliness |
| Charge batteries to 50% for storage | Before storage periods over 1 month | Variable | Battery cell health and capacity |
| Inspect cords, chucks, and triggers | Weekly during active use | 5 minutes | Safety and performance reliability |
| Clean battery contacts | Monthly or when performance drops | 3-4 minutes | Charging efficiency and power delivery |
This maintenance schedule keeps your drills and drivers working well on your cabin project. The small time investment prevents breakdowns and extends tool life by years. Reliable equipment is key in remote locations, making progress smooth and avoiding delays.
Treat your tools well, and they’ll serve you faithfully on many projects. The habits you build during your cabin construction will benefit every future project.
Powering Through Your Cabin Build with Confidence
Building your cabin is more than just a construction project. It’s about creating a space where memories take shape and dreams become reality. The right tools make this journey smoother and more enjoyable.
Your choice of the best drill for cabin construction sets the foundation for success. Selecting a professional drill for homestead projects means picking equipment that stands up to timber work, weather challenges, and long days on the job site. These tools become trusted partners through every phase of your build.
As one experienced builder puts it: “At the end of the day, your tools are your companions. They’re what turn ideas into structures and repairs into lessons. Choose them like you choose your neighbors: reliable, useful, and not too loud.”
Quality drills and drivers from brands like Milwaukee, DeWalt, and Makita deliver the performance you need. They handle heavy fasteners, drill through thick timber, and keep working when the job gets tough. Battery-powered freedom lets you work anywhere your cabin project takes you.
The satisfaction of walking into a cabin that you’ve shaped with your own two hands is unmatched. Your carefully selected drills and drivers play a vital role in that achievement. They help you frame walls, secure beams, and complete countless tasks that transform raw materials into your personal retreat.
Choose your tools wisely. Maintain them well. Build with confidence. Your cabin awaits, and you have everything you need to bring it to life.


