How do you add character to cabin walls without making the place feel like a staged showroom? Panel wainscoting hits that balance. It’s a wood wall treatment that covers the lower portion of your interior walls, and in a cabin it does real work protecting against scuffs, moisture, and the general beating that rough living delivers.
This isn’t a project just for finish carpenters. With basic tools and a weekend or two, a DIYer with some carpentry experience can install panel wainscoting that looks like it belongs there.
What Panel Wainscoting Actually Is (and the Three Styles Worth Knowing)
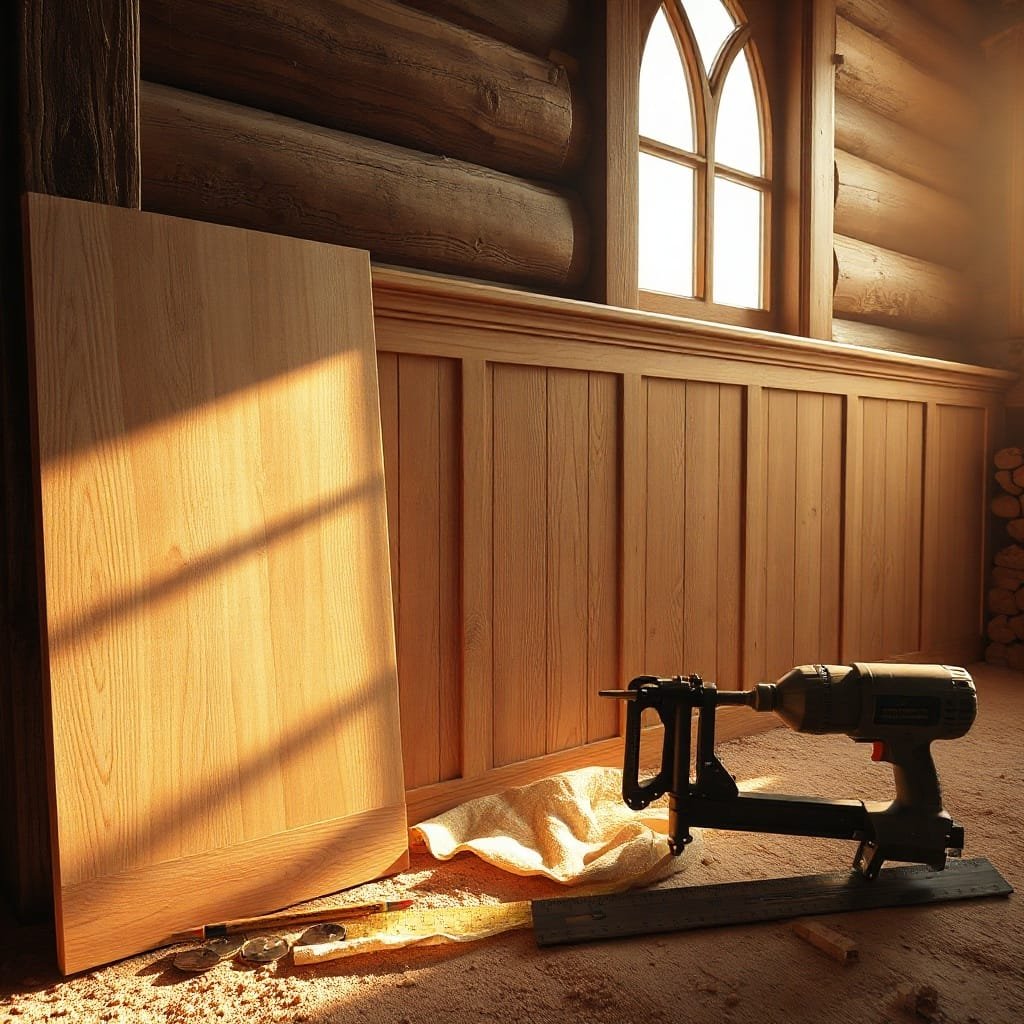
Panel wainscoting is wood paneling applied to the lower section of an interior wall, typically capped with a horizontal chair rail molding at the top. It’s part decorative, part protective. Three styles show up most in cabin builds, and picking the right one matters for how rustic or refined the room feels.
Style
Look
Cabin Fit
Raised panel
Framed panels with a center section that stands proud
Works in finished cabins; can feel too formal in raw log builds
Flat panel
Simple recessed or flush panels inside a frame
Versatile, clean, suits most cabin interiors
Beadboard
Vertical planks with narrow rounded grooves between them
Best match for rustic, off-grid, or tongue-and-groove cabin walls
Beadboard and flat panel are the two styles worth starting with if your cabin leans rustic. Raised panel is better saved for a cabin that already has trim-heavy, finished interior work.
Wood Species That Hold Up in a Cabin Environment
Wood species selection is the single decision that determines whether your wainscoting lasts five years or twenty-five. Cabins aren’t climate-controlled houses. Humidity swings, temperature drops, and seasonal moisture changes put stress on wood that most suburban remodel guides never account for.
Why Humidity Swings Change Everything
Wood moves. It expands when humidity rises and contracts when it drops. In a cabin that sits empty through a cold winter and then gets fired up in spring, that swing can be dramatic — think 20 to 60 percent relative humidity across a single season.
When wood moves too much, panels crack, joints open up, and paint or stain starts to peel at the seams. The technical term for this movement is wood movement, and species with a low tangential shrinkage coefficient handle it far better than dense hardwoods. That’s the spec to check when you’re at the lumber yard.
Pine, Cedar, and Poplar: The Practical Shortlist
Three species work well for cabin panel wainscoting, and each has a clear use case.
Eastern white pine is the most forgiving option for DIYers. It’s soft enough to cut and nail easily, takes stain well, and stays stable through moderate humidity changes. Expect to pay roughly $1.50 to $2.50 per linear foot for dressed pine boards at most regional lumber yards.
Western red cedar is the pick when moisture is a real concern — a cabin near a lake or in a wet climate. Cedar has natural oils that resist moisture and inhibit mold. It’s a bit pricier than pine, usually $2.50 to $4.00 per linear foot, but it needs less sealing work on the back side.
Poplar lands in the middle. It’s harder than pine, machines cleanly, and takes paint better than almost any other affordable species. If you’re painting your wainscoting rather than staining it, poplar is the right call.
Avoid oak and maple for this application. Both are beautiful, but their higher density makes them more prone to cracking when humidity swings hard and fast in an uninsulated or under-insulated cabin.
The Right Wainscoting Height for Cabin Walls
In a standard cabin with 8-foot walls, aim for wainscoting between 42 and 48 inches tall. That range looks proportional and gives the wall treatment enough presence. The common 32–36 inch recommendation you’ll find in most home improvement guides was written for suburban rooms, not for tall log or timber-frame interiors.
Why 32–36 Inches Falls Short in a Log Cabin
Log cabin walls often run 9 or 10 feet tall, sometimes taller. At 32 inches, wainscoting on a 10-foot wall looks like a baseboard that got a little ambitious. The visual weight is all wrong. The paneled section reads as an afterthought rather than a design decision.
The golden ratio principle applies here in a practical way: the wainscoting height should cover roughly one-third of the total wall height. On a 9-foot wall, that puts you right at 36 inches minimum. Closer to 42 inches feels more natural to the eye.
How to Find Your Ideal Height Before You Cut Anything
Tape a horizontal line of painter’s tape at 36 inches, then at 42 inches, then at 48 inches. Step back across the room and look at each one. This takes ten minutes and saves you from committing to a height that looks off once the panels are nailed in.
Mark the height that lines up with a natural feature — a window sill, a door casing shoulder, or a horizontal log course. Tying the cap rail to an existing horizontal element makes the whole installation look intentional rather than arbitrary.
Tools, Materials, and Wall Prep Before You Touch a Panel
Get your materials list and wall condition sorted before you buy a single panel. Skipping prep is the most common reason panel wainscoting looks bad six months after installation. Not the installation itself.
Here’s what you need on hand before the first panel goes up:
Miter saw (a 10-inch sliding compound miter saw handles most cuts cleanly)
Finish nailer with 1.5- to 2-inch brad nails — 18-gauge is the standard for this work
Level, at least 4 feet long
Stud finder
Construction adhesive rated for wood-to-drywall or wood-to-log contact
Tape measure, pencil, and painter’s tape for layout lines
Sandpaper in 80- and 120-grit for surface prep
Acclimating Your Wood: The Step Most DIYers Skip
Bring your panels into the cabin at least 3 to 5 days before installation. Stack them flat with spacers between each board so air can circulate on all sides. This lets the wood reach the same moisture content as the room it’s going into. Skip this step and you’re installing panels that are still adjusting. They’ll move after they’re nailed, and joints will open up or buckle within a season.
In a cabin that runs dry heat in winter, that acclimation period matters even more. The equilibrium moisture content of wood in a heated cabin can drop to 6–8%, and panels brought in from a humid lumber yard may be sitting at 12–14%. That gap is where warping starts.
Getting Rough or Out-of-Plumb Walls Ready
Log and rough-cut walls rarely run flat. Before you touch a panel, hold your 4-foot level against the wall in several spots and mark any high points or voids. High points need to be shimmed around; significant voids behind panels need blocking nailed to the studs so you have a solid fastening surface.
Check for moisture in the wall before anything else. A basic pin-type moisture meter (under $30 at most hardware stores) tells you if the wall surface is reading above 15%. Above that, adhesive won’t bond properly and panels will absorb moisture from the wall itself.
Installing Panel Wainscoting Step by Step
Snap a level chalk line at your target height across the full wall first. That line is your cap rail reference, and everything below it needs to be right before you start nailing panels.
Follow this sequence for a clean installation:
Mark and locate all studs along the installation area — panels should hit a stud at least every 16 inches.
Cut panels to height, leaving a 1/4-inch gap at the floor for expansion clearance.
Apply construction adhesive in a zigzag pattern across the back of the first panel.
Press the panel into place, check it for plumb, and drive two or three brad nails into studs to hold it while the adhesive sets.
Continue panel by panel, using a scrap offcut as a spacer to keep gaps consistent between boards.
Install the cap rail last, cutting miters at inside and outside corners with the miter saw.
Cutting Around Outlets, Corners, and Door Casings
Outlets need a jigsaw cut — measure the box position from the nearest panel edge and from the floor, transfer those marks to the panel face, and cut just inside the lines. The outlet cover plate hides a small gap, so you have about 1/4 inch of forgiveness on each side.
Inside corners are where most DIYers lose time. Don’t miter them. Cope one panel tight to the corner and butt the second panel against it. In a cabin where walls shift seasonally, a coped joint stays tighter than a mitered one over time.
Outside corners take a 45-degree miter on each panel. Glue the joint and pin it with a brad nail from each face to keep it from opening.
Adhesive vs. Nailing: Which Fastening Method to Use in a Cabin
Use both. Adhesive alone won’t hold through the seasonal movement a cabin sees, and nails alone leave panels rattling if the adhesive bond is absent. The combination locks the panel flat against the wall while the nails hold position during the adhesive cure time of roughly 24 hours.
On log walls specifically, pre-drilling is non-negotiable — driving brad nails into a log without a pilot hole risks splitting the surface and the nail won’t seat cleanly.
Sealing and Finishing Wainscoting for Long-Term Durability
Finish the panels before installation if you can. Coat the backs with a sealer first. That back-side sealing step is what keeps moisture from wicking in from the wall side and causing the face finish to fail early.
Stain, Paint, or Clear Coat: Matching the Finish to Your Cabin’s Look
Stain is the right call for pine or cedar if you want the grain to read through. A penetrating oil stain soaks in rather than sitting on the surface, which means it won’t peel when the wood moves. Paint works best over poplar. It hides the grain and gives a clean, consistent look that suits flat-panel styles. Clear coat alone is fine for cedar that you want to age naturally, though it needs a reapplication every two to three years in a cabin that sees real seasonal use.
Wood Treatments That Handle Moisture and Temperature Swings
A water-based polyurethane topcoat is the most practical finish for cabin wainscoting. It flexes slightly as the wood moves, dries fast between coats, and cleans up with water. Apply two coats minimum, sanding lightly with 220-grit between coats. In high-humidity cabins (lakeside or in the Pacific Northwest), add a third coat on the face and don’t skip the back-side sealer. The cabinlodger.com wood treatment guides cover specific product comparisons for oil-based vs. water-based polyurethane if you want a deeper breakdown before you buy.
How Much Panel Wainscoting Costs for a Typical Cabin Room
Budget roughly $300 to $700 in materials for a standard 10×12 cabin room, assuming you already own the tools. That range covers panels, cap rail, adhesive, fasteners, and finish. It does not cover labor if you’re hiring out.
Item
Low Estimate
High Estimate
Panel material (pine or poplar, per room)
$120
$250
Cap rail and base shoe molding
$40
$80
Construction adhesive (2–3 tubes)
$15
$25
Brad nails and fasteners
$10
$15
Stain, sealer, or polyurethane
$35
$80
Sandpaper and painter’s tape
$10
$20
Total (materials only)
$230
$470
Cedar runs about 30–40% more than pine for the same linear footage, so a cedar room can push toward $600 in materials alone. Hiring a finish carpenter adds $400 to $800 in labor for a single room, depending on wall complexity and your region.
The biggest cost variable isn’t the wood species. It’s wall condition. Rough or out-of-plumb walls that need blocking and shimming can add a half-day of prep work and $50 to $100 in extra lumber before a single panel goes up.
Frequently Asked Questions
Can I install panel wainscoting directly on log walls?
Yes, but you need solid blocking between the logs first. Brad nails and adhesive won’t hold reliably on an uneven log surface without a flat nailing substrate. Rip 3/4-inch plywood strips and fasten them horizontally to the logs, then treat those strips as your wall surface.
How long does panel wainscoting installation take for one room?
Expect a full weekend for a 10×12 room if you’re working solo. Day one covers wall prep, acclimation checks, and layout. Day two is the actual installation and finishing. Coping inside corners and cutting around outlets are the two steps that eat the most time.
Do I need to remove baseboards before installing wainscoting?
Yes. Pull the existing baseboard off before panels go in. The panel sits on the subfloor, and the base shoe molding goes on last to cover the expansion gap at the bottom. Trying to work around an existing baseboard leaves a visible gap and makes the base shoe fit poorly.
What’s the best panel wainscoting style for a rustic cabin?
Flat panel or beadboard — skip raised panels in a cabin setting. Raised panels look at home in a formal dining room, not a log cabin. Beadboard adds texture that complements rough-cut wood and natural materials without competing with them.