Why Cellar Wet Rot Is a Cabin Owner’s Worst Nightmare
If you own a cabin, your cellar is doing a lot of heavy lifting — quite literally. It supports the entire structure above it, and when wet rot starts creeping in, that foundation of strength begins to quietly crumble. Cellar wet rot prevention isn’t just a maintenance task you can push to next season. It’s one of the most important things you can do to protect your investment, your safety, and the long-term life of your cabin.
How Wet Rot Quietly Destroys Structural Integrity
What makes wet rot so dangerous is how sneaky it is. Unlike a burst pipe or a collapsed beam, wet rot works slowly and silently. It feeds on the cellulose inside wood, breaking down the fibers that give timber its strength. By the time you notice the damage on the surface, the rot has often already eaten deep into the core of your structural beams and joists.
Fungal decay is the engine behind wet rot. The fungi responsible — most commonly Coniophora puteana, also known as cellar fungus — thrive in damp, poorly ventilated spaces. They don’t need much to get started: just persistent moisture and wood. Over time, load-bearing timbers lose their ability to carry weight, and what was once a solid foundation becomes a serious structural liability. Floors start to sag, walls shift, and in worst-case scenarios, sections of the cabin can become genuinely unsafe to occupy.
The Difference Between Wet Rot and Dry Rot
A lot of cabin owners confuse wet rot with dry rot, but these are two very different problems. Wet rot requires consistently high moisture levels — typically wood with a moisture content above 50% — to survive. It tends to stay localized to the damp area. Dry rot, caused by the fungus Serpula lacrymans, is arguably more aggressive because it can spread moisture through its own mycelium network, allowing it to travel across masonry and into dry timber.
That said, wet rot is no less damaging in a cellar environment where moisture is almost always present. The confined, underground nature of a cabin cellar creates the perfect breeding ground. Treating wet rot early is far less costly than dealing with dry rot that’s spread throughout your structure — but neither should ever be ignored.
Spotting the Early Warning Signs of Wet Rot in Your Cellar
Catching wet rot before it becomes a full-blown structural crisis is all about knowing what to look for. The earlier you spot it, the simpler and cheaper the fix. Here are the key warning signs to watch for, in order of how they typically appear:
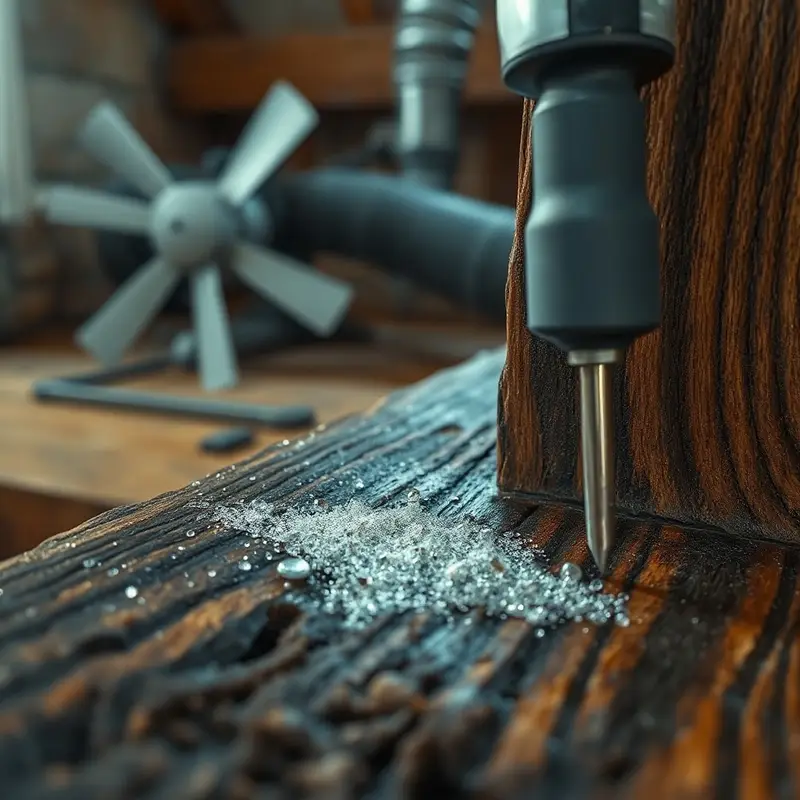
Soft or spongy wood — Press your finger or a screwdriver into exposed timber. If it gives way easily or feels mushy, fungal decay has likely already begun breaking down the wood fibers.
Discoloration on timber surfaces — Look for darkened patches, often brown or black, on beams, joists, or floor supports. This color change usually signals moisture damage and early fungal activity.
Cracking along the grain — Wet rot causes wood to crack in a distinctive pattern that follows the grain of the timber, leaving a cubed or longitudinal fracture pattern.
Musty or earthy odor — A persistent damp smell in your cellar is a classic indicator of active fungal growth, even before visible damage appears.
Peeling or bubbling paint or coatings — On painted timber or masonry walls, moisture pushing through the surface causes finishes to lift and peel.
Visible fungal growth — In advanced cases, you may see strands of white, grey, or dark brown fungal mycelium growing across wood surfaces or in corners.
Visual Clues You Shouldn’t Ignore
Beyond the timber itself, moisture staining on walls, efflorescence (white salt deposits on masonry), and puddles or damp patches on the cellar floor are all red flags. These signs tell you that water is actively entering your cellar space — and where water goes, wet rot follows. Check around pipe penetrations, window frames, and the base of walls where the floor meets the foundation, as these are common entry points for moisture.
When to Call in a Professional Inspector
If you’re seeing more than one of the signs listed above, it’s time to bring in a professional timber and damp specialist. A qualified inspector can use a moisture meter to measure the water content in your timber, identify the specific fungal species involved, and assess the full extent of the damage — including areas you can’t easily see. Don’t wait until the problem is obvious. Early professional assessment can save you thousands in repair costs down the line.
What Causes Wet Rot in Cabin Cellars
Understanding the root causes of wet rot is the foundation of any effective cellar wet rot prevention strategy. It almost always comes down to two things: moisture intrusion and inadequate airflow.
Common Moisture Sources Underground
Cabin cellars are uniquely vulnerable because they sit below or at ground level, surrounded by soil that naturally holds water. Here’s a breakdown of the most common moisture sources and how they contribute to wet rot:
Moisture Source
How It Enters the Cellar
Risk Level
Groundwater seepage
Through cracks in foundation walls or floor
High
Surface water runoff
Poor grading directs rainwater toward the cabin
High
Condensation
Warm air meets cold cellar walls and surfaces
Medium
Plumbing leaks
Dripping pipes or joints inside the cellar
Medium
Rising damp
Capillary action draws moisture up through masonry
High
Roof or gutter overflow
Water pools near foundation during heavy rain
Medium
Hydrostatic pressure — the force exerted by water-saturated soil against your foundation walls — is one of the most underestimated contributors. It can push moisture through even hairline cracks over time.
How Poor Ventilation Makes Things Worse
Moisture alone doesn’t always cause wet rot immediately — but trap that moisture in a poorly ventilated space and you’ve created ideal fungal conditions. Stagnant, humid air in a cellar allows moisture to settle on timber surfaces and stay there. Without airflow to carry that humidity away, wood moisture content climbs steadily until it crosses the threshold where fungal spores can germinate and take hold. Many older cabin cellars have little to no mechanical ventilation, relying on small vents that may be blocked, undersized, or simply not enough to handle the underground environment.
Cellar Wet Rot Prevention Strategies That Actually Work
Now that you know what causes wet rot and how to spot it, let’s talk about what you can actually do to stop it. Effective cellar wet rot prevention isn’t a one-time fix — it’s a combination of physical barriers, drainage improvements, and ongoing maintenance. The good news is that most of these strategies are well within reach for a hands-on cabin owner.
Waterproofing Your Cellar Walls and Floor
The single most impactful thing you can do is seal your cellar against moisture intrusion at the source. Start with a thorough inspection of your walls and floor for cracks, gaps around pipe penetrations, and areas where the wall meets the floor — these are the most common entry points for water.
For walls, tanking slurry (a cementitious waterproofing compound) applied in multiple coats creates a robust barrier against groundwater seepage and hydrostatic pressure. Products like Sika MonoTop or Remmers Kiesol are widely used for this purpose and bond directly to masonry. For more severe water ingress, a cavity drain membrane system — sometimes called a Newton drainage system — channels water away from walls before it ever contacts your timber.
Cellar floors should be treated with a penetrating waterproof sealant or covered with a dimple membrane before any flooring goes down. This prevents rising damp from wicking upward through the slab. Don’t forget to seal all service penetrations where pipes and cables enter the cellar — these small gaps are surprisingly effective at letting moisture in.
Improving Drainage Around Your Cabin’s Foundation
What happens outside your cabin directly affects what happens inside your cellar. Poor external drainage is one of the leading causes of moisture buildup underground, and fixing it is often cheaper and more effective than internal waterproofing alone.
Start by checking your ground grading — the soil around your cabin should slope away from the foundation at a minimum gradient of 1 inch per foot for the first 6 feet. If water pools near your walls after rain, regrading is a priority. Clean and extend your gutters and downspouts so they discharge at least 6 feet from the foundation. Installing a French drain — a perforated pipe surrounded by gravel — along the perimeter of your cabin can intercept groundwater before it builds up pressure against your walls. These relatively simple measures dramatically reduce the moisture load your cellar has to deal with.
Choosing the Right Wood Treatments and Sealants
Even with excellent waterproofing and drainage, some moisture will always find its way into a cellar environment. That’s why treating your timber directly is an essential layer of protection. Choosing the right products makes a real difference.
Product Type
Example Products
Best Use
Protection Level
Boron-based preservative
Borax, Impel Rods
Deep timber treatment, existing beams
High — kills fungi and insects
Fungicidal end-grain sealant
Cuprinol Woodworm Killer, Osmo Wood Protector
Cut ends of joists and beams
Medium-High
Penetrating epoxy consolidant
Rotfix by Osmo, LiquidWood by Abatron
Stabilizing soft or partially decayed wood
Medium — structural reinforcement
Water-repellent preservative
Ronseal Total Wood Preservative
General timber surfaces in damp areas
Medium
Breathable timber coating
Sansin ENV, Rubio Monocoat
Finished timber where vapor movement matters
Medium
Boron-based treatments are widely regarded as the gold standard for cellar timbers because they penetrate deep into the wood and remain effective for years without being toxic to humans or pets at normal application levels. For any timber that’s already showing early signs of softening, an epoxy consolidant can harden the degraded fibers and restore some structural integrity before you apply a preservative coat on top.
End-grain sealing is a step many cabin owners skip, but it’s critical — the cut ends of joists and beams absorb moisture far faster than the face grain, making them the most vulnerable point. Apply a dedicated end-grain sealant every few years as part of your regular maintenance routine.
When applying any treatment, make sure the timber is as dry as possible first. Applying preservatives over wet wood traps moisture inside and reduces the product’s effectiveness significantly. Dry the wood, treat it, then seal it — in that order.
Building Habits That Keep Wet Rot Away for Good
Prevention isn’t just about what you install — it’s about what you do consistently over time. Long-term cellar wet rot prevention comes down to building a few simple habits that catch problems before they escalate.
Seasonal Maintenance Checklist for Cabin Owners
Running through a quick inspection at least twice a year — ideally in spring and autumn — keeps you ahead of any developing issues. Here’s a practical checklist to work through:
Inspect all visible timber in the cellar for soft spots, discoloration, or cracking, using a screwdriver or moisture probe to check below the surface.
Check and clear all vents and air bricks to ensure airflow is unobstructed — debris, leaves, and even paint buildup can block them completely.
Examine walls and floors for new cracks, efflorescence, or damp patches that weren’t there during the last inspection.
Test gutters and downspouts for blockages and confirm water is discharging well away from the foundation.
Inspect the ground grading around your cabin after winter frost heave or summer dry spells, which can shift soil and redirect drainage.
Reapply timber treatments to any areas showing wear, particularly end-grain surfaces and timber close to ground level.
Monitoring Humidity Levels Year-Round
Installing a digital hygrometer in your cellar is one of the cheapest and most effective tools in your prevention toolkit. You want to keep relative humidity below 70% — above that level, conditions become increasingly favorable for fungal spore germination. If your readings are consistently high, a dehumidifier rated for below-grade spaces (such as the Frigidaire 50-pint or the Santa Fe Compact70) can make a dramatic difference. Pair it with a basic mechanical or heat recovery ventilation unit and you’ll maintain a cellar environment that’s simply inhospitable to wet rot year-round.
How Much Does Wet Rot Damage Actually Cost to Fix
If you’ve been putting off dealing with a damp cellar because you’re hoping the problem will sort itself out, it’s worth understanding what ignoring wet rot actually costs — because the numbers climb fast once structural timber is involved.
For minor surface-level wet rot caught early, you might get away with DIY treatment and timber repairs for a few hundred dollars or pounds. A good boron-based preservative, some epoxy filler, and a weekend of your time can handle small, isolated patches before they spread. That’s the best-case scenario, and it’s exactly why early detection matters so much.
Once wet rot has progressed to the point where joists or structural beams need partial or full replacement, you’re looking at a very different price range. A single joist splice or section replacement typically runs $200–$600 in materials alone, and if you’re hiring a carpenter or structural contractor, labor costs can push a single beam repair to $800–$2,000 depending on access difficulty and your location.
Full cellar remediation — which includes tanking, drainage installation, timber replacement, and ventilation upgrades — can range from $5,000 to $25,000 or more for a typical cabin cellar. Larger spaces, more severe decay, or foundations that have been compromised structurally can push costs well beyond that.
There’s also the hidden cost of secondary damage to factor in. Wet rot that goes unaddressed often leads to mold growth, which can affect living spaces above the cellar and create health concerns that require their own remediation. Insurance coverage for rot damage is inconsistent — many policies specifically exclude gradual moisture damage, meaning these costs frequently fall entirely on the owner.
The math is straightforward: spending $300–$1,000 on proactive prevention almost always beats spending $10,000+ fixing damage that built up quietly over a few wet seasons.
Frequently Asked Questions
How do I know if my cellar has wet rot or just normal dampness?
Normal dampness might show up as condensation on walls or a musty smell without any visible timber damage. Wet rot goes further — look for timber that feels soft or spongy when pressed, wood that’s darker than surrounding areas, paint or coatings that are bubbling or peeling, and a distinctly earthy or fungal smell. If your screwdriver sinks into a joist more than a few millimeters, that’s a strong indicator of active decay rather than surface moisture.
Can wet rot spread to dry areas of my cabin?
Wet rot fungi need a sustained moisture content above roughly 50% to survive, so they won’t spread into genuinely dry timber the way dry rot can. However, the moisture source itself can spread — if water ingress worsens, the zone of affected timber will expand. Fixing the moisture problem is always the first priority, even before treating the wood.
How long does it take for wet rot to cause serious structural damage?
This depends heavily on the species of timber, the level of moisture, and the temperature. In consistently damp conditions with poor ventilation, significant structural degradation can develop within 12–24 months. Softer woods like pine and spruce are vulnerable faster than hardwoods like oak. This is why twice-yearly inspections are so important — catching it at 6 months is a minor fix; catching it at 3 years can mean major structural work.
Is cellar wet rot covered by home insurance?
In most cases, standard home insurance policies exclude gradual moisture damage, including wet rot. Coverage typically applies only to sudden and accidental water damage. It’s worth reviewing your specific policy and speaking to your insurer, but most cabin owners should treat wet rot prevention as an out-of-pocket maintenance responsibility rather than something they can rely on insurance to cover.
What’s the single most effective step for cellar wet rot prevention?
Controlling moisture at the source. Whether that means improving external drainage, installing a cavity drain membrane, or running a dehumidifier, keeping timber moisture content below 20% is the one condition that makes wet rot essentially impossible to establish.