Grab a curved board and try to build a rocking chair off it without checking the other side, and you’ll get a chair that wobbles side to side every time you sit down. A woodworking rocking chair project lives or dies on two things: matching rocker radius and joints that won’t crack under load. If you’re building this in a cabin workshop with a bandsaw, a spokeshave, and rough lumber instead of a fully stocked shop, the real question isn’t “how do I build a rocking chair” — it’s which steps you can skip without ending up with something that falls apart in a year.
Rocker Curve and Radius: The Part Most Guides Skip Past
The rocker curve is the single most important dimension in the whole build, and it’s the part beginners get wrong most often. Both rockers need the identical radius, typically somewhere between 42 and 48 inches for a standard adult chair, or the chair rocks unevenly and drifts sideways instead of moving in a straight line.
Getting the Radius Right With Limited Tools
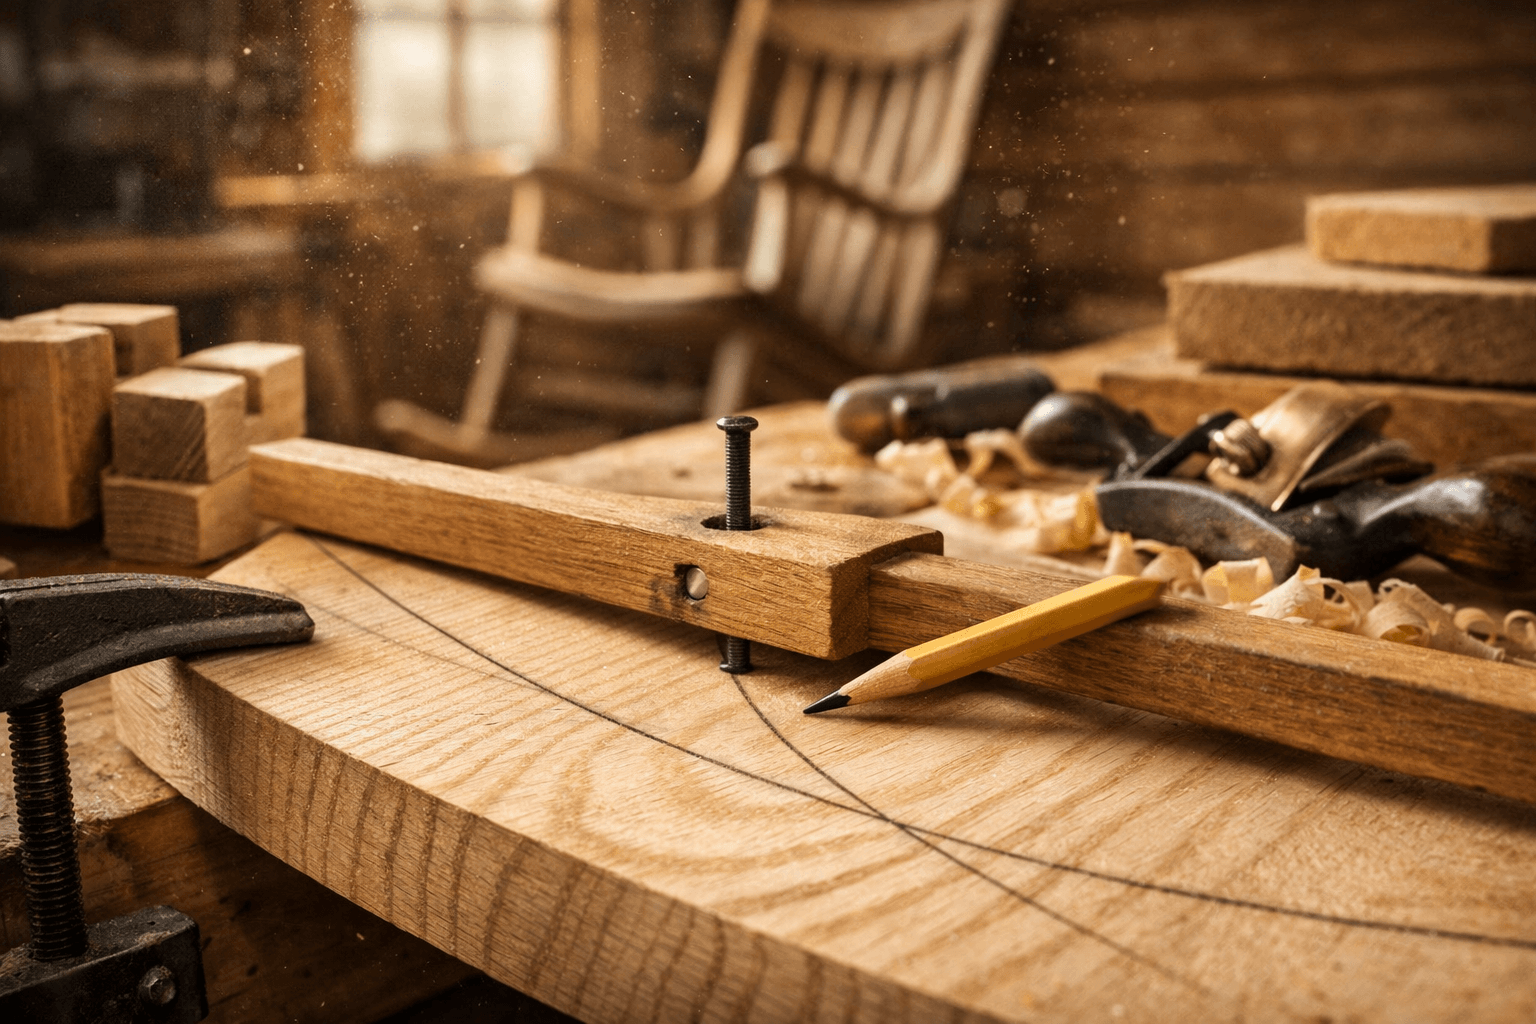
You don’t need a CNC router to nail this. Cut one rocker to your chosen radius using a shop-made trammel (a strip of wood with a pivot nail and a pencil hole), then trace that exact curve onto your second blank before cutting it on the bandsaw. Sand both rockers together, stacked and clamped, so any drift gets corrected instead of doubled.
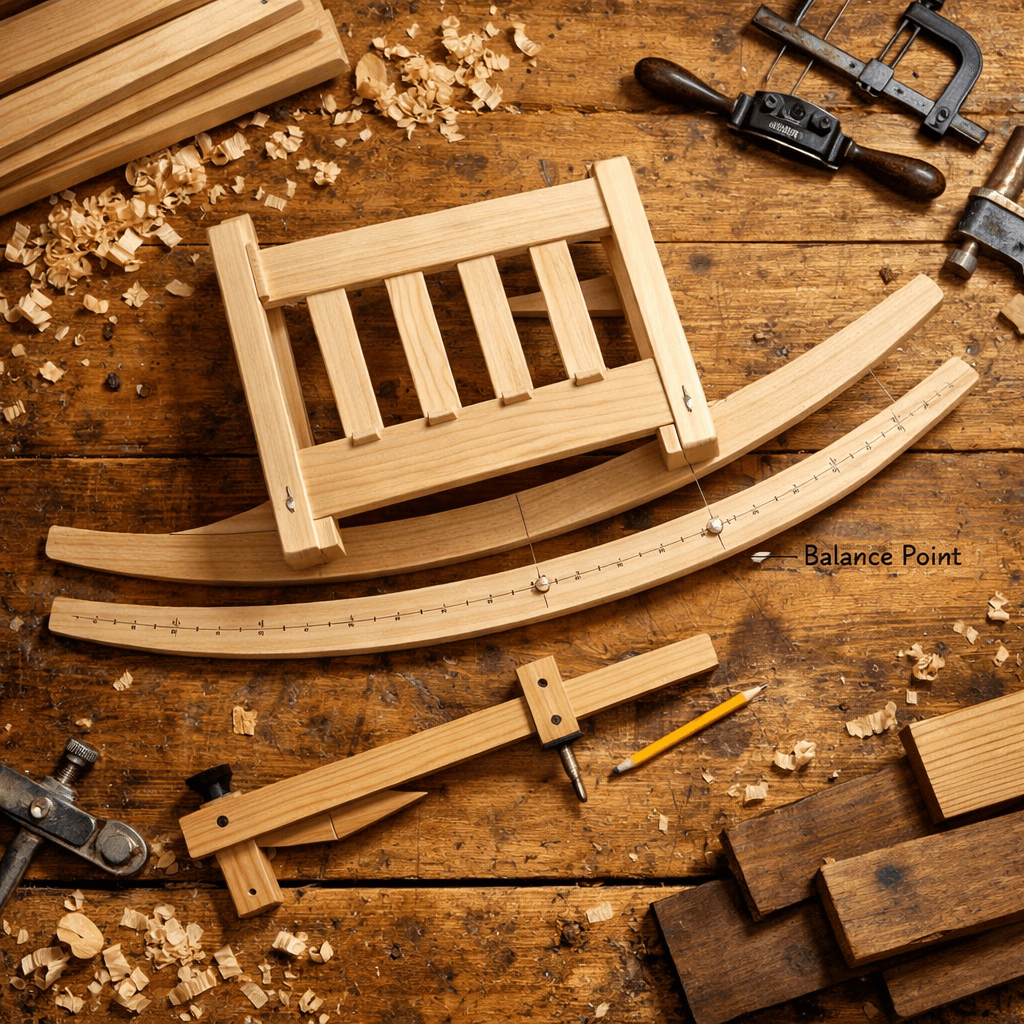
Setting the Balance Point
The pivot point of the curve needs to sit roughly under the sitter’s center of gravity, which for most builds means the front of the rocker extends about 8 to 10 inches ahead of the front chair leg and the back extends 12 to 14 inches behind. Get this wrong and the chair either tips forward when you stand or kicks back too far when you lean. Test it with a mockup seat height before committing to final leg-to-rocker joinery — that’s a five-minute check that saves you from redoing an entire base.
Species choice matters more here than in almost any other cabin furniture project, because a rocking chair puts repeated flexing stress on the same joints thousands of times a year. Skip pine and cedar for the frame — save softwoods for shelving or trim, not chair joints that take real stress.
Oak, ash, and cherry are the three worth stocking for this build. Ash is the traditional choice for steam-bent parts because it bends without splintering and has enough flex to survive the rocking motion for decades. White oak is heavier but gives you the strongest mortise and tenon joints, which matters most in the seat rails and leg connections. Cherry cuts and finishes beautifully for a cabin-style chair that’s staying indoors near a stove, though it’s softer than oak and shows dents faster if the chair lives outside on a porch.
Walnut looks great and works easily with hand tools, but it’s pricier per board foot and, honestly, overkill for a rustic cabin build unless you’ve already got scrap walnut sitting around from another project. For a weekend build with a tight budget, ash for the rockers and back spindles, paired with oak for the seat frame, is the combination I’d reach for.
Joinery, Bending, and Seat Comfort: Where the Chair Either Holds or Fails
This is the section that separates a chair that lasts twenty years from one that loosens up after two winters. Three decisions drive the outcome: how you join the frame, how you shape the back, and whether you bother contouring the seat.
Mortise and Tenon vs. Shortcuts
Mortise and tenon joinery is non-negotiable for the leg-to-seat and back-post connections. A doweled joint might hold for a while, but under the repeated rocking load it works loose faster than a proper mortise and tenon joint glued with a waterproof exterior-rated wood glue. If you’re limited to hand tools, a router with a straight bit and a simple jig gets you clean mortises in an afternoon — you don’t need a dedicated mortiser for a one-off chair.
Steam Bending vs. Laminated Rockers
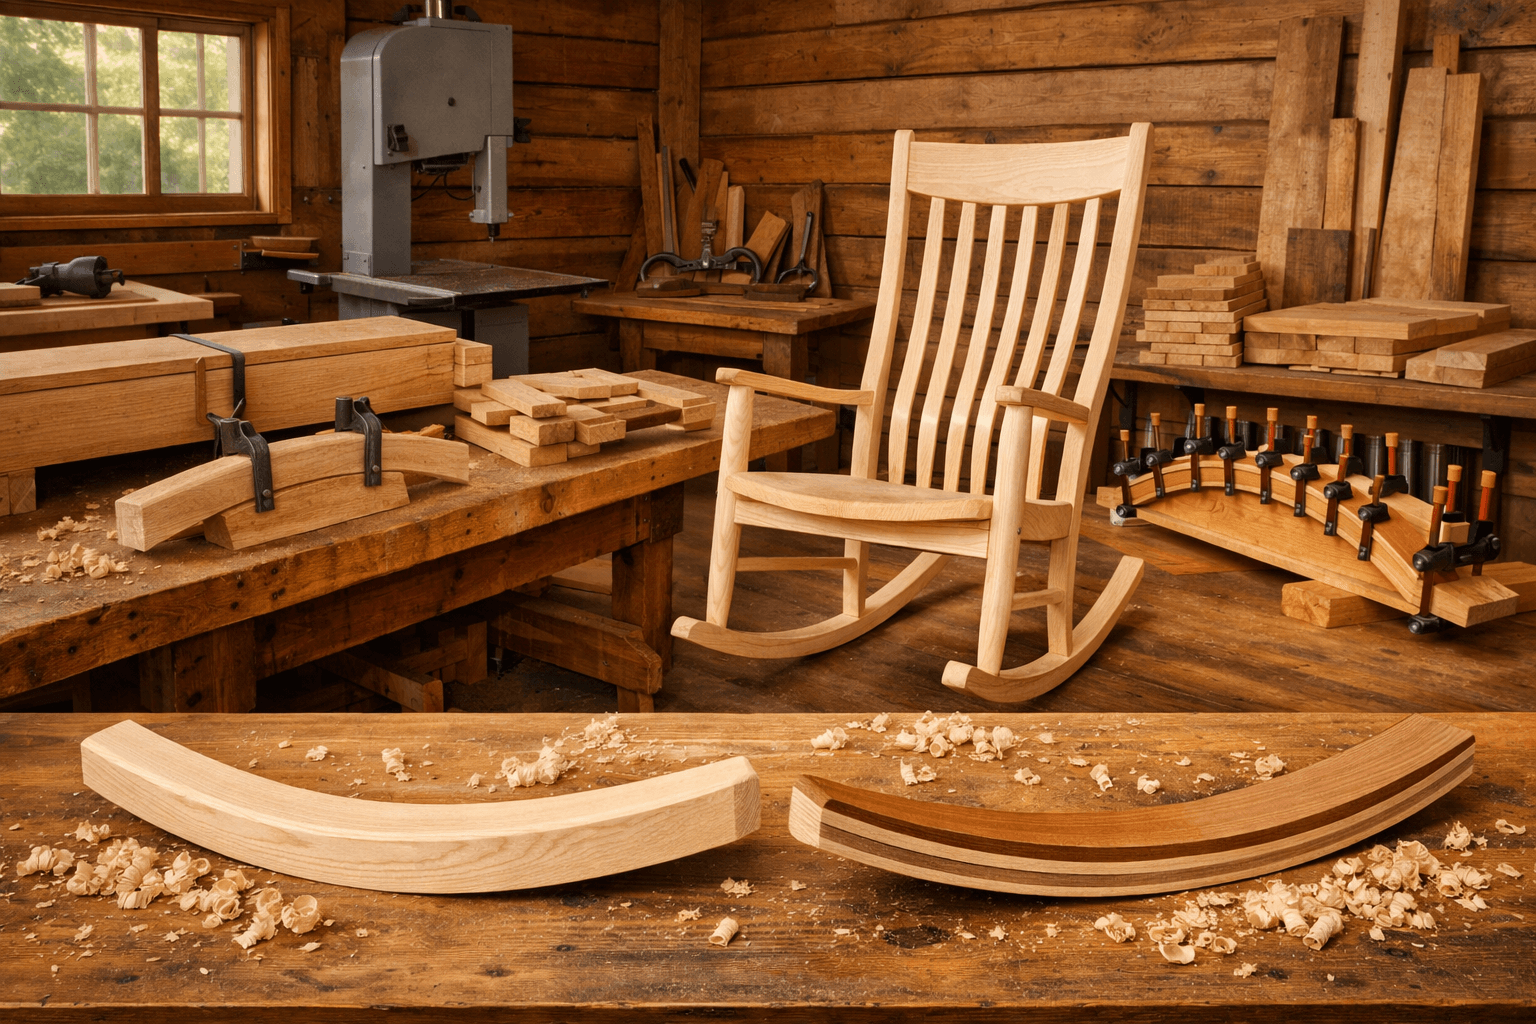
Steam bending gives you a stronger, more traditional-looking back slat and rocker, but it needs a steam box, clamps, and a bending form you’ll only use once. Laminating thin strips of ash or oak with waterproof glue over a bent form is slower to set up but far more forgiving for a first-timer, and it’s the method I’d recommend if this is your first rocking chair build in a cabin shop with limited jigs on hand.
Contouring the Seat
Skipping seat contouring is the most common shortcut that ruins comfort. A flat board seat feels fine for ten minutes and awful after an hour. Rough out the contour with an angle grinder and a coarse sanding disc, then finish the curve with a spokeshave and a scraper for the final pass — expect an hour or two of hand work per seat blank.
Here’s a quick comparison of the three build methods for the back and rockers:
Method
Tools Needed
Skill Level
Best For
Steam bending
Steam box, bending form, clamps
Advanced
Traditional look, strongest single-piece curve
Laminated bending
Bending form, clamps, waterproof glue
Intermediate
First-time builders, cabin workshop setups
Sawn/glued-up curve
Bandsaw, glue, clamps
Beginner
Rustic style, fastest turnaround
Finishing for a Porch, a Lodge, or a Living Room
Finish choice depends entirely on where the chair ends up, and this is where a lot of otherwise solid builds fail early. Wood movement is the enemy: a rocking chair built tight in a heated shop and then moved onto an unheated porch will see the joints expand and contract with humidity swings, and an unsealed finish won’t protect it.
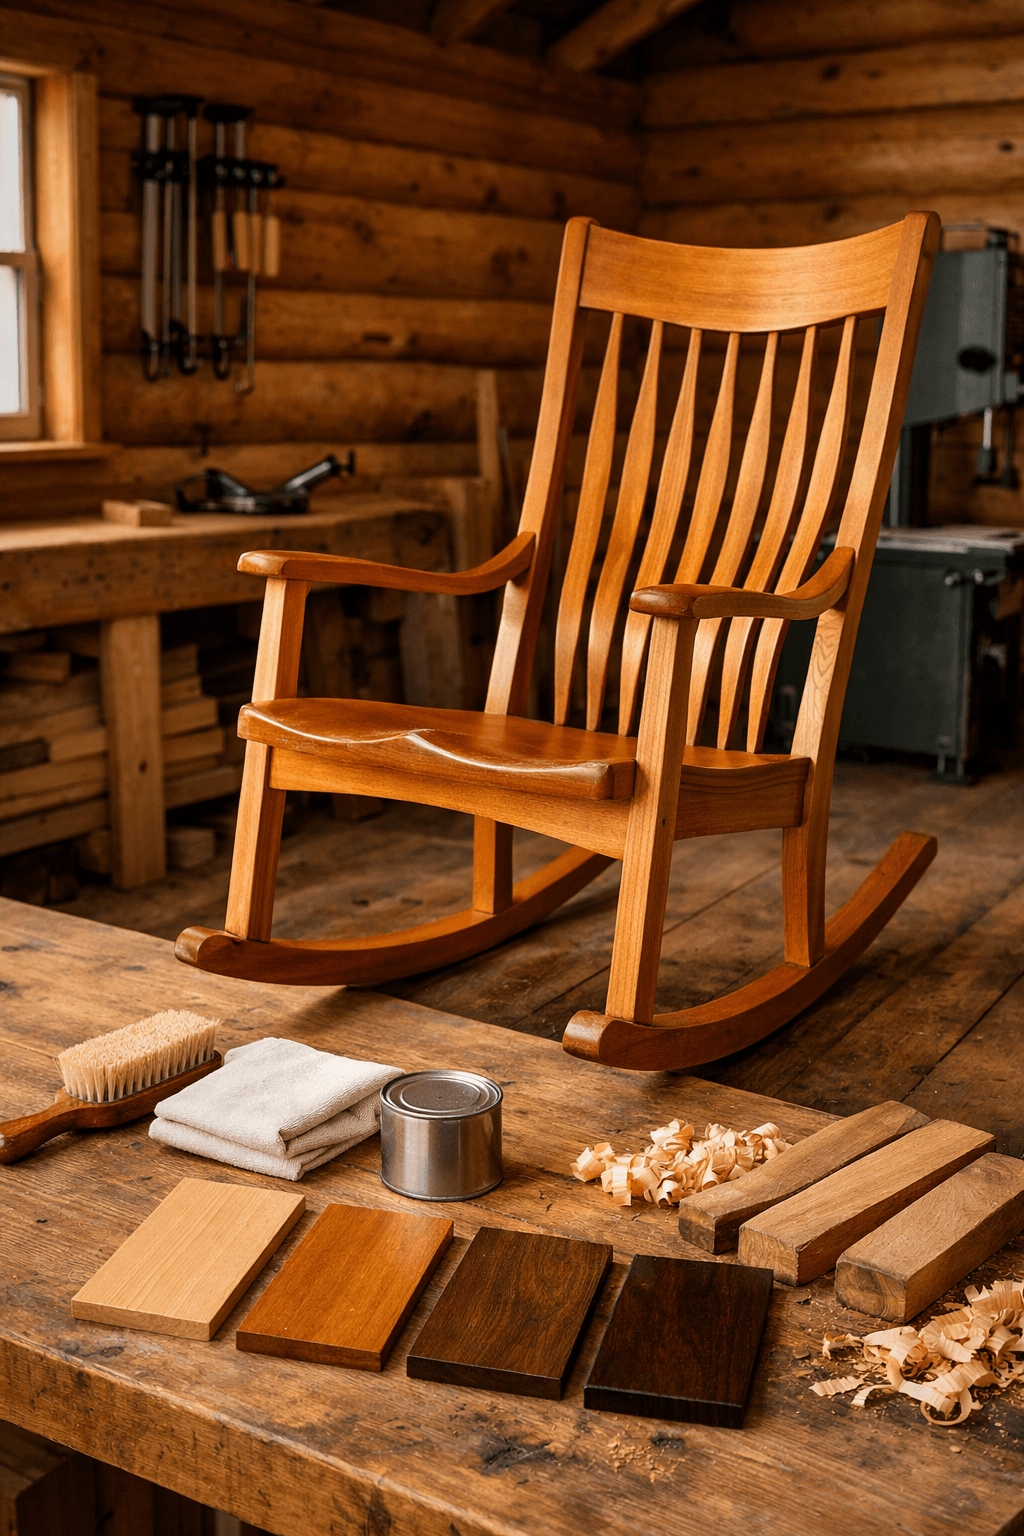
For indoor cabin use near a wood stove, a simple oil-based wipe-on finish like tung oil or a Danish oil blend works well and lets you touch up worn spots without stripping the whole chair. For a porch rocker exposed to rain and swinging temperatures, go with a marine-grade spar varnish instead — it flexes with wood movement better than a hard polyurethane shell, which tends to crack at the joints after a season or two outdoors.
Sand through 120, then 180 grit, hand-sanding all curved surfaces with the grain.
Wipe down with a tack cloth to pull dust out of the pores.
Apply the first coat of finish and let it sit 24 hours minimum.
Sand lightly with 220 grit between coats to knock down raised grain.
Apply two to three total coats for indoor oil finishes, or three to four for outdoor spar varnish.
Let the final coat cure a full week before regular use, longer in cold or damp cabin conditions.
If you want a deeper dive into wood treatments that hold up in unheated cabins and off-grid setups, cabinlodger.com has more on matching finish type to your specific climate and build.
Frequently Asked Questions
Is it cheaper to build a rocking chair than buy one?
Usually not by much in raw material cost, but you gain control over wood species, size, and joinery quality. Expect $80 to $150 in ash and oak lumber for a standard chair, versus $150 to $400 for a comparable premade solid-wood rocker.
Can I build a rocking chair with only hand tools?
Yes, but budget more time. A bandsaw speeds up rocker and seat blank cuts dramatically; without one, plan on a full extra day of handsawing and a coarse rasp to rough out the curves before fine-tuning with a spokeshave.
How do I know if my rocking angle is right?
Sit in the mockup before final assembly. The chair should rest with all rocker length touching the floor when empty and rock smoothly forward and back without kicking up at either end when you lean.