Draw a log home floor plan the same way you’d draw a stick-built house, and you’re setting yourself up for cracked trim, jammed doors, and a roof that doesn’t sit right in five years. Log walls move. They shrink vertically as the wood dries and settles, sometimes 3 to 6 inches over a full log wall height in the first few years, and your floor plan has to plan for that motion from day one. Get the layout right and you get a home that opens up beautifully and still functions in year seven, not just on move-in day.
That’s the real difference between a pretty rendering and a buildable plan: one accounts for wood, the other just looks good on paper.
Open Concept vs. Defined Rooms: Which Layout Actually Works in Logs?
Open concept works better in log construction than most people expect, but not for the reason you’d think. It’s not about aesthetics — it’s about wall count. Log walls are load-bearing by nature, so every interior log wall you add is a structural decision, not just a design one.
Why Log Walls Limit Your Interior Flexibility
In stick framing, you can move an interior wall for $200 in lumber and a weekend. In a log home, an interior log wall is stacked, notched, and settling right along with everything else, which means moving it later basically means rebuilding it. That’s why most log floor plans lean toward a great room design for the main living space: kitchen, dining, and living area sharing one open volume, with fewer log partitions to fight against.
Where Defined Rooms Still Make Sense
Bedrooms, bathrooms, and a mudroom usually get built with a mix of shorter log walls and conventional interior framing (2×4 or 2×6 stud walls) instead of full log partitions. This gives you privacy and sound control without adding another settling structural wall in the middle of your floor plan. A lot of builders frame the bathroom plumbing wall in dimensional lumber even in an otherwise all-log house, because running pipes through a log wall that’s still shrinking is asking for trouble.
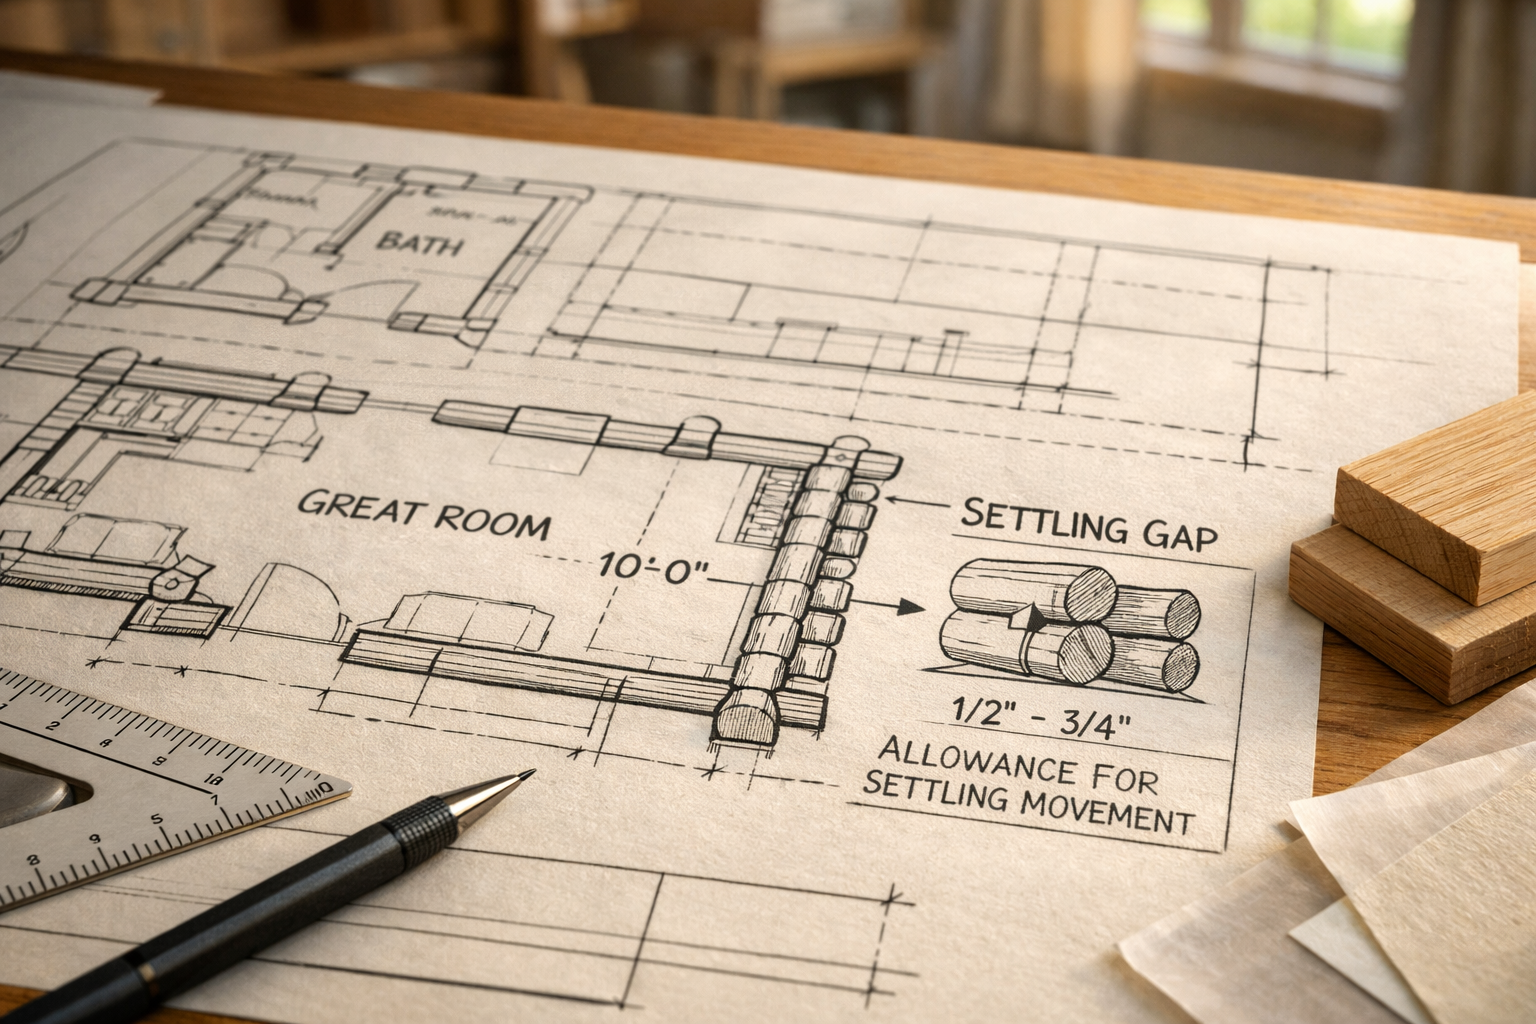
Settling Gaps: The Detail Most Floor Plans Skip Entirely
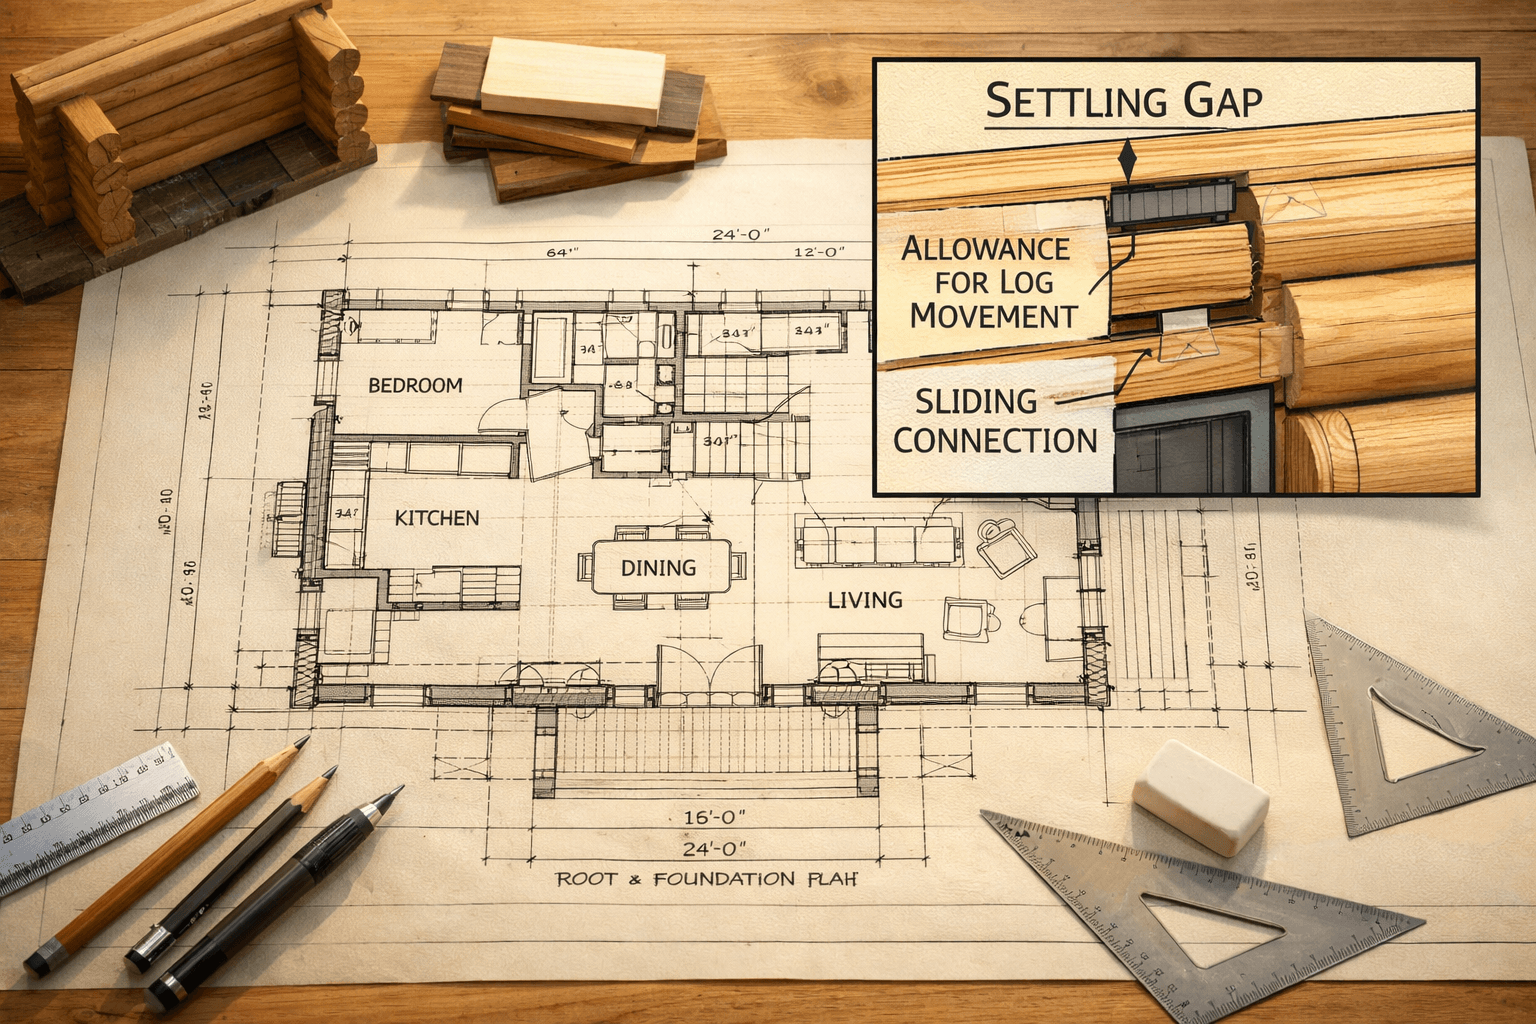
Every door, window, and stair opening in a log wall needs a settling gap above it, typically 1 to 1.5 inches per 8 feet of wall height below the opening, and your floor plan needs to show where that gap goes before you ever order materials. Skip this and your windows will bind, your doors will stop closing, and your interior trim will crack within two or three heating seasons.
Standard house plans just don’t include this because stick-built walls don’t shrink. A true log house floor plan marks compression posts, slip joints at partition walls, and adjustable window and door bucks that can slide down as the wall settles around them. If your plan set doesn’t show these details, ask the designer directly — this is the one thing that separates a log-specific plan from a stick-built plan with log siding drawn on top.
Here’s roughly how settling plays out over time on an average 8-foot log wall section:
Time After Build
Typical Settling
What to Check
First 6 months
1/2 to 3/4 inch
Door swing, window operation
Year 1
1 to 1.5 inches
Trim gaps, stair stringer clearance
Years 2-3
1.5 to 2.5 inches (cumulative)
Interior partition slip joints
Years 4-5+
Settling mostly complete
Final trim can be installed permanently
That last row matters more than people realize: don’t install your finish trim and permanent stair railings until settling has mostly stopped, usually 4 to 5 years for kiln-dried or standing dead timber, longer for green logs.
Sizing the Plan: Square Footage, Stories, and Loft Weight
A comfortable log cabin runs anywhere from 800 square feet for a small two-bedroom retreat up to 2,400+ square feet for a full-time family home, and the right size depends more on your foundation budget than your wish list. Log walls and log framing cost more per square foot than conventional framing, roughly 15 to 30% more depending on log species and profile, so every extra 100 square feet has real weight in your budget.
Single-Story vs. Two-Story Trade-offs
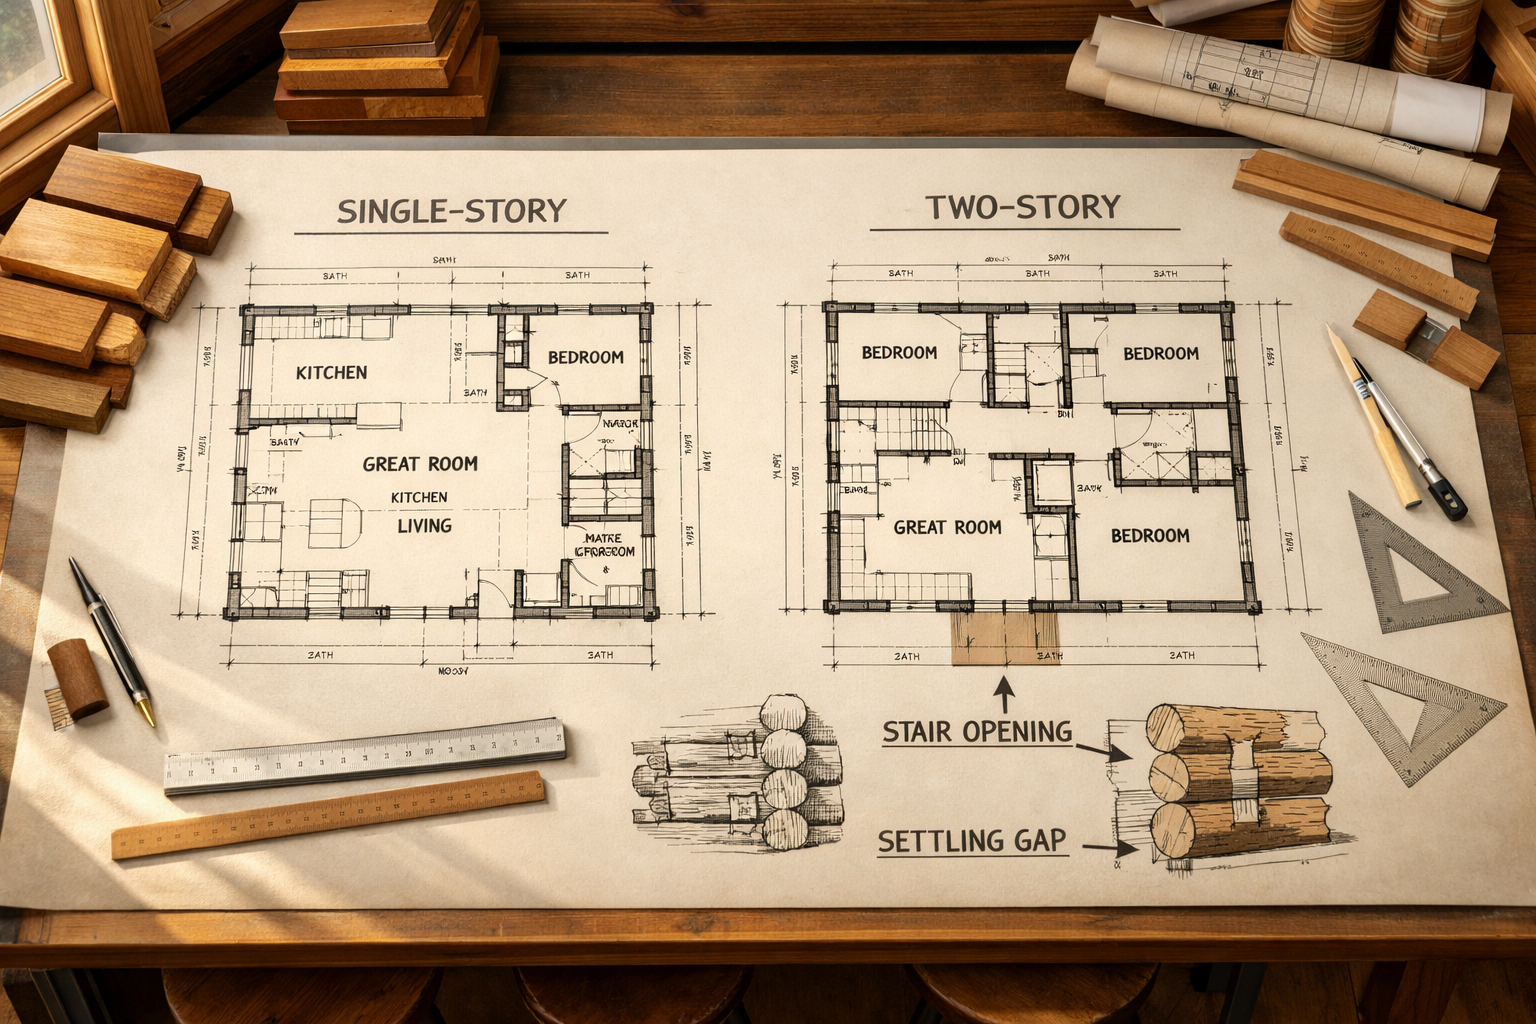
A single-story plan settles more evenly and avoids stacking log walls on top of log walls, which simplifies the settling math a lot. Two-story plans look striking with a big log gable end, but the second-floor log walls settle independently from the first floor, so your stairwell and any interior chase need extra clearance built into the plan.
Adding a Loft Without Overloading the Roof
Lofts are popular in small cabin floor plans because they add a bedroom without adding a full footprint, but a loft floor is dead weight sitting on your roof structure or on ridge beam supports. Before you sketch a loft into a 16×24 cabin, check with a structural engineer or your log package supplier about the ridge beam size and post spacing needed to carry that extra load, because undersizing it is one of the most common mistakes in small cabin plans.
Placing Rooms for Light, Heat, and Daily Flow
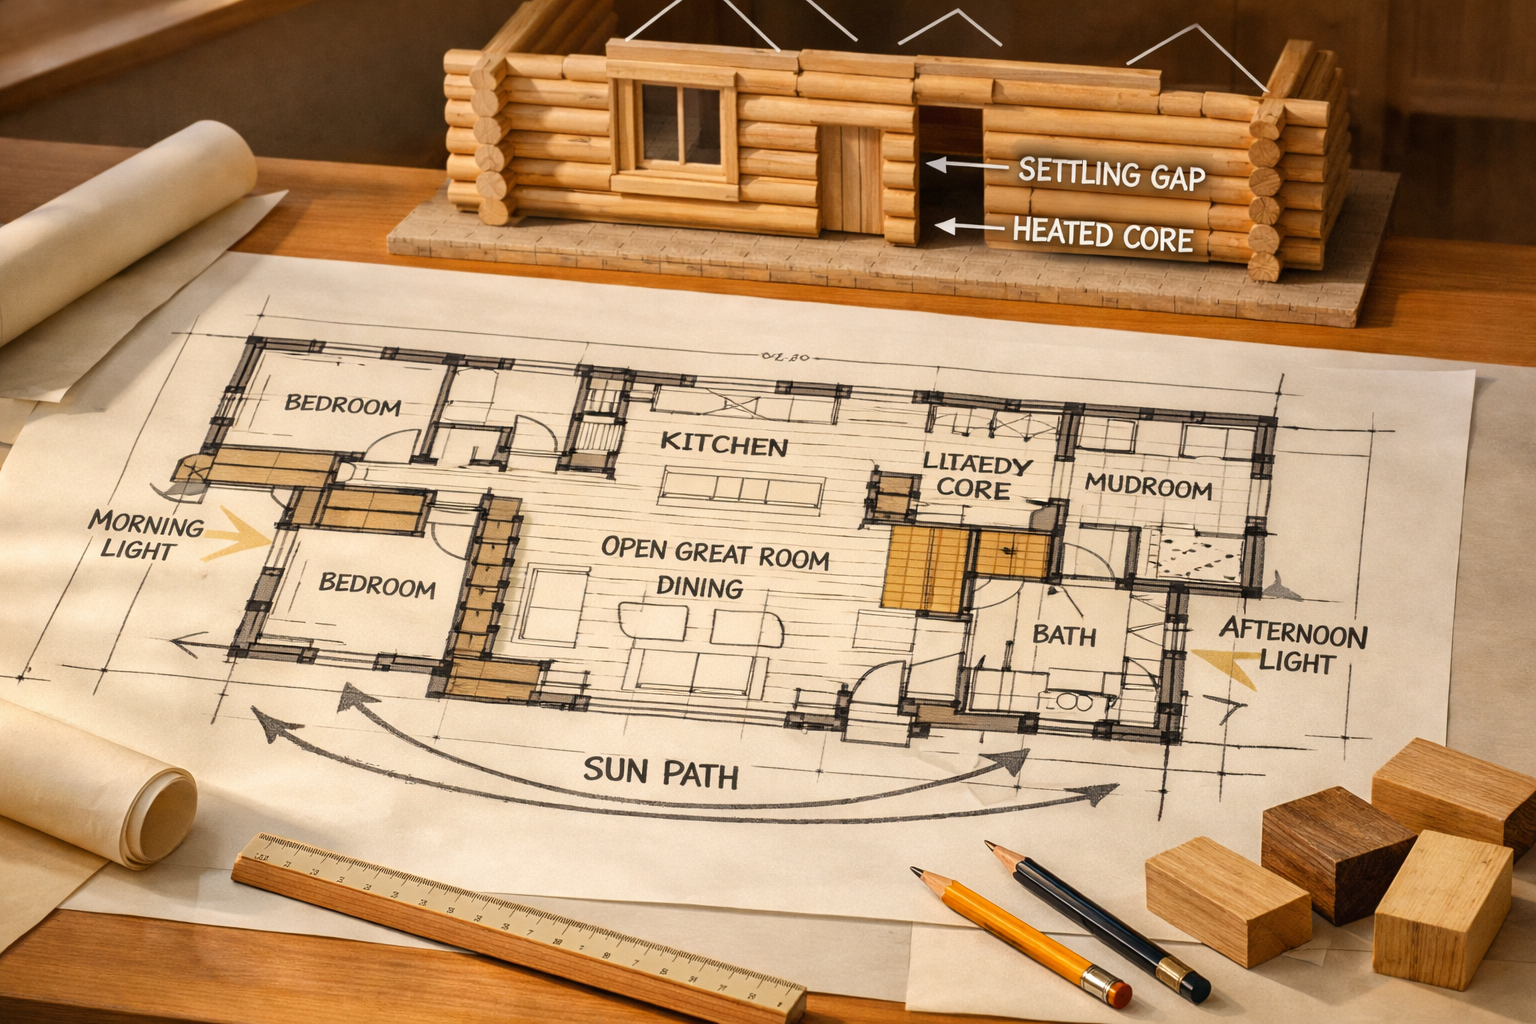
Room placement in a log home isn’t just about views. Log walls are thick, usually 6 to 12 inches, and that mass changes how heat moves through the house and how light lands in each room, so the floor plan has to work with the material, not against it.
Getting the sequence right up front saves you from redesigning mid-build:
Orient the great room’s biggest windows south or southeast to catch passive solar heat gain in winter.
Place the kitchen and bathroom on a shared plumbing wall to shorten pipe runs and cut freeze risk in cold climates.
Put the mudroom and garage entry on the side that takes the worst weather, usually north or northwest.
Zone your HVAC by level if you’re building two stories or adding a loft, since open-concept log homes lose heat unevenly through that thick log mass.
Keep bedroom windows smaller and higher on exterior walls to preserve structural log courses near corners.
Locate the porch or deck off the great room, not off a bedroom, so it extends the main living space instead of just adding curb appeal.
Porches also do double duty on a log home: a deep porch, 8 feet minimum, shades the log walls from UV and rain, which slows the checking and graying that happens on exposed timber. That’s a maintenance decision as much as a design one, and it’s worth tracking alongside other upkeep steps if you’re following a build like the ones documented over at cabinlodger.com.
Frequently Asked Questions
Do I need a special architect for a log house floor plan, or can I use a standard plan?
Use a plan drawn or reviewed specifically for log construction. Standard stick-built plans don’t account for wall thickness, settling gaps, or load-bearing log walls, and adapting one after the fact usually costs more than starting with a log-specific design.
How much smaller does a log home feel compared to the same square footage in a stick-built house?
Log walls average 6 to 12 inches thick versus 4 to 6 inches for framed walls, so a 1,200-square-foot log home loses roughly 3 to 5% of usable interior space to wall thickness alone. Plan slightly larger if room size matters more than the number on paper.
Can I add an interior wall to my log home after settling is finished?
Yes, once settling is done (usually 4 to 5 years), you can add conventional stud walls without worrying about crush zones. Avoid adding another full log partition wall at that point since it introduces new settling movement into an otherwise stable structure.