Which woodworking skills actually matter when you’re building a cabin, and which ones can wait? That’s the question most guides skip, because most guides treat every types of woodworking list as one flat menu for hobbyists. A cabin build doesn’t work that way. You need certain skills the day you start cutting your frame, and others don’t matter until you’re hanging cabinet doors months later.
This guide ranks the skills by when you’ll actually need them, from foundation and frame joinery through to the finish work that keeps your cabin standing for decades. It also calls out which techniques a solo DIYer can pick up on the fly, and which ones deserve a weekend of practice on scrap lumber before you touch a load-bearing wall.
Frame and Foundation Joinery Comes First, Not Fine Furniture Skills
If you’re new to woodworking and trying to figure out where to spend your practice hours, spend them on framing joints, not furniture joints. Cabin walls, sills, and rafters need connections that hold weight and resist weather, and that’s a completely different job than making a drawer slide smooth.
A lot of beginner builders assume that if they can dovetail a jewelry box, they can handle a cabin frame. That assumption causes real problems. Fine furniture joinery is built for controlled indoor conditions, tight tolerances, and loads measured in pounds, not tons. A cabin frame deals with snow load, wind shear, and wood that shrinks and swells with the seasons. The joint that looks perfect in your workshop in July might telegraph a gap by January once the humidity drops and the timber moves.
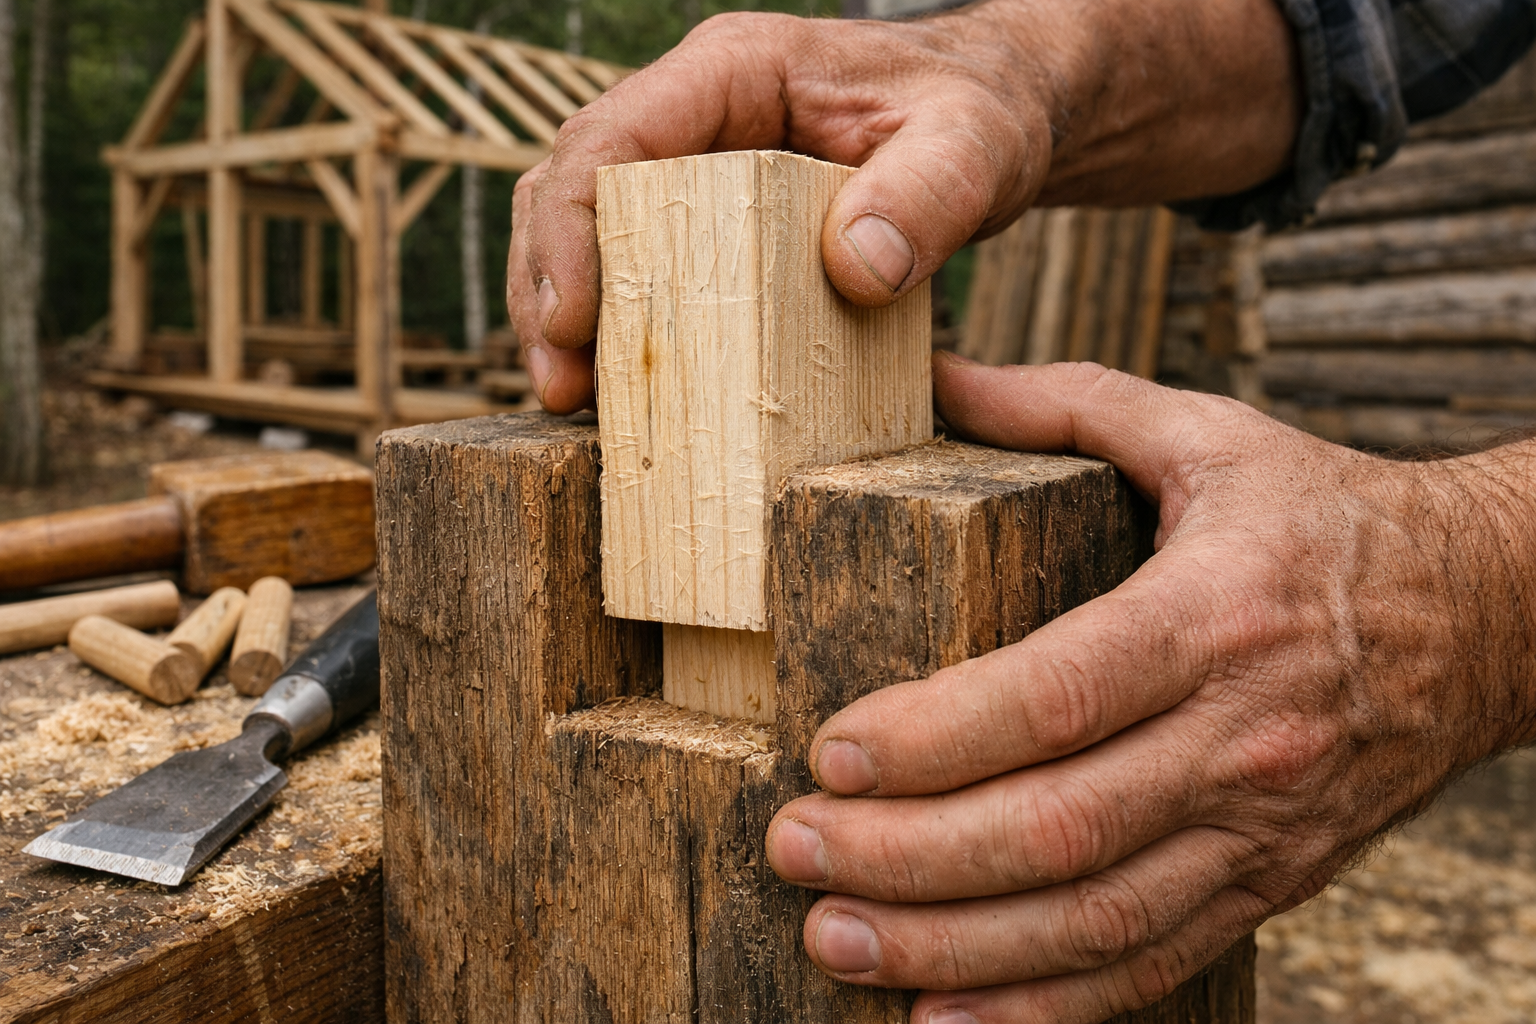
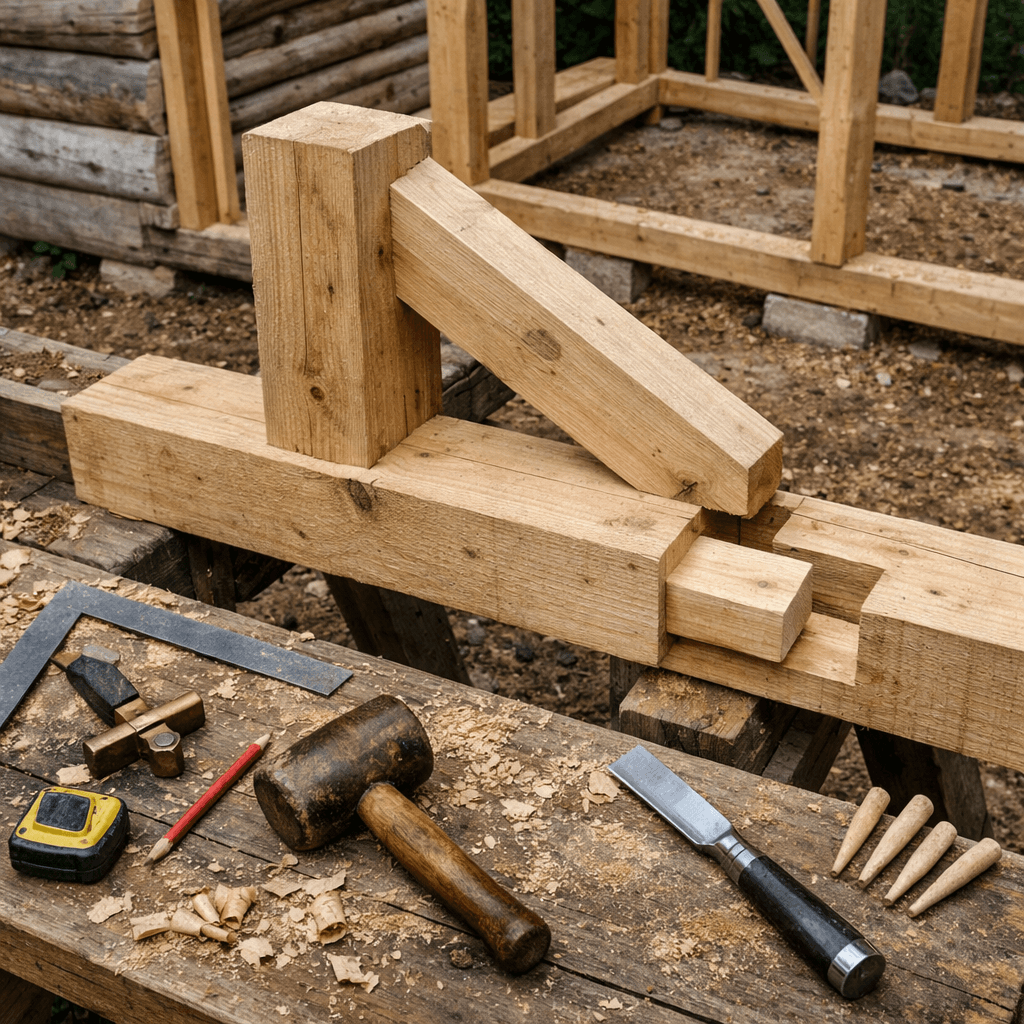
That’s why mortise-and-tenon joinery sits at the top of the priority list for anyone framing a cabin by hand or with basic timber framing methods. It’s simple in concept: you cut a peg-shaped tenon on one timber and a matching socket, or mortise, in the other. Done right, with a snug fit and a wood peg or two driven through for extra hold, this joint has been holding up post-and-beam structures for centuries without a single metal fastener.
Why Structural Joints Need Different Tolerances Than Furniture Joints
Furniture joints are cut to fractions of a millimeter because the wood barely moves once it’s inside a heated house. Structural cabin joints need some built-in tolerance for wood movement, or they’ll crack under stress instead of flexing with it. A tenon cut dead-tight with zero allowance for seasonal swelling can actually split the mortise open over a year or two.
Most experienced timber framers leave a small margin, sometimes called relief, at the joint’s non-bearing edges. It’s a tiny detail, but it’s the difference between a joint that lasts thirty years and one that starts creaking by year three.
Practicing Before You Cut Your Actual Frame Timbers
Don’t cut your first mortise-and-tenon joint on the timber that’s going into your cabin wall. Grab a few 8-foot or 10-foot sections of construction-grade lumber, the kind you’d get for under $15 a board at a lumber yard, and practice the layout and cuts there first. Expect to burn through two or three practice joints before your first one fits without hammering it in with a mallet and a prayer. That’s normal. Even builders who’ve framed a few sheds still warm up on scrap before a big timber-framing day.
Log Notching Techniques Every Log Cabin Builder Needs to Know
If you’re building with round or squared logs instead of dimensional lumber, notching is the single skill that determines whether your walls stay weathertight or start leaking at every corner. This isn’t optional decorative work. It’s structural, and it’s unforgiving of sloppy cuts.
Saddle Notch vs. Dovetail Notch
The saddle notch is the classic round-log cabin joint, cut as a rounded scoop on the underside of each log so it cradles the log below it at the corner. It sheds water naturally because of its curved shape, and it’s the notch most beginner log builders start with because the geometry is more forgiving than square-cut joints. The tradeoff is that it takes practice to get a consistent curve with a chainsaw or a scribing gouge, and a poorly cut saddle notch leaves gaps that let wind and moisture straight into your wall.
The dovetail notch is squared, angled, and self-locking, meaning the logs actually wedge tighter together as the structure settles. It looks sharper and is often used on squared or hewn log cabins rather than round ones. It’s harder to cut well because the angles have to match on both mating logs, but once it’s in, it doesn’t rely on gravity alone to stay tight the way a saddle notch does.
Scribing: The Skill That Makes Log Fitting Actually Work
Scribing is the process of tracing the exact contour of one log onto another so they nest together with almost no gap, and it’s arguably the most underrated skill on this whole list. Logs are never perfectly round or perfectly straight, so without scribing, you’re just guessing at fit and caulking the gaps later. A cheap scribing tool with two pins, one that follows the lower log’s surface and one that transfers the line to the log above, costs around $20 to $30 and pays for itself the first time you avoid a chinking disaster.
Here’s the honest truth: log notching is not something to learn for the first time on your actual cabin walls. Build a mini test corner with four short log sections first. It’ll cost you an afternoon and maybe $40 in scrap logs, and it’ll save you from ruining a $200 timber over a bad notch.
General Carpentry and Framing Skills for the Walls, Roof, and Openings
Once your foundation and main frame are up, general carpentry carries you through walls, roof structure, window and door openings, and all the connective tissue that turns a skeleton into a building. This is the broadest category on the list, and honestly the most learnable for a solo DIYer with no formal training.
Standard stick-framing, using 2×4 or 2×6 studs on 16-inch or 24-inch centers, doesn’t require the precision joinery that timber framing does, because you’re relying on nails, screws, and metal connectors like joist hangers and hurricane ties to do the structural work instead of cut joints. That makes it far more forgiving for someone learning as they go.
Roof framing is where carpentry skill gets tested the most. Cutting rafters with the correct birdsmouth notch and ridge cut, so they sit flush at the top and bear evenly on the wall plate, takes some geometry and a couple of practice cuts, but it’s absolutely something a first-time builder can master with a rafter square (sometimes called a speed square) and a framing calculator app or a basic rafter table.
Here’s a rough sequence most solo cabin builders follow once the frame is standing:
Set and brace the wall studs, checking plumb every few feet with a level.
Install top and bottom plates, making sure joints land over studs, not in open air.
Cut and raise rafters or trusses, starting from one gable end and working across.
Sheath the roof with plywood or OSB, staggering the seams for strength.
Frame window and door rough openings with proper headers sized for the span.
Add blocking and bracing wherever the plan calls for extra rigidity.
Skipping step 6 is the most common mistake I see in DIY framing photos online. A wall that looks solid can still rack, or shift diagonally, under wind load if it’s missing diagonal bracing or structural sheathing.
Power tools genuinely shine in this phase. A circular saw, a framing nailer, and a decent cordless drill will get a solo builder through wall and roof framing far faster than hand tools alone, and there’s no meaningful structural downside to using them here the way there can be in tight joinery work.
Hand Tools vs. Power Tools: Where Each One Actually Wins
Power tools win on speed for repetitive cuts, and hand tools win on precision for tight-fitting joints. The mistake a lot of new builders make is assuming a good tool collection replaces skill entirely, when really each tool type is suited to a different kind of cut.
A circular saw or miter saw will get you through hundreds of identical stud cuts faster than any hand saw could, and for a cabin build on a deadline, that speed matters. But when you’re cutting the cheeks of a mortise-and-tenon joint or fine-tuning a log notch for a scribed fit, a chisel, a hand plane, or a slick (a large timber-framing chisel) gives you control a power tool simply can’t match. You can feel the wood resist and adjust pressure mid-cut, something you can’t do with a spinning blade.
There’s a real belief among first-time builders that a track saw or a good router will substitute for hand-cut joinery skill. It won’t, not fully. Routers can hog out a mortise fast, which is genuinely useful, but the final fit, that last sixteenth of an inch that determines whether a tenon is snug or sloppy, almost always comes down to hand-chisel work. Skilled timber framers use both: power tools for bulk removal, hand tools for the fit.
A Practical Starter Kit for Both Camps
A solo builder doesn’t need a full workshop to start. A reasonable starting kit includes a corded or cordless circular saw, a framing hammer, a sharp 4-in-1 rasp or a couple of good bench chisels, a hand plane for smoothing joint faces, and a decent set of clamps, because almost every joint needs to be held tight while glue or pegs set.
When Hand Tools Are Non-Negotiable
Anywhere two pieces of wood need to fit tight without gaps, hand tools take over. That includes log notching, timber joinery cheeks, and any spot where you’re custom-fitting a piece against an irregular surface, like scribing a log or trimming a door jamb to an out-of-square rough opening.
Comparing Woodworking Types by Cabin Build Phase
Not every woodworking skill belongs at the same stage of a build, and trying to learn them all at once is a fast way to get overwhelmed. The table below breaks down where each type fits, how hard it is to pick up without formal training, and whether it’s something you can safely learn on the actual structure or need to practice elsewhere first.
Woodworking Type
Build Phase
Learning Difficulty (Solo DIY)
Practice on Scrap First?
Timber framing joinery (mortise-and-tenon)
Foundation/frame
Moderate to hard
Yes, always
Log notching (saddle, dovetail)
Wall construction
Hard
Yes, always
General carpentry/framing
Walls, roof, openings
Easy to moderate
Optional, low risk
Wood carving (decorative)
Trim, accents
Moderate
Recommended
Wood turning
Furniture, railings
Moderate to hard
Yes
Cabinetmaking
Interior finish
Moderate to hard
Recommended
Wood finishing/sealing
All exterior wood, ongoing
Easy
No, but test on offcuts
Notice where the “hard” and “practice first” columns cluster. It’s almost entirely in the structural and log-fitting work, which makes sense, because that’s the wood that holds the roof over your head. Decorative and interior work, by contrast, gives you more room to learn as you go, since a wobbly carved handrail baluster is an annoyance, not a safety issue, while a bad saddle notch can be.
Decorative and Furniture-Building Skills for Later in the Build
Wood carving, wood turning, cabinetmaking, and general furniture making all belong toward the back half of a cabin project, once the structure is weathertight and you’re working on the parts people actually touch and see every day. None of these are structural, which means mistakes here cost you time and material, not the integrity of your building.
Wood Carving and Wood Turning for Character Pieces
Wood carving, shaping wood with chisels, gouges, and knives to create decorative detail, shows up in cabins as carved corbels, mantel details, or a hand-shaped sign by the door. It’s slow work and genuinely a hobby unto itself; most builders treat it as an optional flourish rather than something they need to master. Wood turning, done on a lathe to produce round, symmetrical pieces like railing balusters, table legs, or bowls, requires a lathe (a benchtop model runs somewhere around $200 to $400) and a different set of hand skills entirely, since you’re removing material while the workpiece spins rather than while it sits still.
Both skills reward patience more than raw strength, and both are genuinely fun once you get past the learning curve, which for most people is a handful of ruined blanks before the first clean piece comes off the lathe or out from under the gouge.
Cabinetmaking and Interior Furniture Come Last
Cabinetmaking, the fine, precise joinery used for kitchen cabinets, built-in shelving, and interior furniture, is the most detail-oriented skill on this whole list, and it’s also the one with the least urgency. Nobody’s cabin falls down because the kitchen cabinets aren’t installed yet. This is where techniques like dovetail joints genuinely belong, since dovetails are built for drawer boxes and fine casework, not for framing a wall.
A lot of woodworking guides written for hobbyists lead with dovetails and cabinetry because that’s what’s popular in workshop culture and on woodworking forums. For a cabin builder, that’s backwards. Save the dovetail practice for winter evenings after the roof is on and the cabin is dried in. There’s no rush, and honestly, cabinetmaking is more enjoyable when you’re not racing the weather to get the shell closed up before the first snow.
Wood Finishing and Sealing: The Type Most Builders Skip Too Fast
Wood finishing and sealing is the technique most likely to get skipped or rushed, and it’s the one most directly tied to how long your cabin actually lasts. Untreated exterior wood, whether it’s log walls, timber posts, or trim, starts graying and checking within a single season of sun and rain exposure.
This isn’t glamorous work. There’s no satisfying joint to admire when you’re done, just a wall that looks the same color it did before you started, except now it’s protected. That’s probably why so many first-time builders treat it as an afterthought instead of a core woodworking skill, when really it belongs on this list right alongside framing and joinery.
Choosing Between Stains, Sealers, and Borate Treatments
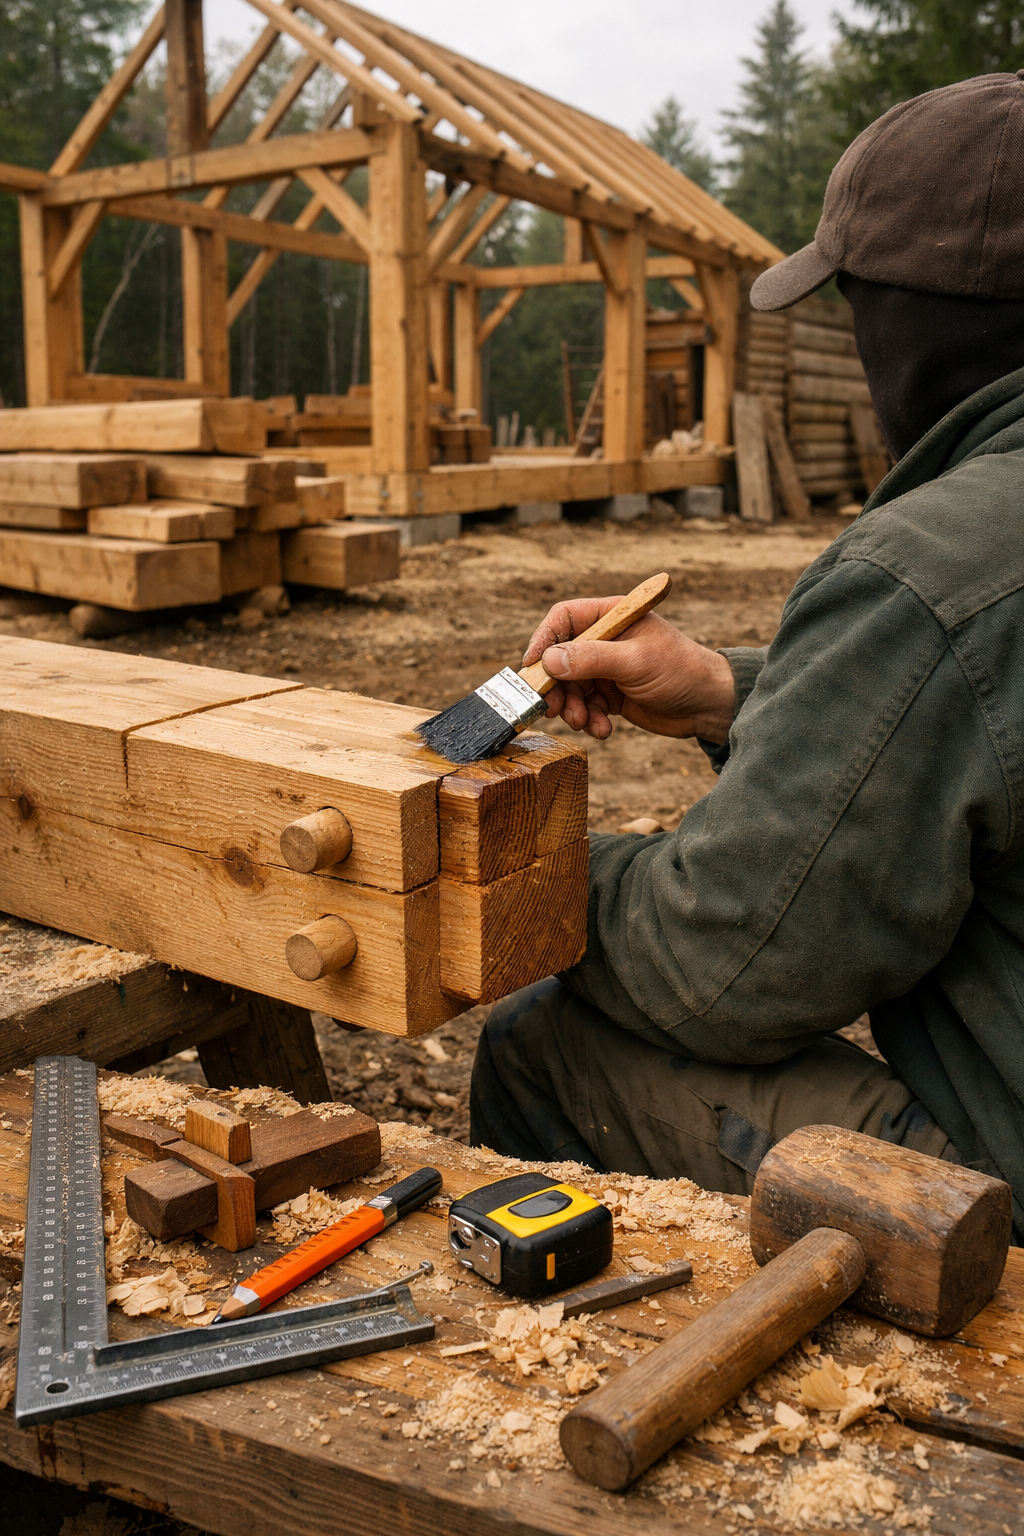
For exterior log and timber work, a borate-based wood preservative applied before the wood ever sees weather protects against rot and insect damage from the inside out, and it’s especially worth it on sill logs and anything sitting close to grade. On top of that, a penetrating oil-based stain with UV blockers, reapplied roughly every 2 to 3 years depending on sun exposure, keeps the wood from graying and checking. Film-forming finishes like polyurethane look glossy at first but tend to crack and peel on exterior log walls because they can’t flex with the wood’s seasonal movement, so most experienced builders steer clear of them outside.
Timing Your Finish Work Around the Build
Ideally, treat your structural timbers and logs before they go up, then do a final coat once the cabin is framed and any construction grime is cleaned off. Waiting until after the interior is finished to start exterior sealing is a common mistake, because by then you’ve often got a full season of unprotected sun exposure already baked into the wood. If you want a deeper walkthrough on product choices and application schedules, cabinlodger.com has a dedicated wood treatment guide worth reading before you buy your first can of sealer.
There’s also a real difference between finishing structural wood and finishing furniture or cabinetry indoors. Interior pieces can handle film finishes just fine since they’re not fighting rain and UV, but treat your exterior structural wood like it’s going to fight the weather for the next twenty years, because it is.
Frequently Asked Questions
Do I need to learn timber framing joinery if I’m building a simple stick-frame cabin?
No, not the full mortise-and-tenon system. Standard stick framing relies on nails and metal connectors instead, so basic carpentry skills cover it. Timber framing joinery matters most for post-and-beam or exposed-frame cabin styles.
What’s the fastest woodworking skill to pick up for a first-time cabin builder?
General framing carpentry, since it uses simple cuts, common lumber sizes, and metal hardware instead of precision joints. Most solo builders get comfortable with stud walls and rafter cuts within the first week or two of hands-on practice.
Can I skip hand tools entirely and just use power tools for my whole cabin?
Not if you want tight-fitting joints. Power tools handle bulk cutting well, but log notching and timber joinery cheeks almost always need hand-chisel work for the final, snug fit that keeps water out.
How often does exterior cabin wood actually need to be resealed?
Roughly every 2 to 3 years for oil-based stains with UV protection, though sun-exposed south and west walls may need it closer to every 18 months. Shaded, north-facing walls often stretch longer between coats.