Grab a handful of plain steel nails for your cabin furniture and you’re asking for rust streaks down the leg of a table within a season. Nails for furniture aren’t a one-size-fits-all hardware store grab — the right choice depends on wood thickness, indoor vs. outdoor exposure, and whether you’re swinging a hammer instead of running a pneumatic gun. Get the gauge, finish, and head type wrong, and you’ll either split your lumber or end up with a piece that looks fine in June and rusts by October.
This matters more in a cabin than in a normal shop project. Humidity swings, temperature drops, and hand-tool builds all change what “the right nail” actually means.
Finish Nails vs. Brad Nails: Which One Actually Holds Furniture Together?
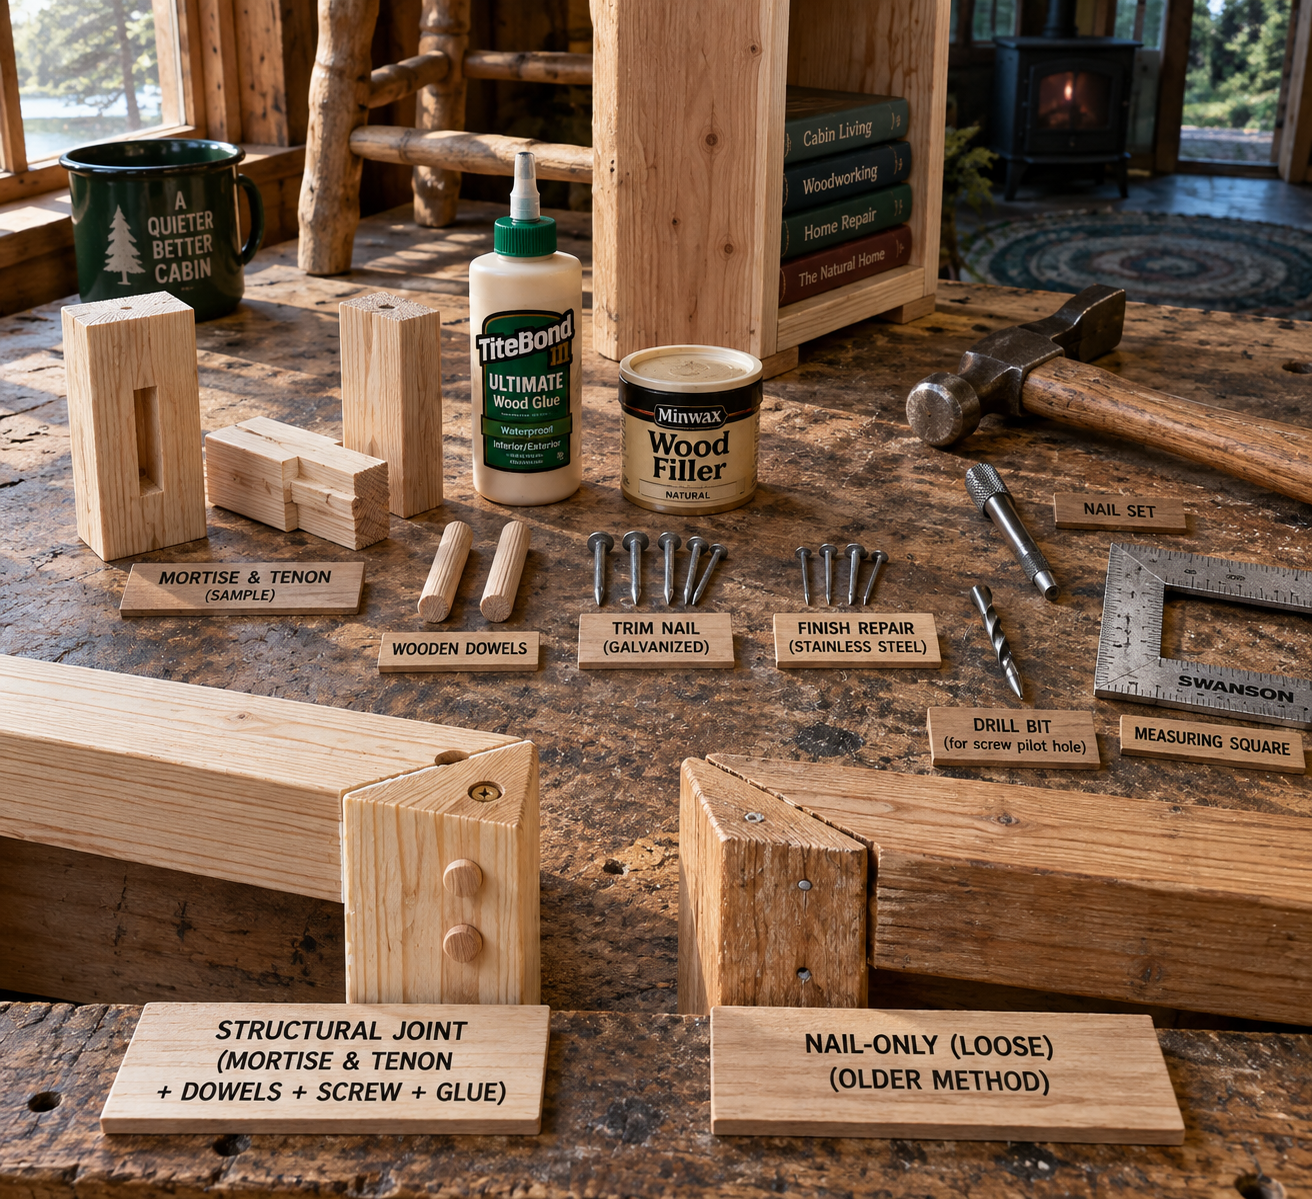
Neither one, honestly — that’s the mistake most guides skip past. Finish nails and brad nails are trim and joinery-assist fasteners, not structural connectors, and using them alone on a chair leg or table joint is how furniture ends up wobbly within a year.
What Finish Nails Are Good For
Finish nails typically run in the 15 to 16 gauge range, with small heads designed to sink below the surface and disappear under filler. They’re great for attaching face frames, trim strips, and thin panel edges to a cabinet carcass that’s already held together by glue or screws underneath. On a cabin bookshelf, I’d use them to pin a face frame while glue cures, not to bear the shelf’s weight.
What Brad Nails Are Good For
Brad nails are thinner still, often 18 gauge, and they’re built for delicate trim work where splitting is the enemy — thin battens, small molding, drawer bottoms. They hold almost nothing in terms of load. If your joint needs to survive someone leaning on it, back it up with wood glue and a screw, and let the brad or finish nail just keep things aligned while everything sets.
The Real Structural Fix
For actual furniture joints — stretchers, aprons, leg-to-seat connections — use screws or a doweled/mortise joint with glue, and treat nails as a secondary holder, not the primary fastener. This is the single biggest correction to make if you’re used to thinking “nail gun equals strong joint.”
Matching Nail Finish to Your Cabin’s Humidity and Temperature Swings
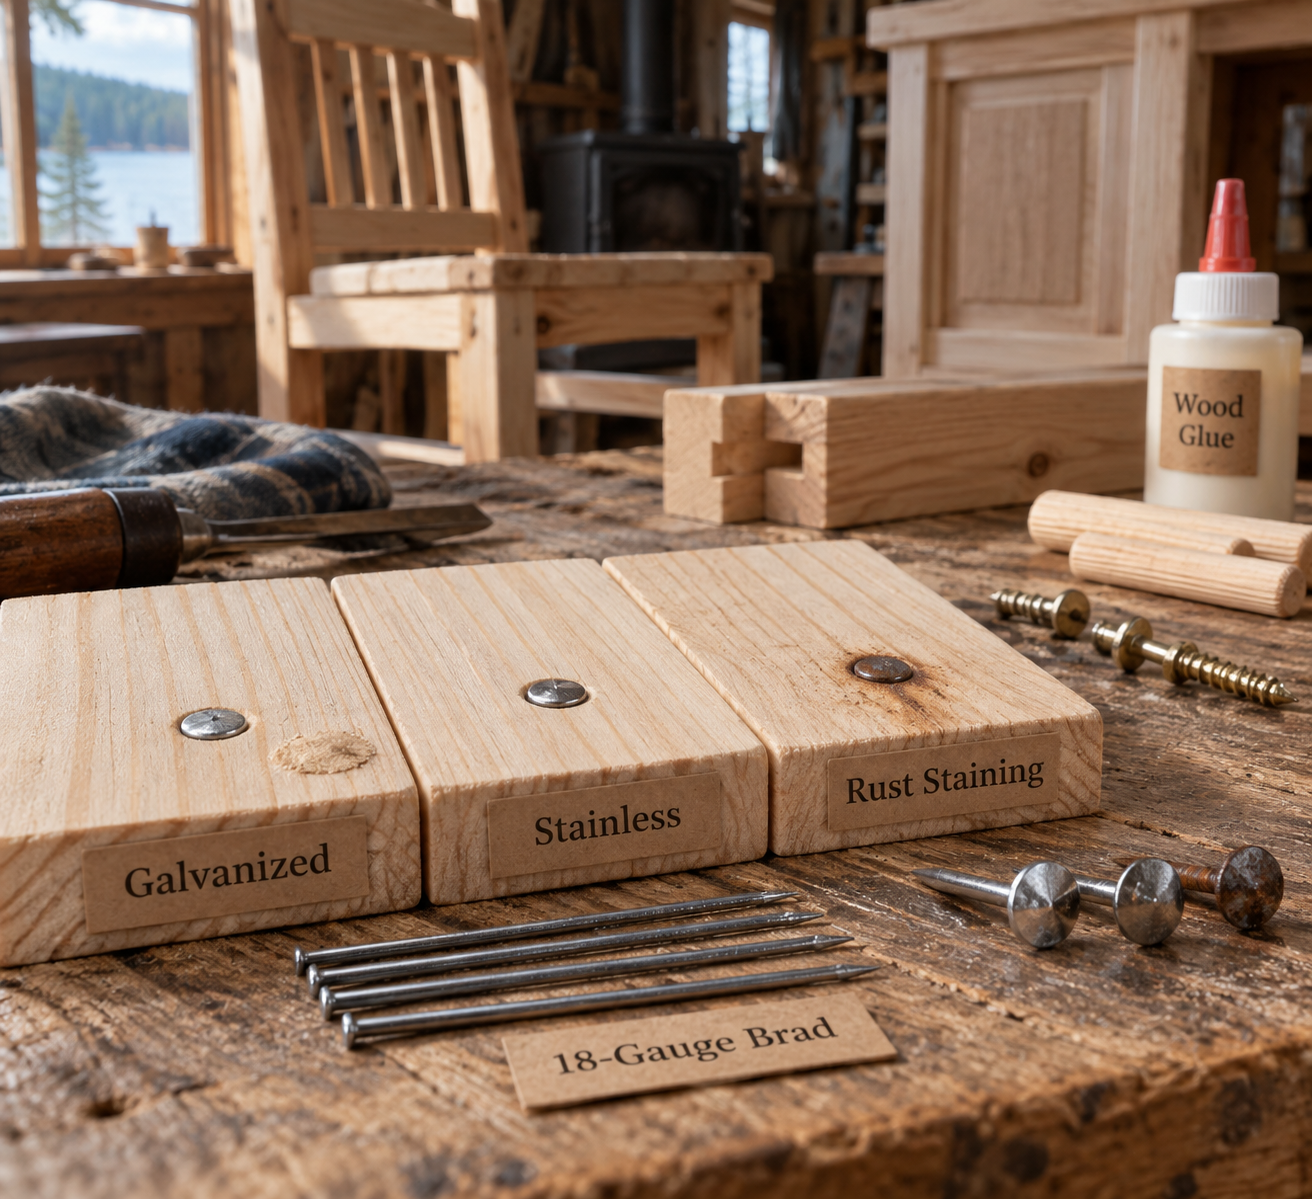
This is where cabin builds diverge from a climate-controlled workshop. Plain bright steel nails will rust in a space that isn’t heated and cooled year-round, and that rust bleeds into the wood grain as a dark stain that no amount of sanding fully removes.
Cabins swing from damp spring mornings to bone-dry woodstove heat in winter, and that moisture cycling is brutal on unprotected metal. A porch bench or an outdoor picnic table takes it even harder, with direct rain and snow contact on top of humidity.
Galvanized Nails
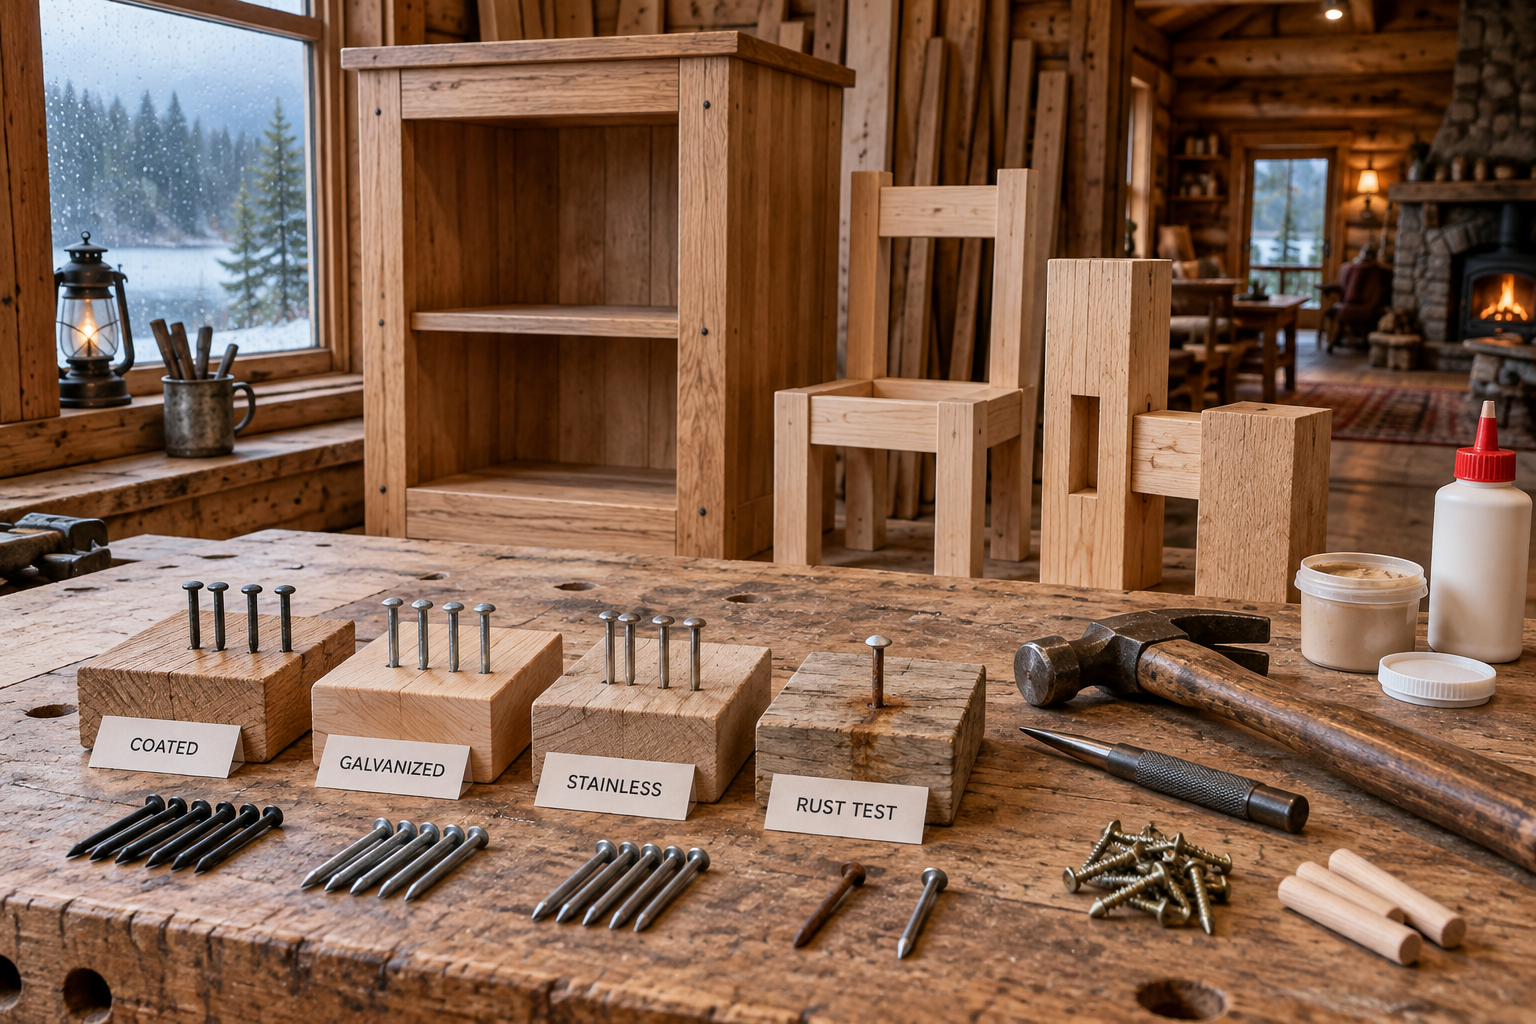
Galvanized nails have a zinc coating that resists rust and costs very little more than plain steel — usually just a dollar or two more per box. They’re the right call for anything that lives outside or in an unheated three-season porch, like a mudroom bench or a woodshed shelf unit.
Stainless Steel Nails
Stainless steel nails cost noticeably more, sometimes three to four times the price of galvanized, but they won’t corrode even with direct weather exposure over years. I’d spend the extra money on stainless for anything near a cabin’s exterior deck furniture or a wet sanitation-area bench where standing moisture is a given.
Coated Nails
Coated nails, often with a vinyl or resin coating, give you better holding power in softwoods like pine and cedar because the coating creates friction as it’s driven in, and some coatings offer mild rust resistance too. They’re a solid middle choice for interior furniture built from construction-grade lumber, but I wouldn’t rely on them outdoors the way I would galvanized or stainless.
Nail Type
Rust Resistance
Best Use
Rough Cost
Plain steel
Low
Dry indoor furniture only
Cheapest
Galvanized
Good
Porches, sheds, unheated cabins
Low, +$1-2/box
Coated
Moderate
Indoor softwood furniture
Low-moderate
Stainless steel
Excellent
Decks, wet areas, long-term outdoor
3-4x galvanized
Nail Gauge and Length: Sizing to Your Actual Lumber
Get this wrong and you’ll either split a 3/4-inch pine board or drive a nail clean through it, tip poking out the far side like a hazard waiting to snag a shirt sleeve.
The rule of thumb carpenters use is that a nail should penetrate roughly two-thirds to three-quarters of the way through the receiving piece, not the piece being attached. So if you’re nailing a 3/4-inch face frame onto a 3/4-inch carcass wall, a 1 1/4-inch to 1 1/2-inch nail is usually the sweet spot. Go longer than that and you risk poking through, especially on thinner cabin-grade plywood.
Gauge affects splitting risk just as much as length does. A thicker nail (lower gauge number) holds better but splits softwood more easily, especially near board edges or end grain — hardwoods like oak and maple split even more readily than pine. When I’m working close to an edge on a hand-built piece, I’ll pre-drill a pilot hole slightly smaller than the nail shank, which cuts split risk dramatically and doesn’t cost more than thirty seconds per hole.
Here’s a rough sequence for picking length and gauge on a typical cabin furniture piece:
Measure the thickness of the board you’re nailing into (the base piece), not the piece on top.
Pick a nail length equal to about two-thirds of that base thickness, rounding down if you’re between sizes.
Choose 15-16 gauge for anything load-bearing-adjacent, 18 gauge brad for pure trim.
Test on an offcut of the same wood species before committing to the real piece.
Pre-drill within 3/4 inch of any edge or end grain, regardless of gauge.
Drive the nail, checking that the tip stays at least 1/8 inch shy of exiting the far face.
Set the head with a nail set if you plan to fill and finish the surface.
Hiding the Hardware: Head Types, Countersinking, and Wood Filler
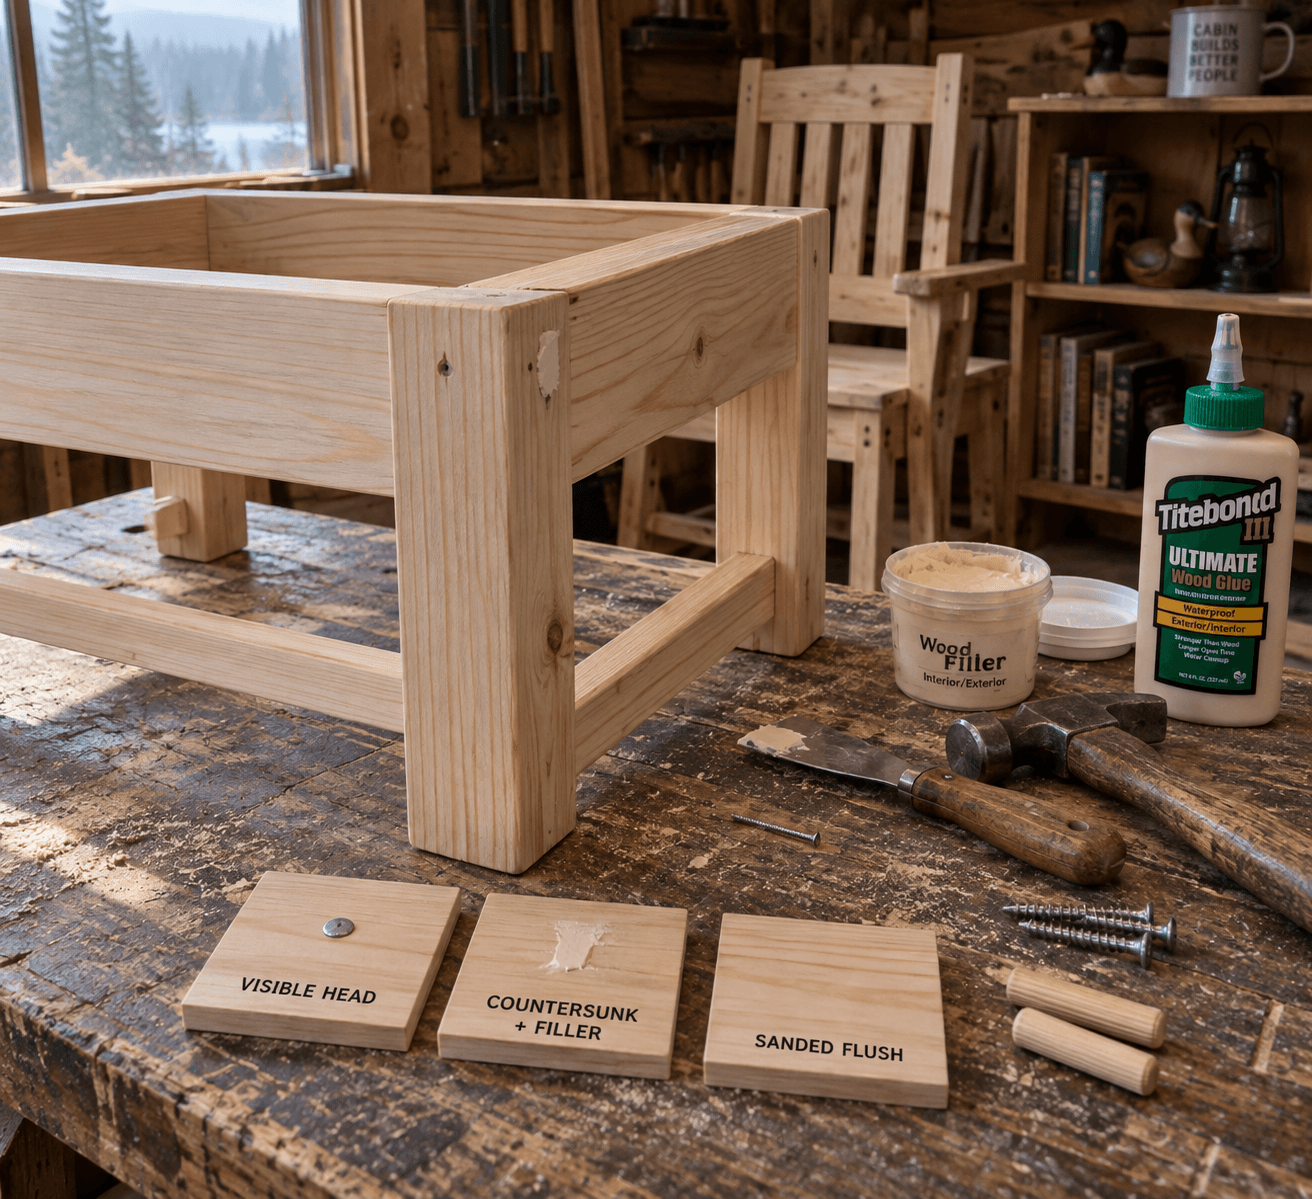
Skip this step and even a well-built cabin table looks amateur, with little silver dots scattered across every joint. Countersinking and filling nail holes is what separates a rustic finish from a sloppy one, and it takes maybe an extra five minutes per piece.
Finish nails have small, barely-there heads specifically so you can drive them slightly below the wood surface with a nail set — a cheap tool, usually under $10, that’s basically a metal punch. Once the head sits about 1/16 inch below the surface, a dab of wood filler tinted to match your stain covers it completely. For a rustic cabin look, some builders actually leave the heads slightly visible on purpose, treating them as part of the aesthetic rather than something to hide — that’s a legitimate stylistic choice, just make it on purpose rather than by accident.
Common wood fillers come in a paintable version and a stainable version, and picking the wrong one is a classic mistake. Paintable filler won’t take stain evenly, so if your cabin furniture is getting a natural or stained finish rather than paint, buy filler specifically labeled stainable, and test it on a scrap first because filler and stain rarely match wood tone exactly on the first try. If you’re also treating the wood against moisture and pests afterward, it’s worth reading through a wood treatment guide over on cabinlodger.com before you seal anything, since filler and finish interact differently depending on what protective coat goes over them.
Frequently Asked Questions
Can I use regular framing nails for cabin furniture?
Not for anything visible or load-critical. Framing nails are thick, have large heads that won’t countersink cleanly, and are usually plain steel, which rusts fast in cabin humidity — stick to finish, brad, or galvanized nails depending on the piece.
Do I need a nail gun, or can I build cabin furniture with just a hammer?
A hammer works fine for most cabin furniture builds; you’ll just want a nail set for countersinking and should pre-drill near edges to prevent splitting, since hand-driving gives less control than a pneumatic gun.
How do I stop nail heads from showing on a stained furniture piece?
Countersink the head about 1/16 inch below the surface with a nail set, then fill with a stainable wood filler, not a paintable one, and test the stain match on an offcut before applying it to the finished piece.